
You can build a safe, well-fitting bird cage door in an afternoon using powder-coated steel wire mesh or stainless steel hardware cloth, a simple frame of the same material as your cage, and a reliable spring latch. The key is measuring the opening twice, cutting clean edges with no sharp points, and testing the latch before your bird ever gets near it. Here is exactly how to do it from start to finish.
How to Make a Door for a Bird Cage: Step by Step

Maya Bennett
27 May 2026
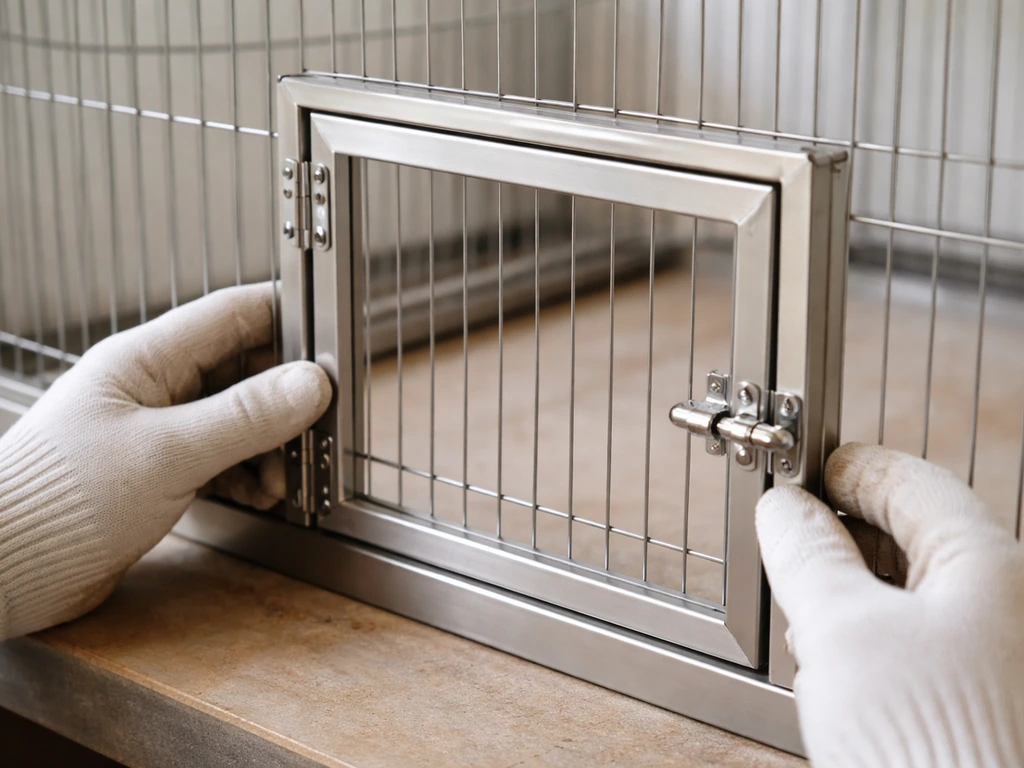
If you want to build with acrylic instead of wire mesh and metal hardware, follow a dedicated guide for how to make an acrylic bird cage so the materials stay safe for your bird. If you are specifically building a plexiglass bird cage, you should match these same door measurements and safety checks to the plexiglass frame and attachment method how to do it from start to finish.
If you are aiming for a custom glass bird cage build, focus on safety first by choosing the right materials and ensuring the door and all edges stay secure and bird-safe.
Decide what kind of cage door you need
Before you cut anything, think about how you actually use the door every day. There are four practical door styles worth considering, and each one suits a different situation.
| Door Style | How It Works | Best For | Downside |
|---|---|---|---|
| Swing-out (hinged) | Hinges on one side, swings open like a cabinet door | Most cages, easiest build, works for small to large birds | Needs clearance space outside the cage to open fully |
| Sliding (guillotine) | Panel slides straight up in a channel track | Tight spaces where a swing door won't open freely | Bird can push panel up if latch fails; needs a positive lock |
| Drop-down (drawbridge) | Bottom-hinged panel folds down, doubles as a perch landing | Parrots and larger birds that step out onto the door | Puts hinge stress at the bottom; reinforce the frame |
| Latch-in access panel | Small secondary panel set into the main wire, no frame rebuild needed | Adding a feeding port or quick-access hole to an existing door | Limited size; not suitable as a primary entry for large birds |
For most DIY builds, a swing-out door with a side hinge is the simplest and most reliable option. If you are building a full cage front from scratch, the approach described in a cage fronts build is essentially the same workflow scaled up. A sliding guillotine style is worth considering if your cage sits on a shelf or in a cabinet and there is no room for the door to swing open.
Measure the opening and plan clearances
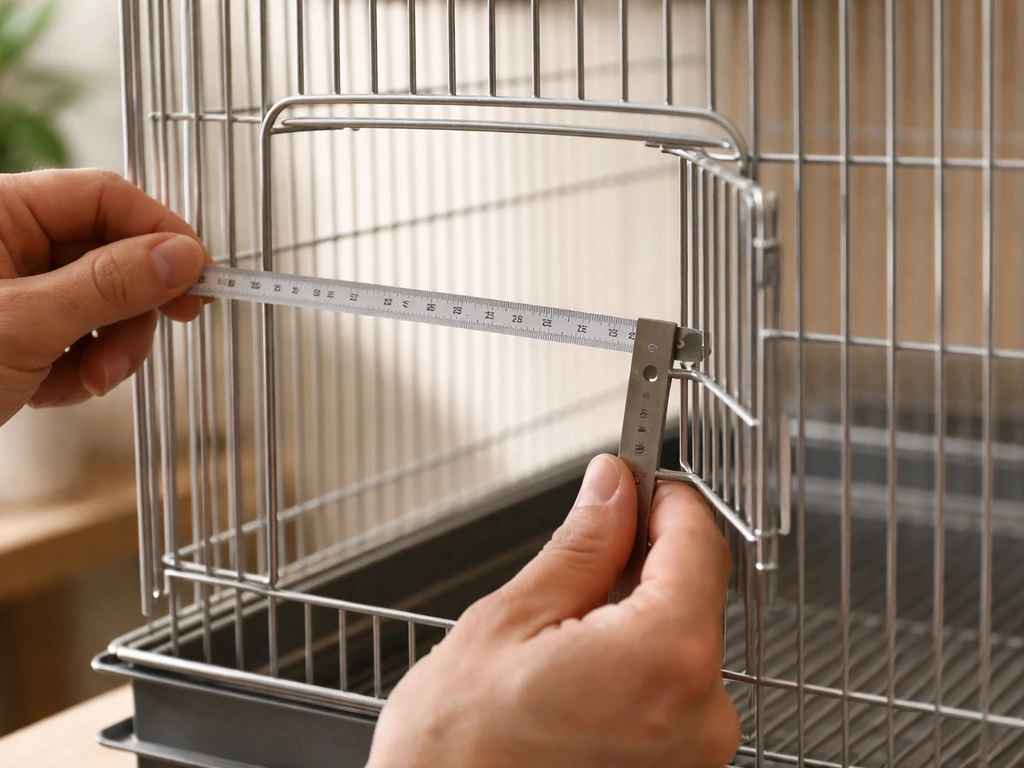
Measure the opening at three points across the width and three points down the height. Use the smallest measurement at each axis. Bird cage frames are rarely perfectly square, and cutting to the largest measurement means your door will bind.
Plan for a 3mm to 4mm gap on all sides between the door panel and the frame opening. This lets the door swing without dragging, prevents pinch points, and still closes tightly enough that a determined parrot cannot force a gap wide enough to escape. For wire spacing on the door itself, use the same rule as the rest of the cage: no larger than half the width of your bird's head. A common safe spacing is 12mm (about 1/2 inch) for small birds like budgies and cockatiels, and 19mm to 25mm (3/4 to 1 inch) for medium parrots. Larger gaps risk a foot or head becoming trapped, which is a documented hazard in avian husbandry.
- Measure opening width at top, middle, and bottom. Record the smallest number.
- Measure opening height at left, center, and right. Record the smallest number.
- Subtract 6mm to 8mm total (3mm to 4mm per side) from each measurement to get your door panel size.
- Mark hinge placement on the cage frame before you cut anything.
- Double-check that the door swings clear of perches, food bowls, and toys inside the cage.
Safe materials and hardware for bird access
Material safety is not optional here. Birds chew and mouth everything they can reach, and the wrong metal can cause heavy-metal poisoning. Zinc, lead, tin, and nickel are all documented risks for captive birds, and galvanized wire hardware is a common problem source because it contains zinc that flakes or is ingested during normal chewing behavior.
Stainless steel is the gold standard. It is non-porous, corrosion-resistant, and does not flake or leach. It costs more but lasts the life of the cage. Powder-coated steel is a practical and widely accepted alternative, but only when the coating is fully intact and properly cured. Check it regularly for chips or wear. The moment the coating is compromised, the base metal underneath is exposed and the risk goes up. Never use galvanized wire, chrome-plated hardware with unknown base metals, or any painted or coated materials where the finish is already peeling.
What you need before you start
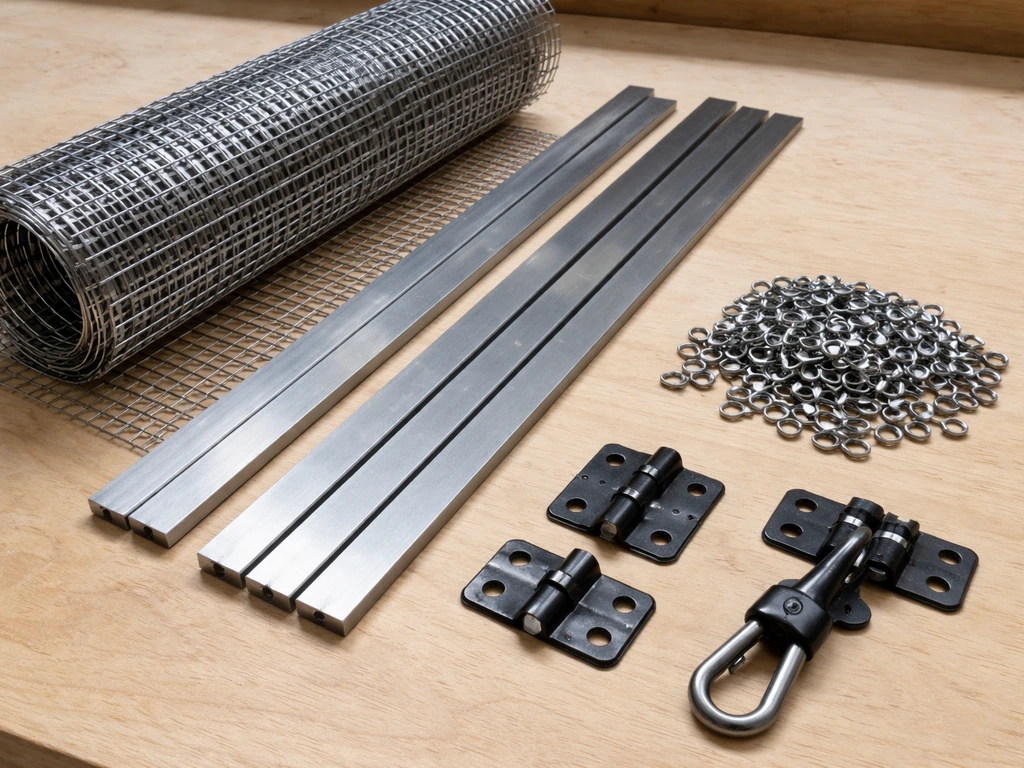
- Stainless steel or powder-coated welded wire mesh (correct gauge and spacing for your species)
- Stainless steel or bird-safe powder-coated flat bar or rod stock for the frame (if building a framed door)
- Stainless steel hinge pins or small cabinet hinges rated for the door weight
- Spring-loaded snap latch or key-lock latch (stainless steel) rated for bird-proof use
- Wire cutters or aviation snips (for mesh)
- File or rotary tool with sanding drum (for deburring edges)
- Tape measure and permanent marker
- Pliers (needle-nose and standard)
- Hog ring pliers and hog rings if you are joining mesh to a wire frame
- Safety glasses and gloves
Step-by-step: cut, fit, frame, mount, and latch
Step 1: Cut the mesh panel
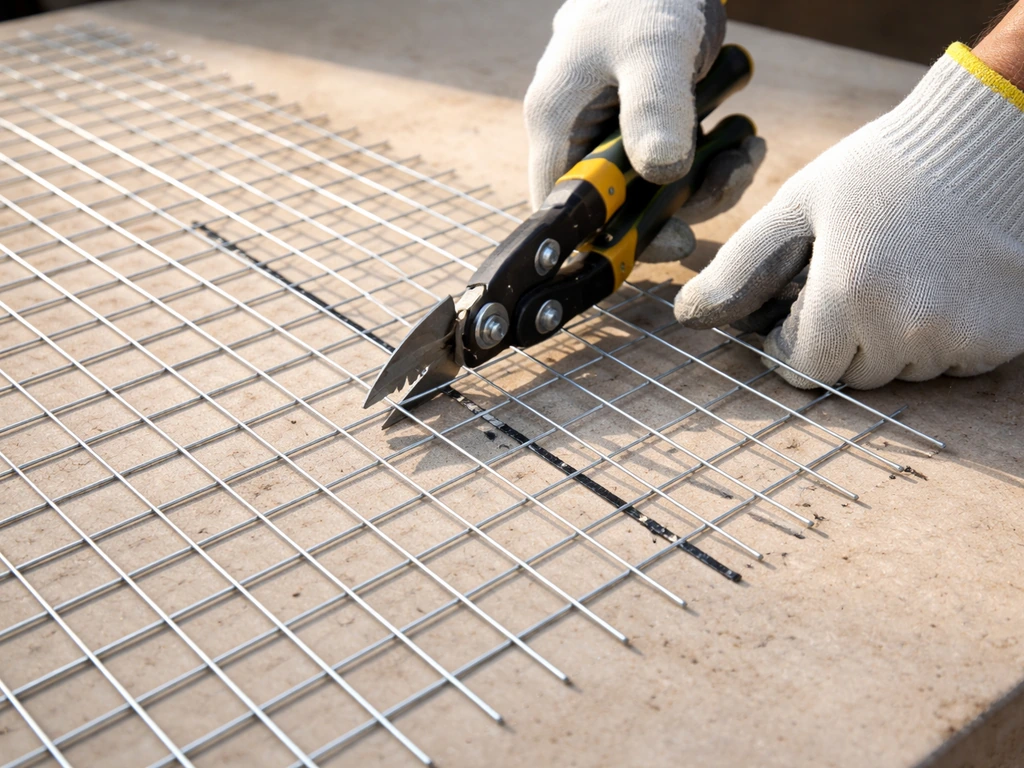
Mark your door dimensions directly on the wire mesh with a marker. Cut with aviation snips or heavy-duty wire cutters, staying on the outside of the marked wire so the cut ends up slightly smaller rather than slightly larger. Cut one side at a time and check the fit against the opening before moving on. This is easier than trying to trim a door that is already assembled.
Step 2: Deburr every edge immediately
This step is non-negotiable. Every cut wire end is a potential injury point for your bird and for you. Use a file, rotary sanding drum, or fine metal grinding bit to smooth every cut edge until you can run your bare finger along it without catching. Take your time here. A sharp wire end at the door perimeter is exactly the kind of hazard that causes toe or foot injuries.
Step 3: Build or attach the frame
If you are building a framed door, cut your flat bar or rod stock to form a rectangle matching the panel dimensions. Attach the mesh to the inside of the frame using hog rings placed every 50mm to 75mm around the perimeter. Hog rings are the standard method used in commercial cage builds because they create a clean, strong bond without adding sharp protrusions. Alternatively, you can fold the mesh edge around the frame bar and crimp it flat with pliers, then file the folded edge smooth.
Step 4: Mount the hinges
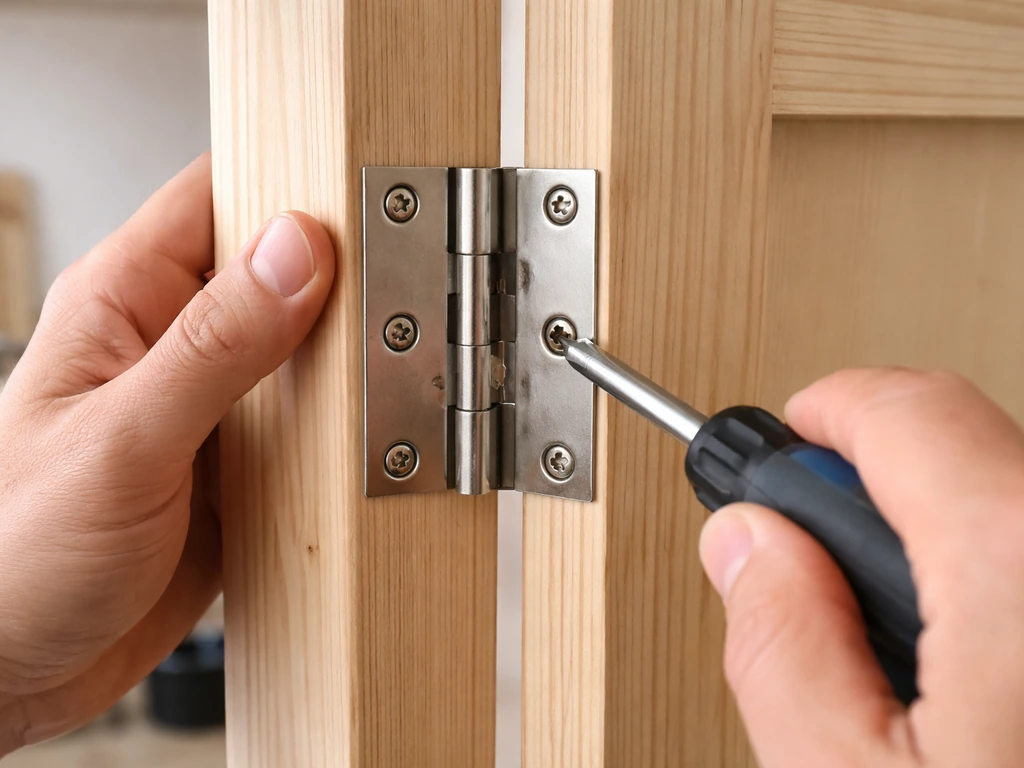
Position hinges so the door sits centered in the opening with your planned 3mm to 4mm gap on all sides. For a swing-out door, two hinges placed at roughly one-quarter and three-quarters of the door height give even support. Mark the hinge screw holes or attachment points on both the door frame and the cage frame. If your cage is wire-only with no solid frame, use hog rings or J-clips to attach hinge loops directly to the vertical cage wire.
Test the swing before adding the latch. If what you mean is a decorative fake bird cage, use the same safety mindset, and avoid any small parts or toxic finishes that could harm a bird if it ever comes close.
Step 5: Install the latch
Choose a spring-loaded snap latch at minimum. For parrots, especially larger ones like African greys, cockatoos, or macaws, use a two-step latch (one that requires two separate motions to open) because these birds are fully capable of working a single-action latch open on their own. Mount the latch at a height comfortable for you to operate with one hand while you are holding something in the other. Test it a minimum of 20 times before declaring the door done. The latch should click positively and not release under pressure from inside the cage.
Safety checks before your bird uses the door
Run through these checks every time you install or modify a cage door. Do not skip them because the door looks fine. Birds are small, strong, and persistent, and problems that seem minor to you can be serious for them.
- Run your bare finger along every edge, corner, and hog ring. Nothing should catch or scratch.
- Check all wire spacing with a ruler. No gap should be large enough for a foot or head to enter and become stuck.
- Open and close the door 10 to 15 times at varying speeds. It should swing freely without binding at any point in the arc.
- With the door closed, push firmly from the inside at the latch point. It should not flex open. If it does, the latch is undersized.
- Inspect the gap around the door perimeter. The 3mm to 4mm target gap should be consistent all the way around. A wider gap at any point is an escape or entrapment risk.
- Look at hinge attachment points from both sides. No wire ends should protrude into the bird's space.
- Check that the door does not swing inward in a way that could trap or startle a perched bird.
Troubleshooting common door problems
Door binds or drags when opening
The door is almost certainly slightly oversized, or the cage frame is not square. Re-measure the gap on the binding side. If it is less than 2mm, use a file or rotary grinder to remove a small amount of material from the door edge on that side. Do it gradually, checking the fit after each pass.
Door does not sit flush when closed
The most common cause is a hinge that is mounted slightly off-plane. Loosen the hinge attachment on the cage-frame side and shift it slightly inward or outward until the door sits flat. If the door is warped (this happens with wire-only doors without a rigid frame), add a frame to stiffen it.
Latch feels loose or does not click positively
First, check that the latch receiver (the strike plate or loop) is positioned exactly where the latch bolt hits. Even a 2mm misalignment stops the latch from seating properly. Adjust the receiver position and test again. If the spring tension in the latch has weakened, replace the latch entirely. Do not try to stretch or bend a worn spring latch back into shape.
Bird is working the latch open
Upgrade to a two-step or key-lock latch immediately. You can also add a small carabiner clip through the latch loop as a temporary measure while you source a better latch. If you are making a temporary bird cage, use the same door fit and safety checks so the latch cannot be worked open. This is a very common problem with parrots and should be treated as urgent, not a curiosity.
Gaps have appeared after a few weeks of use
Hog rings or J-clips may have loosened under the stress of the door being opened and closed repeatedly. Inspect every attachment point and re-crimp or replace any that have shifted. If the frame itself is bending, the wire gauge or bar stock used is too light for the door size. Consider rebuilding the frame with heavier material.
Cleaning, maintenance, and simple upgrades
Clean the door using the same approach as the rest of the cage: hot water and a non-toxic, bird-safe disinfectant. Let the disinfectant sit for 10 to 15 minutes for effective contact time, then rinse thoroughly. Any chemical residue left on the wire is a direct ingestion risk, so rinsing is not optional. Dry the door completely before returning your bird, especially if the frame is powder-coated steel, since prolonged moisture accelerates coating wear.
Inspect the door monthly. Look specifically at hinge attachment points for wear, check the latch spring tension, and run your finger along the edges again looking for any new sharp points caused by the door flexing over time. If you spot any powder-coat chipping on the frame or wire, sand the area smooth and apply a bird-safe touch-up paint rated for the purpose, or plan to replace that section with stainless steel.
For simple decor upgrades that do not compromise safety, you can weave natural sisal rope or untreated wood strips through the door frame as a foraging feature. Keep any additions on the outside of the door where they cannot create pinch points on the hinge side, and make sure nothing blocks the latch from operating fully. If you use a cage cover for sleep or temperature control, confirm the cover can be draped and removed without catching on the latch mechanism. These small steps keep the door functional and safe long-term while giving your bird a little environmental enrichment right at the entry point.
FAQ
What gap should I leave if I’m using a thicker wire mesh or a framed door with extra padding?
Use your target clearance of about 3mm to 4mm, then subtract any added thickness from the door’s overall dimensions. Measure the actual assembled panel thickness (including folded edges, hog rings, and any frame bar) and recheck the smallest gap point after you mount hinges, since thicker material can make the door bind on the latch side.
Can I use magnets instead of a spring latch?
It’s not recommended as the primary closure for parrot cages. Magnets can be compromised by chewing or corrosion, and stronger birds may push the door open faster than a weak magnet can hold. If you add magnets as a secondary aid, keep them outside the reach zone and still use a two-step latch for larger parrots.
How do I choose hinge locations for a heavy door so it doesn’t sag over time?
For swing-out doors, keep hinges roughly at one-quarter and three-quarters of the door height, then add a rigid frame to prevent flex if the door panel feels springy. After installation, check for alignment under the door’s own weight (open the door partway and see if the latch side drops). If it drops, stiffen the door or relocate the hinge mounts slightly to reduce torque.
My cage frame isn’t square, the door fits on one side but binds on the other. What’s the best fix?
Don’t force the door to the largest opening measurement. Re-measure and set the door using the smallest gap side, then adjust incrementally (file down the door edge or shift hinge position) until all sides have clearance. If the frame is visibly skewed, rebuilding or adding a proper rigid frame is often safer than endlessly trimming the door panel.
What wire spacing is safe for a baby bird or a smaller species?
Use the head-based rule from the bird’s perspective, not just the species average. If you have a baby that is thinner-headed or you’re unsure of growth stage, err toward smaller spacing (around 12mm for small birds) and verify that no toe, beak, or head part can wedge into the opening.
Is stainless steel always safe even if it’s spot-welded or has mixed metals?
Stainless steel hardware is safest, but mixed metals can still create issues if parts are not truly stainless. Check that screws, hinges, latch bodies, and any weld areas are the same stainless grade or otherwise known safe. Avoid hardware with unknown plating, and if you see rust staining, replace the suspect part rather than sanding it indefinitely.
How can I prevent pinch points at the hinge side, especially if I’m working near a finger or towel?
Make sure the hinge gap area maintains clearance during full swing, and confirm there is no exposed moving pinch line between the door frame and the cage frame. If needed, add smooth protective edge covers on the outside surfaces only, and verify the bird cannot reach the hinge hardware when the door is closed.
What’s a practical way to test the latch for reliability besides opening it 20 times?
After your repeated open-close test, add a pressure test from inside the cage: press the door toward the latch while the bird is not present, then release it and confirm the latch fully seats. Check the strike plate alignment again and verify the latch does not partially disengage when the door is jostled.
How do I handle cleaning if my latch or hinges are powder-coated or not fully sealed?
Clean with hot water and a bird-safe disinfectant, then rinse thoroughly so residues do not build up around the latch receiver and moving parts. Dry completely before reintroducing the bird, and keep disinfectant from pooling in hinge seams since residue and moisture can accelerate wear of coatings and spring components.
Can I temporarily secure a door while parts are on order?
Use the same safety mindset and avoid methods the bird can defeat. A small carabiner through the latch loop can work as a short-term measure, but treat it as temporary and still verify the bird cannot lift, chew, or push the door enough to create an escape gap. Replace it as soon as the proper two-step latch arrives.
When should I replace the latch instead of adjusting it?
Replace if the spring action has weakened, the latch no longer clicks positively, the receiver no longer aligns cleanly, or you find wear that prevents full seating. Don’t bend or stretch a worn spring latch, alignment fixes usually won’t restore reliable holding force.
Next Articles
Little Live Pets Bird Cage Instructions: Assembly & Care Guide
Step-by-step Little Live Pets bird cage instructions: assembly, safety checks, species setups, parts & troubleshooting.
Vivohome Bird Cage Instructions: Complete Setup & Care Guide
Step-by-step Vivohome bird cage assembly with safety checks, maintenance schedules, troubleshooting, and species‑adapted
A&E Bird Cage Instructions: Step-by-Step Assembly Guide
Step-by-step A&E bird cage instructions to identify your model, assemble safely, install trays and accessories, and trou