You can build a glass bird cage, but the safest and most practical approach for a real pet bird is a glass-front enclosure: a wood or aluminum frame with tempered glass panels on the front (and sometimes sides), mesh or wire on the back and top for airflow, and a solid tray floor. A fully enclosed glass box is genuinely dangerous for birds because it blocks ventilation, traps heat, and creates a disorienting reflective environment. Once you understand that distinction, the build becomes very manageable with basic woodworking tools and a weekend of work.
How to Make a Glass Bird Cage: Step-by-Step DIY Guide

Maya Bennett
16 Jun 2026
Full glass box vs. glass-front enclosure: which one should you build?
A lot of people searching for a glass bird cage have one of two things in mind. The first is a decorative terrarium-style enclosure where glass makes up most or all of the walls. The second is a cage where the front panel is glass for visibility and aesthetics, while the rest of the structure uses wire or mesh. These two designs are not equally safe for live birds, so it is worth being direct about which is which before you start cutting anything.
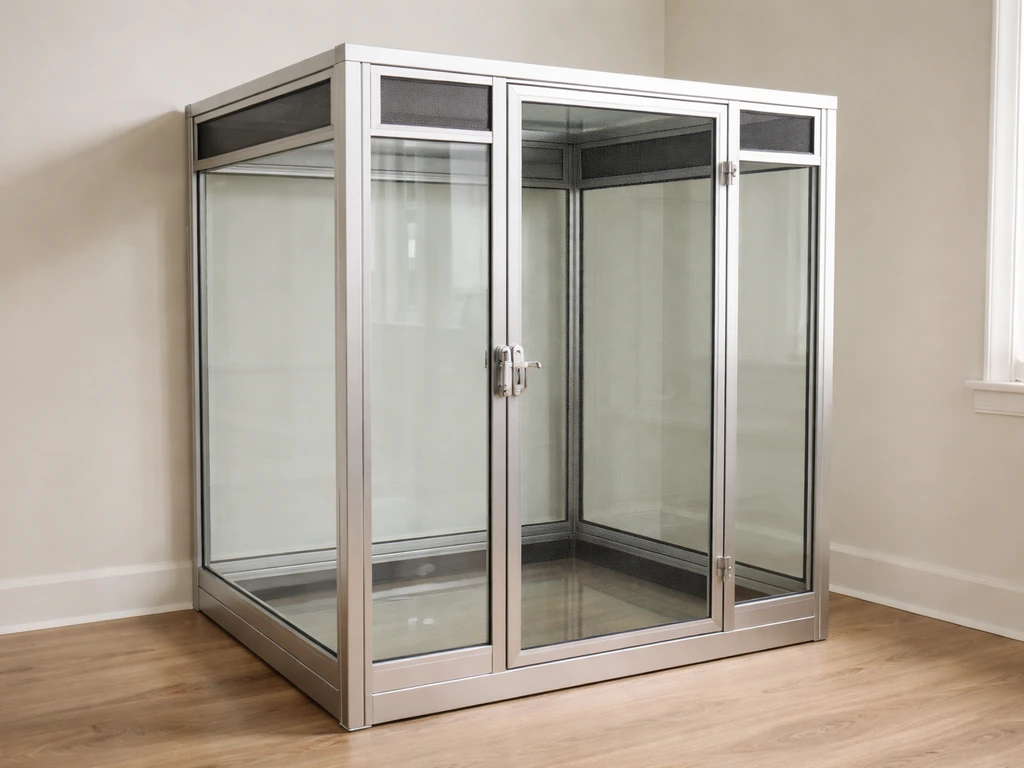
A fully glass enclosure works well for display pieces, temporary housing, or small decorative setups, but it should never be used as a permanent home for pet birds without significant ventilation modifications. Glass traps warm air, blocks cross-ventilation, and can create a visual loop that stresses birds who cannot perceive glass as a barrier. If you want that clean, tank-style look, the right move is a large mesh or wire panel built into at least two opposing walls (usually the back and top), with glass used only on the front and possibly one side. That is also very close to what a plexiglass or acrylic bird cage build achieves, if you want to compare materials.
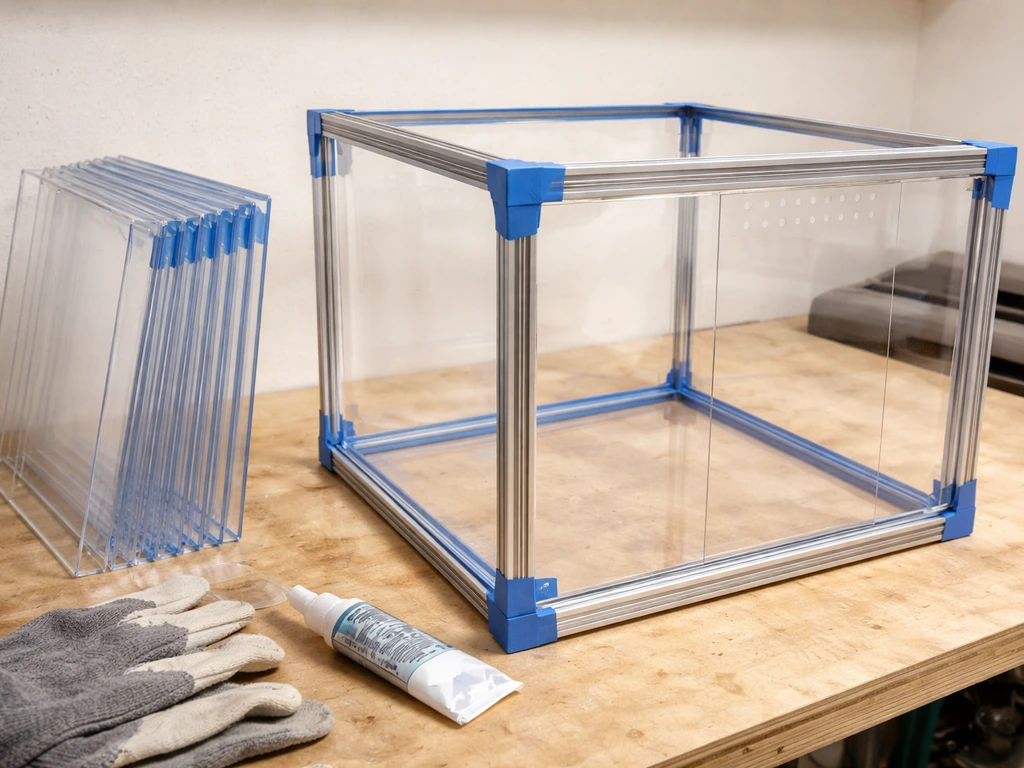
For this guide, the primary build is a glass-front enclosure on a wood frame. It gives you the best of both worlds: the clean visual of glass panels you can actually see through, combined with the ventilation and structural strength that birds need.
Safety first: glass type, ventilation, strength, and escape-proofing
Choosing the right glass
Never use standard annealed glass (the plain flat glass cut at hardware stores) for a bird enclosure. If it breaks, it shatters into long, sharp shards that can seriously injure a bird or a handler. You want fully tempered glass, which is heat-treated to a much higher strength and, when it does break, crumbles into small blunt pieces. Wolverine Glass notes that only [fully tempered glass](https://www.
wolverineglass. com/heat-treated-glass/) meets ANSI Z97. 1 and CPSC 16 CFR 1201 safety-glazing test requirements, while heat-strengthened glass may not. Tempered glass certified to ANSI Z97.
1 and CPSC 16 CFR 1201 is what you are looking for. Look for the SGCC mark on the panel or ask your glass supplier to confirm the certification. Heat-strengthened glass is not the same thing and does not always meet those safety-glazing requirements, so confirm 'fully tempered' specifically.
For thickness, 3/16 inch (approximately 5mm) tempered glass is adequate for panels up to about 24 inches in any single dimension. For larger panels, step up to 1/4 inch (6mm). Your glass supplier can cut panels to exact dimensions, which saves a lot of trouble since you cannot cut tempered glass yourself after it has been treated.
Ventilation requirements

At minimum, 30 to 40 percent of the total wall surface area should be open mesh or wire. The back wall and ceiling are the best candidates. Use stainless steel mesh with blank" rel="noopener noreferrer">openings no larger than 1/2 inch for small birds like budgies and finches, or up to 5/8 inch for cockatiels. Stainless steel is the material of choice here because zinc-coated or galvanized wire poses a real toxicity risk if a bird chews on worn or flaking coatings. Lead, zinc, tin, and nickel are all documented causes of heavy metal poisoning in captive birds, so stainless steel hardware and mesh are worth the extra cost.
Escape-proofing and structural strength
The frame needs to be rigid enough that joints do not flex and create gaps. Any gap wider than the bar spacing spec (1/2 inch for small birds) is a potential escape route or a head-trap. Use stainless steel screws and corner brackets rather than nails, and seal all glass-to-frame contact points with 100% pure, neutral-cure aquarium silicone. Neutral-cure silicone is odorless after curing and non-toxic, which matters a lot in a bird's enclosed environment. Acetoxy-cure silicones release acetic acid during curing and can be irritating, so stick to neutral-cure for this application. Doors need positive-latch hardware: parrots and many medium birds can slide open simple friction catches, so use a twist-lock, carabiner, or spring-loaded bolt on any door panel.
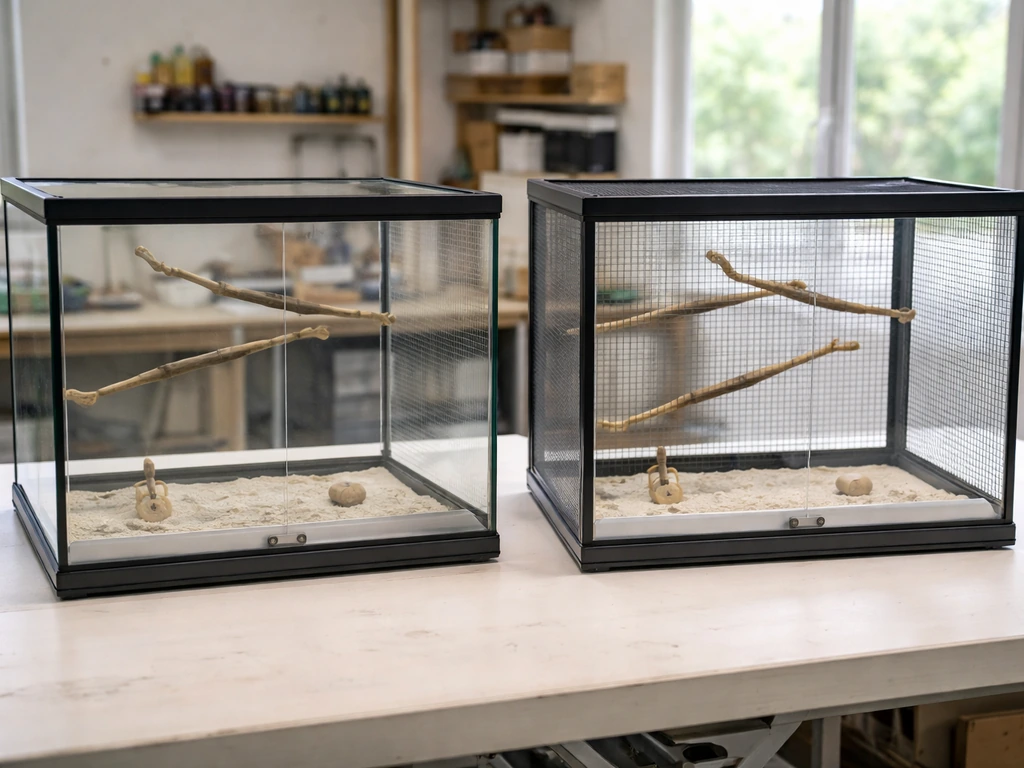
Planning your build: sizing for species and layout
Cage size is one of the most important decisions you make before you cut anything. The minimum floor space recommendations by species group are a starting point, but bigger is almost always better for a bird's welfare.
| Bird type | Minimum floor space | Suggested bar/mesh spacing | Minimum height |
|---|---|---|---|
| Finches / canaries | 18 in × 18 in | 1/2 inch or less | 18 inches |
| Budgerigars (budgies) | 18 in × 18 in | 1/2 inch | 24 inches |
| Cockatiels | 24 in × 30 in | 1/2 to 5/8 inch | 30 inches |
| Small parrots (lovebirds, conures) | 24 in × 24 in | 1/2 inch | 30 inches |
| Medium parrots (African grey, Amazon) | 36 in × 24 in | 3/4 to 1 inch | 48 inches |
Height matters for birds because they instinctively prefer to perch high. Plan your enclosure so that perches sit in the upper third of the interior space, leaving the lower section for feeding stations, water, and the waste tray. For a glass-front build, the door should be positioned in the upper half of the front panel so you can reach perches and handle birds without awkward reaching. If you are planning a bird cage front, focus on clear visibility, proper door placement, and enough ventilation so the enclosure stays safe. A good rule is to place the door opening at roughly 60 to 70 percent of the total height from the floor.
Sketch your layout before ordering materials. Note the outer frame dimensions, the glass panel dimensions (slightly smaller than the frame opening to allow for silicone and seating), the door opening size (at least 8 × 8 inches for small birds, 12 × 12 for medium), and the mesh panel dimensions for the back and top. Mark where perch attachment points will land so you can plan for internal mounting hardware.
Tools and supplies you will need
- Fully tempered glass panels, cut to size by your supplier (3/16 inch or 1/4 inch, SGCC-certified)
- 1×2 or 2×2 hardwood or aluminum framing lumber/extrusions for the cage frame
- Stainless steel welded wire mesh, 1/2 inch grid (for back and top panels)
- 100% neutral-cure aquarium silicone sealant
- Stainless steel screws (1.5 inch and 2 inch) and corner brackets
- Twist-lock or spring-bolt door latch hardware (stainless steel)
- Galvanized or stainless steel heavy-duty staple gun and staples (for securing mesh)
- Drill with driver bits and a countersink bit
- Tape measure, square, and pencil
- Table saw or circular saw (for frame lumber)
- Router or table saw with dado blade (for glass channel grooves, optional but cleaner)
- Caulking gun
- Sandpaper (120 and 220 grit) for smoothing frame edges
- Non-toxic paint or food-safe wood sealant for the frame
- Pull-out waste tray (sheet metal or heavy plastic, cut to floor dimensions)
- Perch dowels (hardwood, 3/4 to 1 inch diameter depending on species)
A note on the frame material: hardwood (poplar, oak, or maple) is strong and takes sealant well. Pine is softer and more likely to be chewed or warped by humidity. Aluminum extrusion channels are an excellent option if you want a cleaner look and zero chewing risk, but they require more precise cutting and drilling. If you are new to this kind of build, a hardwood frame is easier to work with and adjust.
Step-by-step assembly
Step 1: Build the base frame
Cut your four base pieces to form the floor rectangle. Join them at the corners with stainless steel L-brackets and 1.5-inch screws. Check square by measuring diagonally corner to corner in both directions; both measurements should match within 1/8 inch. Sand all edges smooth so there are no splinters. If you are using a pull-out waste tray, add two parallel runners on the interior base that the tray slides along, spaced to match your tray width.
Step 2: Assemble the vertical frame
Cut four corner uprights to your target height. Attach them to the base corners using countersunk screws from below and add an L-bracket on each interior corner for rigidity. Cut and attach horizontal rails at the top and at the door-height mark on the front face. These horizontal rails define the door opening. Double-check that the front face is square and plumb before the silicone or mesh goes in, because it is very hard to correct later.
Step 3: Cut glass channels or install glass stops

The glass panels need to be seated securely. The cleanest method is to rout a shallow channel (about 3/8 inch wide and 1/4 inch deep) along the inner edges of the front frame members where the glass will sit. If you do not have a router, you can nail thin wooden stop strips on either side of the glass to hold it in place. The glass panel should sit with at least 1/4 inch of contact on all sides. Lay a thin bead of neutral-cure aquarium silicone in the channel before setting the glass, then run a second bead along the interior seam after the panel is in place. Let it cure for at least 24 hours before handling.
Step 4: Install the mesh back and top panels
Cut your stainless steel mesh to the back and top frame openings, leaving about 1/2 inch of overlap on each edge. Staple it firmly to the frame members using a heavy-duty staple gun, placing staples every 2 to 3 inches. Fold any sharp cut wire ends back against the frame and staple them flat. Run a bead of silicone along the frame-to-mesh edge on the interior side for a cleaner seal and to eliminate any small gaps at the perimeter.
Step 5: Build and hang the door
The door can be a glass panel in a smaller wood frame, or a mesh panel for more airflow. For a glass door, build a smaller frame from 3/4-inch hardwood strips, seat and silicone a tempered glass piece into it, and hang it with two stainless steel butt hinges on the left side of the opening. For mesh, use the same staple method as the back panel. Mount your twist-lock or spring-bolt latch on the opposite side.
Test the door swing and confirm it closes flush with no gaps at the edges. If you are interested in a more detailed breakdown of door options and hardware, building bird cage doors is its own craft worth exploring separately. If you are specifically looking for how to make door for bird cage, this section on building bird cage doors and choosing the right latch hardware will be a helpful comparison point before you finalize your opening size.
If you are looking for a safe way to create a prop or display version, learn how to make a fake bird cage with materials and styling that do not involve animal housing risks.
Step 6: Seal the frame and do a safety inspection
Seal all exposed wood with two coats of a food-safe, water-based wood sealant or bird-safe paint. Let it dry and off-gas for at least 48 hours in a well-ventilated space before putting any bird inside. Once dry, run through this checklist before your bird goes in:
- No gaps larger than 1/2 inch anywhere in the structure, including door edges and mesh perimeter
- All silicone seams fully cured and not tacky
- Door latch requires deliberate action to open (test with one hand)
- No protruding screw tips, wire ends, or splinters on interior surfaces
- Mesh is taut with no sagging sections a bird could get a toe caught in
- Glass panels are seated with no flex or rattle when you press firmly on the center
- Waste tray slides in and out without catching and has no sharp edges
Customization: stands, covers, seasonal protection, and mess control
Stands and placement
If your enclosure is large, build a dedicated stand to bring the cage floor to about 36 to 42 inches from the ground. This puts the perches at or above eye level, which birds prefer. A stand built from the same frame lumber with four legs and a lower shelf for supply storage works perfectly. Bolt the cage to the stand through the base to prevent tipping.
Placement in the room matters a lot: position the cage against one solid wall so the bird has a visual backstop (a sense of security), but never in direct sun through a window for extended periods. Glass amplifies solar heat quickly, and a bird can overheat in under an hour in strong direct sun.
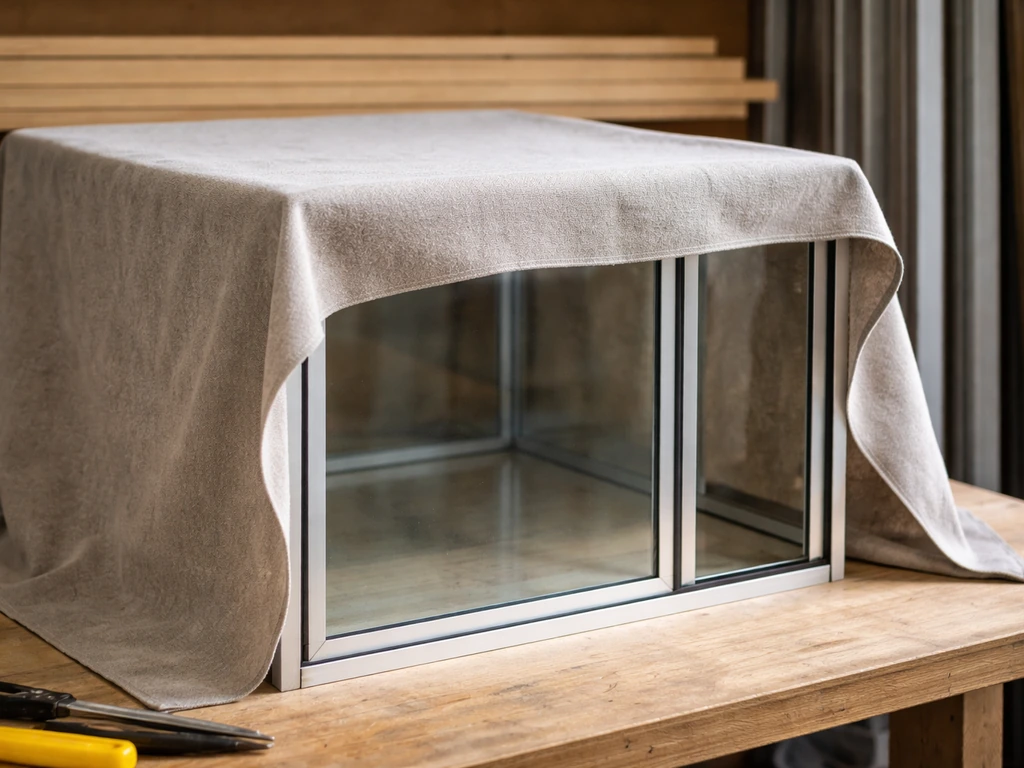
Covers for night and drafts
A fitted fabric cover helps birds get uninterrupted sleep and blocks drafts. Measure the outer dimensions of the cage and sew or buy a cover that drapes over three or four sides, leaving the front partially open for airflow. Heavy cotton or canvas works well. Avoid synthetic fabrics that can fray into threads a bird could ingest. In winter or in air-conditioned rooms, a cover also acts as a draft barrier on nights when room temperatures drop.
Seasonal protection from sun, cold, and humidity
In summer, place a UV-filtering window film on the glass panels if the cage is near a window. This reduces heat gain and prevents the cage from becoming a greenhouse. In cold climates, avoid placing the cage near exterior walls or air vents. The glass panels will conduct cold from a nearby window on winter nights, so move the cage at least 3 feet from any cold surface during cold months. Humidity can be an issue with glass: if you notice condensation on the interior glass surface, your ventilation is insufficient. Open up the mesh areas, add a small USB fan nearby, or reposition the cage for better airflow.
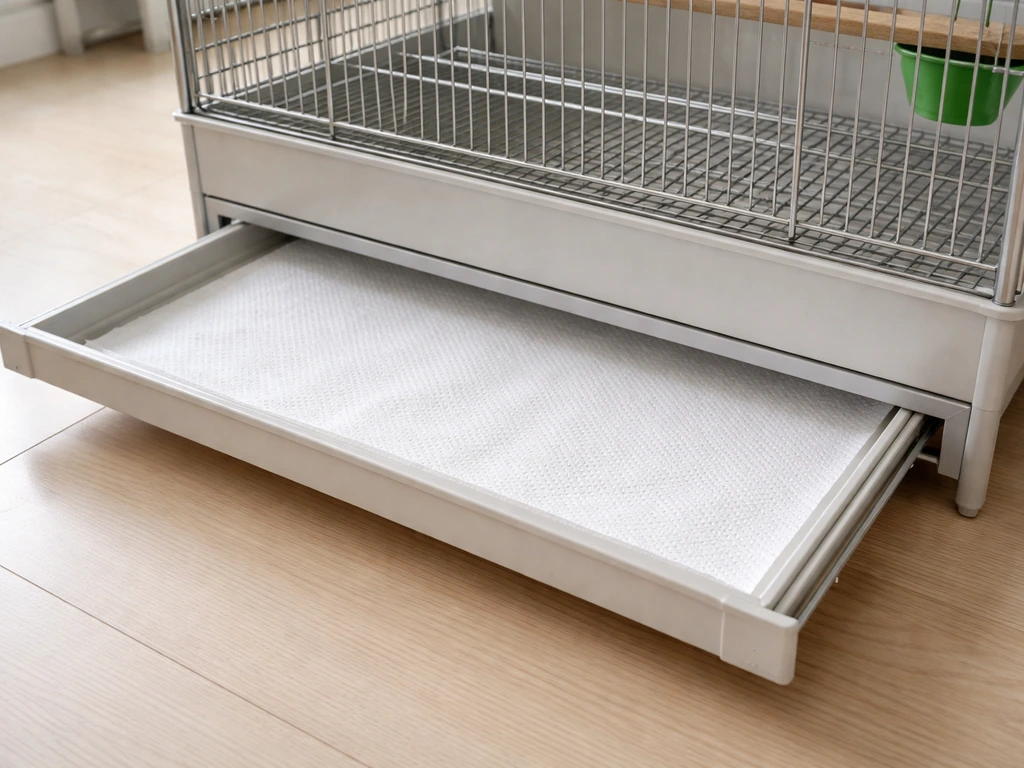
Mess control
Birds are messy. The pull-out waste tray is your first line of defense. Line it with paper towels or unbleached newsprint (avoid printed paper with colored inks) for easy daily changes. Add a 2 to 3 inch seed guard skirt around the lower perimeter of the cage (a strip of clear acrylic or thin aluminum flashing bent to shape works well) to catch thrown seed and feathers. If you want acrylic specifically, plan a hybrid build that keeps the ventilation and escape-proofing sections the same as the glass-front enclosure clear acrylic. Place the food and water dishes in the middle section of the cage, not directly above the tray, to reduce contamination of the substrate below.
Maintenance and troubleshooting
Daily and weekly cleaning
Change the tray liner and wipe down any soiled surfaces daily. For the glass panels, a microfiber cloth dampened with plain warm water removes most smudges and droppings without leaving residue. Avoid commercial glass cleaners with ammonia or fragrances because fumes from these products are harmful to birds even in small concentrations.
For a weekly deep clean, remove the bird to a safe temporary space, take out all accessories, and scrub the frame and tray with hot water and a small amount of unscented dish soap. For a short-term setup, you can use this same ventilation-first approach to make a temporary bird cage safely until your main enclosure is ready. Rinse thoroughly and let everything air dry before reassembly.
The key principle is that disinfectants only work effectively after organic matter (droppings, food residue) has been physically scrubbed away first.
When to use a disinfectant
You do not need to disinfect the cage at every cleaning, and overdoing it can introduce chemical risks. Reserve disinfectant use for after an illness, a pest infestation, or when you have introduced a new bird and want to sanitize before use.
VCA Hospitals also advises using disinfectants like bleach with great care, since fumes and other risks can affect birds Reserve disinfectant use for after an illness, a pest infestation, or when you have introduced a new bird and want to sanitize before use. . A 10% bleach solution (roughly one part bleach to nine parts water) is effective, but every surface must be rinsed completely and allowed to dry and off-gas before the bird returns.
Vinegar is sometimes recommended but its fumes are also irritating to birds' respiratory systems, so ventilate thoroughly regardless of which product you use.
Condensation and fogging
Condensation on the inside of the glass means warm, moist air from bird respiration and water dishes is hitting a cooler glass surface. The fix is almost always better ventilation: enlarge the mesh area, add cross-ventilation by repositioning the cage away from walls, or run a small fan at low speed nearby. Persistent fogging can also encourage mold growth on the wood frame, so do not ignore it. Check the silicone seams around the glass for any gaps, since a broken seal can let moisture into the frame joint and cause wood swelling.
Pest control and joint wear
Red mites and other cage pests hide in joints, cracks, and frame corners. If you see your bird scratching excessively, inspect every corner and seam with a flashlight. Disassemble the cage for cleaning and treat the frame with a bird-safe mite spray or a thorough hot-water scalding rinse. Silicone seams around glass panels can crack or peel over time, especially in high-humidity environments. Inspect all seams every three to four months and re-apply neutral-cure aquarium silicone to any that have lifted or cracked. Catching this early prevents gaps from forming that could injure a bird or allow escapes.
Monthly safety inspection checklist
- Check all glass panel edges and seams for chips, cracks, or lifted silicone
- Inspect every mesh seam for protruding wire ends or loose staples
- Test the door latch for smooth, secure operation with no play
- Look at all screw heads and bracket hardware for any rust or coating wear
- Examine wood frame surfaces for signs of chewing, swelling, or mold
- Confirm the waste tray slides freely and has no new sharp edges from warping
- Check that no perch positions have shifted to create a direct fall hazard to the tray
Your next steps: what to buy and how to start
The fastest way to get moving is to finalize your species-appropriate dimensions from the sizing table above, sketch the front face layout including door position, and then call or visit a local glass supplier with those measurements for a quote on fully tempered, SGCC-certified panels. Order the glass first because it has the longest lead time (usually three to seven business days for custom cuts). While you wait, buy your framing lumber, stainless steel mesh, neutral-cure silicone, and hardware. Cut and dry-fit the frame before the glass arrives so you can adjust measurements if needed.
The whole build can be done in a weekend once materials are in hand. Day one is frame assembly and mesh installation. Day two is glass seating, door hanging, and sealant application. After the 24 to 48 hour silicone cure and a final safety inspection, you are ready for birds. If you want to extend the project with a custom stand, a built-in seed guard, or a decorative front panel design, those are easy add-ons after the core structure is proven and solid.
FAQ
Can I use tempered glass scraps or cut tempered glass myself after it arrives?
Tempered glass must be fully seated and sealed, not just “resting” against the frame. If you want extra security, add a continuous gasket or thin silicone-backed stop strip inside the glass seating so the panel cannot shift when the door is opened or bumped. Also confirm your glass supplier uses tempered processing on the exact cut sizes you order, since you cannot safely trim it after tempering.
Is it ever safe to build a mostly glass enclosure for a live bird?
Yes, for pet use the safer target is to keep glass to the front and possibly one side, while dedicating the back and top to open mesh. If you insist on more glass on the sides, you should compensate by increasing total mesh area and ensuring there is airflow through at least two opposite openings, not just ventilation holes in one panel.
What should I do if the glass keeps fogging up after the cage is built?
To prevent a cage “fog box” effect, plan for airflow that forces warm air out and cooler air in. A practical approach is to enlarge the back and top mesh openings, keep the water dish and humidifying items away from the glass, and maintain at least a small air path behind the bird. If you see recurring condensation, fix ventilation before adding fans, because fogging can also indicate gaps that let moisture into the frame seams.
How long should I wait before putting a bird into a cage after applying neutral-cure silicone?
Do not rely on label directions for when it is safe by smelling alone. After sealing, leave the cage to cure and off-gas in a ventilated area for the full recommended time, then wipe the interior with plain warm water to remove any surface residues. Only after the silicone has fully cured and the surface is dry should you introduce the bird.
Can I use any metal mesh or wire I have on hand for the back and top?
Regular metal chain-link or unknown-coated wire is risky because birds can chew and ingest particles from coatings. Use stainless steel mesh specifically, and verify the mesh is food-grade or intended for animal enclosures. If you are unsure about the wire origin, buy new mesh rather than “saving” materials from construction projects.
How do I check the cage is escape-proof and not head-trap prone?
For most birds, the key is to avoid sharp edges and gaps where a toe, nail, or head can get trapped. Check bar or mesh spacing against your species, then also check that the frame is rigid and square so the door closes without a visible crack. A ruler or feeler gauge can help, measure the opening around the door and glass edges after assembly.
Can I add a USB fan or small fan to improve ventilation in a glass-front cage?
Yes, but size matters. The “open mesh percentage” is a planning guideline, not a substitute for actual airflow. If you add a fan, keep it on low, aim so it does not blow directly into the bird’s face, and ensure it does not increase drafts when the bird is sleeping. A fan that runs only during cleaning or only when you remember is usually not enough for stable temperature and moisture control.
If I use acrylic for a portion of the enclosure, what changes from the glass-front build?
Yes, but treat acrylic as a ventilation and durability trade-off. Acrylic can scratch and can be more chewable than glass depending on thickness and edges, and it will flex if undersized. If you use clear acrylic for any panels, keep the ventilation-first layout for back and top mesh and use smooth, rounded edges so birds cannot catch feathers or claws.
What is the safest liner to use in the pull-out waste tray?
Avoid printed paper with colored inks, because dyes can transfer when damp and you do not want ink-laden waste near a sensitive bird respiratory system. Stick to unbleached newsprint or plain paper towels, and keep the liner dry under feeders so droppings and spilled seed do not soak through and create mold-prone wet spots.
Do I need to disinfect the cage every time I clean it?
Most disinfectants are unnecessary for routine cleaning because residue can remain on surfaces and irritate birds. Use disinfectant only after illness, after a pest issue, or when introducing a new bird. Even then, scrub first to remove organic matter, rinse thoroughly, and let everything dry and off-gas fully before the bird returns.
How can I tell whether moisture problems are coming from ventilation or from the silicone seals?
A good sign of correct humidity and cleaning is that condensation stops returning on its own. If you still get persistent moisture at the seams, inspect the neutral-cure silicone joints for lifts or cracks, and look for wetness on wood near the glass edges. Fixing seam leaks early prevents swollen frame joints, which can later cause door misalignment or new escape gaps.
How often should I inspect and re-seal the glass-to-frame seams?
You should inspect seams and hardware on a schedule. A practical interval is every 3 to 4 months, look closely for peeling silicone, small creases in corners, and any looseness around the glass seating. If your room is high-humidity, shorten the interval and re-seal any seam that opens, because small gaps can turn into escape routes over time.
Where should I place the glass bird cage in a room to avoid overheating or cold drafts?
Cage placement should consider both heat and drafts. Keep it out of direct sun because glass can heat the interior quickly, avoid locations near cold exterior walls or air vents in winter, and do not place it where drafts blow across perches at night. If the cage is against a wall, use a solid backstop for security, but leave enough room for airflow to the back mesh.
Next Article
How to Build a Plexiglass Bird Cage Step by Step
Step-by-step DIY guide to build a safe plexiglass bird cage: materials, dimensions, cutting, sealing, doors, airflow, an