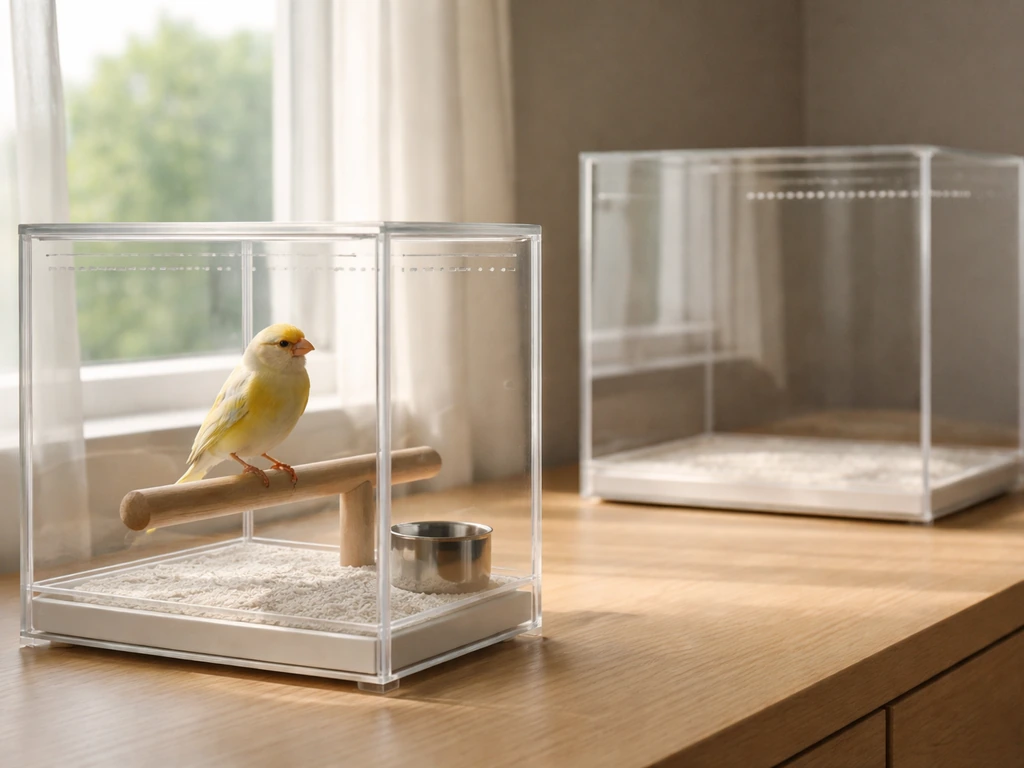
You can build a safe, functional plexiglass bird cage using cast acrylic sheet (minimum 3mm thick for small birds, 4-6mm for medium birds), an aluminum or hardwood frame, solvent cement joints, and drilled ventilation openings that cover at least 16% of each ventilated wall. The build takes a weekend, a handful of basic tools, and careful planning upfront, and the result is a cage that's easy to see into, simple to wipe clean, and fully customizable for your bird's species and behavior.
How to Build a Plexiglass Bird Cage Step by Step

Maya Bennett
2 Jun 2026
Is a plexiglass cage actually right for your bird?
Before you cut a single sheet, be honest about whether acrylic is a good fit for your specific bird. Plexiglass cages work well for small to medium birds like finches, canaries, budgies, cockatiels, and similarly sized parrots. They're especially useful for birds that scatter seed or kick bedding everywhere, because the solid panels contain mess far better than wire. They also provide excellent visibility for observation and a cleaner aesthetic in a living space.
The bigger concern is heat. Acrylic panels positioned near a window can act like a magnifying glass, concentrating sun rays and raising the internal temperature to dangerous levels very quickly. If your home gets direct sunlight through windows for long periods, you'll need to place the cage carefully and build ventilation that actively moves air rather than just venting passively. Birds cannot sweat, so overheating is a genuine welfare emergency.
Acrylic cages are not a good fit for large parrots like macaws, cockatoos, or Amazon parrots. These birds chew constantly and with serious force. They will crack, splinter, and eventually shatter acrylic panels, creating sharp edges and ingestible fragments. If you have a large or destructive chewer, a stainless steel wire cage is the only safe choice. For everything below that size, plexiglass is a legitimate and practical option when built correctly.
Materials and tools checklist before you start
Getting the right materials before you start saves you a lot of frustration mid-build. Here's what you need, with specific notes on why each choice matters.
Acrylic sheet selection
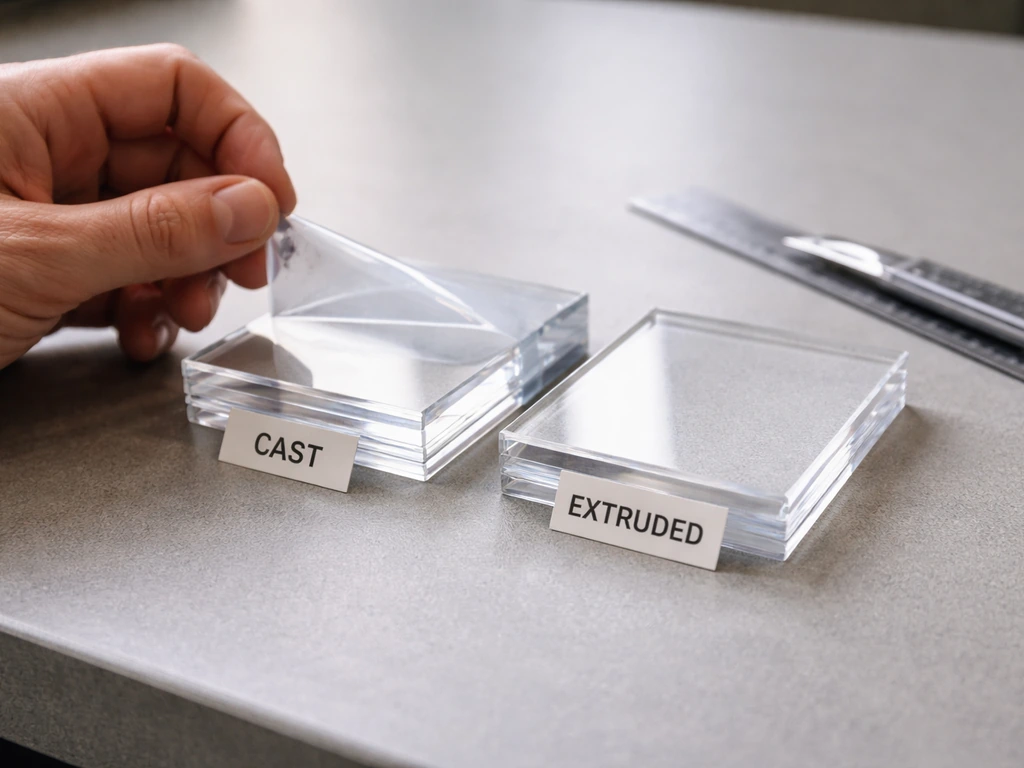
Use cast acrylic rather than extruded acrylic wherever possible. Both types have similar impact resistance, but cast acrylic machines, cuts, and cements more predictably, and holds tolerances better for structural panels. Extruded is cheaper and fine for non-structural decorative pieces, but cast is the better call for the main panels. For small birds (budgies, finches, canaries), 3mm thickness is workable. For cockatiels and small conures, step up to at least 4-5mm. Go 6mm if you're building a large enclosure or want extra rigidity.
Frame materials
Aluminum channel extrusion is the cleanest option for framing because it's lightweight, rust-proof, and easy to drill. Hardwood (oak, maple, or birch) works well too and gives a warmer look, but you'll need to seal it with a bird-safe sealant to prevent moisture damage from cleaning and droppings. Avoid MDF, particle board, and softwoods, they absorb moisture, harbor bacteria, and don't hold fasteners well over time.
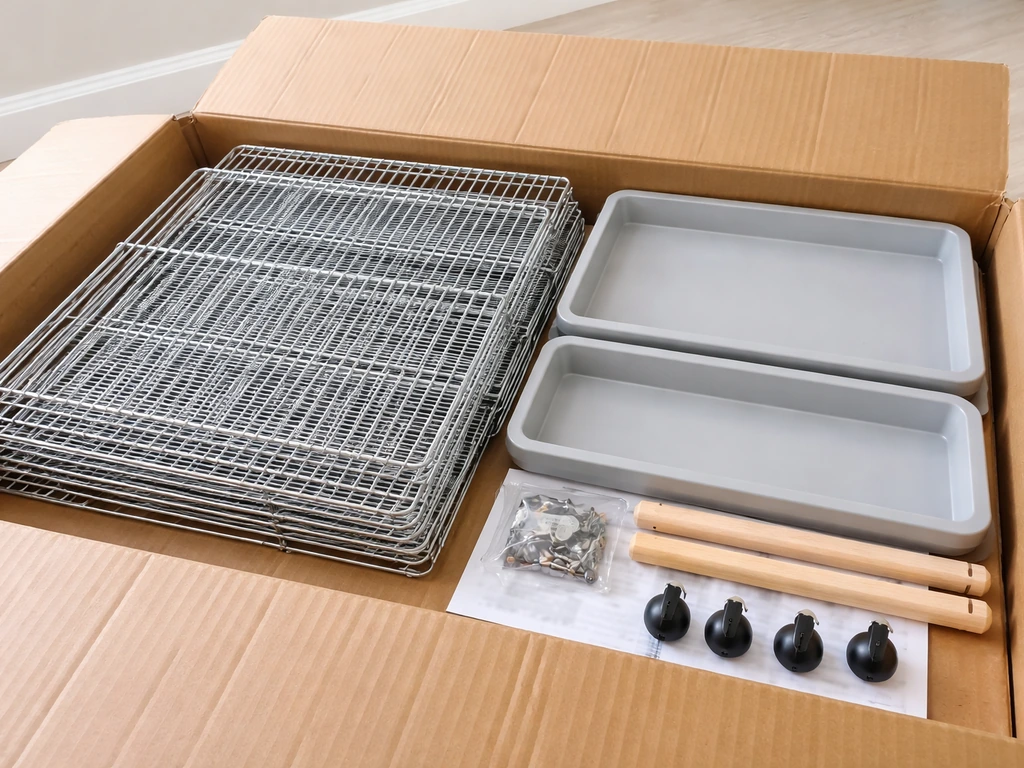
Full materials and tools list
- Cast acrylic sheet (thickness matched to bird size, see above)
- Aluminum channel or hardwood stock for the frame
- Acrylic solvent cement — look for a dichloromethane-free formula like ACRIFIX 1S 0117; always read the product's MSDS before use
- Stainless steel screws, bolts, and washers (no galvanized or zinc-coated hardware inside the cage)
- Stainless steel or brass hinges and a tamper-resistant latch for the door
- Drill with stepped drill bits for ventilation holes
- Acrylic scoring tool or fine-tooth table saw blade (tooth count and blade size matter for clean cuts on acrylic)
- Clamps, a straight edge, and masking tape to protect panel faces during cutting
- Fine-grit sandpaper (220-400 grit) for smoothing cut edges
- Bird-safe sealant for any wood components
- Removable pull-out tray material (acrylic or metal sheet) for the floor
- Soft microfiber cloths for cleaning
- Mild dish soap or an acrylic-specific cleaner for ongoing maintenance
Planning your cage: dimensions, ventilation, doors, and placement
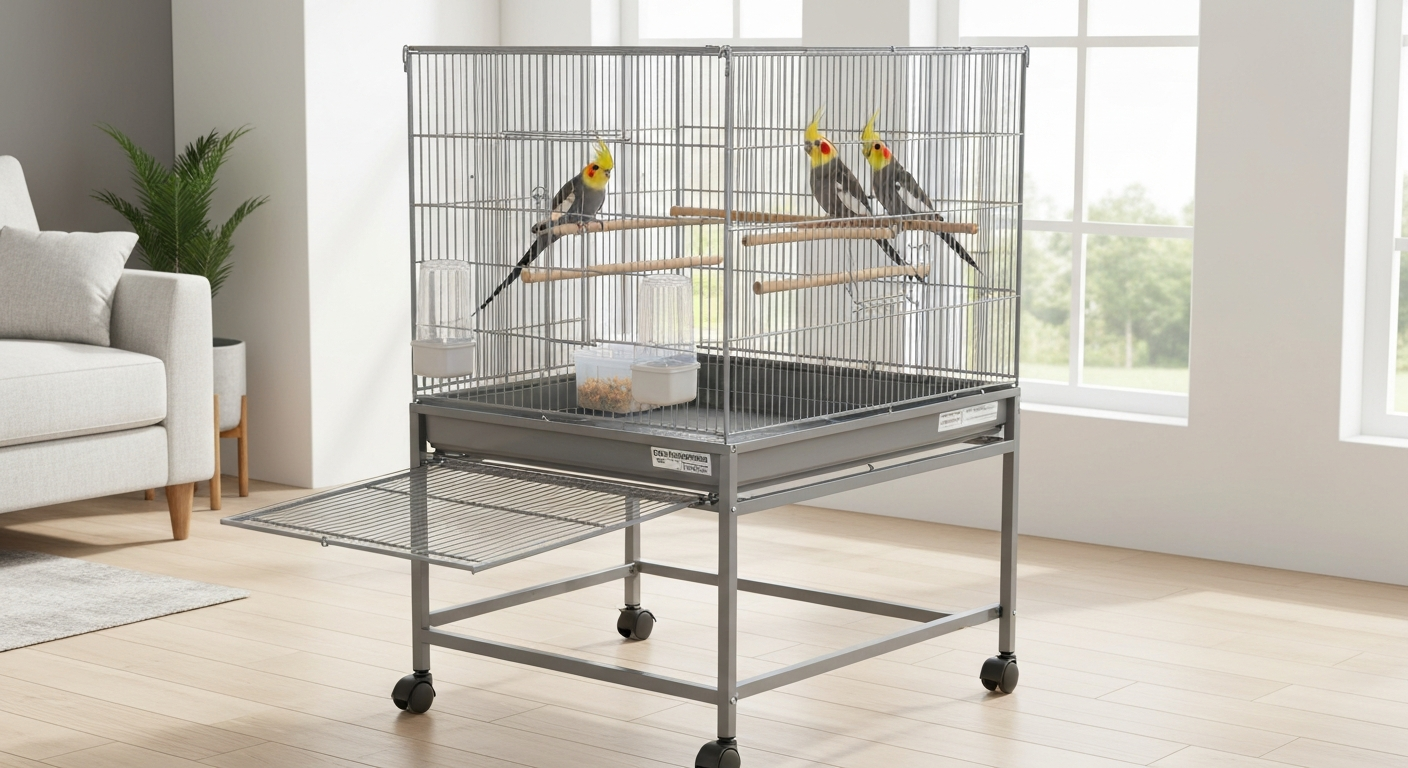
The most common mistake people make is building a cage that's too small. A general working rule: the cage should be wide enough for the bird to fully extend both wings simultaneously, and tall enough to accommodate the bird at full height plus the highest perch. For a single budgie, that's a minimum of about 18 inches wide, 18 inches deep, and 24 inches tall. For a cockatiel, think 24 x 24 x 36 inches at minimum. Bigger is always better, these are just floor minimums.
Ventilation planning
This is the part of a plexiglass cage build that most DIYers underestimate. Solid acrylic panels trap stale air, humidity, and airborne pathogens if you don't design ventilation in deliberately. The US federal enclosure standard requires ventilation openings on at least two opposing walls, with each ventilated wall having openings that total at least 16% of that wall's total surface area. Use that 16% figure as your minimum target for each ventilated wall.
On a wall that is 24 inches wide by 36 inches tall (864 square inches total), you need at least 138 square inches of open ventilation. You can achieve this with a grid of drilled holes or a row of slotted openings near the top and bottom of opposing walls, the key is opposing walls so air actually flows through rather than just pooling.
Door and latch design
Plan for at least one main access door large enough for you to reach in comfortably with both hands. If you need detailed, step-by-step guidance, see our guide on how to make door for bird cage, including sizing, hinges, and safe latch options. A 10 x 12 inch door is a workable minimum for cockatiels; go larger for anything bigger. Add a small food-access door if you want to refill feeders without reaching through the main door.
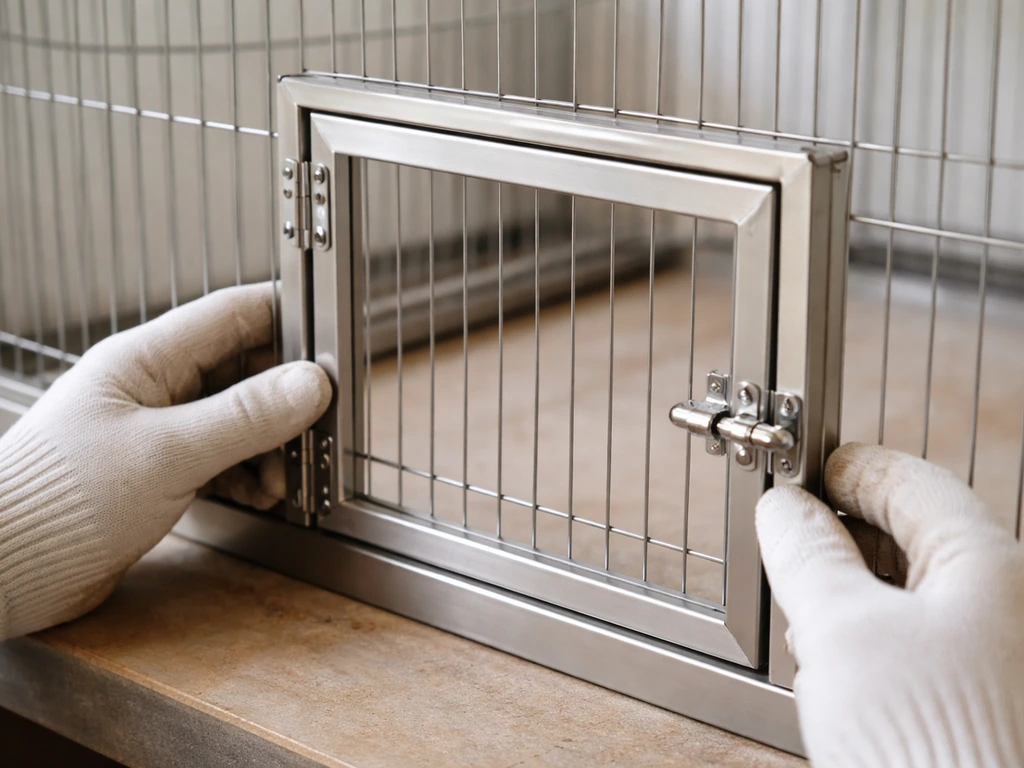
Your latch needs to be bird-proof: many parrots can work simple hook latches open. A two-step latch (or a carabiner-style clip as a secondary lock) is the standard solution. Hinges should be stainless steel and mounted on the outside of the cage so there are no pinch points inside.
Stand and placement planning
Plan the stand before you finalize cage dimensions so the total height puts the cage at roughly eye level, this matters for bird welfare because birds feel more secure at or slightly above human eye level rather than on the floor. Keep the cage away from exterior windows that get direct afternoon sun, kitchen fumes, and HVAC vents. A dedicated stand with locking casters makes cleaning underneath much easier and lets you reposition seasonally.
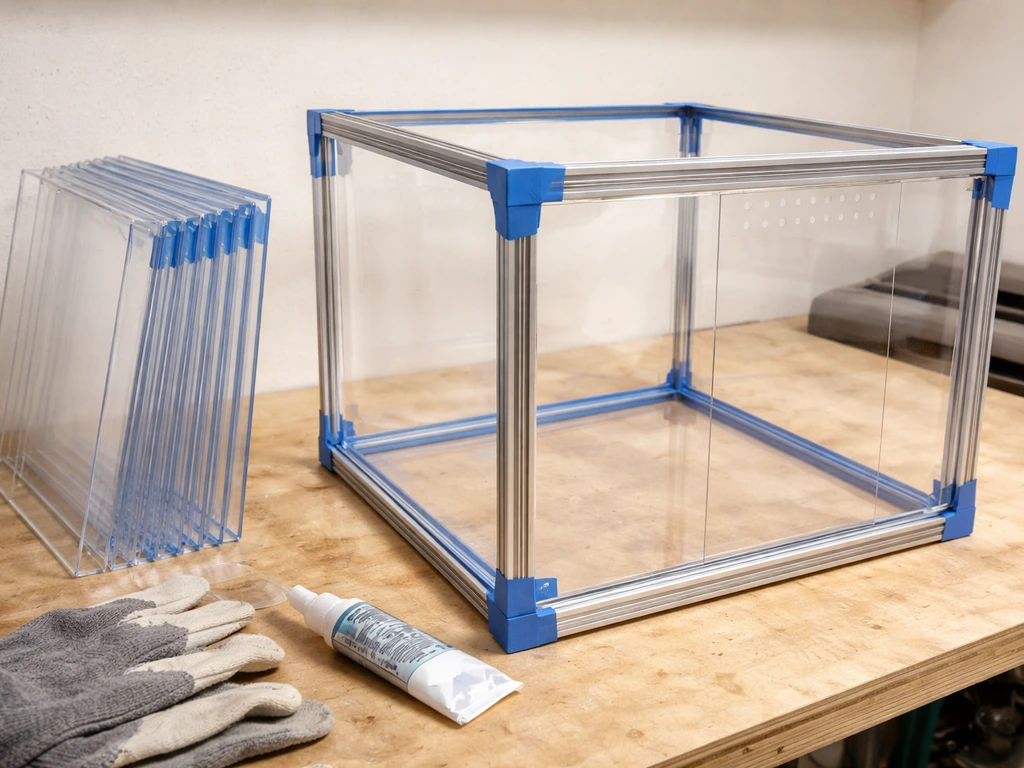
Step-by-step build: frame, panels, joints, and assembly
Step 1: Cut your acrylic panels
Leave the protective masking paper on the acrylic while you cut, it protects the surface and lets you mark cut lines directly with a marker. For straight cuts on thinner sheet (3-4mm), score-and-snap is reliable: use a sharp acrylic scoring tool or dedicated acrylic blade and make multiple firm passes along a straight edge until the groove is about one-third of the sheet thickness deep. Then snap the sheet over a clean straight edge. For thicker panels (5-6mm), a table saw with a fine-tooth blade designed for plastics gives cleaner results. Whichever method you use, go slowly and let the tool do the work, forcing the cut creates heat and binding, which causes cracking.
After cutting, sand all edges with 220-grit sandpaper, then finish with 400-grit. Rough edges can injure birds and also don't cement as cleanly. Flame polishing is optional but gives a cleaner look on visible edges.
Step 2: Drill ventilation openings
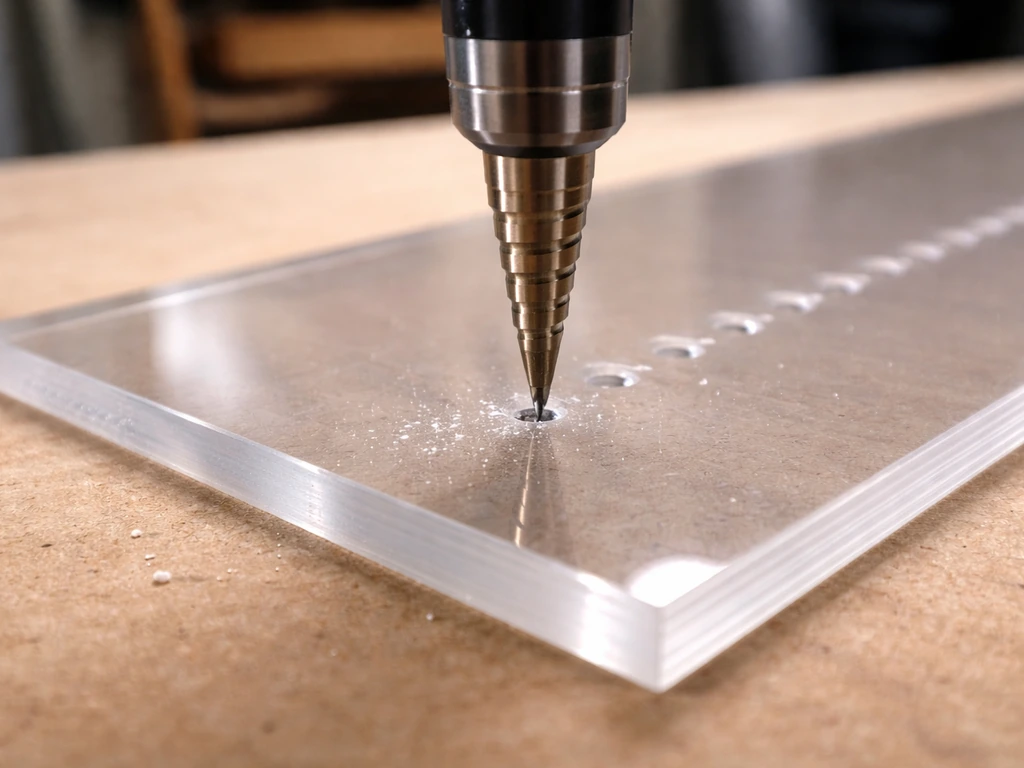
Mark and drill your ventilation holes before assembly while the panels are still flat and easy to work with. Use a stepped drill bit or a sharp twist bit at low speed to avoid cracking. Apply tape over the drill site for extra protection and drill from the face side down into a scrap wood backing. Smooth any rough edges around each hole with a fine-grit sandpaper roll or a small deburring tool. All edges that a bird could contact must be smooth.
Step 3: Build and square the frame
Assemble your aluminum channel or hardwood frame first, before attaching acrylic panels. Square the frame using a large carpenter's square or by measuring diagonals (equal diagonals mean a square frame). Clamp and fasten all frame joints securely. This is your structural skeleton and it needs to be solid before anything else goes on. Pre-drill pilot holes in wood frames to prevent splitting.
Step 4: Attach panels to the frame
There are two approaches to fixing panels: mechanical fasteners, or solvent cement, or a combination of both. For the cleanest look and strongest bond at panel-to-panel edges, use a dichloromethane-free solvent cement (like ACRIFIX 1S 0117). [Read the product's safety data sheet before use](https://www. acrylite.
co/resources/fabrication-manuals/cementing-acrylite), different solvent cements have significantly different ventilation requirements and handling precautions. Apply cement with a syringe applicator along the joint, let capillary action draw it in, and hold the joint clamped for the cure time listed on the product sheet. Mechanical fasteners (stainless screws through pre-drilled oversized holes, with washers to distribute load) are the better choice where panels meet the frame, because they allow for the slight thermal expansion acrylic undergoes with temperature changes.
Never over-tighten screws into acrylic, snug plus a quarter turn, no more.
Step 5: Install the door and latch
Cut the door opening in the front panel after the panel is secured to the frame. Use a jigsaw with a fine plastic-cutting blade, move slowly, and support the cutout piece so it doesn't crack as it separates. Smooth all door opening edges thoroughly. Mount the door with two stainless steel hinges on the outside of the frame, then install your two-step latch. Test the door repeatedly before the bird ever goes in: it should close flush with no gaps at the edges, and the latch should require deliberate two-step action to open.
Step 6: Install the removable floor tray
A pull-out floor tray is essential for practical daily cleaning. Cut a tray from acrylic or thin aluminum sheet that slides snugly into a channel at the bottom of the cage. The tray should have shallow sides (about 1-1.5 inches) to contain seed hulls, droppings, and bedding. Line it with paper-based cage liner or plain newsprint, avoid sandpaper liners, which birds may ingest and which can cause gastrointestinal problems.
Setting up the interior: perches, feeders, toys, and mess control
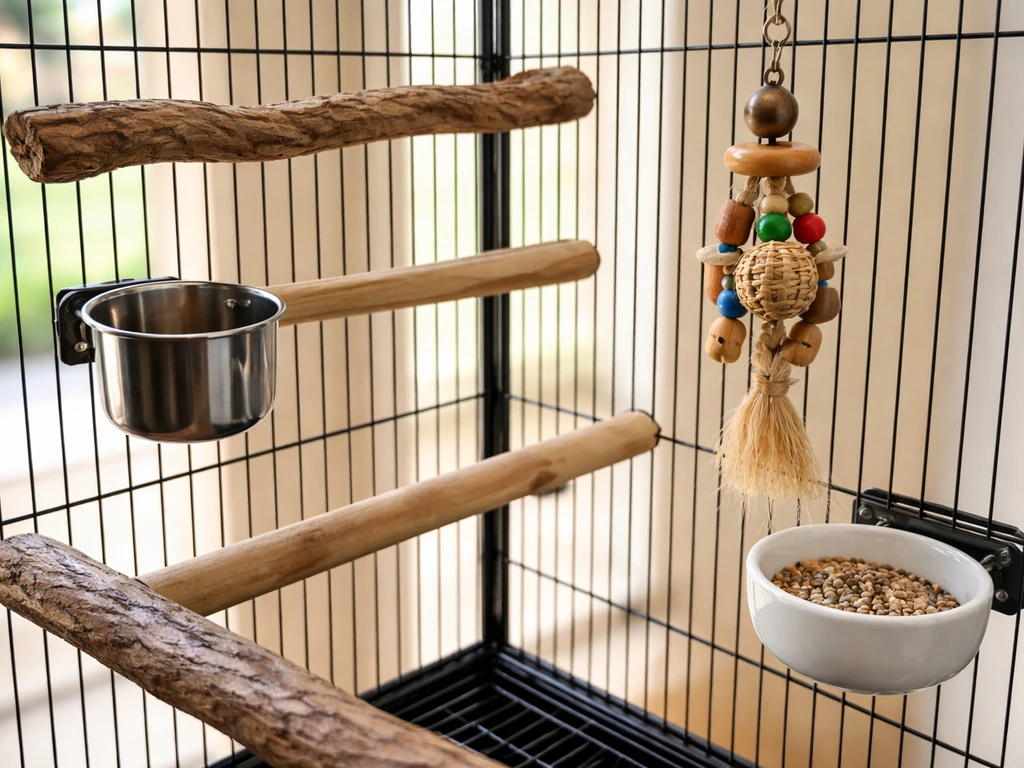
Perches
[Perch variety is one of the most important things you can do for your bird's foot health. ](https://www. staravian. org/wp-content/uploads/2022/07/cage-setup-101.
pdf) Aim for at least three to four different perch diameters so the foot muscles work differently across perches rather than always gripping the same shape. For budgies and small parrots, perch diameter should fall between roughly 1/4 and 1/2 inch. For cockatiels and small conures, 1/2 to 3/4 inch is appropriate.
The perch diameter should let the bird's toes wrap about three-quarters of the way around, not so thin the foot is fully closed, not so thick it can barely grip. Use natural wood perches (untreated manzanita, java wood, or apple wood), rope perches, and one or two textured perches to give variety. Avoid plastic perches as a primary perch, they don't flex or give traction the way natural wood does.
Mount perches so they don't sit directly over food or water dishes, and make sure the bird has clear flying or hopping lines between them without obstruction. In an acrylic cage, perches are typically mounted by drilling a small hole through the acrylic panel and using a stainless bolt or perch screw. Seal around the mounting hole on the outside with a small bead of bird-safe silicone to prevent moisture ingress.
Feeders and water
Mount food and water dishes at a comfortable mid-height, not on the floor where they collect droppings. Use stainless steel or ceramic dishes rather than plastic, plastic scratches and harbors bacteria in the grooves over time. Plan for at least two dish mounting points (food and water) plus a position for fresh food or foraging. If you have a separate food-access door, position at least one dish behind it for easy daily refilling.
Toys and enrichment attachment points
Drill or mount stainless steel eye bolts into the top frame or ceiling panel of the cage before assembly. These give you flexible hanging points for swings, bells, foraging toys, and rotating enrichment items. Put at least three points in so you can vary toy placement. In an acrylic cage, toys with sharp metal parts or abrasive surfaces can scratch panels badly, check each toy before adding it and replace anything that leaves marks.
Waste and mess control
The pull-out tray handles most droppings. Beyond that, a seed skirt around the outside lower edge of the cage dramatically reduces the scatter that gets onto your floor. In an acrylic cage, the solid panels already contain mess better than wire, but seed hulls and feather dust still find their way out through ventilation openings. If you plan and build the front panels with proper ventilation in mind, you can reduce humidity buildup and keep your bird healthier ventilation openings. A simple plastic or acrylic seed guard lip on the inside lower edge of ventilation cutouts helps. Plan for daily tray changes and at least a weekly full wipe-down of interior surfaces.
Critical safety checks before your bird moves in
Airflow check
Close all doors and hold a lit stick of incense or a piece of tissue near your ventilation openings. The tissue or smoke should move noticeably, indicating air is actually flowing through the cage rather than stagnating. If you see no movement, your ventilation openings are insufficient. Add more drilled holes until you hit that 16% minimum on each opposing wall. Stale, humid air inside an acrylic cage leads to respiratory problems fast.
Escape and gap check
Run your fingers around every joint, door edge, and panel seam. Any gap wider than the smallest part of your bird's body is a potential escape route or entrapment hazard. For budgies, any gap wider than about 3/8 inch is a problem. Use a thin acrylic strip cemented or screwed over any gap you find. Check that the door closes with zero gap at the latch side and both hinge-side corners. Shake the cage gently, nothing should rattle loose.
Edge and surface safety
Every single cut edge that is accessible inside the cage must be smooth enough to run your palm across without discomfort. Re-sand anything that feels sharp. Check inside ventilation holes too, rough internal edges on drilled holes can cut feet or toes. Run a small drill bit or deburring tool through each hole one more time if needed.
Latch and hardware check
Have someone else try to open your latch while you watch. If they can do it in under ten seconds without knowing the mechanism, your bird definitely can. Parrots are remarkably good at working out mechanical puzzles. A secondary carabiner clip on the main door is cheap insurance. Also verify that no screws, bolts, or hardware protrude into the cage interior in a way a bird could catch a leg or foot on.
Cleaning compatibility check
Acrylic is damaged by a surprisingly long list of common cleaners. Never use acetone, denatured alcohol, window-cleaning sprays, or undiluted bleach on acrylic surfaces, these cause crazing and cloudiness that weaken the panels over time. For daily cleaning, mild dish soap and warm water applied with a soft microfiber cloth is the right approach. For disinfection, use a diluted bleach solution (roughly 1 part bleach to 32 parts water), rinse thoroughly, and dry with a soft lint-free cloth. Avoid rough sponges or abrasive pads entirely. The same care applies to the removable tray.
Placement, covers, seasonal protection, and ongoing maintenance
Placement rules that actually matter
Keep the cage at least three feet from any exterior window that receives direct afternoon sun. Remember that acrylic panels can amplify solar heat the same way a greenhouse does, and birds can overheat within minutes in an enclosed space. Keep the cage away from kitchen fumes (Teflon/non-stick cookware fumes are acutely toxic to birds), air conditioning vents that blow directly on the cage, and exterior doors that create drafts. The ideal placement is in a room where the family spends time during the day, birds are social and need activity around them, with good ambient light but no direct sun.
Cage covers for sleep and seasonal use
Most birds benefit from 10-12 hours of darkness for sleep, and a cage cover makes this possible even in a brightly lit room. For an acrylic cage, use a breathable fabric cover (cotton or linen) that drapes over the top and sides but leaves the ventilation openings at least partially uncovered, or choose a cover with mesh panels at the sides. A fully sealed cover over an acrylic cage will trap heat and humidity. Never use synthetic or non-breathable materials as a full cover. In winter, a cover also adds a modest layer of insulation against cold drafts, but make sure it doesn't block ventilation.
Seasonal adjustments
In summer, watch interior temperature closely. A small indoor thermometer placed inside the cage during the hottest part of the day will tell you if you have a heat problem. If the interior climbs above 85°F (29°C), you need to reposition the cage, improve ventilation, or both. In winter, make sure drafts from windows and doors aren't hitting the cage directly, a cage that feels fine to you in a room can still have cold pockets near exterior walls.
Ongoing inspection and maintenance schedule
| Task | Frequency | What to look for |
|---|---|---|
| Pull-out tray change and wipe-down | Daily | Droppings, uneaten fresh food, moisture buildup |
| Interior surface wipe with mild soap/water | Weekly | Droppings on panels, dish residue, feather dust on ventilation holes |
| Full disinfection with diluted bleach, thorough rinse | Monthly | Bacterial or mold growth, staining on tray or perches |
| Check all screws, bolts, and hardware for loosening | Monthly | Rattling hardware, any fastener that has shifted or backed out |
| Inspect acrylic panels for cracks, crazing, or cloudiness | Monthly | Any cracks that start near screw holes or at corners |
| Test door latch and hinges | Weekly | Latch tension, hinge tightness, any warping in the door panel |
| Check perch condition and cleanliness | Weekly | Rough or soiled surfaces, chewed ends that create splinters |
| Ventilation hole check | Monthly | Blocked holes from feather dust or debris, rough edges returning |
Troubleshooting common problems
- Panels crazing or clouding: You used an incompatible cleaner. Strip back to mild soap and water immediately and stop using whatever caused it. Minor crazing doesn't always compromise structural integrity but weakens the panel over time.
- Poor airflow despite large openings: Check whether your openings are truly on opposing walls. Vents on the same wall or adjacent walls create a dead-air pocket rather than cross-ventilation.
- Bird opening the latch: Add a carabiner clip as a secondary lock. Parrots especially will solve single-mechanism latches quickly.
- Cracking near screw holes: You over-tightened or used holes that are too small. Acrylic needs oversized holes (about 1/8 inch larger than the screw diameter) and a washer to distribute load. Remove the screw, enlarge the hole, and reinstall with a washer.
- Condensation inside the cage: Your ventilation is insufficient for the room humidity level. Add more drilled openings on opposing walls until the condensation stops.
A well-built acrylic cage is genuinely rewarding, it's cleaner to maintain than wire, gives you a great view of your bird, and can last years with proper care. Once your plexiglass cage is built, follow these glass bird cage steps closely to ensure proper sizing, safe ventilation, and secure door and latch hardware.
If you want to tackle specific sub-projects separately, building the door and latch mechanism, making an acrylic front panel for an existing frame, or designing a temporary holding enclosure are all natural companion projects to this build. If you need a temporary bird cage for travel or a short holding period, plan the size, airflow, and secure door the same way you would for a permanent build temporary holding enclosure.
If you are making bird cage fronts for an existing enclosure, plan the front panel to match your frame and add the same ventilation and smooth-edge safety details before you attach it making an acrylic front panel. If you're looking for a non-habitat prop instead, use our guide on how to make a fake bird cage so the project stays convincing without being dangerous to birds.
Take the build in stages, do your safety checks before the bird moves in, and don't rush the ventilation planning, that's the step that makes the difference between a cage that works well and one that causes health problems. If you need a temporary setup, the same ventilation and safety checks will keep a short-term acrylic cage safer for your bird how to make a temporary bird cage.
FAQ
Is meeting the 16% ventilation rule enough, or do I need to worry about airflow patterns?
For ventilation, aim for open area on two opposing walls and also avoid placing all openings only near the same height. If you only vent one wall or keep vents clustered in the center, you can still get stagnant corners even if the total percentage looks right. After assembly, test airflow by observing tissue movement at multiple vent locations, front to back.
Can I cover a plexiglass bird cage completely to block drafts or light?
No. If you use a fully sealed cover, the cage can trap heat and raise humidity, which increases respiratory risk for birds. Instead, use a breathable cotton or linen cover that leaves vent areas at least partially exposed, or choose a cover with mesh side sections so air can still move through the openings.
How can I tell if my acrylic cage is overheating in different spots?
Don’t rely on a single thermometer reading. Use a simple approach: place one thermometer inside near a vented wall and check again near the opposite side during the hottest part of the day. This helps you catch uneven heating or poor circulation even if the cage looks well ventilated.
What’s the easiest way to adjust perch diameters if my bird seems to grip weirdly?
Choose perch sizes so the bird can wrap roughly three-quarters of the toes around the perch without fully clamping. Then add variety by mixing smooth natural wood with at least one textured surface, but avoid sanding-down natural perches until they become too uniform. Also re-check perch holes and mounting screws after the first week, since wood and acrylic can settle slightly.
How long should I wait before letting a bird into the cage after using solvent cement?
Solvent cement joints should cure fully before you put the bird in. Solvents can off-gas during curing, and fumes are irritating for bird airways. Use the cure time on the cement’s safety or instructions sheet as the minimum, then ventilate the room well and re-check for any joint that looks cloudy or uneven.
What should I do if my acrylic starts to look cloudy or crazed during cleaning?
If you see cloudy areas (crazing) on acrylic, stop and do not keep cleaning with alcohol or harsh chemicals. Clouding indicates surface damage that can worsen with time, and sharp edges may remain if you skipped proper sanding. Replace damaged panels if the clouding is widespread or near any edge a bird can contact.
How do I choose a latch so my bird cannot defeat it quickly?
For door latching, think from a bird’s perspective. If your latch can be opened with just a quick push or a single finger motion, assume a clever bird can learn it. A two-step latch reduces risk, and a secondary carabiner clip is useful as backup. Also ensure hinges and hinge-side gaps do not create a lever point a bird can exploit.
How can I confirm there are no “escape gaps” beyond just visually checking seams?
Yes, even small gaps matter. Use a gap check that matches your bird’s size, then run your palm and also gently apply force to panels around seams and the door frame. If you can catch a fingernail in a seam, the bird can likely exploit it too. Fix gaps before adding the tray and perches so you can still reach and seal everything.
Where should I mount food and water dishes to reduce mess and contamination?
Avoid using a fixed-height approach for dish placement. If you mount dishes too low, droppings and debris fall into them. Too high can put dishes in the bird’s stepping path. Mid-height placement is usually best, and if you change food types or foraging toys, verify that the bird cannot easily kick pellets or hulls into water during feeding.
What parts of the cage get missed during cleaning, and how do I disinfect without damaging acrylic?
Most acrylic panels can be cleaned safely only with gentle methods. For disinfection, follow the dilution and rinsing approach carefully, then dry thoroughly with a soft lint-free cloth. Don’t forget the pull-out tray and the underside of the tray channel, since residue can build up in corners and around the tray slides.
When does a plexiglass cage stop being a safe option due to chewing?
Acrylic does have limits. If your bird is an aggressive chewer, plexiglass may fail even with thicker panels because repeated point pressure can crack and later shatter. A practical decision aid: if your bird already tests acrylic surfaces with strong chewing, switch to wire or reinforce the interior with a chew-resistant barrier rather than hoping thicker sheet alone will solve it.
Next Articles
How to Make a Door for a Bird Cage: Step by Step
Step-by-step guide to build a safe bird cage door with tools, cut-and-fit measurements, secure latches, and no gap or pi
Vivohome Bird Cage Instructions: Complete Setup & Care Guide
Step-by-step Vivohome bird cage assembly with safety checks, maintenance schedules, troubleshooting, and species‑adapted
A&E Bird Cage Instructions: Step-by-Step Assembly Guide
Step-by-step A&E bird cage instructions to identify your model, assemble safely, install trays and accessories, and trou