
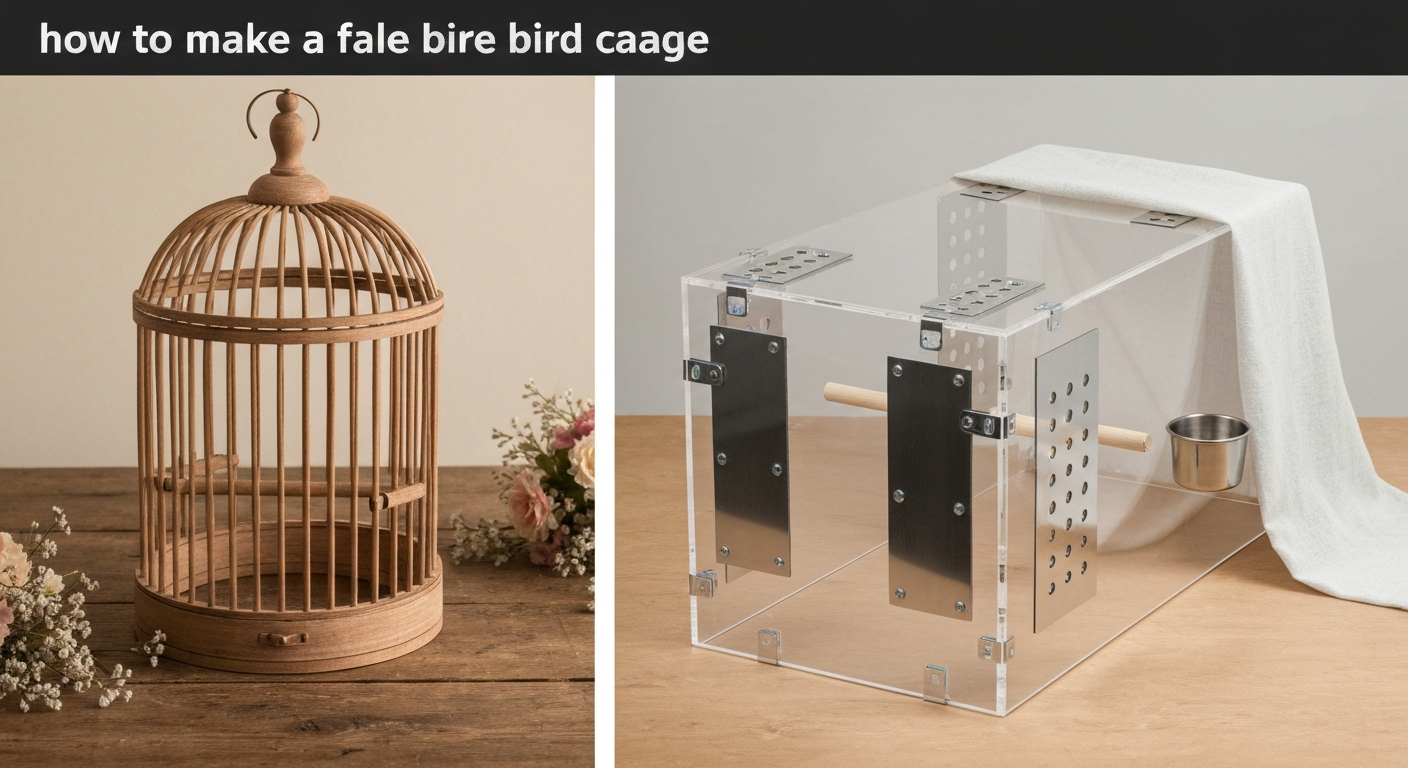
A 'fake bird cage' can mean two completely different things: a decorative prop built purely for photos or home décor, or a transparent temporary enclosure made from plexiglass or acrylic that briefly houses a real bird during a move, vet visit, or cage cleaning. Both are legitimate DIY projects, but only one ever touches a living bird, and that distinction drives every material, spacing, and ventilation decision in this guide. I'll walk you through both builds, step by step, with full cut lists and hardware recommendations, plus the welfare rules that have to come first.
How to Make a Fake Bird Cage: Safe DIY Plans & Rules

Maya Bennett
28 Jul 2026
When a fake or temporary cage makes sense (and when it doesn't)
Decorative faux cages are never appropriate housing for a live bird, full stop. They exist for centerpieces, photography backdrops, wedding décor, and seasonal displays. If you are searching for a quick, cheap alternative to a real cage because you just got a bird, please stop here and get a properly sized, species-appropriate enclosure first. The Association of Avian Veterinarians is clear that housing must meet species-specific behavioral and veterinary needs, and a prop made from craft wire and hot glue does not come close.
A transparent temporary enclosure made from plexiglass or acrylic occupies a different category. Short-term use during cage cleaning, a supervised transport leg, or a brief quarantine period is reasonable, provided the enclosure has adequate ventilation, cannot be escaped from, and the bird is monitored constantly. The U.S. Animal Welfare Act transport clauses and USDA/APHIS guidelines require that even temporary enclosures allow normal postural adjustments, include provisions for food and water, and keep the bird within safe temperature ranges. See Animal Welfare Act Quick Reference Guides, National Agricultural Library (USDA/NAL) for summaries of AWA requirements and USDA/APHIS interpretations on primary enclosures, duties for food and water, and transport provisions governing temporary enclosures Animal Welfare Act Quick Reference Guides — National Agricultural Library (USDA/NAL). 'Short-term' in practice means hours, not days.
Quick decision guide: which build do you actually need?
Before you cut a single panel or pick up a drill, use this table to match your project to the right plan. The four common DIY paths each have different audiences, skill demands, and welfare stakes.
| Project type | Best for | Houses a live bird? | Build plan in this article |
|---|---|---|---|
| Decorative faux cage | Photo props, home décor, events | No | Build Plan A |
| Plexiglass/acrylic temporary enclosure | Short-term housing during cleaning, transport, quarantine | Yes, hours only | Build Plan B |
| Retrofit cage front or panel | Replacing damaged fronts, adding visibility to an existing cage | Yes, permanent use | See the cage fronts guide in this silo |
| Permanent transparent cage | Flight aviaries, breeding setups with mixed panels | Yes, long-term | See the plexiglass and acrylic cage guides in this silo |
If your goal is a permanent see-through enclosure, the guides on how to build a plexiglass bird cage and how to make an acrylic bird cage in this silo cover the full structural requirements for long-term housing. This article focuses on the two end-points: the purely decorative prop and the welfare-safe short-term transparent box.
Basic avian housing principles you have to respect
Even when you are building something temporary, understanding the minimum standards for real bird housing keeps your decisions grounded. The RSPCA is explicit: a bird must be able to fully extend both wings without touching the sides, and it must be able to sit on a perch without its tail touching the floor. Bar spacing must prevent the bird from fitting its head through the gaps. The World Parrot Trust's standing recommendation is simply to get the biggest cage possible, because larger space directly supports psychological and physical health.
Enrichment is not optional. Perches of varying diameter, foraging opportunities, and visual stimulation all matter for daily welfare. A temporary transparent box for a two-hour cage-cleaning session can skip the full enrichment setup, but a bird left in any enclosure beyond a couple of hours needs perches, water, and stimulus. If your 'temporary' use is stretching toward multiple days, you need a proper cage, not a DIY box.
Bar and mesh spacing by bird size
These are the published minimum dimensions and recommended bar spacings from the Merck Veterinary Manual. Treat them as floors, not targets, and always verify the specific requirement for your species with an avian vet, since individual birds and species vary. For transparent temporary enclosures, bar spacing does not apply directly, but the minimum interior dimensions still do.
| Size class / species examples | Minimum cage dimensions (L x W x H inches) | Recommended bar spacing | Notes |
|---|---|---|---|
| Budgerigar, cockatiel, lovebird, parrotlet | 20 x 20 x 30 | 0.5 in (≈12 mm) | Cap at 1/2 in for small species to prevent head entrapment |
| Conure, mini macaw | 36 x 24 x 48 | 0.75 in (≈19 mm) | Minimum; larger is strongly preferred |
| African grey, Amazon, small cockatoo | 40 x 30 x 60 | 0.75 in (≈19 mm) | Monitor chewing on bar coatings |
| Macaw, large cockatoo | 48 x 36 x 66 | 1.5 in (≈38 mm) | Horizontal bars support climbing behavior |
The 1/2-inch (12 mm) spacing cap for small birds is a firm safety rule backed by both the Merck guidance and avian rescue protocols. A budgie or parrotlet can push its head through surprisingly wide gaps and become trapped. When in doubt, go tighter.
Safe materials, tools, and things to avoid
Non-toxic metals and hardware
Zinc and lead are the two metals most commonly responsible for fatal metal poisoning in caged birds, as documented by the Pet Poison Helpline and multiple veterinary references. Galvanized wire (zinc-coated), old lead-based paints, and some imported metal hardware are the main culprits. For any build that will touch or be accessible to a bird, use stainless steel (grade 304 or 316), powder-coated steel from a supplier who can confirm bird-safe coatings, or bare aluminum. Avoid galvanized anything for chewable surfaces, and skip decorative chrome-plated hardware where the plating may flake.
Plastics: acrylic vs polycarbonate vs PVC
For transparent panels, PMMA (acrylic, sold as Plexiglas, Acrylite, or OPTIX) is the most practical option for most DIYers. It comes in common thicknesses (1/8 in / 3 mm, 3/16 in / 4.8 mm, 1/4 in / 6 mm, 3/8 in / 9 mm, and 1/2 in / 12 mm), cuts cleanly on a table saw or with a scoring knife, and bonds well with appropriate acrylic solvent cement or mechanical fasteners. Its specific gravity is about 1.19 and tensile strength runs 10,300 to 11,000 psi, which means 1/4-inch sheet is sturdy enough for panels up to about 18 inches on a side without additional framing. For a temporary enclosure housing a bird, 1/4-inch (6 mm) is a good working thickness for panels under 18 inches; go to 3/8 inch (9.5 mm) for anything wider.
Polycarbonate is tougher and more impact-resistant but yellows faster under UV and costs more. For a temporary box, acrylic is the better value. PVC sheet (not PVC pipe) works for non-transparent panels and frames but adds weight. Glass is heavy, shatters dangerously if a bird panics and strikes it, and is not recommended for temporary enclosures you will be moving around.
Adhesives, finishes, and bonding methods
Solvent-based acrylic cements like the Weld-On series bond acrylic to acrylic by chemically softening and fusing the surfaces. They work extremely well structurally, but their safety data sheets list significant VOC content and respiratory hazards during application and cure. Never apply solvent cement anywhere near a bird, and allow full cure with thorough ventilation (minimum 24 hours, ideally 48 to 72) before any bird comes near the finished piece. The same rule applies to two-part epoxies like WEST SYSTEM 105: fully cured epoxy is far less hazardous than wet or partly cured resin, but you need to follow the manufacturer's cure schedule exactly. VCA Animal Hospitals and avian toxicology sources are consistent that even low concentrations of VOCs, paint fumes, and solvents can cause acute respiratory distress or sudden death in birds. Build outside or in a garage, cure fully, air out completely.
For mechanical fastening of acrylic, use stainless steel or nylon screws with washers, and always drill slightly oversized pilot holes (typically 1/16 inch larger than the screw shank diameter). Acrylic is notch-sensitive and will stress-crack around tight holes if you overtighten. Use nylon washers under the screw heads to distribute the load. This is often a more bird-safe approach than solvent cement for temporary builds, because there are no fumes to wait out.
Tool list for both builds
- Table saw or circular saw with a fine-tooth blade (60+ tooth for acrylic) — or a scoring knife and straight edge for thin sheet
- Cordless drill with titanium or cobalt twist bits
- Countersink bit (for flush-head mechanical fasteners)
- Clamps (bar or spring clamps, at least 4)
- Steel ruler and combination square
- Sandpaper: 220 grit for edge smoothing, 400 grit for finishing
- Heat gun or butane lighter for flame-polishing acrylic edges (optional but useful for prop builds)
- Solvent cement applicator needle bottle or mechanical fasteners as chosen
- PPE: safety glasses, nitrile gloves, N95 or better respirator when using solvent cement
Ventilation, heat buildup, and visibility tradeoffs for transparent panels
This is the section most DIYers skip, and it is the one most likely to harm or kill a bird. Clear acrylic transmits roughly 88 to 92 percent of visible and near-infrared solar radiation, compared to single-pane glass at around 85 to 87 percent. Its thermal conductivity is much lower than glass (approximately 0.18 to 0.22 W/m·K for acrylic versus 0.8 to 1.0 W/m·K for glass), which means heat that enters through the panels does not escape as easily. In direct sunlight, an unvented acrylic enclosure can rise many degrees above ambient in minutes. Engineering and greenhouse research consistently documents rapid temperature elevation inside clear plastic enclosures, and a bird in a small sealed box in a sunny window can die of heat stress very quickly.
The practical rule for any acrylic temporary enclosure is: never place it in direct sunlight, and size your ventilation ports so that total open area equals at least 10 to 15 percent of the total surface area of the enclosure. For a box measuring 20 x 20 x 20 inches (a workable small parrot temporary enclosure), that means roughly 120 to 180 square inches of vent area across all six faces combined. Drill arrays of 1/4-inch to 3/8-inch holes in the top panel and at least two side panels. Cover the holes with fine stainless steel mesh (no wider than your species-appropriate bar spacing) and secure it with stainless washers and screws.
Condensation is a secondary concern. In high-humidity environments or when a bird is left in a poorly ventilated box, moisture from the bird's respiration condenses on the panels and can pool on the floor. This raises ammonia and bacterial load quickly. Keep the temporary box in a climate-controlled room, monitor humidity, and never leave a bird in the box overnight.
Visual stress is also real. Unlike a wire cage, solid transparent walls give a bird no tactile boundary reference and can cause panic, especially in birds not accustomed to clear enclosures. Cover two sides with a lightweight cloth or opaque panel to give the bird a sense of shelter while keeping ventilation open on the other sides.
Measurements, spacing, and the cut-measure-cut rule
Always measure your acrylic panels twice before cutting. Acrylic cannot be un-cut, and a single millimeter of error on a butt-joint panel will leave a gap that lets small birds escape. Work to within 1/32 inch (about 0.8 mm) for any panel that forms a closed edge. Write dimensions directly on the protective paper liner with a marker before removing the liner.
For the decorative prop build, tolerances are relaxed because no bird is inside. A gap of 1/4 inch in a faux cage is a design feature, not a safety hazard. For the temporary enclosure, treat every joint as escape-critical. A cockatiel can squeeze through a surprisingly small gap, and a parrotlet is even smaller. If you are using mechanical fasteners rather than solvent cement, seal the interior face of every joint with a bead of bird-safe, fully cured silicone sealant (aquarium-grade, no mold inhibitors, no fungicide additives).
Build Plan A: decorative faux bird cage (photo prop or décor piece)
This build produces a charming, lightweight prop roughly 12 inches wide by 12 inches deep by 18 inches tall, suitable for table centerpieces, photography backdrops, or seasonal décor. No bird should ever be placed inside it. The structure uses wooden dowels for 'bars,' a plywood or MDF top and base, and basic joinery you can complete in an afternoon. For step-by-step plans to build decorative cage fronts, see how to make bird cage fronts.
Materials list
- 1/4-inch wooden dowels, 3 feet long: 24 pieces (available at any hardware store)
- 3/4-inch MDF or plywood sheet: one piece 12 x 12 inches for the base, one piece 12 x 12 inches for the top
- 1/4-inch drill bit matching your dowel diameter (test fit first; dowels vary)
- Wood glue (PVA, fully dried before any decorative finishing)
- Small brass hinges (25 mm), 2 pieces, for a decorative door
- Small barrel bolt or decorative latch, 1 piece
- Sandpaper: 120, 220 grit
- Chalk paint, spray paint, or wood stain (water-based; choose low-VOC and allow full cure before use near birds)
- Clear matte sealant (water-based polyurethane, optional, for moisture resistance)
Cut list
| Part | Material | Dimensions | Quantity |
|---|---|---|---|
| Base plate | 3/4-in MDF or plywood | 12 x 12 in | 1 |
| Top plate | 3/4-in MDF or plywood | 12 x 12 in | 1 |
| Vertical bars | 1/4-in wooden dowel | 17.5 in (to fit between plates) | 24 |
| Door frame sides | 1/4-in wooden dowel | 17.5 in | 2 (included in above) |
| Door frame top/bottom | 1/4-in wooden dowel | 4 in | 2 extra pieces |
Step-by-step assembly
- Mark hole positions on both the base and top plates. Space 24 holes evenly around the perimeter of each plate, approximately 1.5 inches apart (or closer for a tighter look). Keep holes at least 3/4 inch from the edge to avoid splitting the MDF.
- Drill all holes to a depth of 3/8 inch (or all the way through for a pinned design), using the 1/4-inch bit. Test one dowel in a hole; it should be snug but not forced. If it splits, your bit is slightly undersize — step up by 1/64 inch.
- Sand both plates smooth with 120 grit, then 220 grit. Round the edges slightly. Remove all dust.
- Apply a thin bead of PVA wood glue into each hole on the base plate. Insert all dowels and let the glue tack for 5 minutes.
- Apply glue to the top holes and press the top plate down over the standing dowels, squaring the assembly carefully. Clamp with bar clamps if possible, or weight the top plate while the glue sets (30 minutes minimum, 2 hours for full strength).
- For the door, leave a 4-inch section on one face as an opening. Glue two short horizontal dowels (4 inches each) across the top and bottom of the opening to define the door frame, then build a simple rectangular door from 4 dowel sections glued into a frame using a flat surface to keep it square.
- Attach the door using two small brass hinges screwed into the top plate edge and the door frame top dowel. Add the barrel bolt or decorative latch to keep the door closed.
- Once the glue is fully cured (24 hours), sand any rough spots and apply your chosen finish. If using spray paint, work outside and allow at least 48 to 72 hours of cure time in a well-ventilated area before bringing the prop indoors around birds.
- For a rustic look, a light coat of chalk paint followed by dry-brushed white creates the classic vintage birdcage effect in about 20 minutes.
Finishing, cleaning, and display tips
For cleaning the prop between uses, wipe with a damp cloth and mild dish soap. Avoid soaking the MDF base, as it will swell. If you use the prop outdoors, a coat of outdoor-rated water-based polyurethane on all surfaces will extend its life significantly. Store indoors when not in use. Do not place live birds, even briefly, inside this prop. The bar spacing (approximately 1.5 inches) would allow even a large bird to push its head through and become trapped, and the structure has zero safety hardware to prevent escape.
Build Plan B: plexiglass/acrylic temporary enclosure for short-term bird housing
This build is designed for genuine short-term housing of a real bird, typically during cage cleaning, a supervised transport window of a few hours, or a brief quarantine period. For a complete step-by-step tutorial on how to make an acrylic bird cage, see the dedicated guide covering materials, cut lists, ventilation layouts, and construction tips. For a step-by-step tutorial on how to make a temporary bird cage, consult our detailed guide on how to make a temporary bird cage. The example dimensions (20 x 20 x 30 inches interior) match the Merck Veterinary Manual minimum for budgerigars, cockatiels, lovebirds, and parrotlets. Scale up for larger species using the table above. Do not use this enclosure as primary long-term housing unless you upgrade it to meet full ventilation, enrichment, and structural standards.
Materials list
- 1/4-inch (6 mm) clear cast acrylic sheet: enough for six panels (see cut list below) — cast acrylic bonds more cleanly than extruded for solvent cement; either works for mechanical fastening
- Stainless steel machine screws (M5 x 16 mm or 10-32 x 5/8 in), 40 pieces
- Stainless steel flat washers and nylon washers to match screws, 80 pieces each
- Stainless steel hex nuts or nyloc nuts, 40 pieces
- Aquarium-grade silicone sealant (no mold inhibitor, no fungicide), 1 tube
- Stainless steel mesh (1/2-inch spacing for small species), 2 pieces at 8 x 8 in for vent panels
- Two piano hinges (stainless, 12 in length), for the door panel
- Barrel bolt latch (stainless), 1 piece; plus a secondary spring snap lock if housing an escape-prone species
- 1/4-in drill bit (for screw pilot holes, slightly oversized per earlier guidance)
- 3/16-in drill bit (for vent holes, size up as needed)
- Masking tape and protective liner (leave the paper on the acrylic until final assembly)
Cut list (20 x 20 x 30 in interior dimensions)
| Panel | Dimensions (inches) | Thickness | Quantity | Notes |
|---|---|---|---|---|
| Base (floor) | 20 x 20 | 1/4 in | 1 | Can use 3/8 in for extra rigidity |
| Top | 20.5 x 20.5 | 1/4 in | 1 | Slightly oversized to cap the sides |
| Front (door panel) | 20.5 x 30 | 1/4 in | 1 | Hinged on one side |
| Back panel | 20.5 x 30 | 1/4 in | 1 | Drill vent holes here |
| Left side panel | 20 x 30 | 1/4 in | 1 | Drill vent holes here |
| Right side panel | 20 x 30 | 1/4 in | 1 | Cover with cloth on one side for shelter |
Ventilation port layout
On the back panel, drill a grid of 5/16-inch holes spaced 1 inch apart, covering a central area of approximately 8 x 10 inches (80 holes, totaling about 12 square inches of open area). Repeat on both side panels with an 8 x 8-inch hole grid. The top panel should have a full mesh insert: cut a 10 x 10-inch rectangular opening in the top and attach the stainless mesh over it with screws and washers. If you need a secure hinged access panel, follow a step-by-step how to make door for bird cage guide to build a tight-sealing, bird-safe door that integrates with the mesh insert. Total ventilation area comes to approximately 140 to 160 square inches, which exceeds the 10 to 15 percent guideline for this enclosure size. Cover all drilled-hole arrays with a layer of 1/2-inch stainless mesh on the interior face, secured with stainless screws and nylon washers, so the bird cannot chew through the softer acrylic edges around the holes.
Assembly, edge bonding, and escape-proofing
- Lay out all panels and dry-fit the assembly before committing to any fasteners or adhesive. Mark which face is interior on each panel.
- Start with the base. Stand the back panel on the base's rear edge. Clamp it square. Mark and drill pilot holes (slightly oversized, 1/16 in larger than the screw shank) through the base into the back panel at 3-inch intervals. Fasten with stainless screws, nylon washers under the screw head on the acrylic, and nyloc nuts below. Do not overtighten; snug with a finger-tight quarter-turn extra is enough.
- Attach both side panels to the base in the same way, then screw the side panels to the back panel along their shared vertical edge.
- Run a bead of aquarium-grade silicone along every interior joint before final tightening of the fasteners. This seals gaps against escape and moisture. Smooth the bead with a wet finger. Allow 24 hours of cure before placing any bird inside.
- Attach the front panel with two stainless piano hinges on the left-side edge (or top edge if you prefer a drop-down door). Hinge screws go into the acrylic with nylon washers and slightly oversized pilot holes.
- Install the barrel bolt latch on the right edge of the front panel and the matching receiver on the side panel. If housing a cockatiel or any parrot known to work latches, add a secondary spring snap latch above or below the barrel bolt. Parrots and even cockatiels can learn simple latches very quickly.
- Drop the top panel into place. If you are using the top-mesh approach, fasten the top panel to the sides with screws and use the mesh insert as the primary ventilation zone.
- Before the first use, inspect every joint: pass a business card around all interior edges to check for gaps. If the card slides through anywhere, add silicone and re-inspect after cure.
- Place one or two natural wood perches (untreated manzanita or java wood) across the interior width, secured with small stainless brackets. At minimum, the bird must be able to perch without its tail touching the floor.
- Cover one side panel with a lightweight towel or opaque cloth to give the bird a visual shelter zone while keeping the ventilated panels clear.
Latch and lock options by species temperament
| Latch type | Best for | Notes |
|---|---|---|
| Barrel bolt (single) | Finches, canaries, less-dexterous birds | Fast to operate; adequate for non-parrot species |
| Double barrel bolt (top and bottom) | Cockatiels, lovebirds, parrotlets | Adds redundancy against beak-and-claw manipulation |
| Spring snap latch plus barrel bolt | Conures, caiques, small parrots | Spring snap requires two-step opening; much harder for birds to work |
| Padlock through bolt eye | African greys, Amazons, cockatoos | Use only if the enclosure is truly secure and you need maximum escape prevention; ensure no pinch points |
Troubleshooting: condensation, escapes, pests, and mess
Condensation on interior panels is almost always a ventilation problem. If you see fog or water beads forming during use, increase the vent area (drill more holes, enlarge the mesh insert) and move the enclosure away from any heating or cooling vents that create temperature differentials across the panels. If condensation is mild and the temporary use is genuinely short (under two hours), monitoring is usually sufficient.
Escape attempts are most common in the first ten minutes when a bird is in an unfamiliar enclosure. Watch the bird continuously during initial placement. Check every latch after the first five minutes, because a bird working a latch hard can loosen a barrel bolt that was not fully engaged. If you see stress behaviors (repeated flying at the panels, hanging from the mesh and biting the acrylic edges), cover more of the exterior with cloth and add a perch the bird visibly favors.
For the decorative prop, pest control is mainly a storage issue. Prop birdcages left outdoors or in garages attract spiders, wasps, and insects that build nests in the base and bar intersections. Store props in sealed plastic bags or bins when not in use. Wipe down with a damp cloth and check for insects before bringing any prop near a bird's environment.
Mess control for the temporary acrylic box is straightforward: line the base with paper towels, changed between uses, and wipe all interior surfaces with a 1:10 bleach-water solution after each use. Rinse thoroughly with clean water and allow to air dry fully before storing. Acrylic cleans well with mild dish soap and a soft cloth; avoid ammonia-based glass cleaners, which can cause surface crazing over time.
Scaling your temporary enclosure into permanent housing
If you have built the acrylic temporary box and realized you want to extend it into permanent housing, there are specific upgrades required before that is appropriate. The ventilation standard for permanent housing is higher: the widely cited guideline in avian housing literature is that at least 50 percent of all side surfaces should be open mesh or wire for a permanent cage, because birds need continuous fresh airflow around the clock, not just during supervised use. A solid-panel box does not meet this standard for any species regardless of its dimensions.
The practical path is to replace two or three full side panels with stainless steel wire mesh panels of species-appropriate spacing, keeping one or two acrylic panels for visibility and wind protection. Add proper horizontal wire or natural branch perches at multiple heights, enrichment toys, foraging stations, and appropriately sized food and water dishes. At that point, you have a hybrid transparent aviary that can function as semi-permanent housing, and the guides on how to build a plexiglass bird cage and how to make a glass bird cage in this silo go deeper into the structural and welfare requirements for that kind of permanent build.
Pre-use safety inspection checklist
Run through this list before placing any bird into the temporary acrylic enclosure. For the decorative prop, ignore this section entirely, but keep it bookmarked for any future live-animal build.
- All joints sealed with cured silicone, no gaps that pass a business card
- All screws tight, no hardware protrusions on interior faces that could injure a bird
- All vent holes covered with species-appropriate mesh, mesh edges smooth or folded back from interior
- Door/front panel latches engaged and tested by an adult hand attempting to open them from the inside (simulate what a determined beak can do)
- Interior dimensions verified against the species minimums in the table above
- At least one perch installed, bird can sit fully upright without tail touching the floor
- Enclosure placed out of direct sunlight and away from drafts, HVAC vents, and kitchen
- Water source provided for any use over 30 minutes
- Silicone and any adhesive fully cured (minimum 24 hours from application, ideally 72)
- No solvent, paint, or finish odor detectable from arm's length away (if in doubt, air out longer)
FAQ
When is it appropriate to use a decorative or temporary "fake" bird cage, and when is it unacceptable?
Appropriate uses: short‑term photo/prop staging (minutes to hours) where the bird is supervised; temporary transport or quarantine enclosures that meet species‑specific transport rules; retrofit fronts/doors during repairs if the bird has full out‑of‑cage access and supervision. Unacceptable uses: long‑term or primary housing; overnight or unsupervised confinement; any scenario where the enclosure does not allow species‑specific behaviors (flapping, perching, foraging, dust‑bathing) or meet minimum size/bar‑spacing standards. Welfare rule: never substitute a decorative/transparent temporary build for permanent housing unless it meets recognized species requirements from authorities such as Merck Veterinary Manual, RSPCA, AAV, and World Parrot Trust (sources: Merck, RSPCA, AAV, World Parrot Trust).
What minimum dimensions and bar/mesh spacing should I use for different common species?
Use authoritative minimums as starting points and choose larger when possible. Examples (minimums from Merck and other avian guidance): budgerigar/cockatiel/lovebird/parrotlet: ~20×20×30 in, 0.5 in (12 mm) spacing; conure/mini macaw: ~36×24×48 in, 0.75 in spacing; African grey/Amazon/small cockatoo: ~40×30×60 in, 0.75 in spacing; large macaws/large cockatoos: ~48×36×66 in, 1.5 in spacing. Always ensure spacing prevents head entrapment and allows wing extension without touching sides (RSPCA/AAV guidance). For mixed or unusual species, consult species‑specific husbandry guidance before building.
What materials are safe (non‑toxic) and practical for DIY faux or temporary cages?
Safe choices: stainless steel hardware and mesh (food‑grade 304 or 316) for any bird‑accessible metal; powder‑coated steel with paint/finish verified as bird‑safe (no lead or zinc) can be used but avoid accessible chewable areas; hardwoods sealed with bird‑safe finishes (water‑based, low‑VOC labeled and fully cured) for non‑chewable framing. Materials to avoid: galvanized/zinc‑coated wire where birds can chew (zinc poisoning), painted surfaces with unknown composition or lead, unvented solvent paints/varnishes, and any metal with lead. For transparent panels: acrylic/PMMA (Plexiglas/Acrylite/OPTIX) is common; polycarbonate is more impact resistant but may scratch and off‑gas different profiles; glass is inert but heavier and may shatter. Manufacturer SDS and Pet Poison Helpline guidance list zinc/lead and household fumes as major risks—avoid them near birds.
If I use acrylic (PMMA) for transparent panels, what design, thickness and ventilation rules should I follow?
Panel selection: common acrylic thicknesses: 1/8" (3 mm) to 1/2" (12 mm). For small temporary enclosures use at least 1/8"–3/16"; for larger panels or where structural load exists choose 1/4" or thicker. Fabrication tips: use oversize drilled holes and washers to avoid stress cracking; avoid overtightening fasteners. Ventilation/thermal rules: clear acrylic has high solar transmittance and can trap heat rapidly—always provide continuous ventilation (top and side vents) and shade to prevent temperature spikes. Use vent area equal to at least 10–20% of side panel area as a starting point for small temporary enclosures; for hot climates increase venting and monitor internal temps. Avoid sealed acrylic boxes in direct sun; consider low‑solar films, mesh panels, or intermittent shading. Follow manufacturer data and safety guidance (Plaskolite/OPTIX) for thermal limits and continuous service temperature.
How should I bond or join acrylic/glass/wood components around birds without exposing them to toxic fumes?
Avoid solvent cementing (Weld‑On® and similar) in occupied bird spaces because solvent fumes are hazardous. Safe approaches: mechanically fasten panels with bolts/screws, use gaskets and silicone that is explicitly bird‑safe (use cured, low‑VOC neutral‑cure silicones and allow full off‑gassing/cure outside the bird area), or use two‑part epoxies applied and fully cured before introducing birds (follow manufacturer cure schedules to minimize residual VOCs). Always perform bonding and finishing outdoors or in a well‑ventilated area, allow full cure time per SDS/TDS, and ventilate the finished enclosure for several days before bird use. Consult product SDS for VOC and cure info (Weld‑On SDS warns of solvent hazards; fully cured epoxies have far lower emissions).
What hinge and latch options are safe and escape‑proof for retrofit doors and temporary fronts?
Hinges: use continuous (piano) hinges or heavy butt hinges mounted with stainless steel fasteners and washers sized to avoid stress on acrylic. Latches: secure multi‑point latches or carabiner‑style parrot‑safe clips for small birds; for larger parrots use slide‑bolt latches combined with a safety pin or padlock. Avoid simple spring catches or fragile plastic latches birds can manipulate. Ensure latch design prevents the bird from reaching the mechanism from inside (use recessed or shielded hardware) and test with the bird’s strongest bills/feet. For doors on acrylic panels, reinforce cutouts with wood or metal frames and use gasket seals rather than compression that can cause cracking.
Next Articles
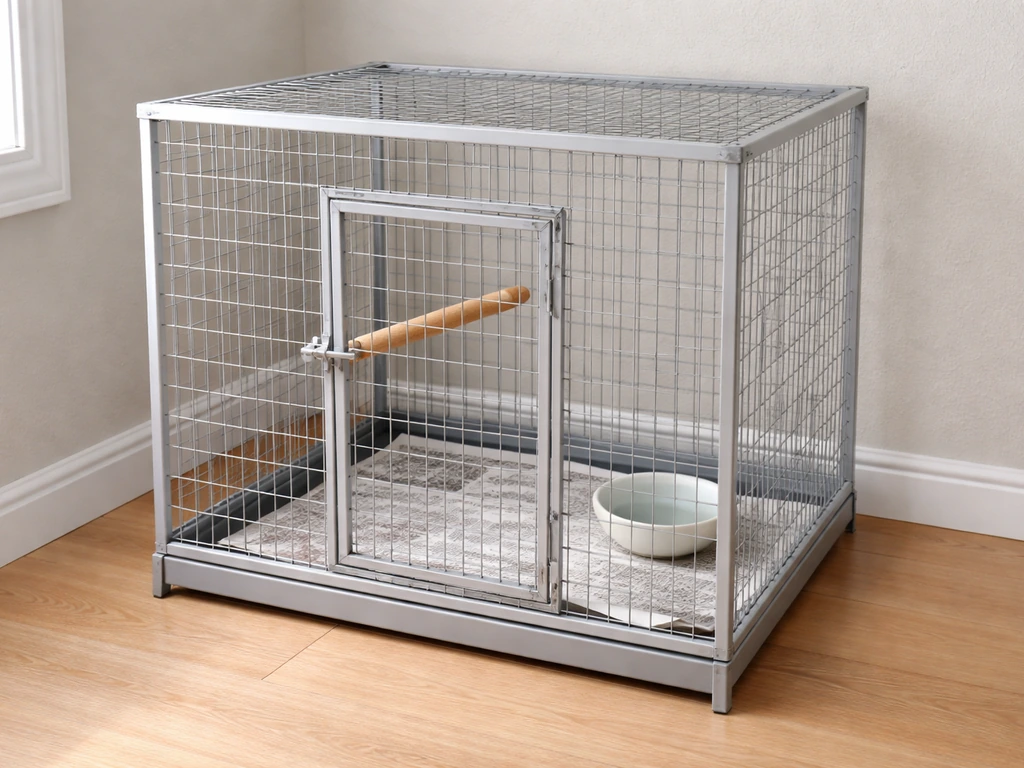
How to Make a Temporary Bird Cage Step by Step
Step-by-step DIY guide to build a safe temporary bird cage now, with sizing, bar spacing, materials, and safety checks.
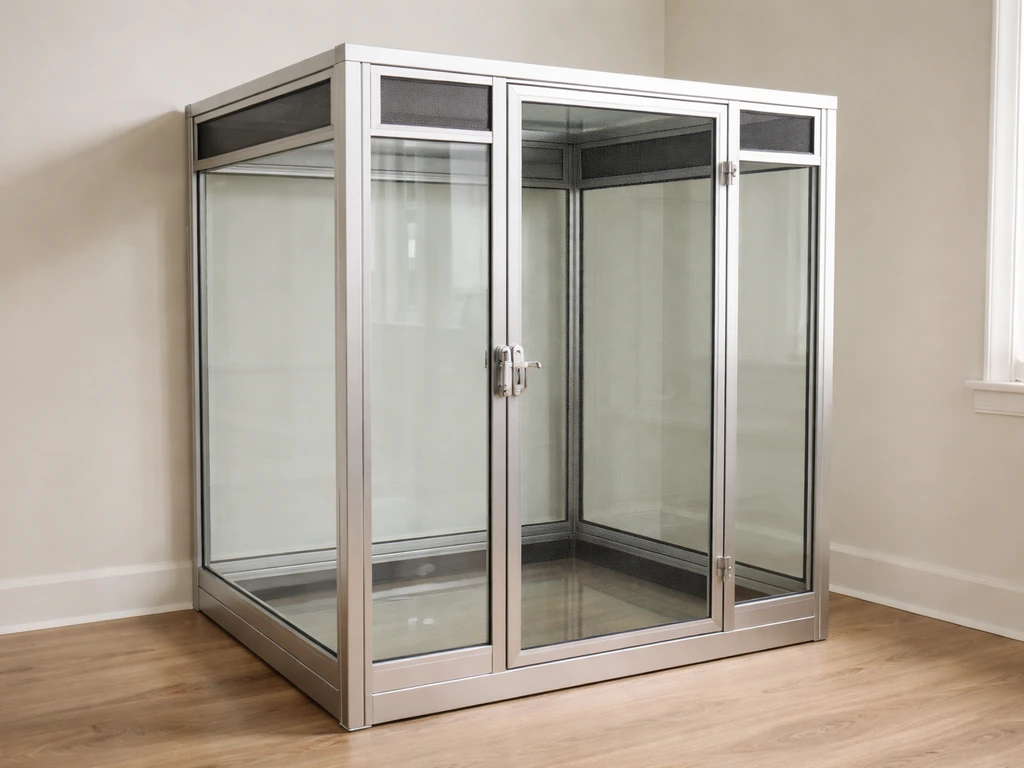
How to Make a Glass Bird Cage: Step-by-Step DIY Guide
Step-by-step DIY for a safe glass bird enclosure: materials, escape-proof design, ventilation, assembly, and maintenance
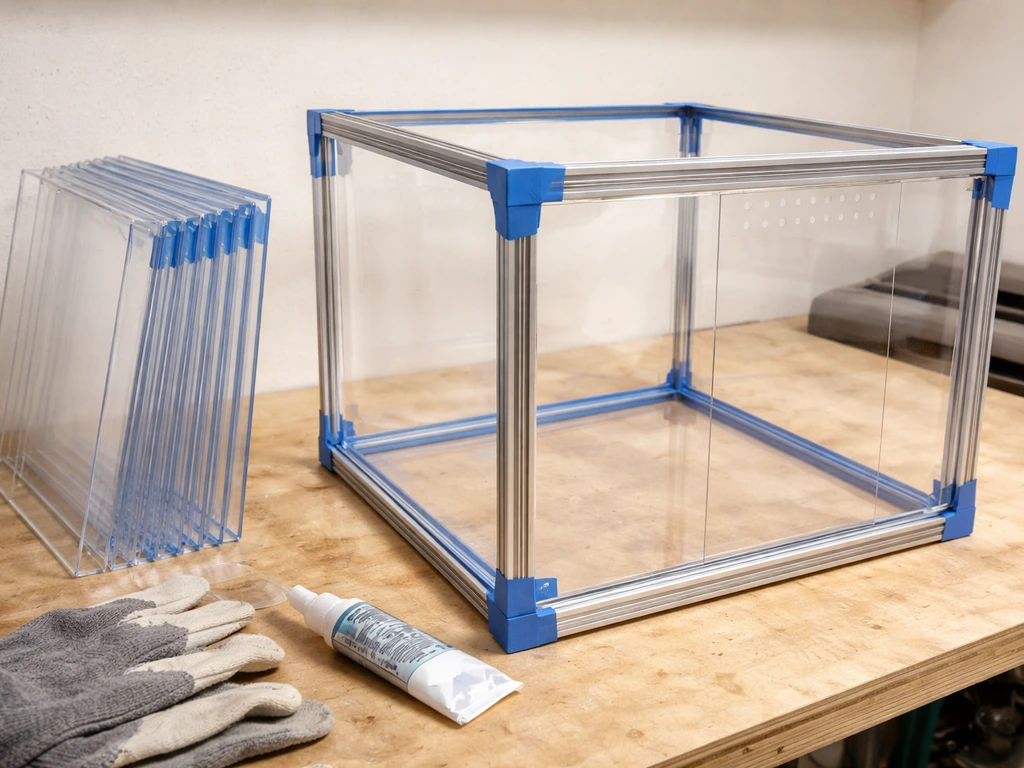
How to Build a Plexiglass Bird Cage Step by Step
Step-by-step DIY guide to build a safe plexiglass bird cage: materials, dimensions, cutting, sealing, doors, airflow, an