If you have a Little Live Pets bird cage kit sitting in a box, the first thing to know is that 'Little Live Pets' is actually a toy brand, not a live-bird cage manufacturer. The cage that comes with the Lil' Bird set is a plastic toy housing made from ABS, polypropylene and PVC, powered by two CR2 batteries, and it is not suitable for a real bird. If you landed here looking for assembly instructions for that toy, I have you covered below. But if you are setting up a real small bird cage and simply searched 'Little Live Pets bird cage instructions' because you saw it mentioned alongside brands like Pets Alive, A&E, Pet Republic or VIVOHOME, this guide covers all of them. I will walk you through assembly, parts identification, safety checks, species-appropriate setup and a cleaning routine that keeps your bird healthy long-term.
Little Live Pets Bird Cage Instructions: Assembly & Care Guide

Who this guide is for and what it covers
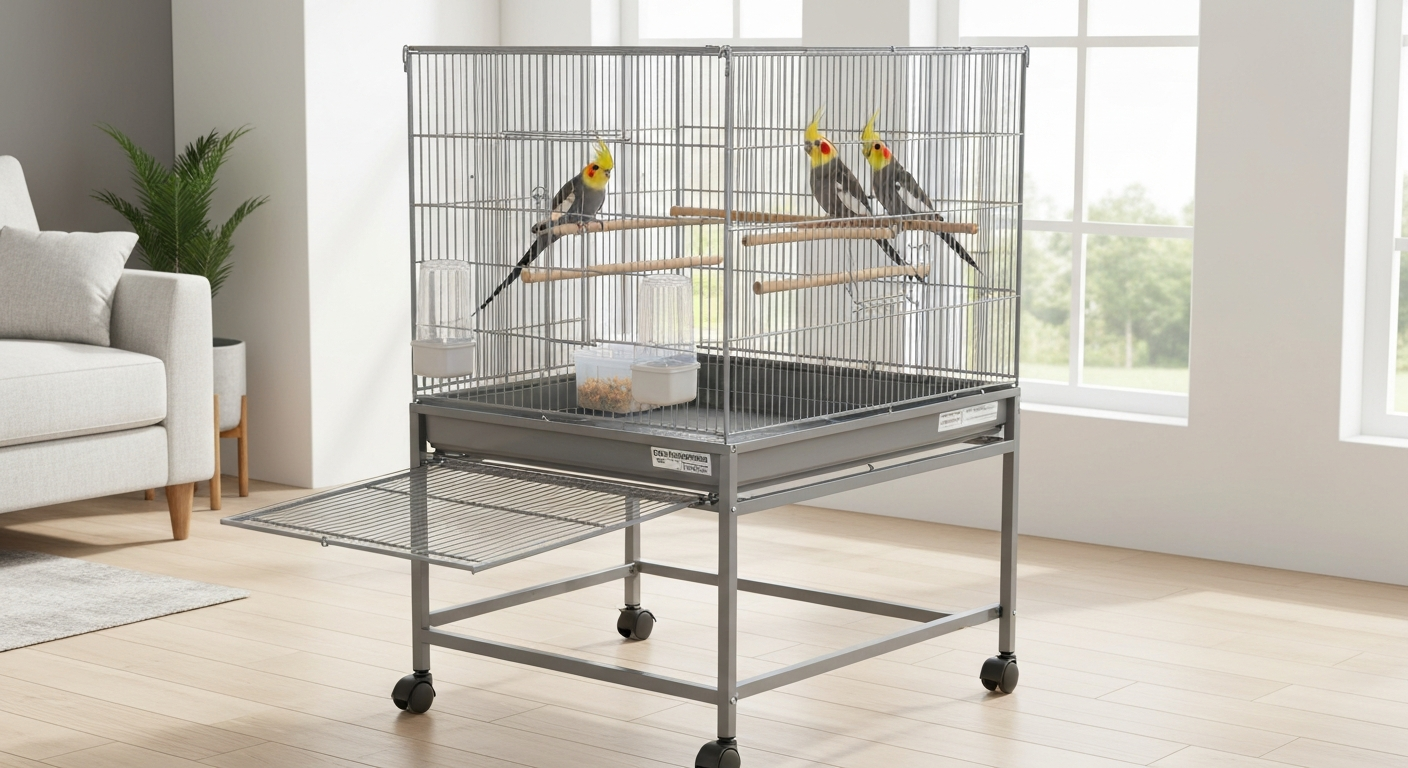
This guide is written for two groups of people: parents or gift-givers assembling the Little Live Pets or Pets Alive toy cage sets, and bird owners setting up a real small cage from A&E, Pet Republic or VIVOHOME. Both groups often end up on the same search, and both deserve clear instructions. Throughout the guide I flag which advice applies to toy products, which applies to real bird housing, and which applies to both. If you own a budgie, finch, canary, cockatiel or small conure and are choosing or building a new cage, the species-size guidelines, bar-spacing notes, material-safety section and cleaning schedule all apply directly to you.
Before you open the box: quick-start checklist
Spend five minutes on this checklist before you touch a single panel or screw. I have rushed past this step before and paid for it with missing hardware I could not source on a Sunday afternoon.
- Locate and download the PDF manual for your exact model number (printed on the box or base sticker). VIVOHOME, A&E and Pets Alive all host these on their product pages or on manual-aggregator sites like Manuals.plus.
- Watch the assembly video if one is linked on the product page. VIVOHOME explicitly recommends this for the VH292 and VH433 models, and the video resolves the two or three steps that exploded diagrams never make obvious.
- Photograph the parts laid out on a clean surface before assembly. This gives you a record for any warranty or missing-parts claim.
- Count every part against the packing list in the manual before you discard any cardboard or foam. Clips and feeder cups are tiny and often taped inside flaps.
- Check all wire or metal surfaces for rust spots, sharp burrs or flaking coating. Reject any panel that shows bare galvanized metal or chipped paint (see material-safety section below).
- Have a flat, stable work surface ready. Most small cages can be assembled on a table; larger models (VIVOHOME 162 cm) need floor space.
- Keep a marker pen handy to label any orientation-specific panels before you mix them up.
Parts and tools you will need
The table below consolidates parts and tools across the main product categories covered in this guide. Your specific model may include more or fewer items, but this covers the typical range. Always cross-reference with your printed packing list.
| Item | Toy cages (Little Live Pets / Pets Alive) | Real cages (A&E / Pet Republic / VIVOHOME) |
|---|---|---|
| Wire panels / cage body sections | Pre-assembled plastic housing | 2 to 6 interlocking wire panels |
| Base / tray | Moulded plastic base (integrated) | Slide-out plastic tray (separate) |
| Grate / grid | Not applicable | Wire grate that sits above tray |
| Door(s) | Hinged plastic flap | 1 to 3 wire doors with latch |
| Latch / lock hardware | Moulded clip or tab | Slide bolt, crescent lock or spring clip |
| Perches | 1 moulded plastic perch (toy) | 2 to 4 wooden or plastic perches |
| Feeder cups | 1 or 2 moulded cups | 2 to 4 removable plastic cups with feeder doors |
| Mounting clips / fasteners | Not applicable | 8 to 20 metal or plastic spring clips |
| Caster wheels | Not applicable | 4 wheels with lock levers (VIVOHOME rolling stand models) |
| Play top / perch stand | Not applicable | Optional top assembly with perch bar and feeder cups |
| Batteries | 2 × CR2 (toy bird motor) | Not applicable |
| Screwdriver (Phillips #2) | Not needed | Yes, for caster axle bolts and feeder door screws |
| Flat-head screwdriver | Not needed | Useful for prying open stubborn spring clips |
| Pliers (needle-nose) | Not needed | Recommended for tightening wire clips |
| Allen / hex key | Not needed | Needed on some VIVOHOME and Pet Republic stand hardware |
| Marker pen | Optional | Yes, for marking panel orientation |
| Clean cloth and warm water | Yes, wipe toy before first use | Yes, wipe all surfaces before introducing bird |
Step-by-step assembly walkthrough
This walkthrough covers real wire bird cages. The steps are broadly the same across A&E, Pet Republic and VIVOHOME because all three use the same panel-and-clip construction principle. I note brand variations where they matter. Toy-cage assembly is product-specific and covered in the brand notes sections below.
Step 1: Prepare the base tray and grate
Slide the plastic tray out fully and wipe it with a damp cloth. Line it with cage paper or a purpose-cut tray liner if you use one. Drop the wire grate on top, checking that it sits flat and the tabs (if present) lock into the tray lip. On A&E models the grate uses a slide-in channel; on VIVOHOME models it rests on small ledges inside the base frame. If the grate rocks, check for a bent corner and gently straighten it with pliers before proceeding.
Step 2: Attach the side panels
Stand the base upright on your work surface. Hold the first side panel vertically against the base frame and align the bottom edge with the slot or channel. Thread the spring clips (or locking clips on VIVOHOME) through the wire intersections at each corner, one at the bottom and one at the top. Use needle-nose pliers to close each clip fully until it clicks. Do not rely on clips that feel loose: give each one a firm pull test before moving on. Repeat for the opposite side, then the back panel.
Step 3: Hang the front door panel
The front panel carries the main door and, on larger models, one or two feeder doors. Lower it into the corner channels last so the door swings freely. On A&E models the front panel slides down into the base frame groove and locks with a top bar clip. On Pet Republic models it clips directly to the side panels. Check that the door opens fully inward or outward (model-dependent) without catching on the tray.
Step 4: Fit the top or roof panel
The roof panel drops onto the four upper corners and clips in. On VIVOHOME play-top models, the roof is replaced by an open-top frame that accepts the play-top perch stand. The play-top assembly connects via two bracket arms that hook over the top wire; secure these with the included thumb screws before using the stand. On cages with removable tops (a common feature on larger A&E and VIVOHOME models), confirm that all four corner clips are engaged before lifting the assembled cage.
Step 5: Install perches and feeder cups
Screw wooden perches onto the threaded bolts that pass through the wire, tightening the wing nut on the outside. Position perches at different heights and not directly over food or water cups. Insert feeder cups into their door frames, hook the door frame onto the cage wire at the recommended height, and test each feeder door to ensure it opens and closes without the cup falling. For real birds, remove any plastic ring perches or moulded plastic dowels and replace them with natural wood perches before the bird enters.
Step 6: Attach casters (rolling-stand models)
Flip the stand base upside down on a padded surface. Thread each caster bolt through the mounting hole and tighten with the included hex key or Phillips screwdriver. Engage the lock lever on each caster, then flip the stand right-side up and set the cage body on top. Many VIVOHOME stands use a bolt-through-tube system: insert the bolt, thread on the nut, and tighten firmly so the stand does not wobble under the cage weight.
Step 7: Final safety check before introducing your bird
Walk through every clip, latch and perch bolt before the bird goes in. Pull each door by the latch rather than the frame: if it opens easily without deliberate release, the lock is not secure. Check every wire intersection that was clipped for sharp protrusions. Run a cloth over all interior surfaces and rinse with clean water. Let the cage air dry fully.
Identifying your model and hardware variations
Cage brands often ship multiple SKUs that look nearly identical in the box but use different tray depths, grate wire gauges or latch types. Misidentifying your model is the single biggest reason assembly goes wrong. Here is how I check.
- Model sticker: check the underside of the base tray or the bottom corner of the back panel. The model number is usually embossed or on a label (examples: VH292, VH433, CA3218).
- Tray fit: if the tray binds or leaves a gap, measure the tray width with a tape measure and compare with the listed internal width in your manual. Tray tolerances can vary by a few millimetres across production runs.
- Grate type: some models use a hinged grate (fold it up to clean), others use a fully removable flat grate. The manual diagram usually makes this clear but it is easy to miss.
- Door latch type: slide bolt (common on A&E), spring-clip lever (common on VIVOHOME), crescent/moon latch (common on Pet Republic), or integrated plastic tab (toy models). Each requires a slightly different technique to secure.
- Removable top: if the top four corners have external clip tabs rather than internal press-fit clips, the top is designed to be removable. This is useful for cleaning but also means an unsupervised bird could potentially push it open. Add a secondary clip or carabiner if your bird is strong enough to lever it.
Brand-specific notes: Little Live Pets models and common quirks
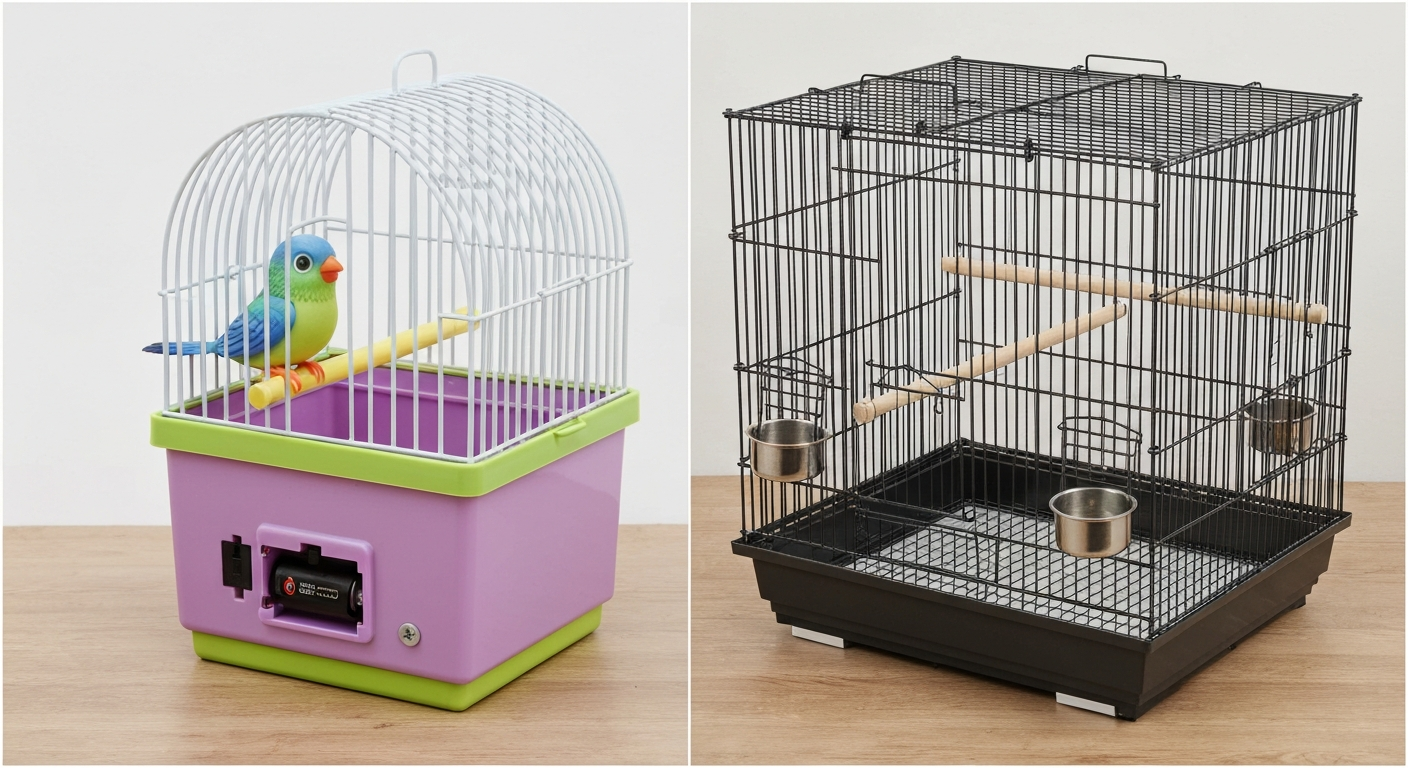
Little Live Pets Lil' Bird and Bird Cage (SKU 563738) is a battery-operated toy, not a live-bird enclosure. The cage body is moulded ABS plastic with a polypropylene perch and PVC accent components. The Little Live Pets 563738 Lil' Bird & Bird Cage User Manual, Manuals.plus lists the materials (ABS, polypropylene, PVC), required batteries (2×CR2), and the product's small‑parts and age warnings Little Live Pets 563738 Lil' Bird & Bird Cage User Manual — Manuals.plus. It runs on two CR2 batteries and animates a small electronic bird that chirps, moves and lights up. Assembly is minimal: the cage housing snaps together, the bird figure clips onto the perch, and the battery compartment is accessed via a Phillips screwdriver on the base. There is no wire, no tray to slide out, and no grate.
The main quirks I see reported with this toy: the door hinge tab snaps if forced open too quickly (always press the release button first), the battery compartment screw strip-out is a recurring complaint (use a correctly sized screwdriver and do not overtighten), and the chirping sound chip can cycle incorrectly if batteries are inserted with any oxidation on the contacts (clean contacts with a dry cotton swab). Cleaning instructions from the manufacturer manual specify a damp cloth only. Do not submerge, do not use solvents. Because this product uses small parts and is not intended for children under three, keep it out of reach of toddlers.
If you are using a Little Live Pets cage as a decorative prop or display housing for a very small live bird temporarily, understand that it is not species-appropriate housing. The bar spacing, cage dimensions and ventilation are not designed for any real bird species, and the electronic components introduce a risk of chewing and electrocution.
Brand-specific notes: Pets Alive models and common quirks
Pets Alive (brand by ZURU) also produces animatronic toy birds, with 'Polly the Surprise Magic Bird' being a well-known example. Like Little Live Pets, the cage included in these sets is plastic, battery-operated (AA or button cell depending on the set) and not appropriate for a real bird. Assembly follows the manual PDF: the cage base clips onto a base plate, the top arch clips on, and the bird figure is inserted onto the central perch post. For the official Pets Alive bird cage instructions and PDF manual, search 'Pets Alive bird cage instructions' or check common manual mirror sites to find the exact SKU download.
Common quirks with Pets Alive sets: the 'surprise reveal' mechanism (a hatching or unboxing element) can stick if the seam was over-glued at the factory. Running warm water over the seam for 30 seconds usually frees it without damaging the electronic internals. The swing or toy accessories that hang from the top arch use small plastic hooks that fatigue and break with repeated use. Replacement hooks are not typically available from ZURU directly, but a small S-hook from a hardware store (non-toxic, smooth finish) works as a substitute. Battery corrosion is faster in these toys than in the Little Live Pets sets because the battery bay is less sealed, so remove batteries if the toy will not be used for more than a few weeks.
Brand-specific notes: A&E models and common quirks
A&E Cage Company makes real, live-bird wire cages intended for parrots, cockatiels, conures and similar species. Their published assembly PDFs (example: model CA3218, available via the Tractor Supply product page and through specialist retailers like Bastrop Cages) document a slide-out grill and tray system, individual feeder doors, and a proprietary 'bird-safe' front door lock. For step-by-step diagrams and downloadable PDFs, see A&E bird cage instructions. A&E frames these safety terms deliberately: their lock design requires a deliberate two-step release that most parrots cannot replicate unassisted.
Quirks I have seen with A&E models: the slide-out grill occasionally binds on one side because the tray warps slightly after repeated washing in hot water. Always wash A&E trays in cool or lukewarm water and let them air dry flat. The spring clips that join the side and front panels can loosen over months of use. Bastrop Cages and other authorized dealers stock replacement clips by part number, and A&E's manual PDF lists the clip reference. If a clip is missing from a new cage, document it in a photo and contact A&E customer service or the retailer before assembling fully, because replacing a clip after the cage is built is more awkward than before.
A&E cages are powder-coated steel. The coating is the safety-critical part: if you see chipping, bare metal or rust anywhere on the wire, do not put a bird in the cage. Request a replacement panel under warranty. A&E's published warranty language specifies coverage for manufacturing defects, and a chipped coating on a new cage qualifies.
Brand-specific notes: Pet Republic models and common quirks
Pet Republic markets a range of metal cages including roof-top and flat-top styles (such as the 39-inch roof-top model sold via Amazon) and regional SKUs like the JAVA Kandang Burung 505. Product listings specify external and internal dimensions, bar spacing and material, and most models include a removable plastic tray and a crescent-style door lock. Pet Republic product pages (example: JAVA Kandang Burung 505), PetRepublic Indonesia product listing provide model dimensions, bar spacing and notes on removable trays for specific SKUs Pet Republic product pages (example: JAVA Kandang Burung 505) — PetRepublic Indonesia product listing. Bar spacing on the 39-inch model is typically listed at around 0.6 to 0.7 inches (approximately 15 to 18 mm), which is suitable for cockatiels and larger budgies but should be verified against the specific SKU listing before purchasing for smaller finches or canaries (who need bar spacing no wider than 12 mm to prevent head entrapment).
Common Pet Republic quirks: the crescent lock is effective but takes some practice to use one-handed. The lock rotates a crescent-shaped plate that blocks the door bar; it will feel stiff when new and loosens with use. If it becomes too loose after several months, a small piece of self-adhesive foam weather-stripping applied to the inside of the crescent plate adds enough friction to keep the door secure without replacing hardware. The removable tray on Pet Republic cages tends to have tighter dimensional tolerances than VIVOHOME models, so if the tray does not slide cleanly, check for a thin plastic flash (a manufacturing overmould) on the tray edges and trim it carefully with a craft knife.
Brand-specific notes: VIVOHOME models and common quirks
VIVOHOME publishes the most detailed assembly documentation of the brands covered here. Their VH433 (162 cm, play top with rolling stand) and VH292 manuals include exploded diagrams, numbered part callouts, a full package-contents list and an explicit instruction to watch the product-page video for any step that is unclear. The VH292 manual is also hosted as a PDF on The Home Depot product assets page, which makes it easy to find if you have lost the paper insert.
The VH433 play-top assembly has one step that trips most people up: the two horizontal perch bars that cross the open play-top platform must be inserted before the bracket arms are attached to the cage body, not after. Reversing this order (which seems logical if you are following the diagrams left-to-right) leaves you unable to thread the perch bars through the bracket slots. VIVOHOME's video makes this clear in about 30 seconds.
VIVOHOME cages use locking clips that are chunkier and more durable than the thin spring clips on budget cages. However, the plastic feeding cups included with most VIVOHOME models are lightweight and tip easily if the bird lands on the rim. Swapping them for heavier ceramic or stainless-steel cups on threaded cup holders (available from most pet suppliers) immediately solves this. The caster wheels on rolling-stand models have lock levers that can feel flimsy. Lock all four casters before placing the cage on the stand, and check them weekly if the cage is on a smooth floor.
Material safety: what your bird cage should and should not be made of
This is the section most assembly guides skip entirely, and it is the one that matters most for your bird's health. Zinc and lead are the two metals most commonly responsible for avian toxicity. Galvanized wire (wire coated in zinc to prevent rust) is a primary exposure source, and so are uncoated zinc clips, old paints and chipped powder coatings that expose bare metal underneath. Clinical signs of zinc or lead toxicity in birds include lethargy, regurgitation, increased thirst and neurological symptoms. Veterinary sources including Today's Veterinary Practice and the Merck Veterinary Manual document these as serious, potentially fatal conditions.
For any real bird cage, the safe materials are stainless steel (best, but expensive), powder-coated steel with an intact food-safe coating, and anodized aluminium. Galvanized wire cages can be used only if all galvanized surfaces have been thoroughly scrubbed with a vinegar solution and the white powdery zinc oxide residue has been removed, and even then the risk is not fully eliminated. My own recommendation is to avoid galvanized wire for any bird that actively chews the bars, which includes most parrots and conures. Budget cages often do not specify their coating type in plain language. If the listing says 'iron wire' or 'electrostatic powder coating' without specifying food-safe or bird-safe, email the seller for a materials data sheet before you buy.
Species-appropriate cage size and bar spacing
The Association of Avian Veterinarians recommends that the minimum cage size should allow a bird to fully extend both wings simultaneously without touching any side. The RSPCA adds that horizontal space is more important than height for most small birds because they fly horizontally, not vertically. A narrow, tall cage gives the illusion of space but provides almost none of the flight room a bird actually uses.
| Species | Minimum internal width (cm) | Minimum internal depth (cm) | Safe bar spacing (mm) | Notes |
|---|---|---|---|---|
| Zebra finch / canary | 60 | 40 | 8 to 12 | Horizontal space is critical; needs room for short flight bursts |
| Budgerigar | 60 | 40 | 10 to 12 | Bar spacing above 12 mm risks head entrapment in juveniles |
| Cockatiel | 75 | 50 | 16 to 20 | Needs horizontal perch placement; chews wood perches quickly |
| Lovebird | 60 | 45 | 12 to 16 | Strong chewers; check latch security weekly |
| Green cheek conure | 75 | 50 | 16 to 20 | Intelligent; needs foraging toys to prevent bar-chewing |
| Sun conure / Jenday conure | 90 | 60 | 20 to 25 | Minimum; larger is always better for active species |
These are minimums, not targets. Larger is always better. If a cage in your shortlist is only marginally above the minimum, size up if your budget allows.
Perch, feeder and toy placement
Place perches at different heights and never directly above a food or water cup. Droppings in the water bowl are one of the fastest routes to bacterial infection. Mount at least one perch near the top of the cage where the bird feels secure for sleeping, and one at mid-height near the feeder doors for feeding. Vary perch diameter if possible: the RSPCA and AAV both note that birds benefit from exercising their feet on different diameters rather than a single uniform dowel. Natural wood branches (apple, willow, pear, hazel) are ideal and can be replaced when soiled.
Toys should fill no more than one third of the internal cage volume. Overcrowding with toys removes flight space and stresses small birds. Rotate toys every one to two weeks rather than adding more. Avoid any toy with small loose parts that could be swallowed, any item with zinc-coated or galvanized hardware, and any mirror toy for birds kept singly long-term (mirrors can discourage bonding with owners and sometimes cause obsessive behaviour).
Where to place the cage in your home
Place the cage against a solid wall on at least one side. Birds feel more secure with a visual barrier behind them and become chronically stressed in a cage surrounded by open space on all sides. Avoid kitchens entirely: non-stick cookware (PTFE, sold under the brand name Teflon) releases fumes at normal cooking temperatures that are acutely lethal to birds. Avoid draughts, direct strong sunlight for more than two hours per day, and rooms where aerosols, candles, incense or air fresheners are used regularly. A living room or dedicated bird room with stable temperature (18 to 25 degrees Celsius) and indirect natural light is the ideal placement.
Seasonal and weather protection
In winter, the main risks are cold draughts and dry heated air. A breathable cage cover (cotton or canvas, not airtight plastic) on three sides at night reduces draughts without cutting off all ventilation. If your home drops below 18 degrees Celsius at night, a ceramic heat emitter (not a red-light heat lamp, which disturbs sleep) positioned safely outside the cage provides supplemental warmth. In summer, ensure the cage is never in direct afternoon sun. Heatstroke in birds occurs quickly and can be fatal; a bird panting with wings held away from its body is a medical emergency.
Cleaning schedule and disinfection protocol
VCA Animal Hospitals recommends a tiered cage hygiene routine: daily spot-cleaning of food and water bowls, weekly scrubbing of perches and the tray, and a monthly deeper disinfection of the full cage. The CDC's compendium of measures to control Chlamydia psittaci (psittacosis) provides the most evidence-based disinfection guidance available: physically scrub all surfaces to remove organic matter first (disinfectants do not penetrate dried faeces or food residue), then apply an appropriate disinfectant, allow the recommended contact time, then rinse thoroughly with clean water and allow to dry completely before the bird returns.
| Frequency | Task | Product / method | Key safety note |
|---|---|---|---|
| Daily | Replace food and water; wipe bowl rims | Warm water and dish soap; rinse thoroughly | Remove bird before using any chemical cleaner |
| Daily | Spot-clean tray liner | Replace paper liner or scrape and wipe | Do not let droppings accumulate; ammonia builds quickly |
| Weekly | Scrub perches | Hot water and unscented soap; rinse and dry | Replace wooden perches when soiled beyond cleaning |
| Weekly | Remove and wash tray and grate | Hot water and unscented soap; rinse; air dry flat | Dry tray flat to prevent warping (especially A&E models) |
| Monthly | Full cage disinfection | Dilute bleach (1:32 ratio with water), or quaternary ammonium disinfectant at label dilution | Ventilate the room; return bird only after cage is dry and smell-free |
| Monthly | Inspect all clips, latches and perch bolts | Visual and manual check; replace worn parts | A loose latch is an escape or entrapment risk |
VCA Animal Hospitals specifically warns that bleach and strong disinfectants produce respiratory hazards for birds if the cage is not fully rinsed and dried. I do all monthly disinfections outdoors when possible, and I never return the bird until I cannot detect any chemical smell inside the cage.
Pest control and mess management
Mites, feather lice and grain weevils are the three most common pest problems in small bird enclosures. Red mites (Dermanyssus gallinae) hide in cage seams and joints during the day and feed on birds at night: if your bird is restless at night but seems fine during the day, check the joints of the cage frame with a white cloth after dark. A red smear on the cloth confirms mites. Treat by removing the bird, stripping the cage completely, boiling any washable parts, treating the cage frame with an avian-safe acaricide spray (from a vet or pet supplier), and replacing all substrate and wooden perches.
For mess control, a cage apron or seed catcher (a fitted fabric or acrylic skirt that hangs below the cage) dramatically reduces the area you need to sweep. Mesh seed catchers are available for most cage sizes and simply hook onto the bottom wire. For trays, a deep-sided tray reduces the scatter from birds flicking food; VIVOHOME's VH433 tray has higher sides than many competitors, which is one practical advantage of that model.
Safe customization and decorative ideas
Customizing a cage is genuinely fun and does not have to compromise safety. Here are approaches I use and recommend.
- Natural branch perches: cut apple, willow or hazel branches to fit, scrub with warm water, bake at 120 degrees Celsius for 30 minutes to kill parasites, then bolt into the cage. Replace any perch that becomes heavily soiled or shows mould.
- Foraging stations: attach a stainless-steel cup holder to the cage wire at mid-height and fill with a forage mix buried under shredded paper. Conures and cockatiels will spend hours on this.
- Cage skirts: sew a fitted canvas skirt that hooks onto the bottom wire. Choose a neutral colour that coordinates with your room but use untreated, undyed canvas to avoid any risk from dye chemicals near a chewing bird.
- Swing perches: a plain wooden swing hung from the top panel adds movement enrichment. Check that the hanging hardware is stainless steel or nickel-free zinc-free alloy.
- Background panels: a printed backing card placed behind the cage (not inside it) adds visual interest and gives the bird a partial visual wall. Keep it on the outside only.
- Grow a safe plant nearby: positioning a spider plant, Boston fern or catnip plant near (not touching) the cage adds humidity and visual interest without cage modification.
Troubleshooting common problems
| Problem | Likely cause | Fix |
|---|---|---|
| Tray will not slide in or out | Warped tray or manufacturing flash on edges | Wash tray in cool water (not hot); trim flash with a craft knife; check for debris in the channel |
| Door springs open on its own | Latch worn or misaligned | Bend latch tab back gently; add a secondary carabiner clip; contact brand for replacement latch |
| Cage panels flex or bow | Missing or loose clips | Locate all clip positions from the manual; replace any missing clips; do not use the cage without all clips in place |
| Rust appearing on wire | Coating chipped or wire gauge too thin for the environment | Do not use cage for live birds in this state; source replacement panel from the manufacturer or authorized dealer |
| Bird escapes feeder door | Feeder door latch not properly closed | Test each feeder door by pressing it closed until you hear/feel the click; add a binder clip as a temporary secondary lock |
| Caster wheels will not lock | Lock lever tab broken | Replace caster (standard 50 mm swivel casters from a hardware store are usually compatible); check the caster bolt thread size first |
| Play-top perch bar does not fit through bracket | Assembly order reversed (VIVOHOME VH433) | Disassemble the bracket arms, thread the perch bar first, then reattach the bracket arms as per the video instruction |
| Toy bird (Little Live Pets / Pets Alive) stops working | Battery contacts corroded or batteries depleted | Clean contacts with a dry cotton swab; replace batteries; check the battery orientation diagram on the battery compartment door |
| Chirp sound cycles incorrectly (toy) | Battery voltage too low or contact issue | Replace all batteries together (do not mix old and new); clean all four contacts |
Finding manuals and replacement parts
For VIVOHOME, start with the product page on The Home Depot or Amazon (search your model number plus 'manual PDF'). See vivohome bird cage instructions for VH292 and VH433 assembly PDFs and part callouts. For Pet Republic bird cage instructions, search the Pet Republic product guides and your model's manual PDF by SKU (use the phrase "Pet Republic bird cage instructions" when looking). The VH292 and VH433 manuals are hosted on Manuals.plus and on The Home Depot's product asset links. For replacement clips, contact VIVOHOME customer service directly via the email address printed in the manual: they typically ship free replacement hardware for new-in-box cages.
For A&E, Bastrop Cages (bastrupcages.com) is an authorized dealer that stocks replacement trays, clips and latches with A&E part numbers. Their site also mirrors some A&E assembly instructions. The Tractor Supply product page for models like the CA3218 includes a direct manual download link. For Pet Republic, product dimension sheets and manuals are available on regional Pet Republic websites and on the Amazon product listing under the 'product guides and documents' section.
For toy brands (Little Live Pets and Pets Alive), Manuals.plus and device.report are the most reliable mirror sites for the official PDFs. Search the full product name and SKU number together. If the toy is under warranty, ZURU (Pets Alive parent company) and the Little Live Pets brand both have customer service email addresses on their official sites and will send replacement parts or units for manufacturing defects within the warranty period.
Quick comparison: which cage type suits your situation
| Need | Best option | Why |
|---|---|---|
| Gift for a child; no real bird | Little Live Pets or Pets Alive toy set | Battery-operated, self-contained, no assembly tools required |
| Budgies or finches, limited budget | Pet Republic mid-size or entry VIVOHOME | Good bar-spacing options, removable tray, widely available parts |
| Cockatiel or small conure, mid budget | A&E mid-size or VIVOHOME VH292 | Powder-coated steel, bird-safe lock, solid assembly documentation |
| Large parrot, high use, long term | A&E large parrot cage or stainless-steel specialist cage | Durability, coating integrity, authorized dealer parts network |
| Play-top setup for out-of-cage time | VIVOHOME VH433 with rolling stand | Play-top included, rolling stand, detailed manual and video support |
Whether you are clicking together a toy cage for a birthday gift or building out a proper home for a cockatiel, the steps that matter most are the same: read the manual for your exact model before you start, check every part before assembly, and never skip the safety inspection before your bird goes in. Take your time on the clips, verify the latch, and get the perch placement right. Everything else is refinement.
FAQ
What primary manufacturer documentation should I collect before writing an assembly/how‑to for Little Live Pets and similar cages?
Download and save each model’s official user manual or assembly PDF (VIVOHOME VH433/VH292, A&E CA3218, Pet Republic product pages, Prevue/Tractor Supply listings). These documents provide package contents, exploded diagrams, part callouts, hardware counts, recommended tools, warranty language and any product‑specific safety notes—essential for step‑by‑step assembly, photo captions and exact part names/numbers.
How do I distinguish toy‑brand instructions (Little Live Pets, Pets Alive) from real‑bird cage guidance?
Obtain the toy SKU manuals (Little Live Pets 563738, Pets Alive PDFs) and note materials (ABS, polypropylene), small‑parts/battery warnings and cleaning directions. Use these to clearly label any toy‑specific instructions and to avoid applying toy cleaning/placement guidance to live‑bird cages; explicitly state where toy vs. live‑pet advice differs in the article.
Which retailer and aftermarket sources are useful for brand‑specific quirks and replacement parts?
Collect product pages and manual mirrors from major retailers (Home Depot, Amazon, Wayfair, Tractor Supply) and specialist parts retailers (Bastrop Cages). These often include alternate photos, exploded views, customer questions about tray/grate fits, latch types, common missing clips and part‑numbers or aftermarket cross‑references useful for troubleshooting and sourcing replacements.
What veterinary and toxicology references are required for materials‑safety guidance?
Cite authoritative avian‑health sources: Pet Poison Helpline (zinc/lead risks), Today's Veterinary Practice and Merck Veterinary Manual (clinical signs and sources of metal toxicity). Use these to justify recommendations against galvanized/unknown coatings, chipped paint and unsafe toys, and to provide guidance on when to seek veterinary help for suspected poisoning.
Which welfare and species‑space guidelines should I use to create species‑appropriate cage setups?
Use Association of Avian Veterinarians (AAV) minimum cage‑size guidance and RSPCA enclosure rules (wing extension, horizontal space). Cross‑reference species pages (budgies, finches, cockatiels, conures) to produce recommended minimum interior dimensions, bar‑spacing limits and perch/feeder placement for each species.
What authoritative sources cover cleaning, disinfection and disease‑prevention protocols?
Reference CDC compendia on Chlamydia psittaci, VCA Animal Hospitals cleaning recommendations and Merck/clinical resources for disinfectant dilutions, contact times and ventilation cautions. These provide validated daily/weekly/monthly schedules and safety caveats for disinfectant use around birds.
Vivohome Bird Cage Instructions: Complete Setup & Care Guide
Step-by-step Vivohome bird cage assembly with safety checks, maintenance schedules, troubleshooting, and species‑adapted