For a single parakeet, you need a cage that's at least 18 inches wide, 18 inches deep, and 18 inches tall, with bar spacing no greater than 1/2 inch. Petco also recommends a minimum parakeet cage size of about 18 inches (W) x 18 inches (D) x 18 inches (H), with bar spacing no greater than 1/2 inch [18 inches wide, 18 inches deep, and 18 inches tall](https://www. petco. com/content/petco/PetcoStore/en_US/pet-services/resource-center/caresheets/parakeet.
How to Build a Bird Cage for Parakeets: DIY Guide

Maya Bennett
10 Jun 2026
html). For two birds, bump that up to 18" x 18" x 24" minimum. Those dimensions aren't suggestions you can fudge, bar spacing above 1/2" creates real entrapment risks for parakeet heads and feet, and anything smaller than those floor dimensions will leave your bird cramped and stressed. If you're building from scratch or heavily customizing an existing cage, this guide walks you through every step: materials, assembly, interior setup, placement, and daily maintenance.
If you want the full process end to end, see our guide on how to build an aviary bird cage from planning to finishing touches daily maintenance. If you are wondering how to build a bird cage for cockatiels, pay extra attention to their larger size and spacing needs as you plan your dimensions and bar layout building from scratch.
If you want to tackle the full process, use this guide as your step-by-step approach to building a bird cage with safe materials and spacing how to build bird cage. If you also need help choosing the right size and bar spacing, this section explains exactly how to build bird cage safely step-by-step approach to building a bird cage with safe materials and spacing.
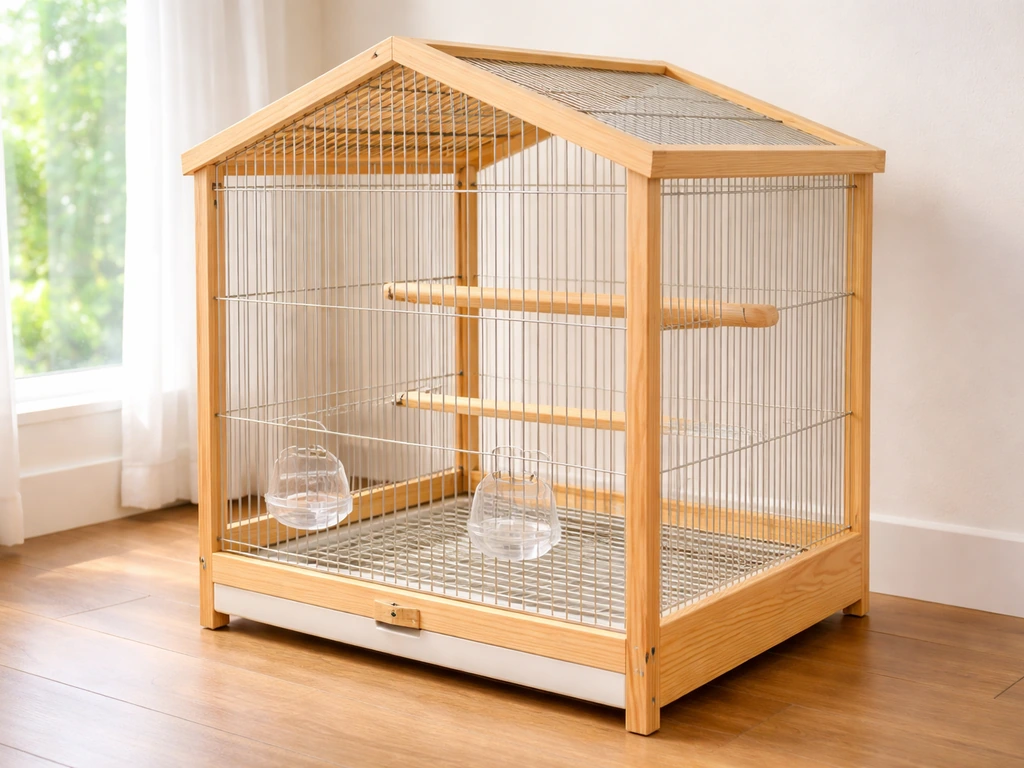
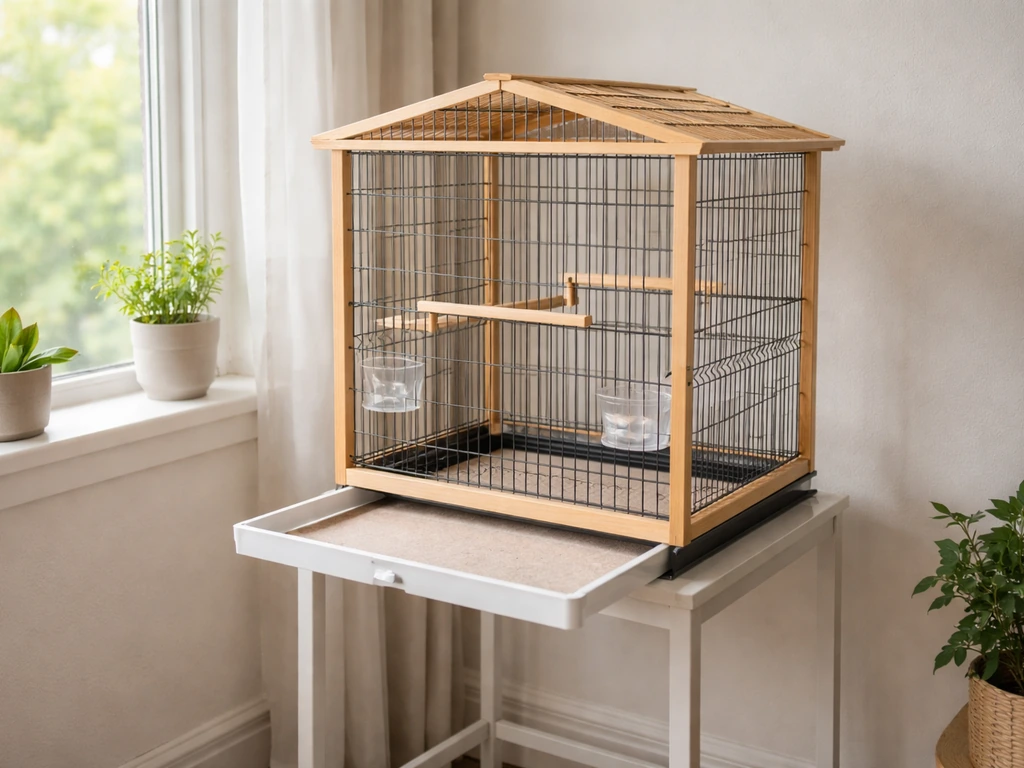
Parakeet cage size, bar spacing, and layout basics
The 18" x 18" x 18" minimum is really just a floor for one bird. In practice, bigger is almost always better, and parakeets benefit enormously from horizontal flight space. If you're also planning a larger DIY build, see how to build a bird flight cage for ideas on expanding horizontal flight space bigger is almost always better. A cage that's 24" to 36" wide gives your bird room to actually move between perches rather than just sit. Height matters less than width for parakeets since they're horizontal fliers, so prioritize floor width and depth over adding extra vertical inches.
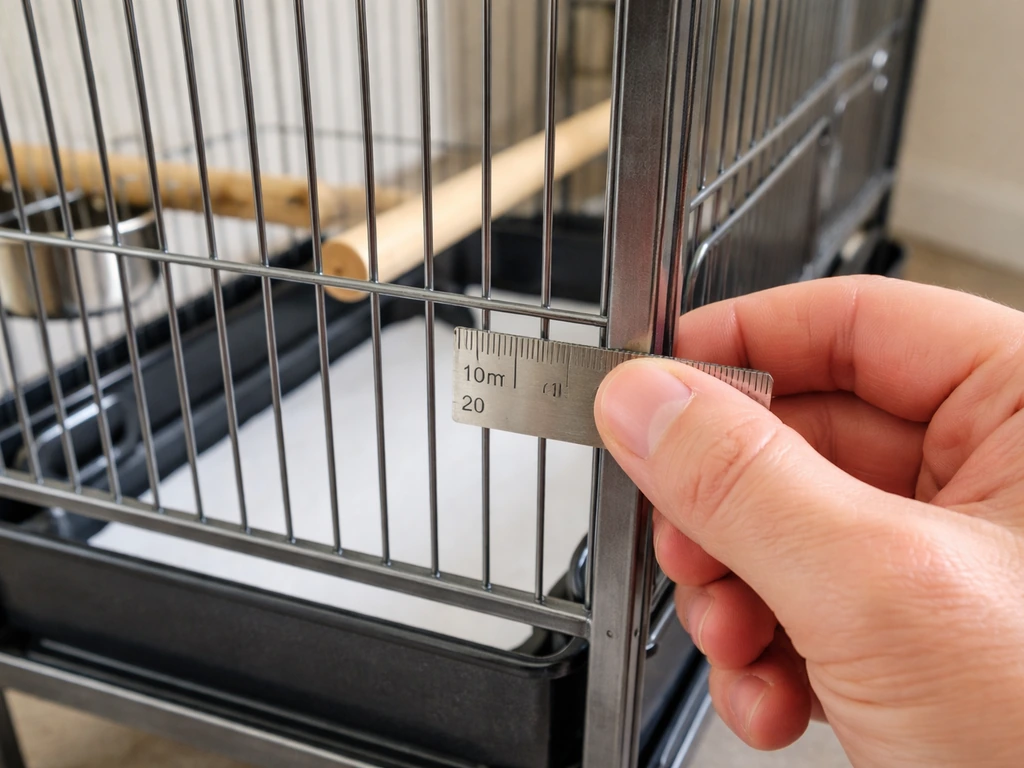
Bar spacing is the dimension that most DIYers get wrong. The rule is firm: no more than 1/2 inch between bars. Wider than that and a parakeet can push its head through and panic, which causes injury. Go narrower than 1/4 inch and you lose ventilation, plus you make cleaning harder. The sweet spot is 3/8" to 1/2" spacing, which gives you good airflow, easy access for cleaning, and keeps your bird safe.
For layout, think in zones. Parakeets need a high perch area where they feel secure, a lower feeding/drinking zone, a middle activity area for toys, and clear open floor space so they can drop down safely. Avoid placing perches directly above food or water dishes since droppings will contaminate them constantly. Plan your door placement so you can reach every zone easily without disassembling anything.
| Setup | Minimum Width | Minimum Depth | Minimum Height | Bar Spacing |
|---|---|---|---|---|
| 1 parakeet | 18" | 18" | 18" | 3/8" to 1/2" |
| 2 parakeets | 24" | 18" | 24" | 3/8" to 1/2" |
| 3 or more | 36" | 24" | 30" | 3/8" to 1/2" |
Picking safe materials and avoiding common hazards
The most important material decision you'll make is what metal to use for the wire or bars. Stainless steel is the gold standard: it's non-toxic, easy to clean, and doesn't corrode. Powder-coated steel is a solid budget option, but only if the coating is confirmed non-toxic and lead-free. Galvanized wire (zinc-coated) is the one to avoid. Fresh galvanization releases zinc dust, which causes zinc toxicity in birds. If you find a good deal on galvanized hardware cloth, you can scrub it thoroughly with vinegar, rinse completely, and let it dry in the sun for several days, but honestly it's not worth the risk when powder-coated options exist at similar prices.
For the frame, untreated or kiln-dried hardwood works well for indoor builds. Pine is the most accessible and affordable. Avoid pressure-treated lumber entirely since the chemical preservatives are toxic to birds. Also skip cedar and redwood as their natural oils can irritate a parakeet's respiratory system. If you're building the frame with wood, seal it with an avian-safe, water-based sealant. Let it cure fully, at least 72 hours with good ventilation, before putting any bird near it.
Hardware choices matter too. Use stainless steel screws and hardware wherever possible. Avoid anything with brass, copper, or chrome plating since parakeets chew everything and metal toxicity is a real risk. For the floor tray, food-safe ABS plastic or stainless steel sheet is easy to clean and won't harbor bacteria the way raw wood does.
- Stainless steel wire mesh or bars: safest, most durable, easiest to clean
- Powder-coated steel: good option if coating is confirmed non-toxic and lead/zinc-free
- Kiln-dried hardwood (pine, maple, birch): safe for the frame
- Food-safe ABS plastic or stainless steel sheet: best for floor trays
- Avoid: galvanized wire, pressure-treated wood, cedar, redwood, brass or copper hardware
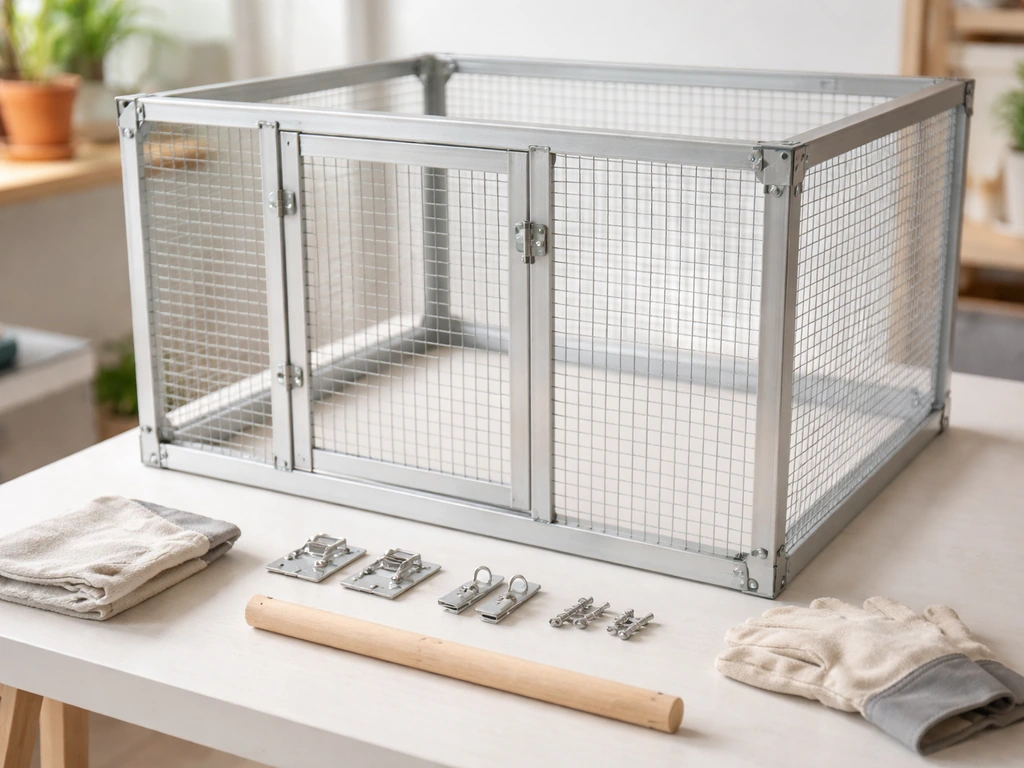
Step-by-step build and assembly
Tools and materials you'll need
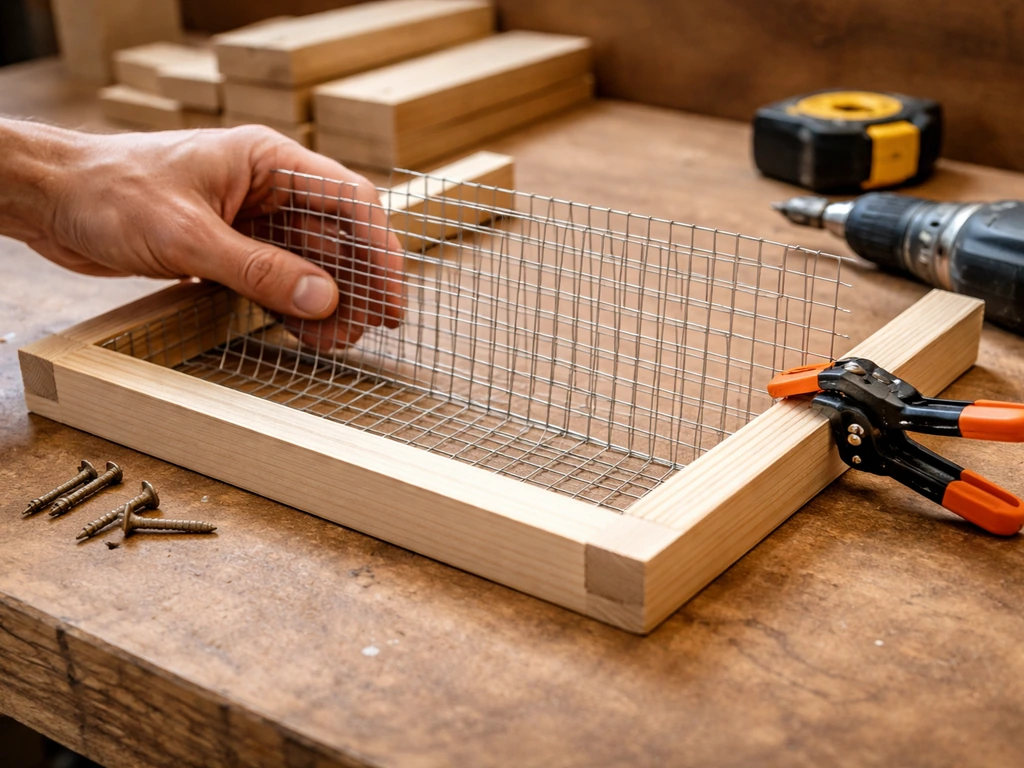
- Wire mesh or bar stock (1/2" grid, stainless or powder-coated steel)
- Kiln-dried pine or hardwood for the frame (1x2 or 2x2 lumber depending on cage size)
- Table saw or circular saw, plus a jigsaw for curves and door cutouts
- Wire cutters and heavy-duty pliers
- Stainless steel staple gun or J-clip pliers (for securing mesh to the frame)
- Power drill and stainless steel screws
- Measuring tape, carpenter's square, and pencil
- Sandpaper (80 grit and 220 grit)
- Avian-safe water-based sealant
- Hinges, door latch, and a carabiner or locking clip for the door
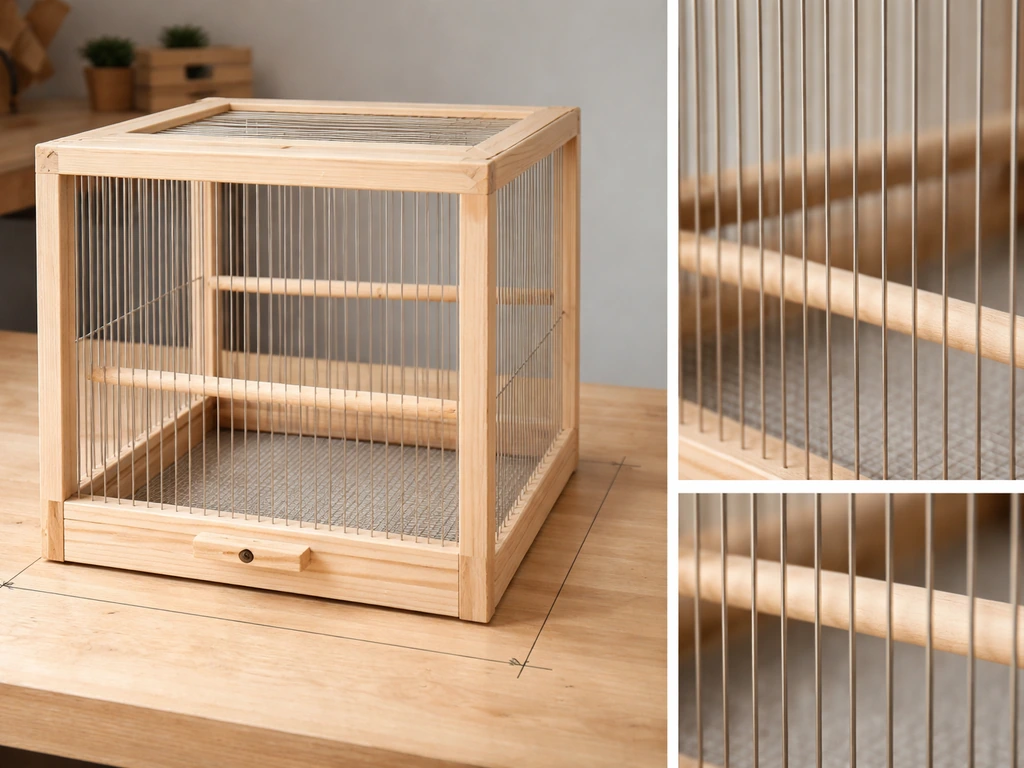
Assembly order
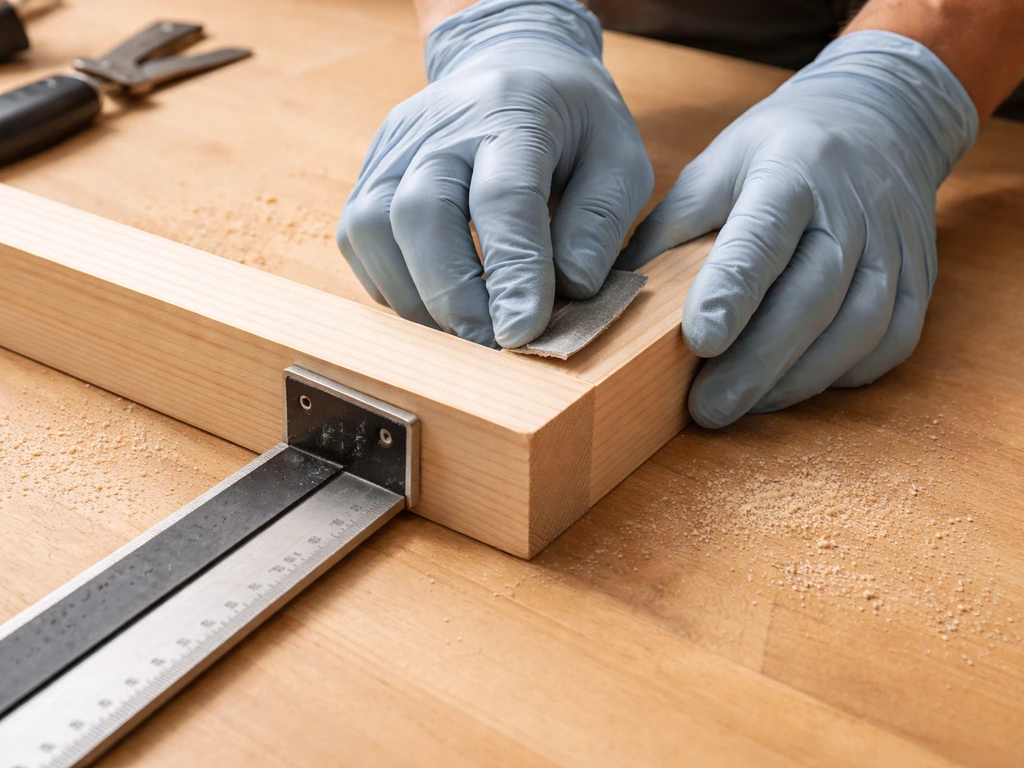
- Cut your frame lumber to size and sand all surfaces smooth. Round off any sharp corners with sandpaper. Check every piece with a carpenter's square before assembly.
- Build the base frame first as a rectangular box using screws and wood glue at every joint. This is your foundation, so check it's perfectly square before the glue sets.
- Add vertical corner posts to bring the frame up to your target height. Brace each post with a crossbar halfway up on all four sides to prevent racking.
- Cut your wire mesh panels to size, leaving about 1/2" overhang on all sides. Fold the overhang back with pliers so there are no sharp wire ends exposed.
- Attach mesh panels to the frame using J-clips (preferred) or a heavy-duty staple gun. Space fasteners no more than 2 inches apart around the perimeter of each panel. Tug-test every section firmly before moving on.
- Cut out the door opening with a jigsaw. A 6" x 8" door is workable for daily access; go larger (8" x 10") if you want easier interior access for cleaning. Smooth all cut edges.
- Build the door as a separate small panel of matching mesh and frame, attach with two hinges, and add a latch. Always add a secondary locking clip (like a carabiner) — parakeets are surprisingly clever at flipping simple latches.
- Seal all exposed wood surfaces with your avian-safe water-based sealant. Apply two coats, letting each dry fully. Leave in a well-ventilated area for at least 72 hours before use.
- Install a removable floor tray: cut a piece of ABS plastic or thin sheet metal to fit inside the base frame with about 1" of clearance on all sides. It should slide in and out easily for daily cleaning without tools.
- Do a full safety check before introducing any bird (see the final checklist section below).
Common build problems and fixes
If the cage wobbles, the most common cause is a frame that wasn't squared up before fastening. Add diagonal corner braces inside the base frame to stabilize it. If the mesh panels bow outward, you didn't space your fasteners close enough, go back and add J-clips or staples every inch around the affected panel. Hard-to-clean corners happen when mesh meets frame at tight angles with no clearance. Solve this by leaving a small gap (about 1/4") between the mesh edge and the inside corner of the frame so a brush can get through during cleaning.
Setting up the interior: perches, feeders, water, toys, and enrichment
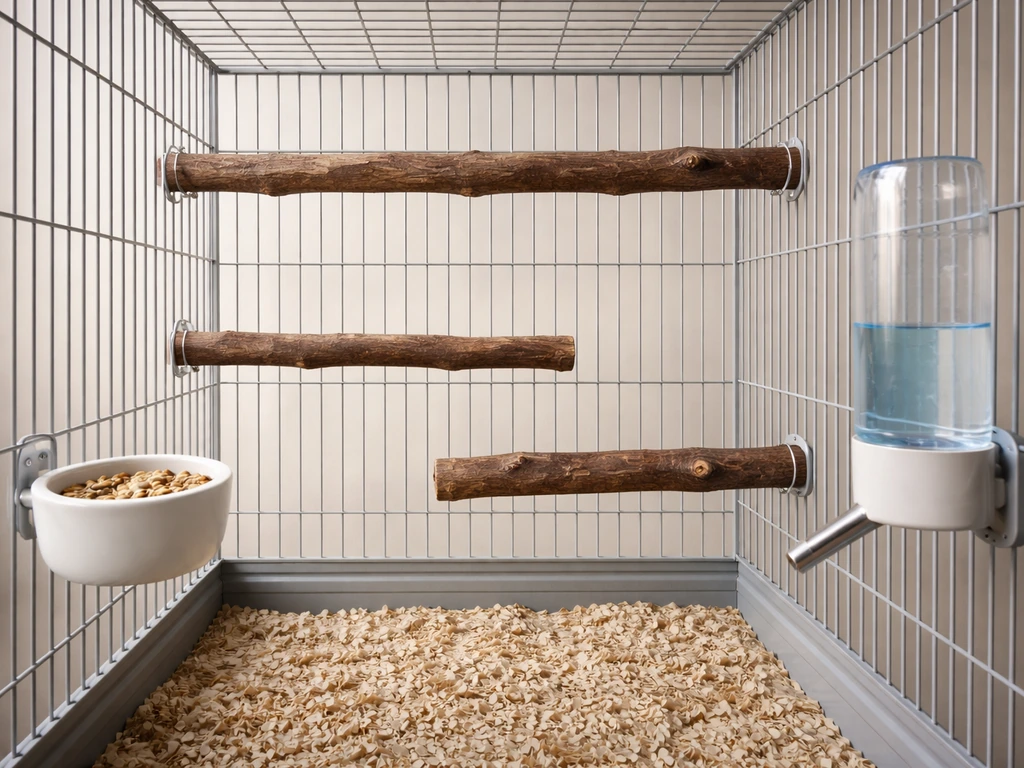
Perch variety is one of the most important welfare factors in a parakeet cage. Parakeets need multiple perch diameters to exercise their feet and prevent pressure sores. Aim for at least three perches ranging from 3/8" to 3/4" in diameter. Natural wood branches (from bird-safe trees like apple, pear, willow, or eucalyptus) are ideal because the irregular surface works the foot muscles naturally.
Avoid sandpaper-covered perches entirely, they abrade the feet and cause serious sores over time. Rope perches and soft cotton perches are fine as secondary options but shouldn't be the only type available. Once your cage is built for safety and comfort, you can use the same principles to plan a breeding setup for your birds breeding cage setup.
Position your highest perch about 2/3 of the way up the cage, away from the sides so your bird doesn't scrape its tail on the bars. Place a second perch at mid-height across from it so the bird can hop or short-fly between them. Put a third, lower perch near the feeding station. Never place a perch directly above food or water, you'll be cleaning contaminated dishes constantly.
For feeders, use two separate dishes: one for pellets or seed and one for fresh food. Stainless steel clip-on cups are easy to remove, dishwasher safe, and don't crack like plastic over time. Water should be in a separate hanging bottle or a dedicated dish that can't be tipped. Change water daily without exception. If you use a water dish rather than a bottle, clip it to the bars at a height that keeps it clean and stable.
Toys and enrichment are not optional extras. Parakeets are intelligent, social birds and they need mental stimulation to stay healthy. Rotate at least three to four toys weekly so the environment stays novel. Good options include shreddable paper or palm toys, foraging toys with hidden food, bells, and mirror toys (though limit mirrors if you only have one bird since they can cause attachment confusion). A shallow ceramic dish or a clip-on bath cup installed near the lower portion of the cage gives your bird a bathing option, which most parakeets love and which helps with feather condition.
Placement and environmental setup
Where you put the cage matters as much as how you build it. Parakeets need 10 to 12 hours of natural or full-spectrum light per day but cannot handle direct midday sun without shade. Place the cage near a window for natural light but set it back or angle it so there's always a shaded zone inside the cage. Your bird needs to be able to get out of the sun voluntarily.
Temperature should stay between 65°F and 80°F (18°C to 27°C). Parakeets are sensitive to sudden temperature swings more than to a stable cool or warm temperature. Avoid placing the cage near HVAC vents, radiators, or exterior doors that let in blasts of cold air. Kitchens are a dangerous placement choice because cooking fumes, especially from non-stick cookware releasing PTFE/Teflon gases, can kill a bird rapidly. Even aerosol sprays, scented candles, and air fresheners are serious hazards in a parakeet's environment.
Airflow matters but drafts don't. You want gentle air circulation in the room without a direct draft hitting the cage. A ceiling fan on its lowest setting across the room is fine. A floor fan pointed at the cage is not. Position the cage so at least one side is against a wall, which gives your parakeet a sense of security and reduces stress from activity on all sides.
Covers, seasonal protection, and pest and mess control
A cage cover is one of the most useful tools you can add to a parakeet setup. Covering the cage at night for 10 to 12 hours helps regulate your bird's sleep cycle and reduces night frights from lights, shadows, or noises. Use a breathable, loosely woven fabric like cotton muslin or canvas. Never use plastic sheeting or anything airtight. The cover should drape over three sides of the cage at most, leaving the front partially open for airflow. Check that the fabric doesn't touch the bars on the inside where a curious beak can grab and chew it.
In summer, if temperatures push above 85°F (29°C), add a small clip fan nearby to improve circulation and mist the cage lightly with room-temperature water once a day. In winter, move the cage away from cold exterior walls and drafty windows. A fleece cage cover on three sides during cold nights helps retain ambient warmth without blocking airflow. If your home drops below 60°F regularly, a low-wattage ceramic heat emitter (not an infrared bulb, which can disturb sleep) placed safely outside the cage provides supplemental warmth.
Mess control comes down to tray design. Line your removable floor tray with newspaper, unbleached paper towels, or commercial cage liner paper. Change it every day or every other day at minimum. Avoid corncob bedding, cedar shavings, or wood chips, they can harbor mold and bacteria, especially in humid climates. A seed skirt or cage apron clipped around the lower bars catches most of the seed husks and feather debris that would otherwise scatter across your floor. For pest control, inspect the cage weekly for red mites, which hide in cracks and corners during the day. A diluted white vinegar spray (1:1 with water) on the frame and bars, wiped dry, is a safe deterrent that won't harm your bird.
Safety checks, cleaning workflow, and final setup checklist
Before your parakeet ever enters the cage, run through a complete safety check. This takes about 15 minutes but it's the step that prevents serious injuries and problems down the line. Here's what to look for:
- Bar/mesh spacing: verify no gap exceeds 1/2" anywhere, including corners and door edges
- Sharp wire ends: run a cloth over every interior surface — it should catch on nothing
- Door latch: test the latch with firm lateral and upward pressure. Add a carabiner clip as a backup
- Sealant cure: confirm wood surfaces are fully dry and odor-free (no chemical smell at all)
- Perch stability: wiggle each perch firmly — none should rotate or pull free under pressure
- Feeder and water attachment: both should hold firmly under a firm tap and be removable without tools
- Tray fit: the floor tray should slide in and out smoothly without gaps that a bird could get a foot stuck in
- Ventilation: with the cover on (if you're using one), check that air flows freely around at least two sides
- Toxic material check: confirm no galvanized wire, no pressure-treated wood, no lead-based paint, no copper or brass hardware is present anywhere
For ongoing cleaning, a simple daily and weekly routine keeps the cage safe without taking much time. Daily: swap the tray liner, wipe down perches with a damp cloth, refresh food and water, and spot-clean any visible soiling on the bars. Weekly: remove all perches, toys, and dishes, wash them with dish soap and rinse thoroughly, scrub the tray with a diluted white vinegar solution, and wipe down all interior surfaces. Monthly: do a full deep clean of the entire structure including the frame, all hardware, and the cover. Let everything dry completely before reassembling.
If you're building a cage for cockatiels instead of parakeets, note that bar spacing and size requirements are different since cockatiels are larger birds. The same is true for canaries, which need specific flight cage layouts. A canary cage is built a bit differently, so check the right cage layout and spacing for canaries before you start cutting and assembling parts. This build is sized and configured specifically for parakeets (budgerigars), so don't scale it down thinking a smaller version is fine for either species.
Final setup checklist
- Frame is square, stable, and fully sanded with no sharp edges or splinters
- All wood surfaces sealed with avian-safe sealant, fully cured with no residual odor
- Wire mesh is stainless or non-toxic powder-coated steel with 3/8" to 1/2" bar spacing
- All wire ends folded back and smooth; no sharp points anywhere inside
- Door latches securely with a primary latch plus a secondary clip
- Removable floor tray installed and lined with unbleached paper
- Three or more perches installed at varying heights and diameters, none over food or water
- Two separate food dishes and one dedicated water source installed
- At least three toys in place, positioned so they don't block flight paths
- Cage placed in a stable 65°F to 80°F environment, away from kitchen, vents, and drafts
- Natural or full-spectrum light available 10 to 12 hours per day with a shaded zone inside
- Breathable cage cover ready for nighttime use
- Cleaning routine scheduled: daily tray swap, weekly deep clean of accessories, monthly full clean
- Emergency vet contact saved and bird is visible from your daily living area
Once you're through that checklist, you're genuinely ready to bring your parakeet home or transfer it into the new cage. Do the move on a calm, quiet day with minimal household activity. Let your bird explore at its own pace rather than reaching in to reposition it. Most parakeets settle into a new cage within a few days once they realize the layout is predictable and the environment feels safe.
FAQ
What should I do if my existing parakeet cage has bar spacing bigger than 1/2 inch?
If you already have a cage with wider-than-1/2-inch bars, don’t try to “fix” it with extra wire or tape inside. The safe approach is to replace the cage or fully re-panel the entire barred area with correctly spaced, properly secured material, because a loose insert can create new pinch points and it can be chewed apart.
If I’m building for two parakeets, is doubling the size enough, or do I need different layout changes?
For two parakeets, plan for more than just the base footprint. Add extra perch locations so each bird can choose a different spot, and avoid stacking perches directly over one another, which increases droppings contamination and can trigger guarding behavior.
How long should I wait after sealing the wooden frame before putting in my parakeets?
Drying time matters. If you seal the wood frame, use a water-based avian-safe sealant, let it cure for at least 72 hours with good ventilation, then wipe with a damp cloth and smell test, if there is any strong odor, wait longer before installing birds.
Can I use any tree branch for natural perches, or how do I choose the right ones?
Use the right perch surfaces and watch for fit problems. If natural branch perches are too thick or too thin, they won’t help foot exercise, so select branch diameters that match your target range (about 3/8 to 3/4 inch) and replace perches that look cracked, overly smooth, or splintered.
Is it safe to add a bird bath dish to a DIY cage, and where should it go?
Yes, but only if it’s designed for birds and installed safely. A bath cup near the lower area is ideal, keep it shallow, remove it after bathing, and don’t place it directly under food or water, since wet droppings and spilled food become a sanitation issue quickly.
How should I set up feeding areas to reduce mess and contamination?
For seed and pellets, separate dishes reduce contamination and let you control diet. Choose dishes you can remove easily for washing, and keep fresh food at a different height than the pellet dish so you can spot-clean without disturbing the whole cage setup.
What’s the best way to position the cage for light without risking overheating or stress at night?
Start with lighting that supports sleep, then avoid “draft plus glare” combinations. Place the cage so it can get natural or full-spectrum light, but prevent direct midday sun, then cover the cage at night with a breathable fabric that leaves the front partially open for airflow.
My home gets below 60°F sometimes, what should I use for winter warmth and how do I avoid overheating?
If the room goes below 60°F regularly, rely on consistent, indirect warmth rather than blasting heat near the cage. Use a low-watt ceramic heat emitter outside the cage for supplemental warmth, keep cords and heater access out of reach, and monitor behavior for signs the bird is avoiding the warmer side.
What bedding or tray liners work best if I live in a humid climate?
Use the tray system and cleaning method to your environment. In humid climates, avoid absorbent bedding like wood chips or corncob, and use liner paper plus daily changes, because damp bedding increases mold risk even if it looks dry on the surface.
What should I check in my completed DIY cage before moving my parakeet into it?
A good first step is to remove anything you didn’t build for safety, then do a close inspection with flashlights for tiny gaps. Re-check that all fasteners are tight, there are no sharp edges, and the mesh-to-frame corner has clearance for cleaning, then verify the door and latches can’t be bumped open.
How do I help a parakeet adjust to a new cage if it seems nervous on day one?
If your parakeet seems stressed during the move, avoid constant repositioning and limit handling. Put the cage in the final location first, allow calm exploration, keep house noise steady, and only offer treats through the door if your bird is comfortable, since sudden reaching-in can delay settling.
Next Articles
How to Build a Bird Trap Cage Safely and Humanely
Step-by-step humane build for a bird trap cage, with legal, safety checks, setup tips, and troubleshooting for welfare-f
How to Build a Bird Cage for Cockatiels: Step-by-Step Guide
Step-by-step DIY plan to build and set up a cockatiel cage, with safe materials, sizing, layout, and daily care tips.
How to Build a Canary Bird Cage: Step-by-Step DIY Guide
Step-by-step DIY canary cage build: safe materials, wire specs, measurements, setup, placement, and maintenance checklis