
To cover a bird cage in winter safely, use a breathable, untreated cotton or canvas cover that drapes over three or four sides of the cage, leaving the front or one panel open a few inches for airflow. Fit the cover snugly enough to block drafts but never seal the cage airtight. Pair it with an in-cage thermometer placed at perch level so you actually know what temperature your bird is sleeping at, not just what the wall thermostat says. Because covered enclosures develop a warmer microclimate, caretakers should monitor temperature inside the covered cage with a thermometer/hygrometer (place sensors at perch level and at the bird’s usual roost) rather than assuming room thermostat values reflect the bird’s microenvironment. That combination of a good cover, a gap for ventilation, and a thermometer is the core of winter cage protection for every common species from budgies to cockatoos.
How to Cover Bird Cage in Winter: Safe DIY Steps & Tips

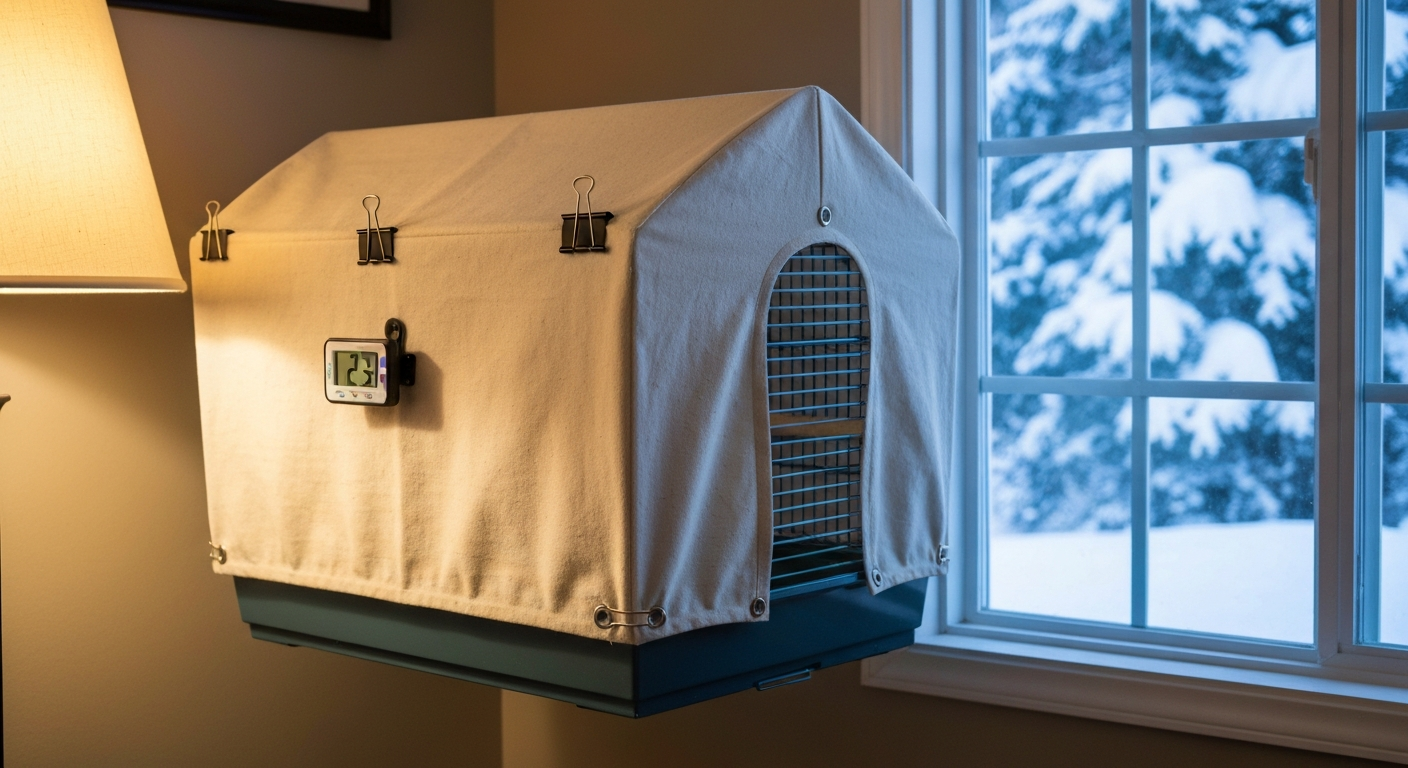
Why bother covering a bird cage in winter?
There are two separate reasons people cover cages in winter, and it helps to keep them distinct. The first is sleep quality. Birds need 10 to 12 hours of consolidated darkness to stay hormonally balanced and well-rested, and in winter your living room lamp, TV, and early-morning light shifts can all fragment that sleep. A cover creates a reliable dark zone regardless of what else is happening in the room. The second reason is thermal comfort. Cold drafts from windows, doors, and HVAC vents are the real winter enemy for caged birds, not low ambient temperature by itself. A cover intercepts moving cold air before it hits the cage bars. Studies on enclosed roost sites show that a well-covered enclosure can run roughly 2 to 5 degrees Celsius warmer than the surrounding room air, which is genuinely useful on a cold night. Experimental microclimate studies (see The use of the nest for parental roosting and thermal consequences of the nest for nestlings and parents - PMC) report interior > ambient differences of roughly 1.5–5°C depending on insulation, occupancy and enclosure design.
The risks are just as real, though. A cover that blocks all ventilation traps CO2, moisture, and any fumes your bird exhales. Parrots and other companion birds have extremely sensitive respiratory systems, and the Association of Avian Veterinarians specifically flags poor ventilation as a hazard. An ill-fitting cover that puddles on the floor also invites mold and pests. And a cover introduced without a consistent routine can cause night-fright episodes in species like cockatiels, who may thrash in sudden total darkness. So the goal is a cover that insulates and darkens without sealing, and introduced as part of a predictable nightly schedule.
Night covering, warmth myths, and direct answers to your biggest questions
Should you cover a bird cage at night?
Yes, for most species, covering at night is a good practice year-round and especially useful in winter. The key is consistency. Put the cover on at the same time every night and remove it at the same time every morning. Sudden total darkness in the middle of the night (a cover accidentally falling, for example) is what triggers night frights in cockatiels and some conures. If your bird is prone to night frights, leave a small nightlight on nearby or leave a two-inch gap at the bottom front of the cover. That faint light reference point is enough to prevent panic without undermining the sleep-promoting darkness. For more detail on whether you should cover a bird cage at night, see the full guide for recommendations and species-specific tips should you cover a bird cage at night.
Does covering a bird cage actually keep it warm?
Partially, yes, but not as much as people assume. A cover traps a layer of still air around the cage, raises the microclimate temperature by a few degrees, and blocks convective drafts, which is where most heat loss happens. But it is not a heater. For more detail on how much a cover raises the cage microclimate, see does covering a bird cage keep it warm. If your room drops to 55°F (13°C) overnight, a cover alone will not keep the cage at a safe 68°F (20°C). It might get you to 58 to 60°F (14 to 15°C), which is still cold stress territory for tropical species. This is why you need to monitor the temperature inside the covered cage with a small digital thermometer rather than assuming the room thermostat tells you what your bird is experiencing. For more detailed strategies on how to keep bird cage warm, see the linked guide for practical heating, cover, and monitoring tips.
Can you cover a bird cage with a blanket?
A plain, tightly-woven cotton blanket can work in a pinch, but there are two specific blanket types to avoid. First, fleece blankets are a documented hazard. The Association of Avian Veterinarians has warned that polyester fleece sheds fine fibers that birds preen and ingest, and gastrointestinal foreign bodies from fleece are a real clinical problem. Second, any blanket that has been treated with stain repellents, flame retardants, or fabric softener sheets should not go near a bird cage. Those treatments can contain PFAS compounds and VOCs that off-gas, and bird respiratory tracts are far more sensitive to airborne chemicals than ours are. An old, untreated, well-washed cotton blanket is fine. A purpose-made cage cover is better. For more details on when and how to use blankets safely, see Can I cover my bird cage with a blanket.
Safe materials and DIY cover options
When I make a cover for a client's cage or my own, I start with the material choice before I pick up a measuring tape. The material determines breathability, safety, and how easy the cover is to launder, and all three matter.
| Material | Breathability | Safety notes | Washability | Verdict |
|---|---|---|---|---|
| Unbleached cotton/muslin | Good | No chemical treatments; low VOC risk | Machine wash easily | Best overall choice |
| Canvas (untreated) | Moderate | Check for wax or water-repellent coatings | Wash on gentle cycle | Good for large cages |
| Linen | Very good | Naturally low chemical load | Hand or machine wash | Excellent but pricier |
| Cotton-polyester blend | Moderate | Polyester content reduces fiber shedding vs. fleece but check for treatments | Easy | Acceptable if untreated |
| Polyester fleece | Poor | Fiber shedding causes GI foreign-body risk | Easy but irrelevant | Avoid entirely |
| Blackout curtain fabric | Poor (most types) | Often contains flame retardants and PFAS coatings | Varies | Avoid unless verified low-VOC |
| Pre-made commercial cage cover | Varies by brand | Look for OEKO-TEX certified or untreated cotton | Check label | Good if certified safe |
For a DIY cover, unbleached cotton muslin is my go-to. You can buy it in wide widths from fabric stores, it breathes well, it launders at high temperature to kill any mold spores, and it has no chemical finishing that would off-gas near your bird. For a more structured cover on a large macaw or cockatoo cage, a heavyweight canvas with a simple hem and a few snap fasteners gives you durability without chemicals, provided you source uncoated canvas and confirm there is no water-resistant treatment on it.
Tools and materials checklist before you start
Gather everything before you measure. It sounds obvious, but having to stop midway through cutting fabric to hunt for scissors means imprecise cuts. Here is what you need for a basic fitted DIY cover.
- Unbleached cotton muslin or canvas fabric (quantity based on cage dimensions plus 6-inch drop on all sides)
- Fabric scissors or rotary cutter and self-healing mat
- Flexible tape measure (cloth, not metal)
- Fabric chalk or washable marker for marking cut lines
- Sewing machine or iron-on hem tape for finishing edges (prevents fraying)
- Snap fasteners, hook-and-loop tape (Velcro), or binder clips for securing the cover to the cage
- Digital thermometer-hygrometer (small unit, place inside the covered cage at perch height)
- Pencil and paper for writing down cage measurements before you cut
Optional but useful: a second person to hold the fabric against the cage while you measure, and a lint roller to check the finished cover for loose fibers before the first use. If you are buying a pre-made commercial cover rather than sewing, you still need the thermometer-hygrometer. That one item is non-negotiable regardless of what cover method you use.
Step-by-step: measuring, cutting, and installing your cage cover
Step 1: Measure the cage
Measure the cage at its widest point on each side, including any external feeders, toys, or cage skirts that stick out. Then measure the height from the top of the cage down to where you want the cover to end (usually just above the tray lip, or to the floor if you want full draft protection). Write these numbers down: width of front, width of side, depth of top, total height. Add 6 inches to the height measurement for a hem allowance and a modest overhang. If you plan to cover only three sides and leave the front open, note which face will be the "open" front. Photo cue: lay your tape measure flat against the widest external point of each panel, not the bars themselves.
Step 2: Cut the fabric panels
For a simple box cover, you can cut one large rectangle that wraps over the top and down the back and two sides, with a separate front panel that you can roll up or tie back. Mark your cut lines with fabric chalk on the wrong side of the fabric. Cut fabric that is 2 inches wider than each finished panel dimension so you have seam allowance on every edge. Photo cue: lay the fabric flat on a clean hard floor, place your cage top-down onto it if the cage is portable, and trace the top outline as a cutting guide for the roof section.
Step 3: Finish the edges
Raw-cut edges fray quickly, and loose threads are a toe and beak hazard. Either run a simple hem stitch on all cut edges with a sewing machine, or use iron-on hem tape. Hem tape is the no-sew option and holds well through multiple washes. Press it with a hot iron according to the package instructions. While the edge treatment is drying or cooling, do a lint-roller pass on both sides of the fabric to check for any fiber shedding before the cover goes anywhere near your bird.
Step 4: Install snap fasteners or securing method
Loose covers that billow in a vent draft are useless and can scare birds. Add four to six snap fasteners or small hook-and-loop patches at the bottom corners and midpoints of the cover where it reaches cage bar level. Alternatively, binder clips clipped directly to the cage bars at the hem work perfectly and require no sewing. Photo cue: clip the cover to the bottom bars of the cage, not to the tray, so the fabric stays in position if the tray is pulled for cleaning.
Step 5: Leave the ventilation gap
Before your bird goes to sleep under the new cover for the first time, lift the front panel two to three inches off the floor of the cage and clip it there, or roll it up 2 to 3 inches from the bottom. This is your permanent ventilation gap. Fresh air enters at the bottom front, stale air rises and exits at the same gap or through the fabric weave. Never zip or tape a cover completely shut. Photo cue: photograph the gap from inside the cage looking out so you can confirm light and air are getting through before you leave the room.
Step 6: Introduce the cover gradually
For a bird that has never had a cover, start by draping it over just one side for the first few nights while the bird is awake and can see it. Then move to covering the top and sides without the front, then add the front with the ventilation gap. This gradual introduction is especially important for cockatiels and nervous conures. Once the routine is consistent, most birds begin to associate the cover going on with sleep time and will often settle immediately.
Ventilation and placement checks, plus temperature targets by species
Even before you add a cover, cage placement in winter is the most important variable you control. The cage should never be against an exterior wall that gets cold, directly below or beside a vent, or within 3 feet of a drafty window or door. These spots create temperature swings that are more damaging than a steady cool temperature. Place the cage against an interior wall, at the highest point of the room (warm air rises), away from kitchen cooking fumes and bathroom steam.
Once the cover is on, place your digital thermometer-hygrometer at perch height inside the covered cage before the bird goes to bed. Check it in the morning before uncovering. That reading tells you the actual overnight microclimate your bird experienced. Room thermostat readings are not a reliable proxy, especially in a covered cage near a window.
| Species | Comfortable ambient range (healthy bird) | Minimum overnight temp | Notes |
|---|---|---|---|
| Budgerigar | 65–80°F (18–27°C) | 60°F (15°C) | Tolerant of cooler temps if draft-free; thermoneutral zone closer to 85°F in lab conditions |
| Cockatiel | 65–80°F (18–27°C) | 60°F (15°C) | Prone to night frights; leave nightlight or partial cover gap |
| Canary | 59–75°F (15–24°C) | 59°F (15°C) | Passerine; abrupt temperature drops increase health risk |
| Finch (zebra, Bengalese) | 65–75°F (18–24°C) | 60°F (15°C) | Social warmth from flock helps; single birds need closer monitoring |
| Green-cheek conure | 68–80°F (20–27°C) | 65°F (18°C) | More cold-sensitive than budgies; avoid any draft exposure |
| Cockatoo | 68–80°F (20–27°C) | 65°F (18°C) | High respiratory sensitivity; no chemical-treated covers |
| Amazon parrot | 68–80°F (20–27°C) | 65°F (18°C) | Monitor for respiratory signs if temperature drops |
| Small parrot (general) | 68–80°F (20–27°C) | 65°F (18°C) | Recovery/sick birds need 80–85°F (27–29°C) with vet guidance |
If your overnight readings are consistently falling below those minimums, a cover alone is not enough and you need supplemental heating. Sick or recovering birds need substantially warmer and more humid conditions, typically 80 to 85°F (27 to 29°C) with elevated humidity around 70% RH, but that level of care should always be directed by an avian vet.
Heating options and how to use them safely
If your thermometer tells you the covered cage is too cold overnight, you have several heating options. For practical guidance on safe supplemental heat options and setup, see our guide on how to heat a bird cage. The important thing is to match the heater type to the space and the species, and always use a thermostat to prevent overheating. A bird that gets too hot is in as much danger as one that gets too cold.
Heated perches
Heated perches are the most targeted option. They warm the bird directly through its feet, which is how birds thermoregulate in cold roost sites in the wild. Look for perches that run at a fixed low temperature (around 100 to 102°F / 38°C surface temp) and have a cord guard or steel-wrapped cord to prevent chewing. These are low-wattage, low-risk devices that do not significantly raise the cage air temperature, so they work best in a covered cage that is already reasonably warm.
Radiant panel heaters
Radiant ceramic or infrared flat-panel heaters designed for aviaries clamp or mount outside the cage and warm the interior without blowing air. This is important because forced hot air from a fan heater dries out the cage environment aggressively and can stress respiratory tracts. Radiant heaters are quieter, do not circulate dust or feather dander, and can be paired with a plug-in thermostat controller. Set the thermostat probe at perch height inside the cage and program the controller to maintain your species-appropriate minimum temperature.
Room heaters and central heat
If you heat the whole room, keep the bird's room at the lower end of the appropriate range during the day (68 to 72°F / 20 to 22°C) and make sure the overnight set-back does not drop below species minimums. Never use non-stick (PTFE/Teflon-coated) space heaters near birds. PTFE fumes at high temperature are acutely fatal to birds, even in another room if ventilation connects the spaces. Stick to ceramic or oil-filled electric heaters, and never use open-flame heaters.
Thermostat and monitoring setup
- Plug your radiant panel heater or heated perch into a plug-in thermostat controller (available at hardware stores and avian supply retailers).
- Place the thermostat probe inside the covered cage at the bird's roost perch level, secured with a plastic cable tie to a cage bar.
- Set the controller's lower limit to your species' minimum safe temperature.
- Place your separate digital thermometer-hygrometer in the cage as an independent check. Do not rely solely on the thermostat display.
- Check both readings every morning for the first two weeks until you understand how the system behaves overnight.
- If the two readings diverge by more than 3 to 4°F, recheck probe placement and check for drafts that may be cooling one area of the cage.
Humidity control in winter: targets, devices, and what to avoid
Heating your home in winter drops indoor relative humidity (RH) significantly, often to 20 to 30% in cold climates. That range is uncomfortable for birds whose native habitats are more humid, and it increases respiratory water loss. Very low RH dries out mucous membranes and makes birds more vulnerable to airborne pathogens. But the flip side is equally important: pushing RH above 60% creates conditions that favor Aspergillus and other fungal molds, which are serious respiratory threats to birds. The practical target for most pet bird rooms is 40 to 50% RH.
| Species group | Target RH range | Notes |
|---|---|---|
| Budgerigar | 40–50% | Australian origin; tolerates moderate-low humidity but benefits from 40%+ in winter |
| Cockatiel | 40–50% | Same origin as budgie; dry conditions worsen feather condition |
| Canary / Finch | 45–55% | Passerine; slightly higher humidity supports feather and respiratory health |
| Conure (small-medium) | 45–55% | South American origin; appreciates moderate humidity |
| Cockatoo / Amazon | 45–55% | Powder-down species (cockatoos) do fine at moderate RH; high RH raises aspergillosis risk |
| Sick or recovering bird | 60–70% (short-term) | Only under veterinary supervision; elevated humidity for respiratory therapy is transient |
Practical ways to raise humidity in the bird room
The safest and easiest first step is a cool-mist ultrasonic humidifier placed at least 3 feet from the cage, directed away from the cage so it does not mist directly onto the bars or perches. For step-by-step methods on how to increase humidity in the bird room, include a cool-mist humidifier placed safely away from the cage and other low-risk options like water trays and houseplants. Wet bars and perches promote bacterial and mold growth. Run it with distilled or filtered water, not tap water, because mineral deposits from hard water can be aerosolized and inhaled. Clean the humidifier reservoir every two to three days to prevent bacterial biofilm buildup. Check the room's RH with a standalone hygrometer, not just the humidifier's built-in sensor, which is often inaccurate.
Other options that help without the risks of a full humidifier: a shallow tray of water placed on a warm radiator (not under the cage), daily misting of the bird with a fine-spray water bottle at room temperature, and keeping live non-toxic houseplants in the bird room. Avoid steam humidifiers near birds. Hot steam can scald, and the heat drives RH up quickly past the safe zone before you notice. Clinical steaming or nebulization for respiratory illness is a veterinary procedure, not a DIY one.
Signs humidity is too low or too high
- Too dry (below 30% RH): flaky skin around beak and feet, excessive preening, dry nasal discharge, increased feather dust in cockatoos and cockatiels
- Too humid (above 60% RH): visible condensation on cage bars or windows, musty smell near the cage, soft or discolored perches, wet-looking feathers at the base of the shaft
- Ideal range (40–50% RH): feathers lie flat and glossy, no excessive nasal discharge, bird is alert and preening normally
Troubleshooting: condensation, pests, and mess under the cover
Condensation on the inside of the cover or on cage bars is the most common problem I see when people first add a winter cover. It means the ventilation gap is too small, the room is too humid, or the temperature difference between the warm interior and the cool cover fabric is too large. Fix it by widening the ventilation gap at the bottom, moving the cage away from the exterior wall, and checking your room RH. If condensation persists, switch to a more breathable fabric such as a looser-weave cotton.
Seed hulls, feather debris, and droppings accumulate in and around the cover hem. A cage skirt or seed guard installed before the cover is fitted keeps most debris inside the tray. Shake or brush the cover outside every two to three days and machine wash it every week or two in hot water with unscented detergent, fully dried before re-use. A damp cover put back on a cage is a mold factory.
Pests, particularly mites, can shelter in thick fabric covers. Red mites are active at night and hide in dark folds of fabric during the day. If you notice your bird scratching excessively at night or small reddish specks on the cover fabric in the morning, treat the cage and cover separately: wash the cover at 60°C (140°F), and consult an avian vet for safe mite treatment for the cage and bird. Avoid commercially sprayed insecticide products around birds.
Safety-first decorative ideas that still keep birds safe
You can make a cage cover look good without cutting corners on safety. Two ideas I genuinely use: first, block-print the cover fabric with non-toxic, water-based fabric ink in a simple leaf or geometric pattern before hemming. The ink is heat-set with an iron before it ever touches the cage, and once cured it does not off-gas. Second, use a contrasting cotton trim or ribbon along the hem edge instead of a synthetic decorative border. Cotton ribbon is bird-safe, washable, and gives the cover a finished look without any chemical treatment risk. Both options keep the fabric breathable and non-toxic while making the cover look intentional rather than improvised.
FAQ
Should you cover a bird cage at night?
Yes for most pet species a consistent nightly cover helps birds get uninterrupted dark, quiet sleep. Use a breathable, lightly insulating cover and a predictable routine (same time nightly). Avoid sudden total blackout for nervous birds—leave a small vent gap if your bird startles easily. Monitor behavior for signs of panic or ‘night frights.’ (See AAV guidance: https://www.aav.org/page/petbirdcare).
Does covering a bird cage keep it warm?
Yes — a cover creates a microclimate that is typically 1–5°C (2–9°F) warmer than room air depending on fabric and fit. Because of this warming effect you must measure temperature inside the covered cage with a thermometer at perch/roost level rather than assuming room thermostat values. Don’t rely on a cover alone for sick birds who need controlled warming. (Microclimate studies: https://www.ncbi.nlm.nih.gov/pmc/articles/PMC5676808/).
Can I cover my bird cage with a blanket?
Only if the blanket is safe: use clean, untreated, tightly woven natural fabric (cotton muslin or unbleached cotton sheet) with no loose fibers, fringe, snaps, chemicals or flame‑retardant treatments. Avoid fleece/polyester (sheds fibers and can be ingested), heavy blackout curtains with chemical finishes, and fabrics that off‑gas VOCs. Secure edges so the bird cannot pull fabric into the cage. (AAV warnings re: fleece ingestion).
Which materials and covers are safe to use?
Preferred: unbleached cotton/muslin, lightweight canvas, tightly woven cotton flannel (no loose nap), purpose‑made breathable cage covers labeled pet‑safe and untreated. Avoid: polyester/fleece, fabrics with visible shedding, heavily treated or coated textiles, and anything with long ties/loops. Use clips or binder clips to secure—don’t staple into cage where sharp edges are exposed.
DIY cover options and tools/materials list
Tools & materials: 1) unbleached cotton/muslin or old clean cotton sheet; 2) measuring tape; 3) fabric scissors; 4) sewing kit or fabric glue/hem tape (optional); 5) binder clips or clothes pegs (non‑sharp); 6) small Velcro strips (low‑VOC). DIY ideas: cut fabric to size leaving 6–8 in extra on each edge, hem edges to prevent fray, add Velcro tabs or use binder clips to attach to cage rim, leave a 3–6 in ventilation gap near top or across a side. Photo‑cue: lay cover over cage, clip corners, fold back 3–6 in at top to create vent. (Photo‑based cue: ‘cover laid flat – corners clipped – vent fold visible’).
Step‑by‑step assembly and installation of a DIY cover
1) Measure cage height, width, depth at perch/roost level. 2) Cut fabric: add 6–8 in to each dimension for overlap. 3) Hem edges or use no‑fray tape. 4) Optional: add Velcro strips on three sides for quick removal. 5) Drape cover over cage; align front opening if you want access. 6) Create a 3–6 in vent by folding and clipping a top section. 7) Place thermometer/hygrometer at roost level and leave for 24–48 hours to observe microclimate before relying on cover nightly. Photo cues: measure, cut, hem, Velcro tabs sewn, clip on cage, vent fold, sensor placement.
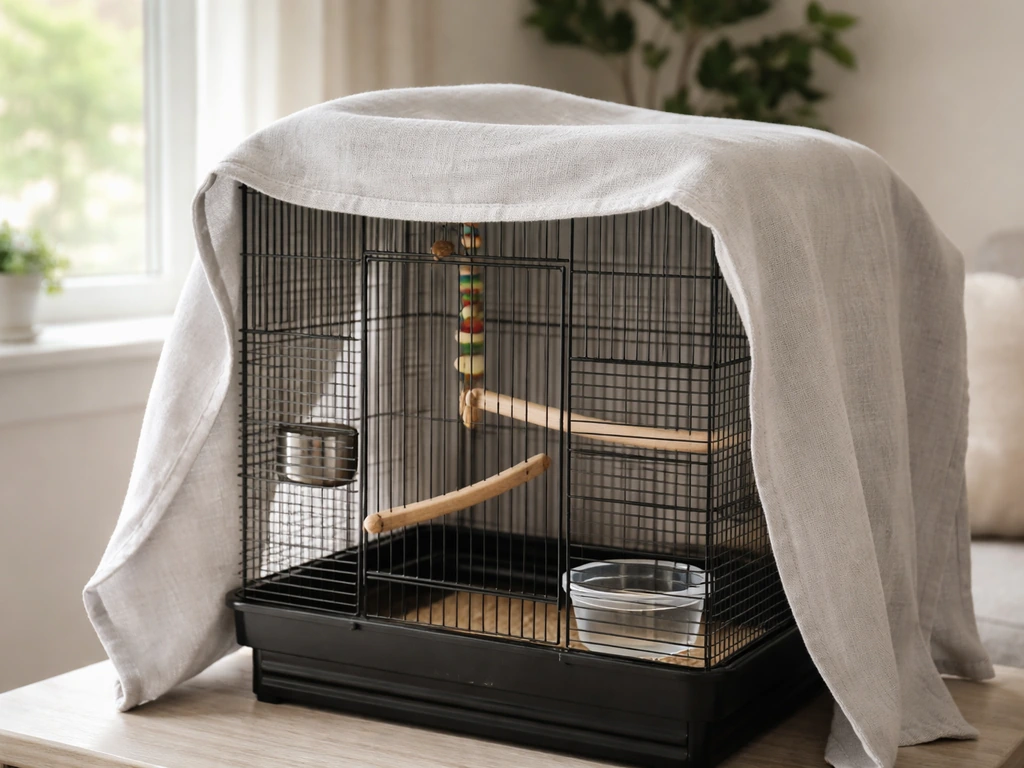
Learn if covering a bird cage keeps it warm, how to do it safely, and when to use other heat options.
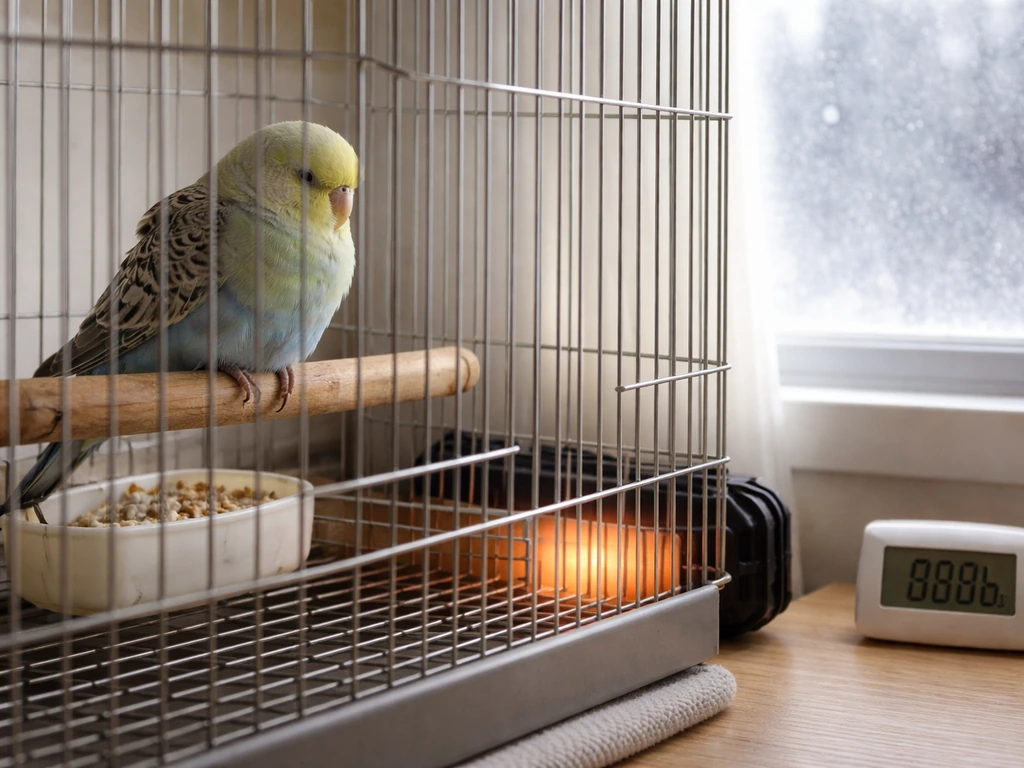
Step-by-step how to heat a bird cage safely: targets, placement, methods, do/don’t, and troubleshooting for cold weather
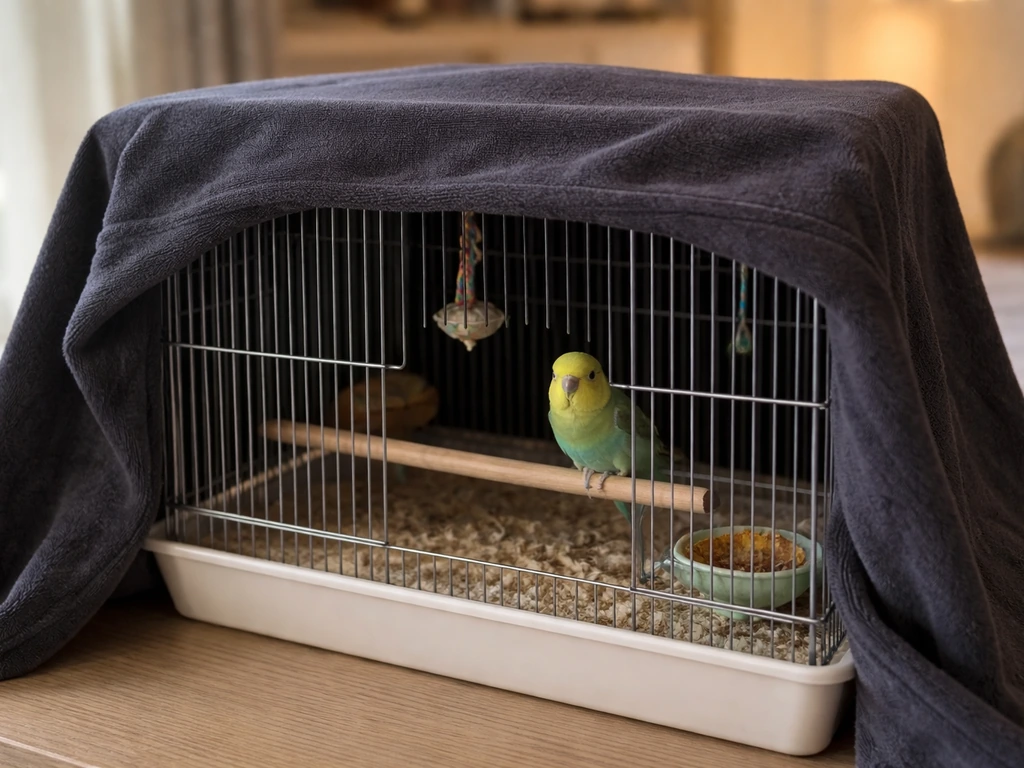
Learn when and how to cover a bird cage with a blanket safely, with do nots for airflow, heat, and stress.