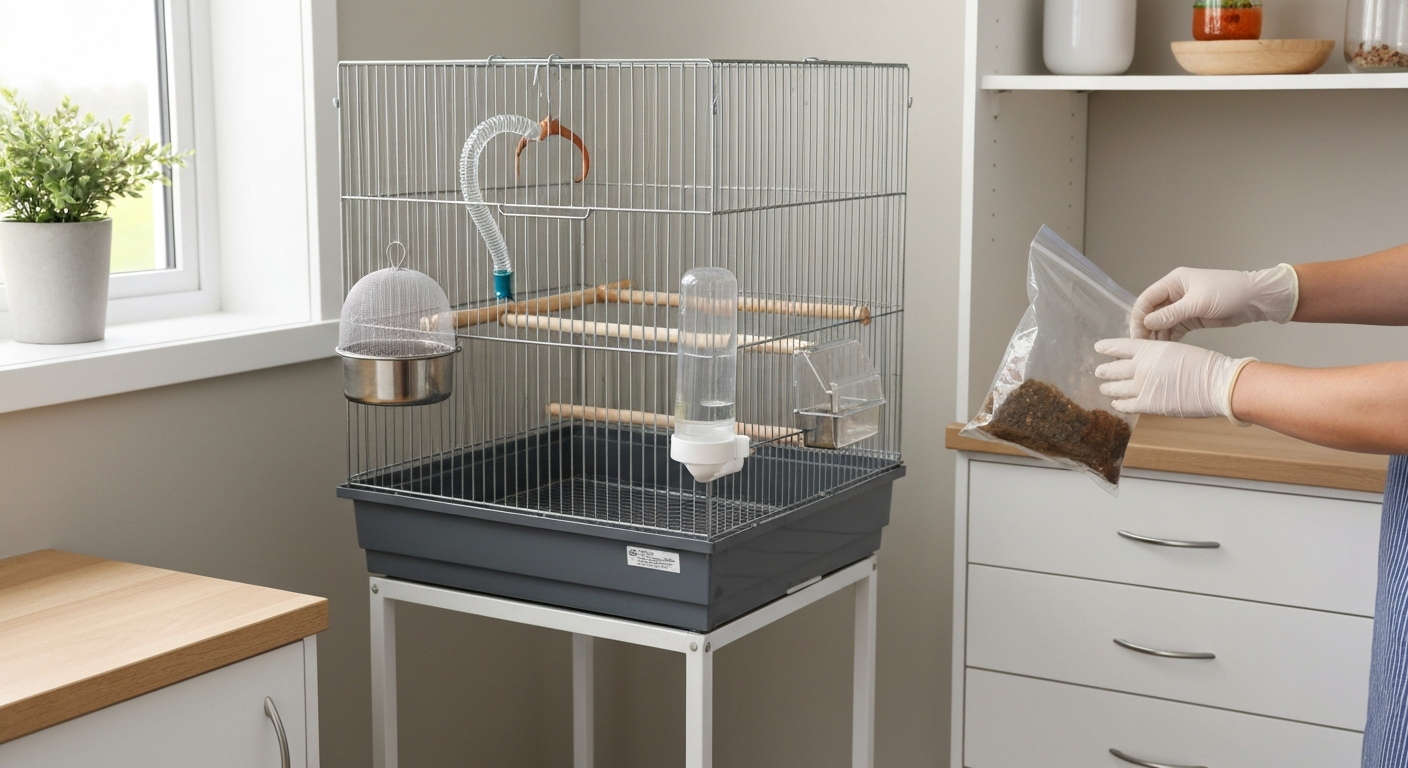
You can meaningfully reduce the noise coming into and out of a bird cage by combining a dense barrier layer (like mass-loaded vinyl) with soft absorption panels and good sealing around gaps, no specialized construction background needed. Done right, you can expect roughly 5 to 12 dB of airborne noise reduction, which cuts perceived loudness almost in half. The catch is that you have to keep ventilation open, stick to non-toxic materials, and tailor everything to the species sharing your home. This guide walks through exactly how to do that, from a ten-minute cover fix to a fully lined retrofit cage panel kit.
How to Soundproof a Bird Cage: Safe DIY Plans & Noise Reduction

Maya Bennett
5 Aug 2026
What this guide covers and who it's for
I built this guide for bird owners who are tired of outside noise stressing their flock, traffic, construction, loud music, barking dogs, and for owners whose birds' own calling is causing friction with neighbors or housemates. If you keep parrots, cockatiels, conures, finches, canaries or budgies, the projects here scale from a simple fleece cover (15 minutes, under $10) to a full retrofit with lined panels and vibration mounts (a weekend, $60 to $150 depending on cage size). Every recommendation below puts the bird's welfare first. If a material or technique creates any fume, chew, or airflow risk, I'll say so clearly and offer a safer swap.
Why bother reducing cage noise in the first place
Birds hear in a similar frequency range to humans, with blank" rel="noopener noreferrer">peak sensitivity roughly between 2 and 4 kHz, a band that includes traffic noise, voices, and most household sounds. Research on budgerigars specifically pinpoints best auditory sensitivity around 2,860 Hz, meaning the mid-high frequency noise that fills most homes hits them hard. Chronic exposure to anthropogenic noise has been linked in multiple studies to elevated corticosterone (a stress hormone), disrupted sleep architecture, and long-term effects on body condition. A small 2023 meta-analysis covering dozens of species confirmed that noise causes measurable behavioral and physiological stress across birds, and those effects are not hypothetical.
On the flip side, if your birds are the ones making the noise, soundproofing a cage (or the room around it) can reduce the sound that escapes into the rest of your home by a meaningful amount, which keeps the peace without punishing the bird. The goal is never silence inside the cage, birds need auditory stimulation and should not be isolated. The goal is a calmer, more stable acoustic environment that protects sleep, lowers chronic stress, and keeps your household functional.
Welfare checks and species-specific constraints
Before you add anything to or around a cage, run through these welfare checkpoints. Different species have different tolerances, and a mistake with a large parrot is very different from a mistake with a tiny finch.
Species-by-species considerations
| Species | Noise sensitivity notes | Chewing risk | Key constraint |
|---|---|---|---|
| Parrots (African Grey, Amazon, Eclectus) | High vocal range; stress-sensitive to sudden loud sounds | Very high — will destroy soft panels if accessible | All absorption panels must be cage-exterior only or behind chew-proof mesh |
| Cockatiels | Moderate; can develop night frights from sudden noises | Moderate | Nighttime noise reduction is especially valuable; cover must allow air circulation |
| Conures | High vocalization; acute hearing; prone to stress screaming | High | Exterior-only soft panels; never block more than 50% of cage with solid panels |
| Budgerigars | Best sensitivity ~2,860 Hz; complex sleep architecture disrupted by noise | Low to moderate | MLV or dense covers fine if airflow maintained; monitor humidity |
| Finches and canaries | Sensitive to high-frequency vibration; can become quiet and withdrawn under chronic noise | Very low | Vibration isolation mounts especially useful; these small birds benefit most from stable, low-noise placement |
| Larger parrots (Macaws, Cockatoos) | Produce extreme noise; also sensitive to sudden sounds | Extreme — destroy almost anything | Cage-exterior solutions only; wire mesh guard required over any soft material |
For all species, pay attention to behavioral signs that soundproofing is helping or hurting. Signs of reduced stress include normal foraging, regular preening, and steady eating. Signs of a problem include feather plucking, excessive stillness, labored breathing, or any change in droppings. If you notice respiratory symptoms, especially after installing new materials, remove the bird to a well-ventilated area immediately and call an avian vet. The Association of Avian Veterinarians recommends keeping birds in stable, well-ventilated housing away from fumes at all times, and that principle applies here more than anywhere.
When to consult an avian vet before starting
- Your bird already shows respiratory symptoms, feather problems or behavior changes before you start any project
- You are unsure whether your cage has any existing coatings (paint, powder coat, galvanizing) that could interact with heat, adhesives or cleaning products
- Your bird is a strong chewer and will have any access to new materials
- You plan to use any spray adhesive, sealant or paint within the same airspace as the bird
Safety rules and what not to do
This is the section I want you to read twice. Birds have an incredibly efficient respiratory system, it makes them excellent singers and terrible survivors of airborne toxins. Here is the non-negotiable list. For safe, bird-friendly advice on controlling pests such as fruit flies around cages, see our guide on how to get rid of fruit flies in bird cage.
- Never use PTFE-coated (Teflon or non-stick) materials anywhere near birds. PTFE decomposition products at roughly 260 to 280 °C cause acute pulmonary edema and rapid death. This means no PTFE-coated wire, heat tape, or foam with PTFE backing. If you suspect exposure, move the bird to fresh air and call an emergency avian vet immediately.
- Never use fresh MDF, raw particleboard or urea-formaldehyde-glued plywood directly inside or tightly enclosing a cage. These off-gas formaldehyde, which is a respiratory irritant. If you use wood panels, specify CARB Phase 2 or TSCA Title VI certified products and allow full cure (at least two weeks of ventilation in an unoccupied space).
- Never use galvanized metal hardware cloth or mesh as the inner surface of any enclosure a chewer can reach. Zinc from galvanizing causes heavy metal toxicity. Use stainless steel (304 or 316 grade) mesh instead.
- Never use spray paints, spray adhesives, or aerosol sealants with the bird in the room. Move the bird out, apply the product, and allow full cure in a ventilated space before returning the cage to the area.
- Never seal more than 50 to 60 percent of any cage face with solid panels. You must maintain airflow for temperature regulation, humidity control, and fresh air exchange.
- Never use essential oils, scented sprays or aerosol fresheners near soundproofing materials, which can absorb and slowly re-release chemicals.
- Do not use foam with open cells directly accessible to the bird. Ingested foam pieces can cause crop impaction.
- Do not mount heavy panels on spring-loaded doors or clips not rated for the weight. Panels can fall and injure the bird.
Materials: what works, what's safe, and what to avoid
Soundproofing works through two different mechanisms: absorption (soft, porous materials that convert sound energy to heat inside a space) and blocking (dense, limp mass that stops sound from passing through a wall or panel). For a cage setup, you need both. The materials below are prioritized by safety first, then performance.
| Material | Role | Pros | Cons | Bird-safe rating |
|---|---|---|---|---|
| Mass-Loaded Vinyl (MLV), 1 lb/sq ft | Sound blocker (barrier layer) | Flexible, adds significant mass, no off-gassing once cured, cuts with scissors, recyclable | Heavy; needs sealing at seams for best performance; must be exterior-mounted away from chewers | Safe when fully cured and exterior-mounted |
| Acoustic moving blankets (fiberglass-free, polyester fill) | Absorption + partial blocking | Inexpensive, washable, readily available, good mid-frequency absorption | Reduce airflow if fully wrapped; must leave ventilation gaps; not chew-resistant | Safe exterior use; keep away from chewer access |
| Dense wool or fleece fabric (double-layered) | Absorption panel facing | Non-toxic, washable, bird-safe if chewed in small amounts, attractive | Low mass so limited blocking alone; needs MLV backing for meaningful STC improvement | Safe |
| Solid-core PVC sheet (3–6 mm, no fillers/plasticizers) | Rigid panel substrate | Non-toxic, waterproof, easy to clean, no off-gassing, lightweight | Less mass than MLV alone; needs MLV laminate for best blocking | Safe |
| CARB Phase 2 certified plywood (1/2 inch) | Rigid panel substrate | High mass per panel, good structural base, easy to cut and mount | Must be fully cured; keep unsealed edges sealed with water-based sealant; heavier than PVC | Safe when cured and sealed with water-based finish |
| Closed-cell EVA foam (ethylene vinyl acetate, foam floor tiles) | Vibration isolation / decoupling mounts | Non-toxic, non-off-gassing, firm, cleanable; used in anti-fatigue mats | Not effective as primary sound blocker; limited absorption | Safe |
| Stainless steel 304/316 mesh (1/2 inch hardware cloth) | Chew-proof panel guard | Inert, durable, easy to clean, no toxic coatings | More expensive than galvanized; must specify 304/316 grade | Safe |
| Standard open-cell acoustic foam (polyurethane) | Absorption | High NRC absorption values, widely available | Chewing hazard (crop impaction risk), some off-gas VOCs when new; must be exterior-only behind mesh barrier | Conditional — exterior only, behind mesh, fully cured |
| Galvanized hardware cloth | Structural mesh | Cheap and widely available | Zinc coating toxic to chewing birds; do NOT use | Not safe for chewers — avoid |
| MDF (raw, uncured) | Rigid panel | Very cheap, easy to cut | High formaldehyde off-gassing; NOT safe near birds until fully sealed and cured (2+ weeks) | Conditional — CARB-certified, fully sealed only |
| Any PTFE-coated material | N/A | None relevant | Acutely lethal fumes when heated or abraded; NEVER use near birds | Never use |
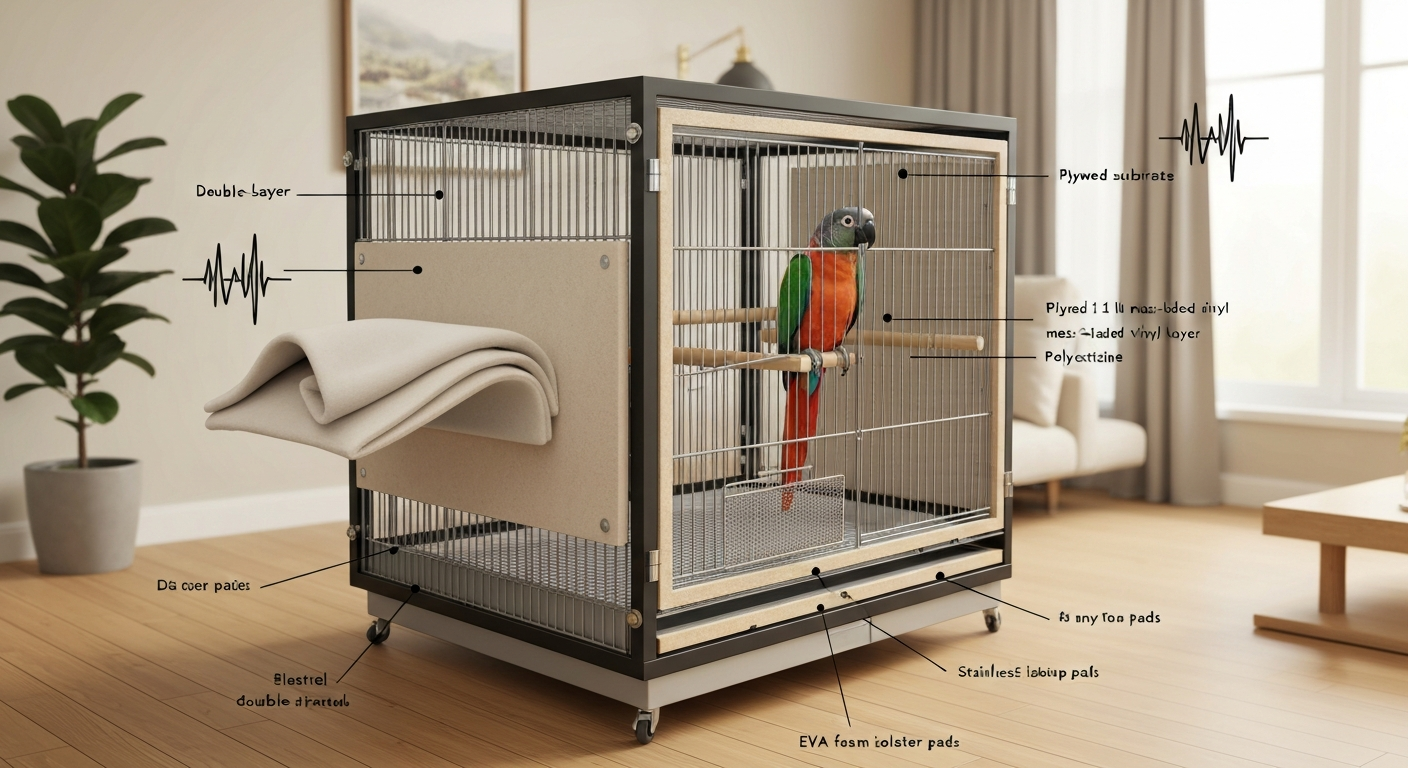
My top recommendation for most setups: a 1 lb/sq ft MLV sheet laminated to a CARB Phase 2 plywood or solid PVC panel, with a polyester fleece facing, mounted on the exterior of the cage with EVA foam vibration isolators at mounting points. This combination gives you real blocking mass, decent absorption, zero off-gassing risk once assembled, and a cleanable, attractive surface.
Tools you'll need
Essential tools
- Measuring tape (25 ft) and pencil for marking cut lines
- Utility knife or heavy shears for cutting MLV and fabric
- Circular saw or jigsaw for cutting plywood or PVC sheet panels
- Drill/driver with Phillips and hex bits for mounting hardware
- Contact cement (water-based, low-VOC) or heavy-duty staple gun for laminating layers
- Steel rule or straight edge for clean cuts
- Safety glasses and dust mask (N95 minimum when cutting any wood composite)
- Gloves (MLV has a slightly tacky surface and cuts cleanly with clean hands)
Optional but useful
- Rubber mallet for seating EVA foam isolator pads
- Cable ties and velcro strips (easy reversible panel mounting)
- Door and window foam tape (3M 3/16-inch closed-cell) for sealing panel edges
- Acoustic sealant (non-hardening, water-based) for sealing any fixed panel seams
- A cheap decibel meter app on your phone (free apps are accurate enough for 5-dB-scale testing before/after)
- Hand roller or J-roller for bonding MLV laminates flat without bubbles
Quick fixes: simple covers and absorption panels
These projects take 15 minutes to two hours and require no power tools. Start here if you want to test whether sound reduction makes a difference before committing to a bigger build.
Project 1: Double-layer fleece night cover
This cover targets the 2 to 4 kHz range where birds are most sensitive and works well for nighttime noise reduction for cockatiels, budgies and finches. It is not a heavy blocker, expect 2 to 4 dB improvement, but it absorbs ambient noise and keeps the cage darker, which matters for sleep quality based on what we know about bird sleep architecture. Budgerigars have complex sleep structure similar to that of mammals, PMC Budgerigars have complex sleep structure similar to that of mammals — PMC.
Parts list
- 2 yards of anti-pill polyester fleece (100% polyester, no fire-retardant treatment)
- Sewing machine or fabric glue (washable, non-toxic)
- Velcro strips (sew-on or self-adhesive, 1 inch wide, 12 inches total)
Cut list (standard 18 x 18 x 24 inch cage)
- Top panel: 20 x 20 inches (double-layered, so cut 4 pieces total at this size)
- Side panels (x2): 20 x 26 inches (double-layered, 4 pieces)
- Front panel with ventilation gap: 20 x 18 inches — leave a 6-inch uncover strip at the bottom for airflow
- Back panel: 20 x 26 inches (double-layered, 2 pieces)
- Measure all four sides and the top of the cage. Add 1 inch on each edge for overlap and hemming.
- Cut two layers of fleece for each panel. Layer them right sides together.
- Sew or glue a 1/2-inch hem around all edges. Leave the bottom edge of each side panel open (unhemmed) to allow a 4 to 6-inch ventilation gap at the base of the cage when hung.
- Attach Velcro tabs at the top corners of each panel so they connect to adjacent panels. This lets you open one side without removing the whole cover.
- Hang the top panel first, draping it over the cage top. Attach side panels, connecting them at corners with Velcro. Leave the front panel off initially or use it as a partial drape only — never fully seal the front overnight.
- Photo tip: Take a shot from above showing the Velcro corner connections — this is the most useful reference for adjusting fit on different cage shapes.
- Test with a free decibel meter app: measure ambient noise at cage level with cover on versus off. Note your baseline reading. A consistent 2 to 4 dB reduction is a real result for this type of cover.
Project 2: Freestanding absorption panel (exterior)
This is a flat panel that stands or hangs behind and beside the cage, absorbing reflected sound in the room. It is especially useful if your cage is against a hard wall that bounces noise back in. You are targeting NRC (absorption) here, not STC (blocking), so the panel reduces reverberation around the cage rather than stopping sound from passing through.
Parts list
- One sheet of 2-inch thick polyester acoustic batting (standard 24 x 48 inch panel, NRC roughly 0.7 to 0.85)
- One piece of solid PVC sheet or 1/2-inch plywood (24 x 48 inches) as a rigid backing
- 1 yard of stretched polyester knit fabric (breathable, for facing — keeps fibers contained)
- Heavy-duty staple gun and 3/8-inch staples
- Two D-ring picture hangers and appropriate wall anchors, or a small freestanding A-frame made from 1x2 pine
- Cut your rigid backing to size — 24 x 48 inches works well beside most medium cages.
- Lay the acoustic batting flat on the backing. Trim it flush with the edges.
- Stretch the polyester knit fabric tightly over the batting and wrap it around to the back of the rigid panel. Staple at 3-inch intervals around the perimeter. Pull firmly — wrinkles let sound reflect instead of absorbing.
- Attach D-ring hangers to the back of the panel at the top corners. Hang on the wall behind the cage at cage height.
- Photo tip: A shot showing the cross-section edge — backing, batting, then fabric — helps viewers understand the layering before assembly.
- Keep the panel at least 2 inches from the cage bars to allow air circulation. Never press a panel flush against a cage.
Intermediate retrofit projects: lined panels, sealed doors and vibration mounts
These projects involve cutting materials, drilling, and mounting hardware. Move the bird to a safe room during all cutting and adhesive work. Allow any glued or sprayed components to fully off-gas for at least 48 hours in a ventilated, bird-free space before bringing the cage back.
Project 3: MLV-laminated exterior cage panels
This is the highest-performing DIY approach for blocking sound from leaving or entering through cage walls. A 1 lb/sq ft MLV layer added to a rigid panel can deliver 5 to 10 dB of airborne noise reduction across critical frequency bands. You mount these on the exterior only, they never contact the inside of the cage.
Parts list
- 1 lb/sq ft mass-loaded vinyl sheet (order by the square foot; measure your cage faces first)
- 1/2-inch CARB Phase 2 certified plywood (one sheet, cut to panel sizes)
- Water-based contact cement (low-VOC, non-aerosol)
- Polyester fleece facing fabric (enough to cover each panel front)
- 3M closed-cell foam tape, 3/16 inch thick x 3/4 inch wide (for sealing panel edges)
- 1/4-inch stainless steel hex bolts, washers and wing nuts (4 per panel — for cage bar mounting)
- EVA foam pads, 1/4 inch thick (cut into 1-inch squares for vibration isolation at each mounting point)
Cut list (for a standard 24 x 24 x 36 inch parrot cage)
- Two side panels: plywood at 25 x 37 inches each; MLV at 25 x 37 inches each
- One back panel: plywood at 25 x 37 inches; MLV at 25 x 37 inches
- Ventilation cutouts: cut a 6 x 20 inch horizontal slot in each panel, centered 3 inches from the top — this is non-negotiable for airflow
- Fleece facing: cut 1 inch larger than each panel on all sides to wrap around
- Move the bird out of the room. Cut plywood panels to size with a circular saw. Wear your N95 mask. Let dust settle, then wipe panels with a damp cloth.
- Apply water-based contact cement to one face of each plywood panel and the corresponding face of each MLV sheet. Let both surfaces tack up per the adhesive instructions (usually 5 to 10 minutes).
- Press MLV firmly onto the plywood face using a J-roller or rolling pin, working from the center outward to eliminate bubbles. Allow 24 hours cure time in a ventilated, bird-free space.
- Wrap the polyester fleece facing tightly over the MLV face and staple it to the back of the plywood, keeping it taut. The fleece both softens reflected sound inside the room and protects the MLV surface.
- Run closed-cell foam tape around all four edges of each panel. This creates a soft seal where the panel meets the cage bars, closing flanking gaps that would otherwise let sound bypass the panel.
- Cut ventilation slots in the panels using a jigsaw. Sand all edges smooth and seal cut edges of plywood with water-based polyurethane. Allow full cure.
- Mount panels to the exterior of the cage using stainless steel hex bolts through the bars. Place an EVA foam isolator pad between the panel and each bar at every mounting point — this decouples the panel from the cage frame and reduces vibration transmission. Tighten wing nuts by hand to allow easy removal for cleaning.
- Photo tip: Show the layering cross-section (plywood, MLV, fleece) before laminating, and a second shot showing the EVA foam isolator pad at a mounting point.
- Test with your decibel meter app: play a consistent tone or music at a fixed volume at cage distance, take readings with panels on and off. You should see 5 to 10 dB reduction on the outside of the panels with a good seal. If you see less than 3 dB, check your foam edge seals — gaps are almost always the problem.
Project 4: Vibration isolation tray and stand mounts
If your cage sits directly on a hard floor or a wooden stand, low-frequency vibration from traffic, appliances or footsteps travels straight into the cage structure and is perceived by your bird. A simple vibration isolation base takes 20 minutes and costs almost nothing.
Parts list
- Four to six EVA foam anti-fatigue mat tiles (the puzzle-piece interlocking type, 1/2 inch thick — cut to fit under the cage stand feet)
- Alternatively: neoprene rubber pads, 1/2 inch thick, one per stand leg
- Optional: a second layer of 1/4-inch closed-cell foam on top of the EVA layer for added isolation
- Lift the cage stand (with a helper for large cages) and slide EVA foam tiles under the base. You want each leg sitting on at least a 3 x 3-inch pad.
- For stands with four legs, cut individual pads and position one under each foot. For a solid base plate, cut tiles to match the full footprint.
- Press down firmly on the cage after placement and check for wobble. Trim pads to level if needed.
- Photo tip: A side-view shot showing the gap between the stand foot and the hard floor, with the foam pad visible, is the clearest way to show what this accomplishes.
- This modification is especially valuable for finches and canaries, which are highly sensitive to low-frequency vibration and may go silent or show stress behaviors when cage structures resonate.
Project 5: Sealed door and gap treatment
The biggest weak point in any soundproofed cage enclosure is the gaps around doors, feeders and access hatches. Sound travels through gaps the way water does, even a small unsealed crack can wipe out most of your panel work. This project seals those gaps without compromising access.
- Identify all gaps around door frames, feeder ports and access doors using the decibel meter: hold it near each edge while a helper makes noise on the other side. Gaps show up as clearly louder spots.
- Cut strips of 3M 3/16-inch closed-cell foam tape to fit around each door frame interior. This tape compresses to seal when the door closes but springs back to allow easy opening.
- For feeder port openings, cut a piece of fleece slightly larger than the port opening and attach it with a velcro tab on the outside. It drapes over the port as a flexible baffle when the feeder cup is removed.
- For any fixed gaps at corners where panels meet cage bars, run a thin bead of non-hardening acoustic sealant (water-based) along the exterior edge. Smooth with a wet finger. Allow full cure (at least 24 hours) before returning the bird.
- Photo tip: A close-up showing the foam tape compressed in a closed door frame gap illustrates how thin but effective this seal is.
Ventilation, humidity and temperature, keeping it safe inside
Every soundproofing project must maintain adequate airflow. If you also need advice on pest control, see how to get rid of ants in bird cage for safe, bird‑friendly methods. The Merck Veterinary Manual emphasizes that ventilation rate, avoidance of drafts and low airborne contaminants are all critical for captive bird health, and those requirements do not change when you add panels. Keep at least 40 to 50 percent of each cage face unobstructed (which is why the ventilation slots in the panel project above are non-negotiable). For humidity, most captive birds tolerate 30 to 70 percent relative humidity; extreme swings in either direction increase respiratory disease risk. If you notice condensation forming on the inside of panels after installation, you have a ventilation problem: increase the size of your ventilation cutouts before anything else. Proper sealing and ventilation also reduce moisture and entry points, helping prevent flying bugs around the bird cage. Monitor temperature at cage level with a simple digital thermometer, panels can trap heat in warm rooms, especially in summer. If cage temperature climbs more than 2 to 3 degrees above ambient room temperature, add a ventilation gap or reposition the cage.
Where to place your cage for maximum acoustic benefit
Placement is the lowest-effort noise reduction tool you have. A cage on an interior wall away from windows and mechanical equipment starts with a quieter baseline than one on an exterior wall next to an HVAC vent. A corner position lets you add absorption panels on two fixed sides without blocking any cage faces. For practical steps on protecting a bird cage from household predators like cats, see our guide on how to protect bird cage from cats. Keep cages out of kitchens, not just because of cooking fumes (which include PTFE risk from non-stick cookware), but because kitchen appliances generate unpredictable high-frequency bursts that are stressful for birds. If you’re also worried about other pests, see our guide on how to make bird cage snake proof for practical tips on sealing gaps and securing cages to deter snakes. A quiet interior room at mid-height on the wall (eye level to slightly above) gives the best combination of acoustic calm, airflow and the bird's sense of security.
Testing your results and troubleshooting common problems
Use a free decibel meter app on your phone. Set a consistent noise source (a speaker playing pink noise at a fixed volume works well) at a fixed distance from the cage. Take three readings with panels removed, then three with panels installed. Average each set. A difference of 5 dB or more is a real, meaningful result, it represents roughly a halving of perceived loudness. A 10 dB difference is excellent for a DIY exterior panel system.
Common problems and fixes
| Problem | Likely cause | Fix |
|---|---|---|
| Less than 3 dB improvement after installing panels | Unsealed gaps at panel edges or door frames | Add closed-cell foam tape to all panel edges; re-check feeder ports |
| Panels make the cage smell after installation | Adhesive or MLV not fully cured | Remove panels, cure in ventilated space for 48 more hours; do not return bird until odor is gone |
| Bird seems more anxious after panels installed | Panels blocking too much of the cage face, reducing visual access or light | Reduce panel coverage to maximum 50% of any one face; add a ventilation slot |
| Condensation appearing inside cage near panels | Insufficient ventilation causing humidity buildup | Enlarge ventilation cutouts; check that no more than 50% of any face is covered |
| Temperature rising at cage level | Panels trapping heat, especially in summer | Add ventilation gap at top of panels; move cage away from direct sun; monitor with thermometer |
| Panels sagging or falling | Mount hardware not rated for panel weight | Use stainless steel bolts with wide washers; check that each panel mount point carries weight evenly |
Rough costs and DIY versus buying or hiring out
The fleece night cover runs under $15 in materials and is the first thing I would try for any new setup. The freestanding absorption panel costs $25 to $50 depending on panel size and batting type. A full set of three MLV-laminated exterior panels for a medium parrot cage runs $80 to $150 in materials, not counting tools you may already own. Pre-made acoustic cage panel kits from bird product suppliers run $120 to $250 for a medium cage and are worth considering if you dislike cutting, the main advantage of DIY is being able to verify every material that goes near your bird. Hiring a pro to do acoustic room treatment around the cage (instead of modifying the cage itself) is worth considering for large aviaries or if you have construction constraints, a basic room acoustic treatment from a contractor runs $500 to $1,500 depending on room size, but that is usually overkill for a single cage in a home setting.
Seasonal care and long-term maintenance
Check all foam seals and panel mounts every three months. Closed-cell foam tape compresses permanently over time and will need replacing every six to twelve months to maintain its sealing function. MLV panels are very durable but inspect the fleece facing for tears, a torn facing exposes the MLV surface, which larger parrots may investigate. Wash fleece covers monthly at minimum. For practical tips on how to keep roaches out of a bird cage, including cleaning, storage, and bait-safe practices, see our guide on pest prevention in bird enclosures. For tips on preventing and removing fabric- or pantry-type moths from cage covers and nesting materials, see how to get rid of moths in bird cage. In summer, increase ventilation gaps and monitor cage temperature more closely, thermal comfort is a higher priority than noise reduction on hot days. In winter, placed near exterior walls or windows, panels actually help retain cage warmth slightly, which can be a benefit for tropical species like finches and canaries as long as ventilation is still maintained.
FAQ
What are the main reasons to soundproof a bird cage?
Reduce stress, improve sleep and recovery, limit communication masking (so birds can hear vocalizations/enrichment), protect neighbours or householders from persistent noise, and reduce neighborhood complaints. Noise reduction should be balanced with welfare: maintain ventilation, visibility, enrichment and ability to monitor health.
Which welfare and safety constraints must I prioritize before any soundproofing work?
Never compromise airflow, temperature or access for cleaning and emergency removal. Avoid toxic materials or finishes (PTFE/Teflon, many uncured paints, some adhesives, lead/galvanized coatings). Ensure cage modifications don’t prevent a bird from escaping in an emergency or trap toes/feathers. Monitor behavior, respiration and droppings during and after changes.
Which materials are safe and effective for bird‑safe soundproofing?
Prioritize non‑toxic, chew‑resistant, low‑offgassing materials: stainless steel hardware and cage surfaces, solid hardwoods or marine‑grade plywood sealed with bird‑safe finishes and fully cured, Mass‑Loaded Vinyl (MLV) as an external barrier if kept out of reach, closed‑cell neoprene or silicone vibration isolators, acoustic mineral wool or polyester acoustic panels kept behind wire or external to cage (inaccessible to beaks). Avoid PTFE/Teflon, raw MDF/particleboard unless sealed and cured thoroughly, lead paint, and exposed foam that birds can chew.
What tools and PPE will I need for DIY projects?
Basic tools: tape measure, pencil, circular saw or jigsaw for wood, utility knife, drill/driver, clamps, rivet gun or stainless steel bolts, metal snips (for MLV), screwdrivers, caulk gun. PPE: NIOSH‑rated respirator for cutting/sealing materials, gloves, eye protection. Work outdoors or in a well‑ventilated area and fully cure finishes before returning parts near birds.
What are simple, quick fixes I can try right away?
1) Use a breathable fabric cover (heavy cotton or canvas) draped over three sides at night to reduce high‑frequency escape and reverberation. 2) Add an external acoustic absorption panel behind the cage (not touching wire) using rockwool or polyester panels encased in fabric and out of beak reach. 3) Place the cage on vibration isolators (neoprene pads) and add soft floor rugs to reduce structure‑borne noise. These reduce perceived noise modestly and are reversible.
How do I make an intermediate retrofit kit for better reduction?
Components: fitted MLV outer skirt to block airborne energy (cut to cover back/three sides), breathable acoustic panels (PET felt or mineral wool in sealed fabric bags) mounted to the outer skirt, neoprene vibration mounts under cage stand, and a simple wood frame to hold panels 1–2 in. from the cage (air gap for absorption). Steps: measure cage, cut MLV to size with access flaps for doors, attach panels to frame outside wire using stainless hardware, install isolators under stand, ensure gaps for airflow and monitoring. Keep all added materials out of beak reach.
Next Article
How to Get Rid of Fruit Flies in Bird Cage, Safe DIY Traps & Prevention
Bird-safe, step-by-step guide to get rid of fruit flies in bird cages: traps, cleaning checklist, prevention & vet/escal