The vanishing bird cage is a classic stage illusion where a small metal cage, often holding a live canary, appears to disappear instantly from a performer's hands. The cage itself is the trick: it's a collapsible spring-loaded prop engineered to compress from a full cage shape into a flat tube roughly 1 to 2 inches thick, thin enough to be whisked up a sleeve or palmed behind the body in a fraction of a second. Studying it in slow motion reveals every mechanical phase of that collapse, and building a replica for study purposes is a genuinely interesting DIY project. But one rule applies throughout: no live birds go inside a collapsible illusion cage, ever. This guide covers the history, the physics, how to film it, and how to build a safe replica for study or display only.
Vanishing Bird Cage Slow Motion: History, Mechanics & Safe DIY

What the vanishing bird cage is and why safety-first study matters
The prop looks like an ordinary small rectangular cage, typically sized to hold a single small bird like a canary. In performance, the magician holds it at arm's length, makes a sharp inward gesture, and the cage is simply gone. From the audience's perspective it vanishes in under a second. From a mechanical and welfare perspective, that same instant is the most dangerous moment imaginable for any animal inside. The cage collapses rapidly, interior volume drops to near zero, spring-loaded hinges snap shut, and any creature inside would face crushing forces, sharp pinch points, and immediate suffocation risk. That's not a theoretical hazard. Stage magic historians and auction catalog descriptions of surviving props document springs, piano-wire hinges, and reset mechanisms that are specifically designed to snap closed with force. Animal welfare guidance from organizations like The Magic Circle explicitly states that animal welfare must not be compromised in performance, and U.S. federal rules under the Animal Welfare Act now extend to birds used in exhibition contexts. Studying the mechanism with slow-motion footage and a bird-free replica is the right approach, both ethically and practically. See vanishing bird cage explained for a concise technical overview of the mechanism and safety considerations.
History and notable performers: Buatier de Kolta, Blackstone, and the stage tradition
The illusion traces back to Buatier de Kolta, the inventive 19th-century French-Belgian conjurer who is credited with creating and popularizing early versions of the vanishing cage, sometimes called the 'flying birdcage.' Contemporary press accounts from the 1900s describe de Kolta's routine in consistent detail: he held a small rectangular cage containing a live canary, made a gesture as though tossing it forward, and the cage disappeared. Those same newspaper reports confirm the core mechanism was already understood at the time, describing a collapsible cage that could be drawn up the performer's sleeve almost instantaneously. Edwin Sachs, in his public-domain manual Sleight of Hand, documents the classical method directly: a specially constructed collapsible metal cage with a cord running up the sleeve, engineered so the performer could close it obliquely and vanish it in one motion. Edwin Sachs' Sleight of Hand, 'The Flying Cage' (public domain description) documents the classical collapsible-cage method, describing a specially constructed collapsible metal cage with a cord running up the sleeve so the performer could close it obliquely and vanish it in one motion Sleight of Hand — 'The Flying Cage' (public domain description).
Harry Blackstone Sr. made the vanishing bird cage one of his signature pieces. He performed it on stage and on television, and it appears repeatedly in his program notes and biographies under names like 'Vanishing Bird Cage' and 'Flight of the Canaries.' Blackstone's version was a theatrical centerpiece rather than a close-up trick, which meant his staging, lighting, and misdirection were all engineered around the single moment of collapse. Commercial prop builders including Klingl, Bartl-Willmann, and Abbott's Magic produced collapsible vanishing cages and transformation trays from the late 19th century onward, and surviving examples in auction catalogs come with measurable dimensions and condition notes that give researchers enough data to reconstruct the kinematics. The Blackstone legacy in particular connects the illusion to American broadcast magic and is worth deeper reading alongside the mechanics overview. For a focused mechanical overview tied to Blackstone's presentation, see the piece 'Blackstone vanishing bird cage: how it works' which connects his staging to the underlying collapse mechanism.
How the mechanism actually works: the physics in plain terms
The cage is built around a collapsible frame, typically thin steel or brass wire formed into a rectangular shape with hinged or pivoting panels. When open, it looks like a normal cage. When triggered, the panels fold inward along pre-stressed hinge lines, the wire bars compress flat against each other, and the entire structure reduces to a narrow flat bundle. The critical dimension reported across encyclopedic descriptions and auction prop notes is that the collapsed cage reaches approximately 1 to 2 inches in thickness, thin enough to vanish behind a forearm or into a coat sleeve. The collapse sequence is driven by a combination of spring tension and cord mechanics: a cord runs from the collapsed cage up the performer's sleeve, so the moment the grip releases and the spring fires, the cage collapses and the cord pulls it out of sight simultaneously. The two actions are mechanically linked, which is why the vanish looks instantaneous even at normal viewing speed.
Patent and trade catalog records from the turn of the 20th century document several mechanical variants, but the underlying physics is the same across all of them: stored elastic potential energy in springs or pre-tensioned wire is released at the moment of performance, converting into kinetic energy that drives the collapse. The speed of that energy release is what makes slow-motion analysis so useful. At standard video frame rates (24 to 30 fps), the collapse happens in fewer than two or three frames, making it effectively invisible. At high frame rates, each mechanical phase becomes distinct and traceable. The physics connects directly to topics like frame kinematics and hinge mechanics that are worth exploring alongside detailed mechanism breakdowns.
Frame-by-frame slow-motion analysis: the four motion phases
When you film a collapsible cage mechanism at high frame rates, the collapse separates into four distinct phases. Recognizing each one tells you exactly what part of the mechanism you're watching.
- Pre-release tension: The cage is held open by the performer's grip. Springs or cord tension are at maximum stored energy. In slow motion this phase appears static, but you can often see slight vibration or micro-flexion in the wire bars if lighting is good. This tells you the spring pre-load and grip geometry.
- Trigger and initial collapse: The performer releases grip pressure or activates a trigger point. The first hinge lines begin to fold inward. This is typically the shortest phase in real time, often under 20 milliseconds. In slow motion at 240 fps or higher you'll see which panel moves first and in which direction, revealing the hinge hierarchy of the design.
- Full collapse sequence: All panels fold flat in sequence. The cage volume drops from roughly full open to near zero. You can measure angular velocity of individual panels here, and identify any point where a panel hesitates or binds, which is where entrapment risk would be highest in any prop that wrongly contained an animal.
- Concealment and cord pull: The collapsed flat bundle is drawn away from the camera's view line, either up the sleeve, behind the arm, or into a loading pocket. In slow motion you can see the cord geometry, the direction of travel, and the speed differential between collapse completion and concealment. This phase confirms how misdirection and body mechanics work together.
Watching each phase individually also helps you identify failure modes in your own replica builds. A panel that stalls in Phase 3, for example, is a hinge friction problem. A bundle that doesn't clear the frame cleanly in Phase 4 is a cord-routing issue. Frame-by-frame review turns troubleshooting from guesswork into a diagnostic process.
Slow-motion filming settings and shot checklist
Getting usable slow-motion footage of a fast mechanical collapse takes some deliberate setup. Here's the configuration I use for this kind of prop analysis.
Recommended camera settings
| Setting | Recommended Value | Why It Matters |
|---|---|---|
| Frame rate | 240 fps minimum; 480–960 fps preferred | Collapse happens in under 50 ms; 240 fps gives ~12 frames across the event, 960 fps gives ~48 |
| Shutter speed | 2x frame rate (e.g., 1/480 at 240 fps) | Limits motion blur per frame so wire edges stay readable |
| Aperture | f/4 to f/5.6 | Keeps depth of field wide enough to track 3D collapse without losing focus on rear panels |
| ISO | As low as possible (100–400) | High-speed shooting needs bright light; keep ISO low to avoid noise that obscures fine wire detail |
| Focal length | 50–85 mm equivalent | Avoids wide-angle distortion that would skew angular measurements |
| Stabilization | Tripod or locked-off mount | Any camera movement during a sub-second event corrupts phase timing analysis |
Lighting setup
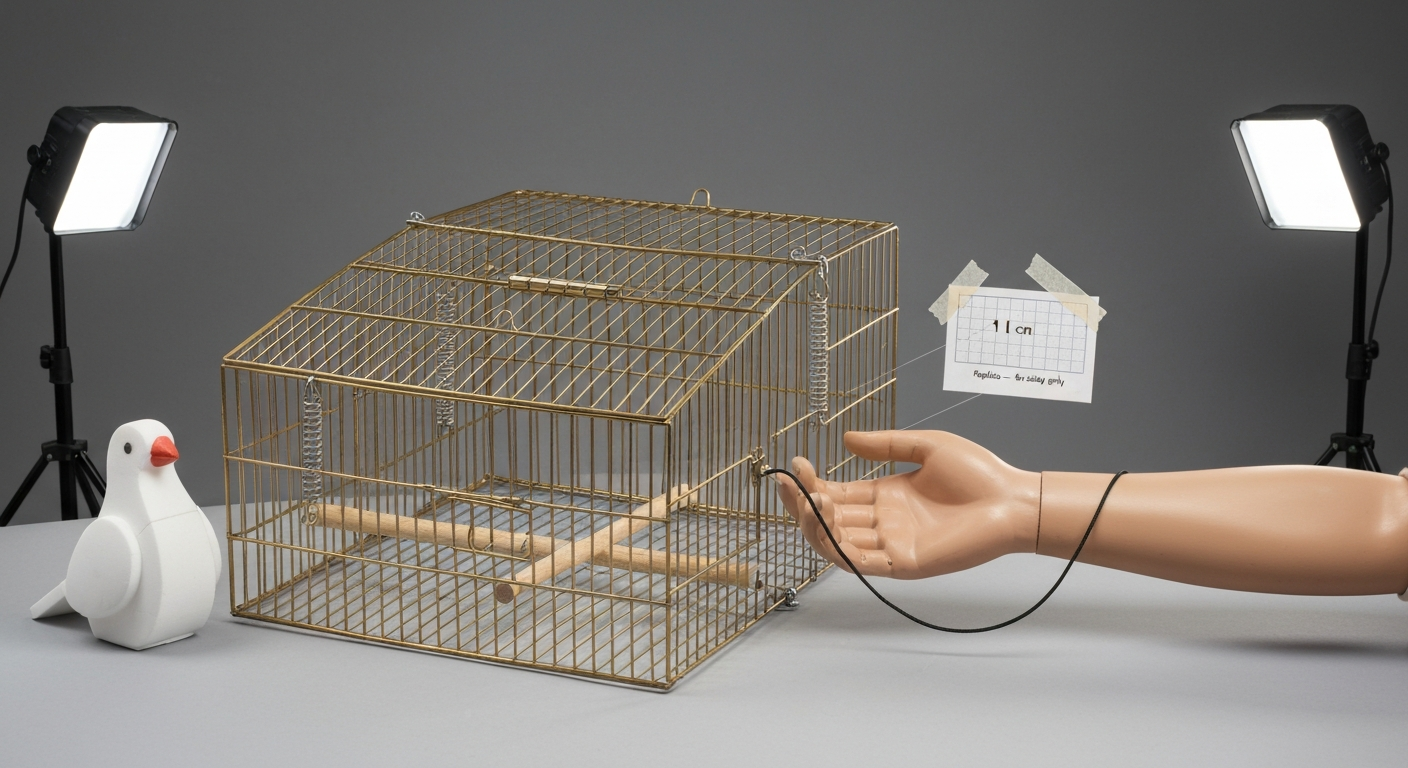
High frame rates eat light fast. For indoor bench testing I use two continuous LED panels at 45-degree angles to the cage, plus a backlight or bright background to create silhouette contrast on the wire bars. Avoid flickering fluorescent or standard LED bulbs without flicker-free mode; at 240 fps they pulse visibly and ruin exposure consistency. A plain white or matte black backdrop works best. If you're outdoors, bright overcast light is ideal because it's even and avoids harsh shadow lines across the bars.
Shot checklist before you press record
- Place reference markers: tape a ruler or scale card directly behind the cage in frame so you can calculate real dimensions from footage
- Mark hinge points with small dots of bright paint or tape so they're trackable frame by frame
- Set a clapper or hand-signal at frame start so you can sync multiple camera angles in post
- Shoot from at least two angles: front-on and 45 degrees from the side, to capture both panel fold direction and depth of collapse
- Run three to five identical release cycles per session so you can compare consistency and identify variability
- Log ambient temperature: spring tension varies with temperature, and this matters if you're comparing results across sessions
- Confirm no live animals are present in or near the testing area before any release
Study protocol without live birds: dummies, scale markers, and repeatable tests
The single most important rule in any study or test session is that no live bird goes inside a collapsible illusion cage under any circumstances. The mechanical forces involved, rapid spring closure, pinch points at hinge lines, and near-zero interior volume at full collapse, create multiple simultaneous hazards: crush injury, entrapment, and suffocation. Instead, use a bird dummy scaled to the species you're referencing. For a canary-scale study I use a foam craft bird or a 30-gram weighted soft fabric form roughly 4 cm by 8 cm. This gives you realistic interior volume feedback during the collapse without any welfare risk.
Before each test run, place your dummy inside the open cage and confirm it is positioned at cage center, not near any hinge line. Mark the dummy with a high-contrast dot so its position is trackable in footage. Trigger the collapse and review the footage before handling the prop again. Note whether the dummy was contacted by any collapsing panel, and at what phase. If it was, that's a design problem to fix before your replica is considered display-safe. Run a minimum of five cycles per configuration change, log each result, and only move to the next variable after you have consistent results. This iterative method gives you real mechanical data without any animal involvement.
For scale markers, I use a 1 cm grid printed on cardstock and taped to the inside rear panel of the cage before filming. This lets you measure interior volume at each phase of the collapse directly from the footage, which is useful if you're documenting how quickly clearance drops below a safe threshold for any given dummy size.
Hands-on replica and illusion cage plans: materials and build notes
Building a study replica of a vanishing cage is a satisfying metalwork project. The goal here is a prop that demonstrates the collapse mechanism clearly, holds up to repeated test cycles, and can be displayed safely. This is not a functional bird cage, and it should never be used as one.
Materials list
- 16-gauge galvanized or stainless steel wire for main bars (avoid zinc-coated mild steel if the prop will be handled frequently indoors; stainless is cleanest)
- Thin brass or aluminum strip stock (1/4 inch wide, 1/16 inch thick) for hinge plates
- Small stainless piano-wire hinges or custom-bent hinge loops from 20-gauge wire
- Compression springs rated to collapse resistance appropriate for your frame size (test range: 0.5 to 2 lb trigger force for a canary-scale replica)
- 0.8 mm braided nylon cord or thin aircraft cable for the concealment cord routing
- Fine-grit sandpaper and metal file for deburring all cut ends
- Epoxy or silver solder for permanent joints (silver solder preferred for strength at hinge attachment points)
- Bright paint or nail polish in two contrasting colors for marking hinge points and reference dots
- Foam or fabric dummy (30 g, approx. 4 cm x 8 cm) for interior clearance testing
- Printed 1 cm grid cards for interior volume measurement
Build steps
- Cut and form the main frame: bend four rectangular side panels from 16-gauge wire, sized to approximately 10 cm x 8 cm per panel for a canary-scale replica. File all cut ends smooth with a metal file until no sharp points remain.
- Build the hinge system: attach brass or aluminum hinge plates at the four vertical corners of the cage using silver solder. Each hinge must allow the panel to fold inward to flat (180 degrees of travel) without binding. Test each hinge for smooth travel before proceeding.
- Install compression springs: position one spring at each top corner, oriented to push panels inward when released. Calibrate spring force so the collapse is decisive but not violent. If panels snap hard enough to make a loud clack, reduce spring rate.
- Route the concealment cord: thread nylon cord through a guide loop at the top center of the collapsed bundle. The cord should pull the flat bundle cleanly in one direction when the collapse completes. Test cord routing with the cage open: it should not catch on any bar or hinge during the collapse sequence.
- Deburr and smooth all surfaces: run your fingertip along every wire, hinge plate edge, and corner. Any rough spot gets filed again. This is non-negotiable for a display prop that people may handle.
- Mark all hinge points with bright paint and add a reference dot to the interior rear panel for filming.
- Run five dummy-in-cage test collapses and review footage before declaring the build complete.
- Add a quick-release safety catch: install a simple pin or clip latch that holds the cage open and requires a deliberate two-step action to release. This prevents accidental triggering during handling or display.
Ventilation and display considerations
Because this is a study and display prop rather than a functional bird cage, standard ventilation requirements for pet cages don't apply in the same way. However, if the prop is displayed in a case or enclosed space, keep at least 30 percent of the surface area as open wire rather than solid panel. This prevents heat buildup, keeps the mechanism visible for educational display, and maintains structural lightness. If you're displaying the prop near other bird cages in your setup, make sure it's clearly labeled as a non-functional prop and stored where curious birds cannot reach or interact with the spring mechanism.
Safe construction practices and what to never do with this prop
Every decision in this build comes back to one principle: this prop is for mechanical study and display only. No live bird should ever be placed inside it, and no demonstration should imply otherwise. Here's why that line is absolute, and what safe practice looks like around it.
Material hazards to eliminate completely
If your workshop or filming area is also used around live birds, remove every source of PTFE (polytetrafluoroethylene) before work begins. Overheated nonstick coatings release fumes that cause fatal respiratory failure in birds extremely rapidly, and the same applies to self-cleaning oven cycles and certain heat-treated wire coatings. Veterinary case literature documents sudden death in birds from PTFE toxicosis from sources as innocuous as a nonstick pan in an adjacent room. Stainless steel and bare brass are the safest wire and hardware choices, and all soldering should be done away from any area where birds live.
Mechanical hazards specific to collapsible cage designs
- Sharp wire cut ends: file every cut end to a rounded finish. This is the most common injury source in wire cage builds of any kind.
- Pinch-point hinges: test every hinge with a folded piece of paper before any dummy testing. If paper shreds, the hinge will injure anything softer.
- Spring-loaded snap closure: calibrate springs so collapse is controlled, not violent. Overpowered springs can cause structural failure on the prop and create projectile hazards.
- Cord entanglement: route the concealment cord so it cannot loop around fingers or wrists during testing. Use a dedicated trigger handle rather than pulling bare cord.
- Rapid interior volume reduction: even with a dummy, verify that the dummy clears all panels during collapse. If it contacts a panel, the hinge geometry needs adjustment before further testing.
Legal and ethical framework for exhibition use
If you ever move from study and display into any form of public exhibition or performance involving live birds (in a completely separate, non-collapsible cage context), the regulatory picture matters. See the bibliography 'To Cage a Wild Bird: How Many (books and resources)' for further reading on legal, historical, and welfare sources (internal reference 85bf3626-733c-405e-a93f-b2293f1df7b0). USDA-APHIS published final rules establishing welfare standards for birds under the Animal Welfare Act, and depending on species, exhibition context, and APHIS criteria, a performer or exhibitor may need licensing and inspection compliance. The Magic Circle in London requires formal approval and evidence of appropriate animal handling training before any live animal can appear in a competition or event. The Association of Avian Veterinarians recommends disease screening and a documented program of veterinary care for any bird used in a professional context. None of these requirements apply to a study replica with no live animal involvement, but they're worth knowing if your work ever intersects with public performance.
Stress indicators to know if you work with live birds elsewhere
Even if your replica work never involves live birds, if you keep pet birds in the same space where filming or construction happens, monitor them for stress indicators during noisy or high-activity sessions. Veterinary welfare literature identifies panting or open-mouth breathing, fluffed feathers, drooping wings, decreased activity, abnormal droppings, and reduced preening as primary behavioral and clinical signs of acute stress in captive birds. Corticosterone levels in feathers or droppings are the established physiological biomarker for chronic stress in avian welfare assessments. See the open‑access study 'Assessment of immunoassays for glucocorticoid metabolites in African Grey parrot droppings (open‑access study)' for validation of droppings as a matrix for measuring avian glucocorticoid metabolites. If your bird shows any of these signs during a session, stop the session, return the bird to a quiet space, and assess the environment before continuing.
Displaying your replica and integrating it with your bird cage setup
A finished vanishing cage replica is actually a great display piece in a bird-room or aviary context, as long as it's clearly separated from any functional housing. I display mine on a shelf bracket mounted at eye level, in the open (not in a glass case) so the mechanism is visible. A small printed card explaining the history, Buatier de Kolta's original routine, and the mechanical principle adds real educational value for anyone visiting the space. Keep the prop out of direct sunlight, which weakens spring tension and can discolor wire finishes over time. In humid climates, a light wipe-down with a dry cloth every few weeks prevents surface corrosion on galvanized wire, and a very light application of silicone-free machine oil on hinge points every few months keeps the collapse mechanism smooth.
Seasonally, if your bird room experiences significant temperature swings, check spring calibration at the start of each season. Spring steel loses and gains tension with temperature, so a collapse that felt correctly calibrated in summer may be either sluggish or overly sharp in winter. This is a quick check: one dummy-in-cage test collapse, review the footage, adjust spring rate if needed. It takes ten minutes and keeps your testing protocol consistent year-round.
Troubleshooting common build and filming problems
| Problem | Likely Cause | Fix |
|---|---|---|
| Cage stalls mid-collapse in footage | Hinge binding or misaligned panel | Test each hinge independently with paper test; file hinge plates if they bind |
| Collapsed bundle doesn't clear the frame | Cord routing catches on a bar | Re-route cord through a smooth guide loop; test cord path with cage open before filming |
| Motion blur makes wire bars unreadable | Shutter speed too slow for frame rate | Set shutter to at least 2x frame rate; add more light rather than raising ISO |
| Spring snaps violently with loud clack | Spring rate too high | Step down to next lower spring rate; re-test with dummy before filming |
| Hinge plates flex rather than pivot | Solder joint too thin or incomplete | Re-solder with full coverage; use silver solder rather than epoxy at high-stress hinge points |
| Replica won't hold open reliably for setup | Quick-release latch not engaging fully | Adjust latch geometry so it seats with a positive click; test 10 open cycles before filming session |
| Footage shows inconsistent collapse timing across runs | Variable hand-release pressure | Use a consistent mechanical trigger rather than hand release; or clamp cage in a fixed jig for release |
FAQ
What primary historical research questions should I ask to accurately describe the vanishing bird cage origin and evolution (including Blackstone and de Kolta)?
Identify earliest documented appearances (dates, venues, performers); compare de Kolta’s and Blackstone’s routines and staging notes; locate contemporary press reviews, magician manuals, and program notes; find surviving props, auction catalogs, and museum records to confirm dimensions/mechanisms; and document how public perception and animal‑use practices changed over time. Source categories: 19th–20th century newspapers, performer biographies, magic manuals, museum/auction catalogs, and magic historian articles.
Which mechanical and engineering research questions are needed to produce a frame‑by‑frame physics/mechanism explanation using slow‑motion analysis?
Determine the device’s kinematics: collapse sequence, hinge/spring locations, cord routing, and final compact geometry; measure dimensions and stroke distances from surviving props or technical drawings; quantify closure/translation speeds and accelerations to model forces; identify potential pinch points, edge radii, and ventilation pathways; and map optical cues that create the illusion (angle, sleeve concealment, timing). Source categories: patents/trade literature, surviving props & auction specs, magician how‑to manuals (public domain), mechanical drawings, and filmed reconstructions for motion analysis.
What filming and slow‑motion data should I collect to analyze the mechanism safely (no live birds)?
High‑speed video at 500–2000 fps (adjust by mechanism speed) with a minimum of 240 fps for slower manual actions; multi‑angle coverage: front, side (orthogonal), and overhead; calibrated scale reference (rulers/grids) and frame‑stamp timecode; controlled, flicker‑free lighting (continuous LED or HMI) and neutral background for edge detection; audio or inertial sensors on moving parts to correlate motion with frames. Capture multiple cycles at various performer speeds. Source categories: cinematography guides for high‑speed capture, motion analysis papers, and prior filmed reconstructions.
What specific legal and regulatory sources must I consult before discussing or attempting any live‑bird use historically associated with the trick?
National and local animal exhibition laws and licensing (e.g., USDA‑APHIS/AWA in the U.S. and equivalent agencies abroad); guidance from recognised magician societies about animals in performance (The Magic Circle, Society of American Magicians); veterinary and animal‑welfare association position statements (AAV); and venue or event policies on live animals. Source categories: government regulations (Federal Register, agency guidance), professional society rules, and legal analyses (CRS reports, case law summaries).
Which avian‑welfare and veterinary science questions are essential to keep the project welfare‑first?
Which species are referenced historically and what are species‑specific stress tolerances; validated behavioural and physiological stress indicators to monitor; disease‑screening and quarantine requirements; appropriate enclosure dimensions, ventilation, and enrichment standards; and veterinary oversight requirements for exhibitions. Source categories: peer‑reviewed avian welfare literature, AAV guidance, veterinary textbooks on avian medicine, and regulatory guidance on animal care standards.
What ethical questions and source categories should inform whether to include live birds at all?
Ask whether the educational aims can be achieved without live animals; evaluate the risk/benefit for any bird involved; require documented training, veterinary care, and licensing if live animals are used; and ensure informed consent/oversight from relevant authorities. Source categories: ethics statements from welfare organisations, magic society animal‑use guidance, veterinary ethics literature, and institutional animal‑care policies.
Bird Cage Problem Physics: Diagnose and Fix Wobble, Latch, Safety
Step-by-step physics fixes for wobble, latch failure, safety risks, vibration, airflow, and seasonal placement in bird c