Move the new cage into the same room as the old one, prep and clean it fully, then transfer your bird using a calm, low-chase method with a towel or sheet to block escape routes. That's the core of it. Everything else is about reducing stress before, during, and after so your bird settles in quickly and you're not chasing a panicked cockatiel around your living room.
How to Move a Bird to a New Cage Safely Today

Maya Bennett
21 Jun 2026
Understand your bird's temperament before anything else
Before you touch a single cage latch, take a minute to be honest about your bird's personality. A hand-tamed budgie that steps up reliably is a totally different transfer situation than an untamed conure that screams and bites when you get within arm's reach. Knowing where your bird sits on that spectrum changes which method you'll use and how much prep time you need.
Stress during a cage move is real and it hits small birds hard. Signs that your bird is already stressed include panting, clinging to the cage wall, flying frantically, fluffing up, or going completely silent and frozen. If you see any of that before the move, slow down. Trying to force the transfer when a bird is already in panic mode makes everything worse and raises the escape risk significantly.
Tamer birds that step up on command will let you use a hand-transfer method. Birds that aren't hand-tamed need a hands-off approach where you guide them with the cage setup itself rather than trying to grab them. Biting during handling is almost always a fear response, not true aggression, so don't take it personally and don't rush.
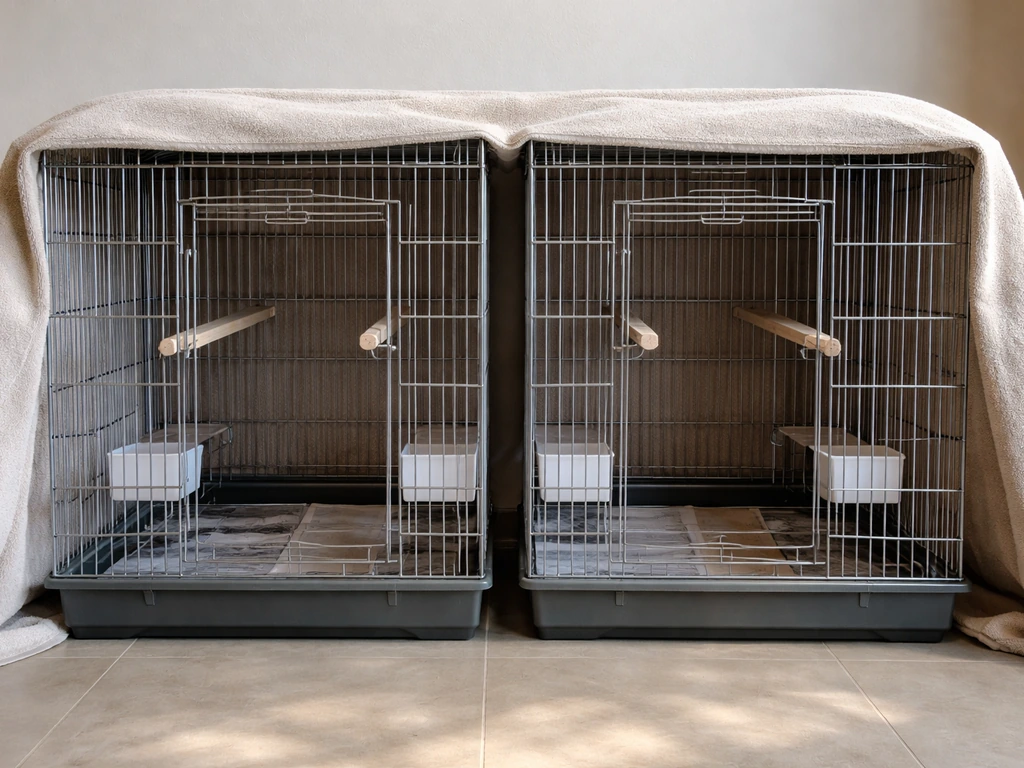
Prep the new cage properly before the bird ever sees it
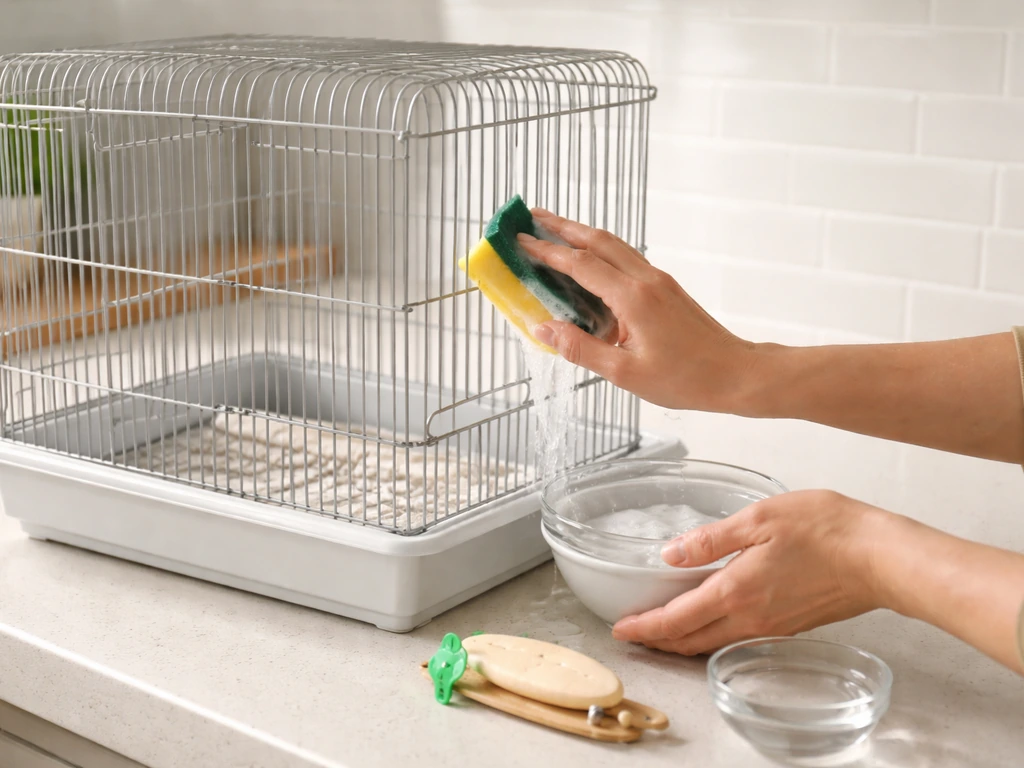
A brand-new cage still needs cleaning before use. If you want to add a cuttlebone for calcium and beak wear, make sure it is secured safely in the cage with easy access for your bird how to put cuttlebone in a bird cage. Manufacturing residues, dust, and coating smells can all be irritating to birds. For a used cage, the stakes are higher because you're dealing with potential bacterial growth and dried droppings, which can contaminate food and water surfaces.
Cleaning and disinfecting safely
Scrub the entire cage with hot water and a mild, bird-safe soap. For disinfecting, hydrogen peroxide works well: spray it on, let it sit for 5 to 10 minutes, then rinse thoroughly with fresh water. The rinse step is non-negotiable. Chemical residue on perches, bars, and feeding utensils is a real hazard, and VCA specifically calls out that the cage must be fully rinsed and dried before your bird is anywhere near it.
Avoid bleach if you can. If you do use it, it must be diluted and followed by an extremely thorough rinse of every surface. Straight bleach and most chlorine-based cleaners pose a respiratory risk. The safest move is to stick with hot water, mild soap, and hydrogen peroxide, then let the cage air dry completely.
Check spacing, door size, and perch setup
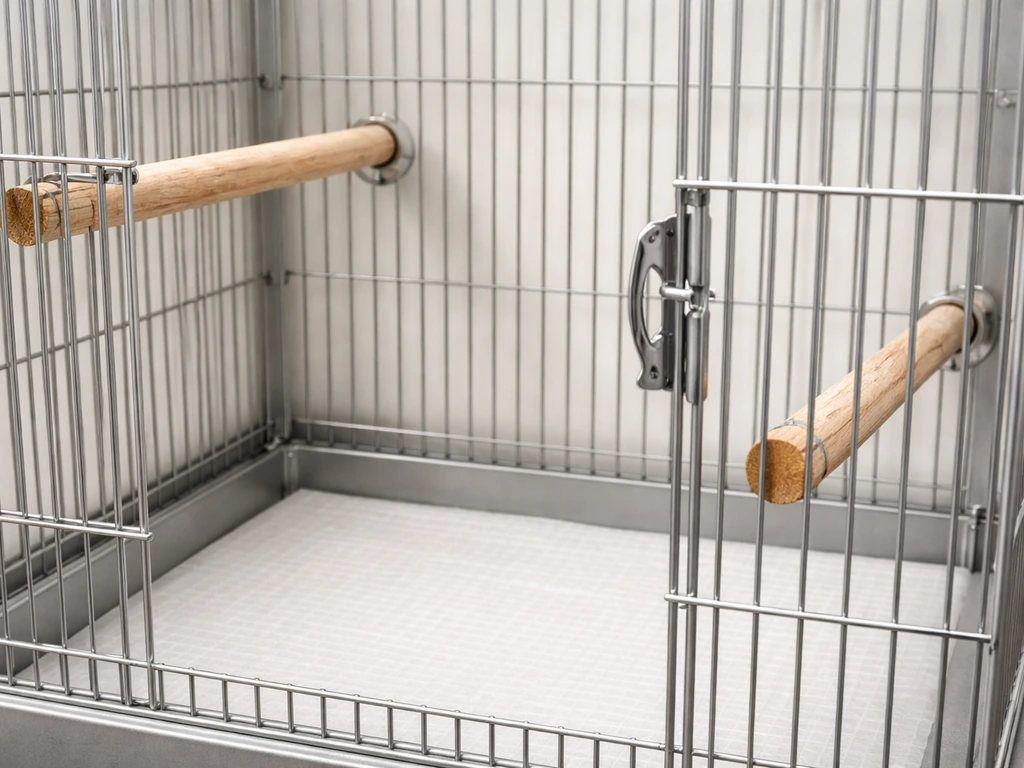
Before transferring your bird, confirm the bar spacing is appropriate for your species. Cockatiels, conures, and lovebirds generally do well with 5/8 to 3/4 inch bar spacing. Too wide and a bird can get its head stuck or squeeze through; too narrow and larger birds can trap toes or beaks. Check the door opening too: it needs to be large enough for your bird to enter and exit without being forced or scraped.
Set up the perches before the transfer. Don't rely only on the included dowel rods. Birds spend essentially all of their time on their feet, so perch variety matters for foot health. Add at least one natural wood perch and one rope or textured perch if you have them. Position perches so the bird can reach food and water easily without climbing over them. You can also position the bird bath so it is easy to reach and won’t get tipped over during normal movement.
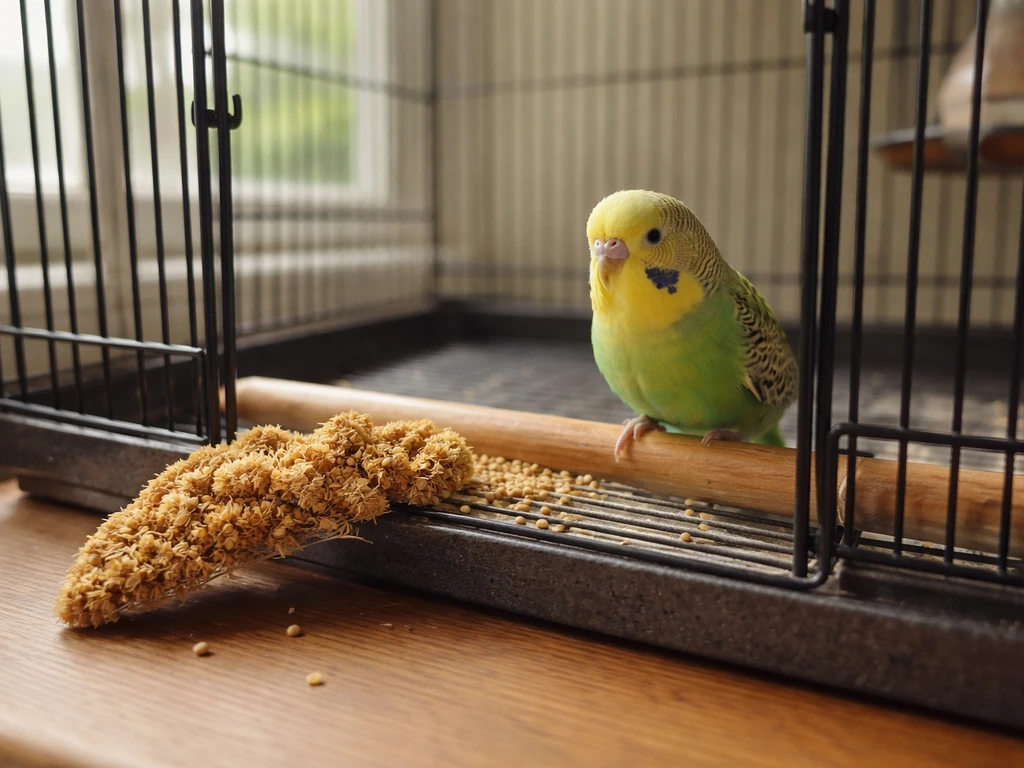
Move some familiar items into the new cage: the bird's current food dish if it fits, a favorite toy, and the same type of liner or tray paper. Familiar smells and objects make the new cage feel less foreign. This is one of the simplest stress-reduction tricks and it costs nothing. If you plan to add spray millet, hang it only after the cage is set up and fully safe for your bird how to hang spray millet in bird cage.
Get the location and routine right before the move
Where you put the new cage matters almost as much as how you do the transfer. Place it in a room your bird already knows, away from direct sunlight (especially during the hottest part of the day, when overheating becomes a real risk), drafts, and kitchens. Keep it against a wall or in a corner if possible. Birds feel more secure when they're not exposed on all sides.
Ideally, set up the new cage in the same spot the old cage occupied, or at least in the same room for a few days before the transfer. This lets your bird observe it and get used to it without any pressure. If that's not practical and you need to do this today, at minimum put both cages side by side in the same room for an hour or two before you begin the transfer.
Try to do the transfer during a calm, quiet part of the day. Avoid times when the house is noisy, when kids are running around, or when other pets are active nearby. Morning tends to work well because birds are alert but haven't yet hit their afternoon rest period.
How to actually move the bird: step-by-step transfer methods
Choose your method based on your bird's temperament. If you are just getting started with a cage transfer, focus on safe preparation and a low-stress approach so your bird accepts the move safe cage transfer. Both methods below are designed to minimize the time your bird is exposed, cut escape risk, and avoid frantic chasing.
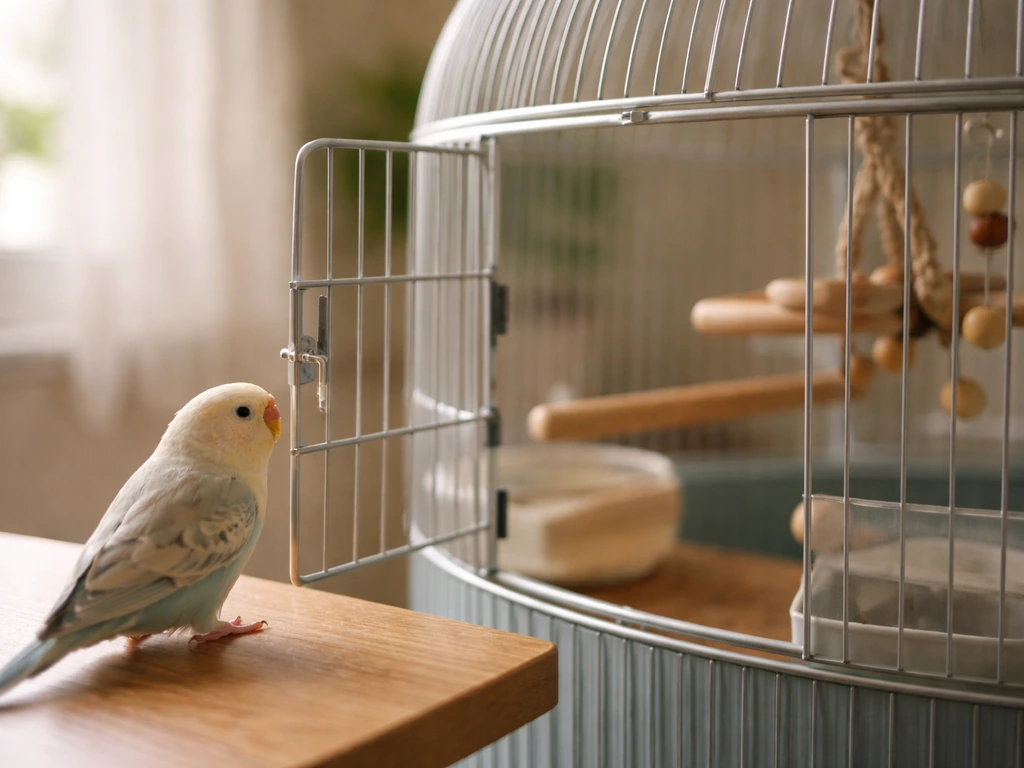
Method 1: Door-to-door transfer (best for hand-tamed birds)
- Place both cages side by side with the doors aligned as closely as possible.
- Drape a large towel or sheet over the back and sides of both cages together, leaving only the door area open. This creates a covered tunnel effect and blocks the bird's view of the wider room, which dramatically reduces the urge to bolt.
- Open both doors simultaneously.
- Step back and give your bird a minute to investigate the new cage on its own. Many birds will walk or hop through on their own once they see familiar items inside.
- If your bird doesn't move in a minute or two, gently encourage it with a finger or perch, or lure it with a small piece of millet held just inside the new cage door.
- Once inside, quietly close the new cage door and remove the towel slowly.
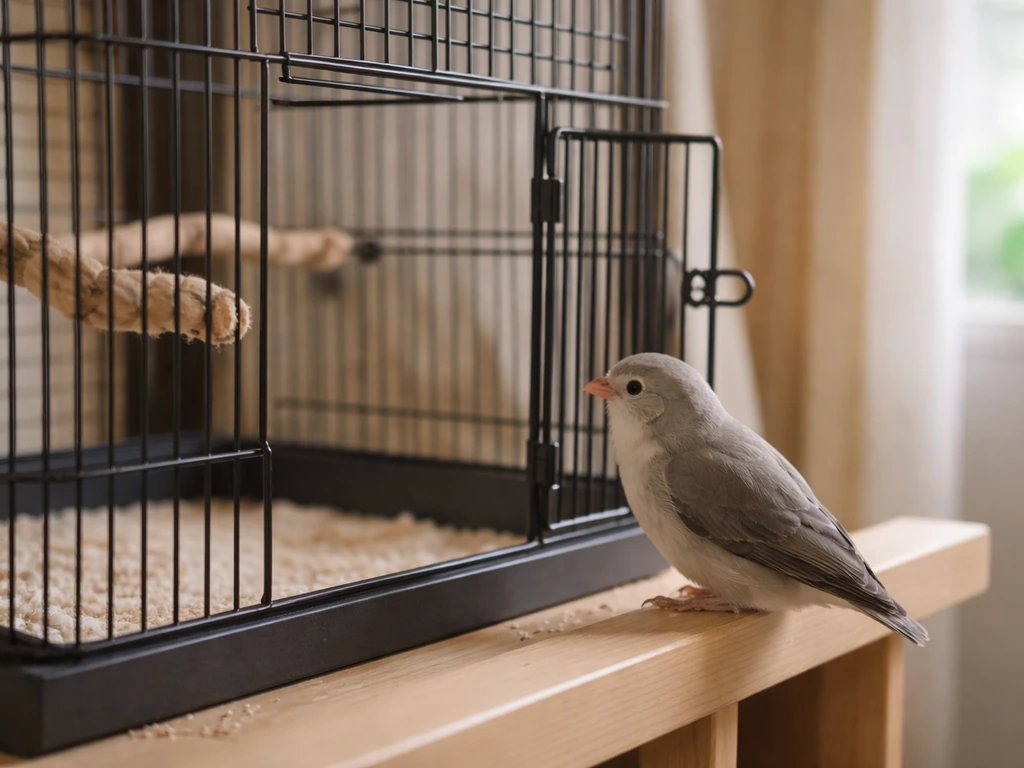
Method 2: Hands-off towel transfer (best for untamed or skittish birds)
- Cover the old cage almost entirely with a large towel or sheet, leaving the door open.
- Cover the new cage the same way, with its door open and aligned with the old cage door.
- Gently guide the bird toward the door opening using a second towel or flat board on the opposite side of the cage. The goal is to herd, not grab.
- Let the bird move through to the new cage on its own. Avoid reaching in unless absolutely necessary.
- Once in, close the door and gradually lift the covering so the bird can adjust to the environment slowly rather than all at once.
For very skittish birds or larger parrots, some owners move the bird in a small carrier first and then do a carrier-to-cage transfer using the same towel-covering method. When doing a carrier-to-cage transfer, covering the carrier and cage with a large towel or sheet is an emergency or shelter-transfer approach used to calm the bird and help block flight during the move blank" rel="noopener noreferrer">towel-covering method. The key principle is the same: reduce open-air exposure, minimize chasing, and let the bird move itself when possible. If you need a clear cage-to-cage plan, follow the guide for how to put a bird feeder in cage step by step transfer methods.
If your bird won't go into the new cage
This is one of the most common snags and it's almost always about the bird not yet trusting the new space. Don't force it. Forcing a scared bird through a cage door spikes stress and can cause injury.
- Put the bird's absolute favorite food (spray millet works well for small birds) just inside the door of the new cage and back away completely. Give it 10 to 15 minutes without anyone hovering nearby.
- Try reducing light in the room slightly. Lower light levels can calm a bird enough to explore.
- If the bird is sitting on top of the old cage, place the new cage directly below or beside it so entering the new cage feels like a natural next step rather than a leap into the unknown.
- Check for anything alarming near the new cage: mirrors, reflective surfaces, objects in the room the bird hasn't seen before. Remove them.
- If the bird had a specific toy, perch, or dish in its old cage that you haven't moved yet, move it now. Familiar smells matter.
- Leave the new cage set up overnight and try again in the morning. Some birds need to observe it for hours before they'll enter voluntarily.
Patience genuinely works here. Multiple owners dealing with untamed budgies and cockatiels report that birds which refused to move or enter for hours eventually settled and began eating and drinking normally by the next morning once the pressure was removed.
After the move: what to watch for in the first 24 to 72 hours
The first three days are the most critical settling window. Your bird may be quieter than normal, eat less, and move around less. A certain amount of this is normal adjustment. The goal is to tell normal adjustment apart from a real health problem.
Normal settling behavior
- Quieter than usual or reduced vocalization for the first 12 to 24 hours
- Staying on one perch and not exploring immediately
- Eating and drinking less on day one, but returning to normal by day two
- Mild fluffing when resting (normal if the bird is also alert and responsive)
Your first 72-hour checklist
- Confirm food and water are topped up and accessible from the perch positions in the new cage.
- Check droppings at least twice a day. Loose or very watery droppings that persist beyond 24 hours are worth noting.
- Keep the environment calm: no new pets, no loud music, no repositioning the cage again.
- Avoid introducing new toys, new food types, or new perches in the first few days. Stick to familiar items until the bird is eating and behaving normally.
- Observe from a distance. Hovering around the cage adds stress, not comfort.
- If you need to hang spray millet or add a cuttlebone to encourage eating, do it quietly without making a production of it.
Safety checks and when to call an avian vet
Birds are prey animals and they hide illness well. By the time symptoms are obvious, a bird can already be in serious trouble. This is especially true for small birds like budgies and finches, which have a very low margin before a health issue becomes an emergency.
Contact an avian vet promptly if you see any of the following, especially in combination:
- Open-mouth breathing or labored breathing at rest
- Tail bobbing up and down with each breath (a clear respiratory red flag)
- Complete refusal to eat or drink for more than 24 hours
- The bird sitting low on the cage floor or on the bottom of the cage rather than on perches
- Extreme lethargy: not responding to sound or movement, eyes half-closed when the bird should be awake
- Fluffed feathers combined with any of the above (not just fluffing alone)
- Visible injury from the transfer: bleeding, a wing held at an odd angle, or limping
Anorexia and lethargy together are flagged by veterinary sources as requiring immediate attention, not a wait-and-see response. If your bird hasn't eaten by the end of day two and is also lethargic or showing any breathing irregularity, call ahead to an avian vet rather than waiting for the next available appointment. If you notice reduced or no eating along with fast breathing or tail bobbing, the RVC exotics factsheet advises urgent attention.
Do a final cage safety check at the 24-hour mark: confirm no sharp edges from the assembly, check that the door latch is secure (birds figure out weak latches faster than you expect), verify that perches haven't shifted and are still stable, and make sure water hasn't been contaminated by droppings landing in the dish. These small checks take two minutes and catch problems before they become health issues.
| Sign | Normal adjustment or concern? | Action |
|---|---|---|
| Quiet and not exploring on day 1 | Normal | Give space, check again in 12 hours |
| Eating less on day 1 | Normal | Monitor; should improve by day 2 |
| Not eating or drinking by end of day 2 | Concern | Remove extra stress, offer favorites; if no improvement, call vet |
| Open-mouth breathing | Emergency | Call avian vet immediately |
| Tail bobbing with each breath | Emergency | Call avian vet immediately |
| Sitting on cage floor, lethargic | Emergency | Call avian vet immediately |
| Mild fluffing while resting | Normal | Watch for other symptoms |
| Fluffing combined with lethargy or no eating | Concern to Emergency | Contact vet promptly |
FAQ
How long should I leave my bird in the new cage before I can stop monitoring closely?
Plan on close supervision for at least the first 72 hours. During the first 24 hours, do your safety check and confirm normal eating and drinking. By day 3, many birds have settled into routine, but if your bird is still hiding most of the time, not perching, or showing breathing changes, extend monitoring and contact an avian vet.
What should I do if my bird won’t enter the new cage after the towel-covered transfer attempt?
Stop the chase and pause with both cages in the same room, then give a calm settling window. You can leave the new cage door open, place familiar food and the favorite perch directionally consistent with the old cage, and try again later. Forcing entry increases escape risk and can cause injuries, especially with skittish or fearful birds.
Is it okay to use the old cage accessories and line, or should everything be replaced?
You can reuse familiar items, but only if they’re fully clean and safe. For the liner or tray paper, replacing it is usually best, then adding the same type your bird is used to (paper style, not just the smell). If the old dish or toys had heavy droppings contamination, disinfect and rinse thoroughly before reintroducing.
Should I keep both cages in the room side by side the entire day, or only briefly beforehand?
Use the side-by-side step as a warm-up, typically one to two hours before the transfer. After the transfer, keep the setup stable for the first few days. If your bird is refusing the new cage, you can keep the old cage nearby temporarily, but avoid moving cages repeatedly, since movement itself becomes a stress trigger.
What are signs that my bird is stressed from the move versus sick?
Stress often looks like temporary quietness, brief reduced appetite, or less movement while still maintaining normal breathing. Sick signs are more concerning, especially a clear lack of eating by the end of day two, lethargy that continues to worsen, or any breathing irregularity. If you see a combination of anorexia and lethargy, contact an avian vet promptly rather than waiting.
Can I move the new cage to a different room after the bird has adjusted?
Yes, but do it gradually. Avoid changing rooms immediately after the first transfer, because the bird is still learning safety cues. If you must relocate later, move the cage a short distance each day or keep the bird in the same room while only adjusting the cage position relative to the bird’s routine.
How do I choose the right perch setup if I can’t add multiple perches right away?
At minimum, ensure one stable perch is comfortable and the bird can reach food and water without having to climb over obstacles. If you can only use the included dowel rods, focus on correct spacing and stability, then add a natural wood and a textured option later once the bird is settled. Always confirm the perch height does not force the bird to jump a long distance to reach key resources.
What should I do about spray millet or treats during the transition period?
Hang millet only after the cage is set up and fully safe, and keep it available in a predictable spot so your bird can find it without exploring the cage under stress. Use treats to support normal eating, not to coax repeated frantic movement, and remove or replace them if they become soiled.
Is hydrogen peroxide safe if I clean the cage right before the transfer?
It can be, but only if the cage is fully rinsed and allowed to air dry completely before your bird approaches. Don’t rely on just wiping, because residue can linger on bars, perches, and utensils. If the cage still smells strongly or feels damp, wait longer and dry thoroughly.
What if my bird escapes during the transfer, how can I prevent it from happening again?
Prepare for escape risk by reducing open-air chasing. Use the towel or sheet method to block escape routes, keep doors and windows closed, and reduce other pets and distractions. If a bird flies during the process, stop chasing and focus on calm containment (darken rooms if needed, create a clear re-entry path) before attempting another transfer.
How do I verify cage bar spacing and door size if I’m between sizes or unsure of my bird’s measurements?
Use the bird’s current position as the guide, check that the head cannot slip between bars, and ensure toes cannot be trapped. For the door, do a dry fit test by sliding the bird carrier or guiding setup into the opening without forcing. If you’re unsure, choose tighter spacing and a door that opens fully to reduce scraping and pressure during entry.
Next Article
How to Put a Bird in a Cage Safely Step by Step
Step-by-step guide to put a bird in a cage safely, reduce panic, prevent escape, and tailor tips by species