Hanging a bird cage safely comes down to three things: picking the right mounting method for your space, using hardware that is genuinely rated for the load, and positioning the cage where your bird will actually thrive. Get all three right and you will never lie awake worrying about a midnight crash. This guide walks you through both ceiling hanging and wall mounting, from the first stud-finder pass to the final wobble check.
How to Hang a Bird Cage: Ceiling and Wall Setup

Maya Bennett
14 Apr 2026
Choosing the right hanging or mounting method
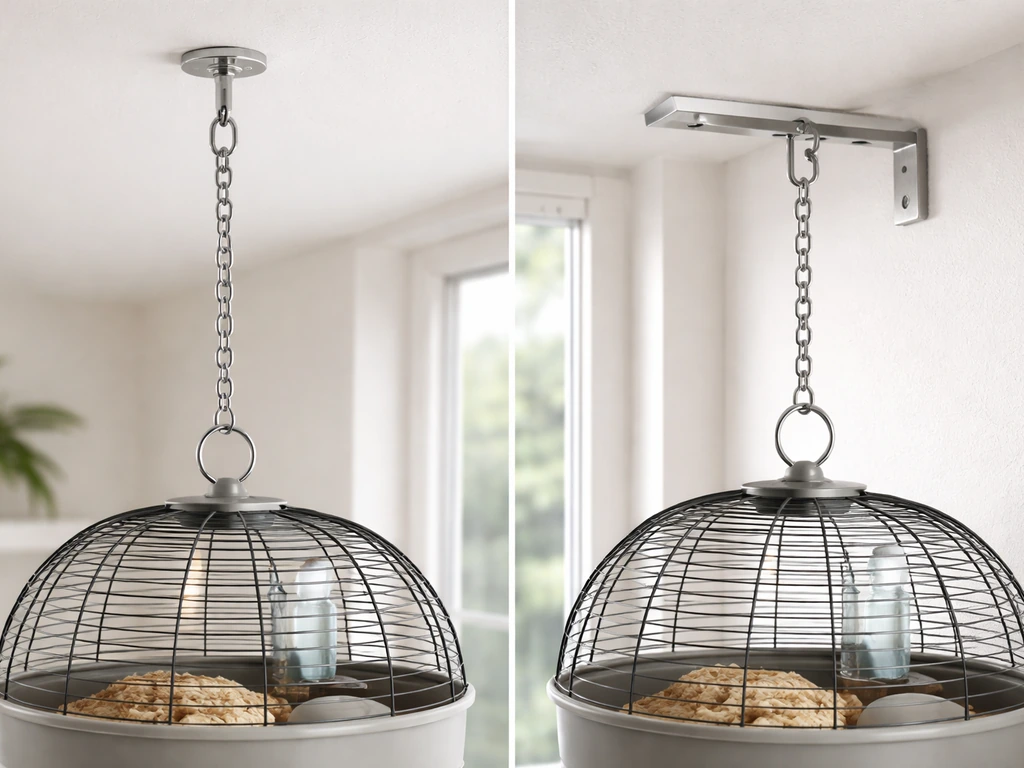
The first decision is ceiling versus wall, and it is mostly driven by your cage design and your room layout. Cages that ship with a built-in ring on the dome are designed to hang from above. Cages on stands, or flat-backed cages, are better candidates for a wall-mounted bracket or rail system. A few quick questions will tell you which path to take:
- Does the cage have a manufacturer-provided hanging ring or chain attachment point? If yes, ceiling hanging is the intended method.
- Is the cage taller than it is wide, with a flat back panel? A wall bracket will keep it more stable and use less floor space.
- Do you have accessible ceiling joists or a solid beam overhead? If your ceiling is all drywall with no joist nearby, wall mounting is far easier and safer.
- How heavy is the cage fully loaded with water dishes, perches, and accessories? Weigh it, then choose hardware rated well above that number.
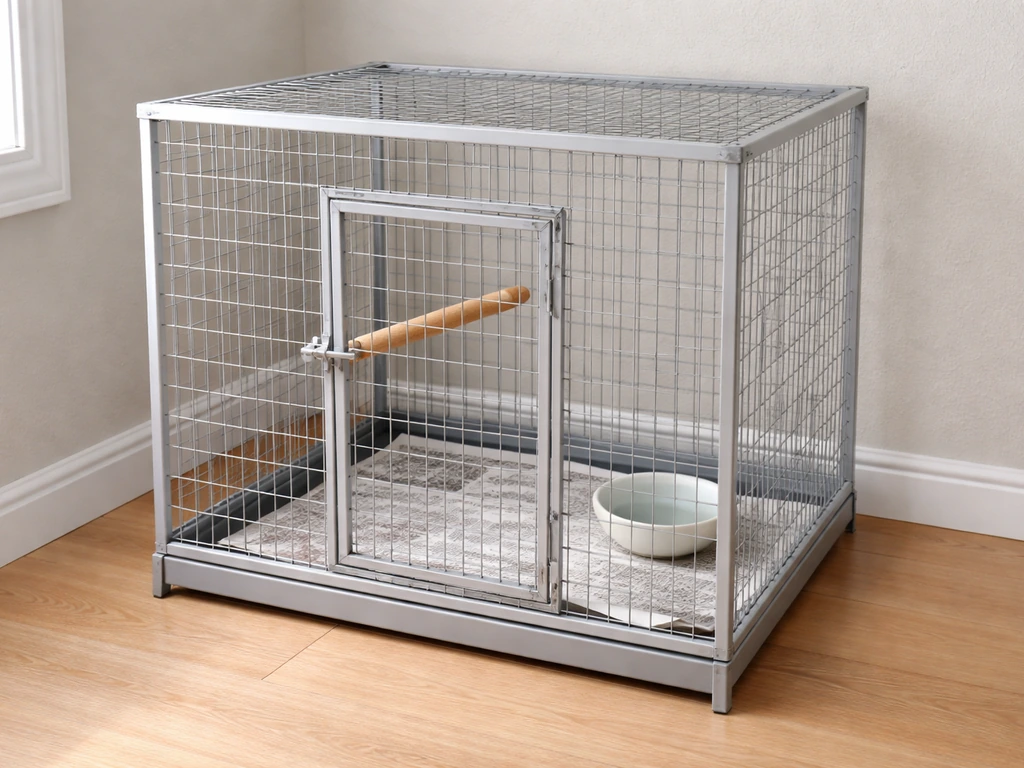
Most hanging birdcages sold for parakeets, cockatiels, and similarly sized birds land between 8 and 25 pounds fully loaded. Hanging chains marketed specifically for bird setups, like the Perky-Pet 33-inch chain, are rated to a maximum of 16 lb, so always cross-check your cage weight against whatever hanging product you buy. When in doubt, go heavier-rated. There is no downside to over-engineering a hang point.
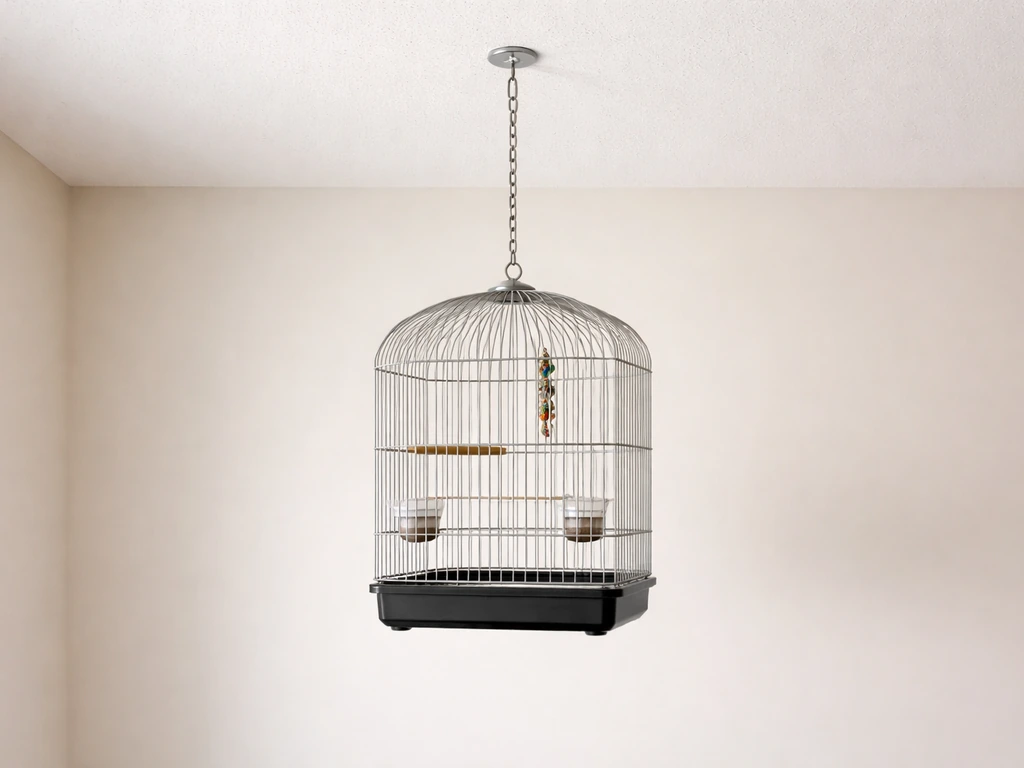
Ceiling hanging setup
What you need before you start
- Stud finder (or a strong rare-earth magnet to locate screws in the joist)
- Drill and drill bits sized for your hardware
- Swivel ceiling hook or eye bolt rated for at least 4x your loaded cage weight
- Hanging chain or cable rated above the cage's full weight
- Spring snap or carabiner rated for the load (stainless steel preferred)
- Level (a small bubble level or a free phone app)
- Pencil, tape measure, and painter's tape for marking
Step-by-step ceiling install
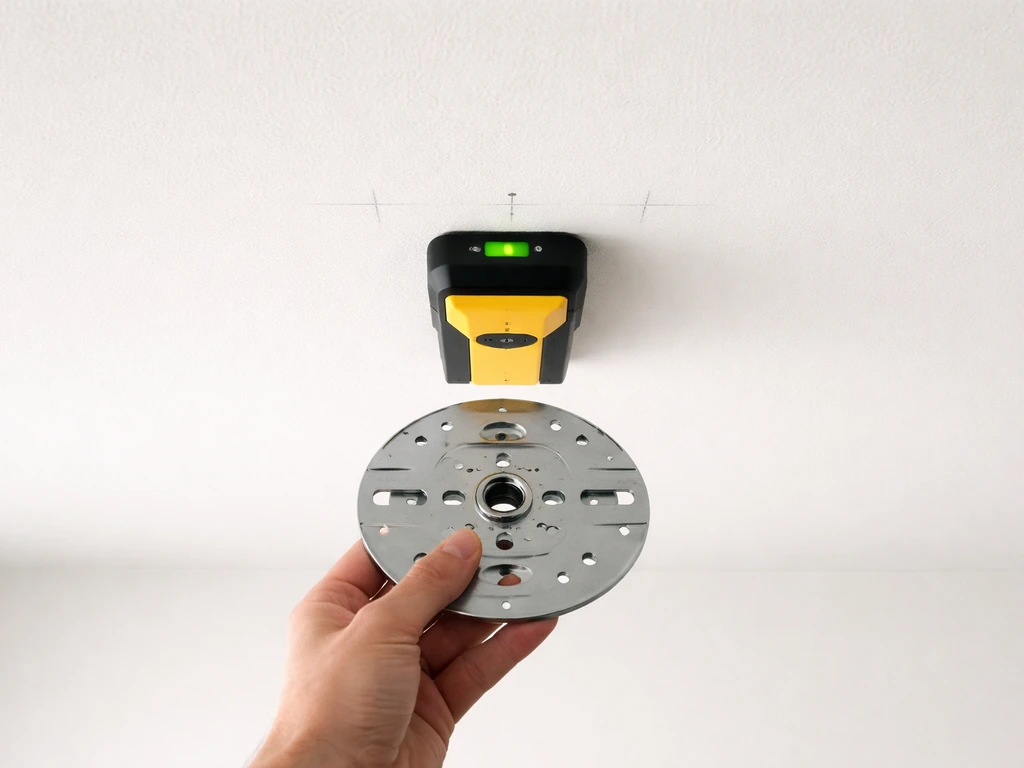
- Locate the ceiling joist directly above your chosen spot. Run your stud finder slowly in two passes and mark both edges of the joist, then find the center. Never hang from drywall alone.
- Mark your drill point with a pencil. Drill a pilot hole slightly smaller than the shank of your eye bolt or swivel hook.
- Thread the eye bolt in by hand first, then use a screwdriver or bolt through the eye to torque it until the shoulder seats flush against the ceiling. For heavier cages (20 lb and up), use a lag eye bolt with at least a 2-inch bite into solid wood.
- If the joist does not land where you want the cage, install a cross-brace between two joists in the attic above, or use a ceiling medallion mount plate that spans and screws into two joists. Do not improvise with a single drywall anchor for a hanging cage.
- Attach your chain or cable to the eye bolt. Thread it through the cage's top ring, then connect with the snap hook. Hang the cage and check level immediately.
- Give the chain a firm tug (about 40–50 lb of force) before you put your bird in. If anything shifts, re-seat the hardware before proceeding.
Spacing matters too. Leave at least 6 to 8 inches between the top of the cage and the ceiling so you can open the top door without obstruction, and so warm air does not get trapped around the cage. Chain length is adjustable on most systems, which also lets you set perch height inside the cage to a comfortable range for daily interaction.
Wall mounting setup
Tools and materials
- Stud finder
- Drill and appropriate bits
- Heavy-duty wall bracket or cage rail system (rated load printed on the box)
- Lag screws (3-inch minimum for stud mounting) or toggle anchors for hollow-wall sections
- Level
- Socket wrench or drill driver
- Wall anchors (snap-toggle style for hollow walls only, never for the primary load point)
Finding studs and setting anchors
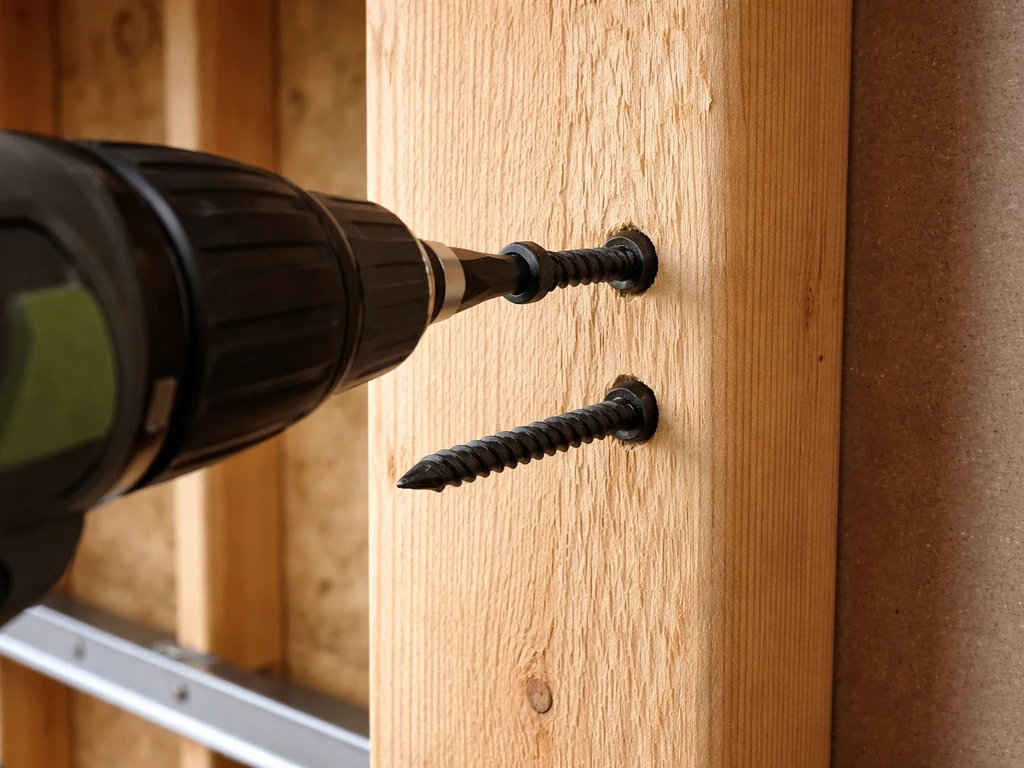
Studs are your best friends here. A standard wood stud gives you a reliable anchor point, and two 3-inch lag screws into a stud will hold far more than any bird cage will ever weigh. Locate the stud, mark it at the height you want the bracket, and pre-drill. If your bracket spans two studs, even better: that spread dramatically reduces torque on the fasteners.
If you cannot hit a stud where you need it, use toggle anchors (snap-toggle style) only as a secondary support, never as the sole load-bearing point for a hanging cage. Drywall anchor manufacturers recommend using no more than one-quarter of an anchor's ultimate load rating as the safe working load. That means if an anchor is stamped with a 100 lb ultimate load, plan on only 25 lb of working load for safety. For a fully loaded cage, that math gets tight fast, so always try to hit at least one stud.
Bracket and rail options
| Option | Best for | Pros | Cons |
|---|---|---|---|
| Single swing-arm bracket | Round or dome cages, medium weight | Swings out for easy access, compact footprint | Single-point stress; must hit a stud |
| Dual fixed brackets / shelf rail | Rectangular flat-back cages | Distributes weight across two points, very stable | Cage must align with bracket spacing |
| Adjustable wall rail system | Multiple cages or future repositioning | Flexible height and spacing, modular | Higher cost, more hardware involved |
| Corner bracket | Small cages in tight spaces | Uses two walls for extra support | Limited to corner placement only |
My recommendation: for most home setups with a single cage, a swing-arm bracket mounted into a stud is the cleanest and safest solution. It lets you pull the cage away from the wall for cleaning, which you will appreciate every single week.
Safety checks and load limits
This is the section most people skip, and it is the one that matters most. Hardware ratings are not the ceiling of what something can hold at a single moment. They are calculated working loads that include safety factors. OSHA guidance on rated capacities notes that working loads typically build in a safety factor (often 5:1 for lifting-rated hardware), meaning you should never plan to use hardware at its rated maximum. Buy hardware with a rated capacity at least 3 to 4 times the actual load you will put on it.
Here is a practical pre-bird checklist to run through before your bird goes anywhere near the new setup:
- Weigh the cage fully loaded: water dishes full, perches installed, food cups in place, and any cage accessories attached. Use a luggage scale hooked to the top ring for an accurate reading.
- Confirm every piece of hardware (eye bolt, chain, snap hook, bracket screws) is rated above 3x that loaded weight.
- Check level in two axes: side to side and front to back. A tilted cage stresses one side of every joint and makes perches uncomfortable for the bird.
- Apply a firm manual tug test to the entire assembly. It should not shift, creak, or rotate.
- Look at the cage floor. Drop something light (a paper towel) and watch where it lands. If it drifts consistently to one side, the cage is not level; adjust before adding your bird.
- Inspect all cage door latches. A freshly hung cage that swings can pop a poorly latched door open.
Once you are happy with the install, take a photo of the mounted hardware with a ruler next to it. If you ever need to re-hang the cage or replace a part, that photo is worth more than any written note.
Placement and bird comfort
A structurally perfect hang in the wrong spot of the room will still stress your bird. Height, light, airflow, and noise all matter. Here is how to think through each one.
Height
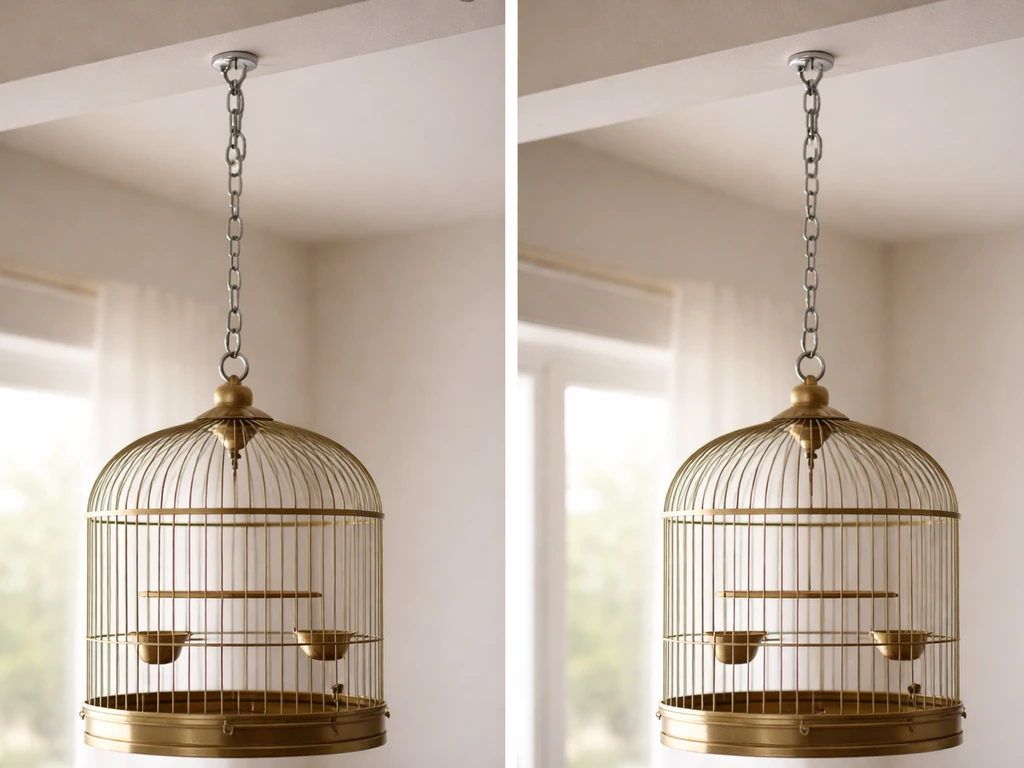
The general rule is that the top of the cage should sit at or just above your eye level when you are standing. This keeps the bird at a comfortable social height: not so low that the bird feels threatened by foot traffic, and not so high that it becomes isolated and hard to interact with. For ceiling-hung cages, adjust chain length to hit this target before you finalize the install.
Sunlight and heat
Direct sunlight through a window can overheat a cage fast, especially a metal-frame cage in summer. Prevue Pet Products' own cage placement guidance specifically warns against positioning a cage in direct sunlight or close to an air conditioner. Veterinary placement advice echoes this: keep the cage away from heat sources like furnaces and heat-generating electronics too. A spot that gets gentle indirect morning light is ideal. If your only wall option catches afternoon sun, hang a light curtain or shade on the window rather than repositioning the whole mount.
Drafts and airflow
You will see a lot of dramatic warnings about drafts online, but blank" rel="noopener noreferrer">Purdue University's veterinary guidance takes a measured view: a draft is usually inconsequential to a healthy pet bird, because feathers provide good insulation. That said, consistently cold air blowing directly onto a cage, especially from an air conditioning vent just above, is worth avoiding simply because it can cause temperature swings and stress. Good ventilation in the room is a positive; a vent aimed directly at the cage is not. When you put a bird bath in the cage, airflow becomes even more relevant since wet feathers and a cold draft together are a much bigger deal than a dry bird in the same breeze.
Noise and activity
Birds do well in rooms with moderate household activity, but avoid placing the cage next to a TV running at high volume all day, near a loud appliance, or in a hallway with constant foot traffic and slamming doors. Veterinary guidance consistently flags harsh lighting and constant loud noise as stressors to avoid in cage placement. A living room wall away from speakers hits the sweet spot: social stimulation without sensory overload. When you are done with the install and ready to put your bird in the cage for the first time, give it 30 minutes to explore quietly before resuming normal household activity around it.
Troubleshooting and maintenance
Wobble and drift
If a ceiling-hung cage sways noticeably when your bird moves around inside, the chain is probably too long relative to the cage width, or the eye bolt has started to work loose. Shorten the chain first (remove one link and retest). If that does not fix it, remove the eye bolt, fill the hole with a wooden toothpick and wood glue, let it cure 24 hours, then re-drive the bolt. For wall-mounted cages that feel loose, check whether the lag screws have backed out slightly. Retighten them firmly, and if the wood feels soft or stripped, move the bracket an inch or two to fresh stud material.
Repositioning over time
Birds are creatures of habit but they do adapt, and you may find after a few weeks that the chosen spot needs tweaking. Maybe the morning sun shifted with the season, or you notice the bird is consistently facing away from the room. Small adjustments matter. If you need to move the cage temporarily during repositioning, this is a good moment to review how to move a bird to a new cage safely, because the same stress-reduction principles apply when you are disrupting an established setup.
Corrosion and hardware wear
Metal hardware in a bird room faces real humidity from water dishes, baths, and misting. Check your eye bolts, snap hooks, and chain links every three months for rust spots, especially at contact points where two metal pieces touch. A light spot of surface rust on steel can be wire-brushed off and treated with a food-safe anti-corrosion spray. Deep pitting or cracking means replace the part immediately. Stainless steel hardware costs a bit more up front but essentially eliminates this maintenance task, making it well worth the price for anything load-bearing.
Refreshing the interior setup after mounting
Once the cage is hung and stable, the interior setup becomes your next project. Spray millet is one of the first things most birds want to investigate, and knowing how to hang spray millet in the cage properly keeps it off the cage floor and at a height where your bird can work at it naturally. Similarly, a well-placed cuttlebone in the cage and a bird feeder inside the cage complete the setup so the space is enriching from day one, not just structurally sound.
Your final step after a successful install: stand back, look at the cage from across the room, and check that it hangs plumb and level visually as well as by instrument. If it looks slightly off to your eye, it probably is. Trust that instinct, make the micro-adjustment, and then you are done. Everything after that is just regular maintenance and enjoying the bird.
FAQ
How much should a bird cage weigh when choosing chains, eye bolts, or brackets?
Use the cage's fully loaded weight (bird, food dishes, water, toys, and any substrate or liners). Then choose mounting hardware rated above that load, with a practical safety margin, because the rating refers to working conditions, not the worst-case instant load.
Can I mount a hanging bird cage to drywall only if the cage is light?
Not as the primary support. Even for smaller cages, drywall anchors should be secondary at most, since shear and pull-out forces can exceed the safe working load. The goal is to secure at least one attachment point to a stud.
What if I cannot line up the bracket with a stud where I want the cage?
Reposition the mount location within a couple inches to catch a stud, or use a design that lets you hit studs on two sides (for example, a bracket spanning multiple studs). Avoid relying on toggle anchors as the sole load-bearing method for a ceiling or swing setup.
How do I prevent a ceiling-hung cage from wobbling when my bird moves?
Shorten the chain first by removing one link and retesting. If wobble continues, the eye bolt may be loosening, so re-seat it properly (fill and re-drive after curing) rather than only tightening it.
Is it okay if the cage sways a little during the first few days?
There should be no noticeable sway once installed correctly. A small shift at first can happen when chain length settles, but persistent movement usually means the chain is too long for the cage width or a fastener is backing out.
How high should I hang a wall-mounted cage if my bird prefers to rest near the top?
Aim for the cage top to sit at or slightly above your eye level when you are standing, then adjust the internal perch height so the bird can access preferred locations comfortably without constantly climbing to the very top.
What should I do if the cage is in indirect light but still gets too hot near a window?
Even indirect sunlight can overheat in summer if the window is warm. Use a shade or curtain during peak hours, or shift the cage to an interior wall while keeping the lighting gentle, indirect, and stable.
Are drafts from HVAC vents actually dangerous for birds?
A light draft is usually not a major issue, but direct, consistent cold airflow onto the cage can cause temperature swings and stress. The safer choice is room ventilation that circulates air without targeting the cage directly.
How far should I keep the cage from heat sources like TVs, electronics, or furnaces?
Keep it away from anything that generates regular heat, including electronics that run for long periods. If you can feel warmth near the cage during typical use, move the cage or shield the heat source.
What is a good way to reduce stress when introducing a bird to a new hanging setup?
After installation, let the bird explore quietly for about 30 minutes before resuming normal household activity. If possible, keep lighting and noise consistent during the first day to avoid pairing the new mount with additional stressors.
How often should I inspect load-bearing hardware for a bird cage?
Check every three months for rust, especially at contact points like eye bolts, snap hooks, and chain links. Replace any part with pitting or cracking, and address surface rust promptly to prevent weakening over time.
What if I notice rust on a hardware piece that holds the cage weight?
If rust is only light surface corrosion, you can clean and treat it, but do not keep using hardware with signs of deep pitting or structural damage. For any load-bearing component, replacement is the safest call when in doubt.
How can I tell if my cage mount is plumb and level beyond just visual judgment?
Use a small level placed on the top rim or the cage body itself, then do a quick check from across the room. If it looks off to you, make the micro-adjustment now, because a slightly tilted cage can feel unstable and affect how the bird uses perches.