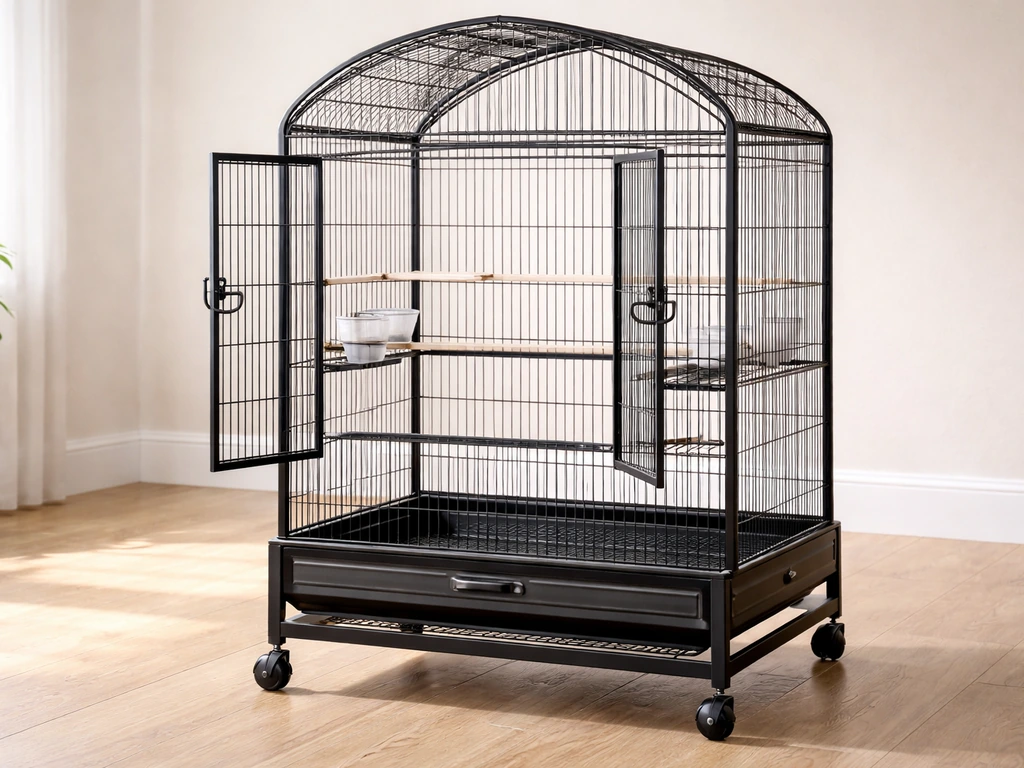
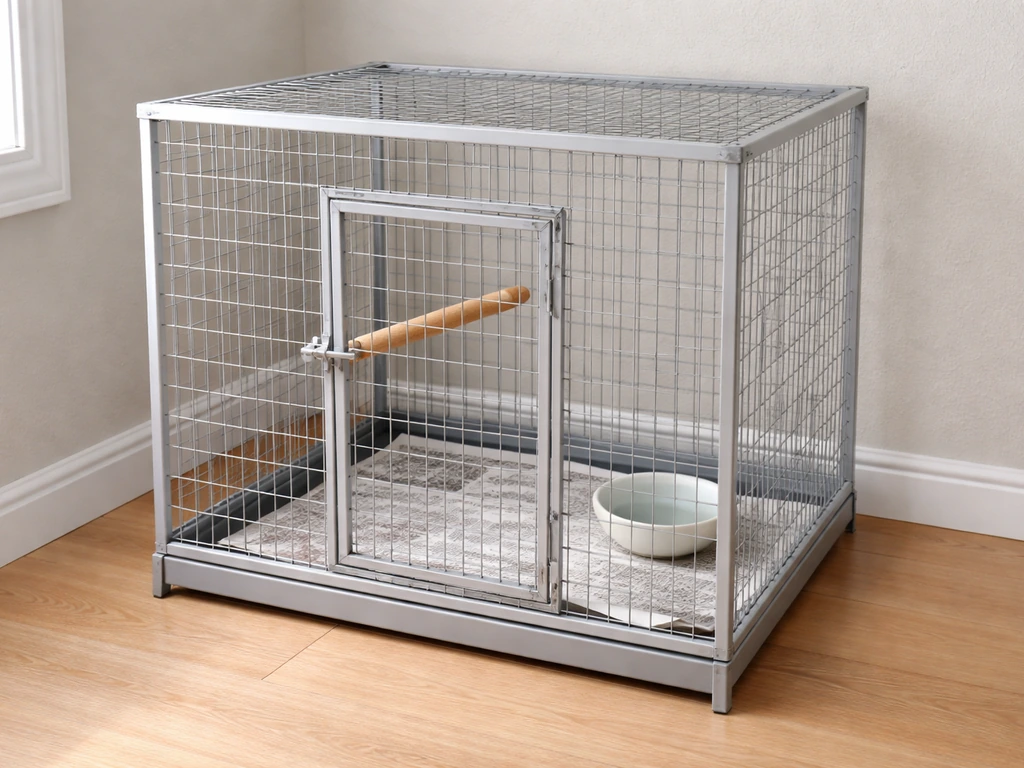
The Zeny 61" bird cage (model ZENY1206) goes together in roughly 30 to 45 minutes if you lay out all your parts first and follow the right order: base frame, stand with casters, main cage body, doors and latches, sliding trays, then perches and accessories. The finished cage stands 61 inches tall with an overall footprint of 25.6 x 25.6 inches, so make sure you have a clear workspace before you crack open the box.
Zeny 61 Bird Cage Instructions: Step-by-Step Assembly Guide

Maya Bennett
27 Jun 2026
Before you start: what to verify with your Zeny 61 cage
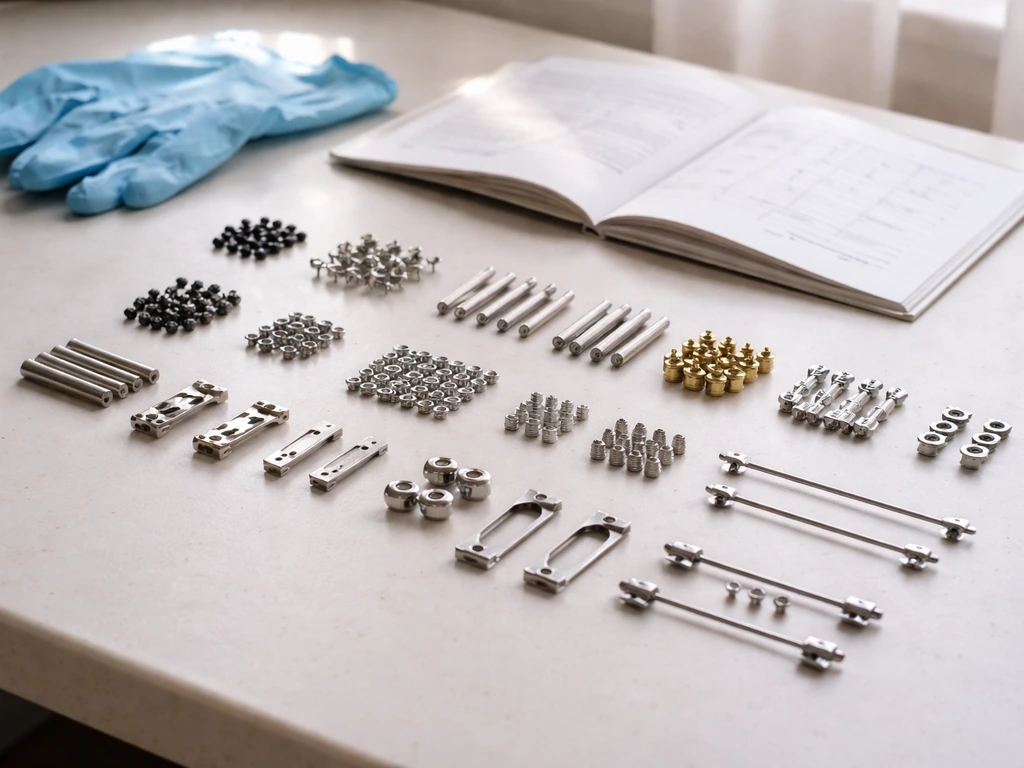
Before you touch a single bolt, do a full parts inventory. Open every bag of hardware and lay everything out on a flat surface. Cross-reference against the included instruction sheet and the list below. If the sheet is missing (it happens), the Walmart listing for ZENY1206 and ZENY's own product page both describe the package contents clearly enough to work from.
Check the bar spacing before anything else. The Zeny 61" is listed at 0.5 inch (1.2 cm) bar spacing, which is appropriate for cockatiels, conures, small to medium parrots, and similar birds. If you have a very small bird like a budgie or parrotlet, that spacing is on the wide side and warrants a closer look at whether a smaller-bar cage is safer. If you notice any bars that are bent, spread wider than 0.5 inch, or have sharp edges from shipping damage, flag those now rather than after assembly.
Also confirm the powder coating looks intact. ZENY uses a non-toxic powder-coated finish, but if the coating is chipped or flaking on any panel right out of the box, contact the seller before using the cage. ZENY’s official product page for the Zeny 61" (model ZENY1206) describes the cage as having a non-toxic powder-coated finish and a rolling stand with 4 swivel casters (lockable design). Birds chew on bars constantly, and a compromised finish on a new cage is a legitimate reason to request a replacement part.
Tools, parts, and hardware identification
You do not need a big toolkit for this. Here is what I recommend having on hand:
- Phillips head screwdriver (medium size, or a powered screwdriver on low torque)
- Flathead screwdriver (for prying open any stubborn hardware bags or leveling caster locks)
- Pliers (optional, useful for tightening stubborn nuts)
- A rubber mallet or a folded cloth to tap panels into alignment without scratching the finish
- A level or a flat floor surface to check for wobble after assembly
Now identify your parts. Lay them into groups so nothing gets mixed up mid-build:
| Part | Quantity | What It Looks Like |
|---|---|---|
| Cage main frame (panels) | 1 set | Pre-assembled or fold-together wire panels forming the cage body |
| Metal sliding trays | 2 | Flat sheet metal trays that slide into the base of the cage |
| Wooden perches | 2 | Natural-finish dowel rods with screw-mount ends |
| Swivel casters (lockable) | 4 | Wheel assemblies with a flip-down brake tab |
| Stainless steel bowls | 5 | Hook-on or clip-in feeding and water bowls |
| Ladder | 1 | Small wire or wood climbing accessory |
| Bolts, nuts, and screws | Varies | Usually sorted into labeled bags by assembly stage |
If anything is missing from that list after a thorough search through all the packaging material, stop and contact ZENY or the retailer before you proceed. Assembling without the correct hardware leads to instability problems that are much harder to fix after the fact.
Step-by-step assembly walkthrough
Step 1: Build the base frame and attach the stand
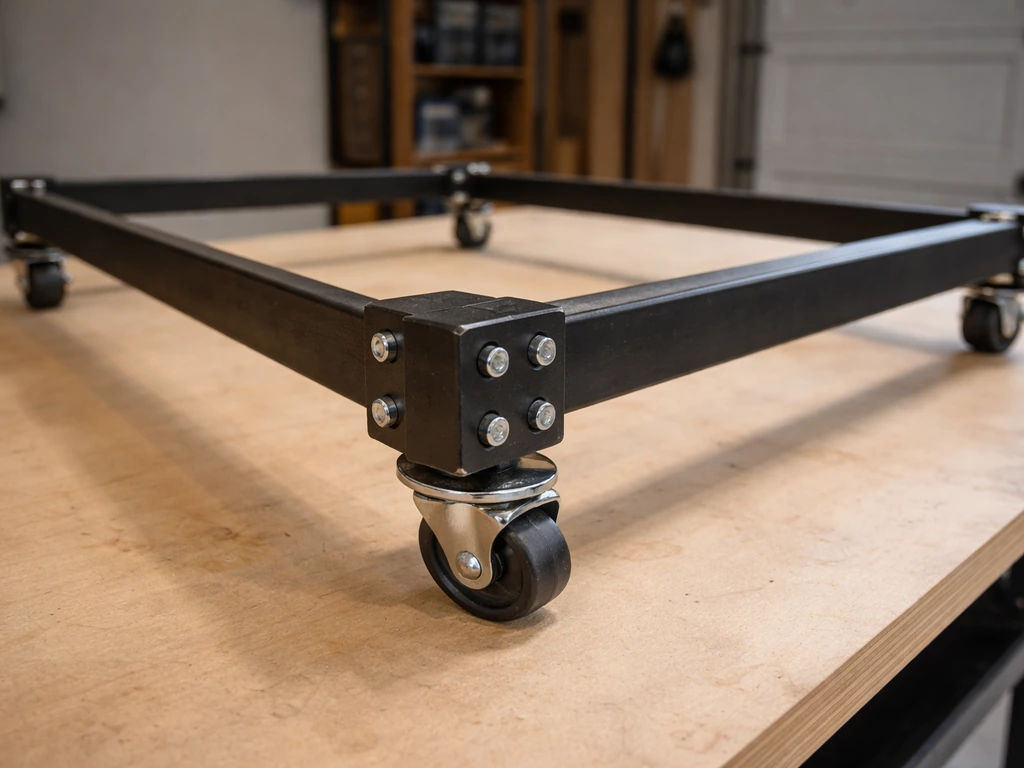
Start with the stand legs. Connect the leg sections together using the provided bolts, hand-tightening first so you can adjust alignment. Once all four legs are connected and the stand frame is square, flip it upside down and press the four swivel casters into the pre-drilled holes at the bottom of each leg. Each caster should click or thread in firmly. Flip the stand right-side up. Before moving on, press each caster to confirm it is fully seated and then test the lock tab by pressing it down and trying to roll the stand. It should hold without rolling. An unlocked caster during assembly is one of the most common causes of a cage tipping mid-build, so lock all four now.
Step 2: Assemble and set the cage body onto the stand
The cage body on the ZENY1206 is typically made of fold-together or clip-together wire panels. If your panels come flat, fold them along the pre-scored edges and clip the locking tabs together at each corner. Work your way around all four sides, then set the top panel in place and secure any top-frame bolts. The completed cage interior measures 18 x 17.9 x 32.9 inches. Once the body is assembled, lower it onto the stand frame and align the mounting holes. Secure the cage body to the stand using the provided bolts, working in a diagonal pattern (front-left, back-right, front-right, back-left) so everything sits evenly rather than rocking. If you are assembling a PawHut bird cage, use these assembly instructions as a guide for the right order and safe hardware setup Secure the cage body to the stand.
Step 3: Install the doors and test the latches

The main door on the 61" model is a generous 16.9 x 8.8 inches, large enough for comfortable access to a medium or large parrot. Doors on this cage typically hang from pre-set hinge pins built into the frame. Align the top hinge pin into its slot first, then swing the door in to seat the bottom hinge pin. The door should swing freely without dragging. Next, engage the latch mechanism. Close the door firmly and test the latch from both inside and outside. Smart parrots can learn to work simple latches very quickly, so if the included latch feels easy to manipulate with a finger, plan on adding a secondary clip or carabiner once assembly is complete.
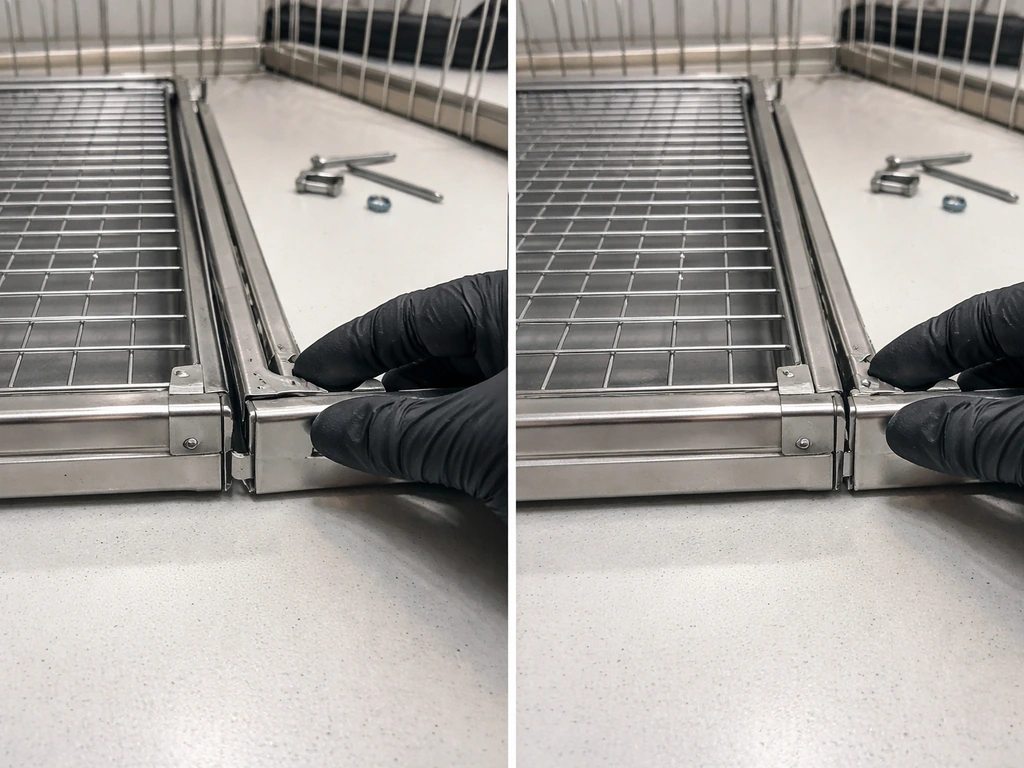
Step 4: Slide in the metal trays
The ZENY1206 includes two sliding metal trays: one sits at the floor of the cage for droppings collection, and one sits just below that as a base tray for the stand. For additional step-by-step guidance that matches how these kits are put together, see the HQ bird cage assembly instructions. Slide the upper tray into the cage floor guides with the lipped edge facing you for easy removal. It should slide smoothly and sit flush without gaps. Slide the lower tray into the stand base in the same way. If either tray binds or does not sit flat, check for a bent lip and gently straighten it with your hand before inserting again. Do not force a tray in; a tray that goes in with force will be very difficult to pull out for cleaning later.
Step 5: Mount perches and attach bowls
Thread the wooden perches through the bar slots at the heights marked or suggested in your instruction sheet. Most users find one perch placed at mid-height and one near the top works best for parrots, giving climbing options without placing a sleeping perch directly above a food bowl. Screw the perch end-bolts finger-tight, then give each perch a firm twist and push-pull test before letting your bird use it. Clip the stainless steel bowls onto the designated bowl-holder rings on the cage bars, usually near the main door for easy access when refilling.
Safety checks after assembly
Do a full safety check before your bird goes anywhere near this cage. Work through these in order:
- Stability test: With all casters locked, push the cage firmly from each side and from the top. It should not rock, tip, or shift. If it wobbles, check whether all stand bolts are fully tightened and whether any caster is not fully seated.
- Door alignment: Open and close every door several times. The door should swing without catching, and the latch should engage positively every time without you having to adjust your grip. If a door sags, the hinge pin has likely not seated fully. Lift the door slightly and re-seat the bottom pin.
- Pinch points: Run your fingers along every bar joint, corner, and hinge area. Feel for any sharp wire ends, protruding bolt tips, or gaps wide enough to catch a toe or beak. File down any sharp ends with a small metal file, or cover them with a bit of bird-safe sisal rope.
- Bar spacing spot check: Use a ruler and check spacing at several spots around the cage, not just one. Shipping can distort panels. Every gap should be consistently 0.5 inch.
- Tray fit: Pull each tray out and reinsert it. It should slide smoothly, sit flat, and have no gaps at the edges large enough for a bird to get a foot or beak caught.
- Powder coating check: Do a final visual pass for any chipped or flaking finish revealed during assembly. Touch up small chips with bird-safe paint or contact the seller for a replacement panel if the damage is significant.
Placement, setup, and mess control
Where you put the cage matters as much as how you build it. The Zeny 61" with its 25.6 x 25.6 inch footprint is a substantial piece of furniture. Place it against a wall on one or two sides so the bird feels secure, but avoid corners that block all airflow. Never place the cage near a kitchen: cooking fumes, especially from non-stick (PTFE) cookware, are acutely toxic to birds at any distance. Keep it away from exterior doors that let in cold drafts and windows with direct afternoon sun that can overheat the cage fast.
For mess control, the dual sliding tray system does most of the heavy lifting. Line the upper tray with newspaper, unbleached kraft paper, or purpose-made cage liners cut to 18 x 18 inches. Avoid corncob, cedar, or pine shavings because they carry health risks for parrots. Change the liner daily or every other day depending on your bird's droppings volume. Rolling the cage on its casters to clean beneath it is easy once you remember to unlock all four wheels before you push.
Position the perches away from food bowls to keep droppings out of the water. Place one perch at a height where your bird can comfortably reach up to the top bars for climbing, and position any food bowls close to the main door at a height your bird can reach without climbing awkwardly. The 16.9 x 8.8 inch door opening gives you comfortable arm access for bowl changes without disturbing the perch setup.
Installing accessories and optional covers without compromising safety
The included ladder, extra bowls, and perches give you a functional setup right out of the box, but most bird owners want to add more over time. The key rule is this: anything you add must be attachable and removable without cutting or bending cage bars, and every new accessory needs a safety check before your bird interacts with it.
- Clip-on toys and foraging accessories: Use the same style of clip-on hooks as the included bowls. Avoid anything with zinc or lead hardware. Stainless steel or nickel-plated clips only.
- Seed catchers and skirts: A fabric or mesh seed catcher that wraps around the lower bars keeps scatter contained. Make sure it does not press against bars in a way that creates a gap large enough to trap a foot.
- Cage covers: A fitted cage cover for nighttime is fine and often beneficial for sleep. It should be breathable fabric (cotton or fleece, not plastic) and should not bunch up against bars where a bird could pull it in and chew it. Fit it snugly so it does not drape loose flaps inside the cage.
- Water bottle attachments: A sipper bottle attached to the outside bars with a stainless steel spout through the bars is a cleaner alternative to an open bowl. Confirm the spout hole does not create a bar gap larger than your cage's 0.5-inch standard.
- Additional perches: Natural wood perches from bird-safe species (manzanita, java wood, grapevine) are great upgrades. Mount them using the same screw-through-bar method as the originals and test each one before use.
For seasonal protection, a cover or moving the cage away from windows is usually enough in winter. If your home drops below 65 degrees Fahrenheit at night, a cover plus positioning away from drafts is important. Parrots tolerate moderate temperature variation but hate sudden cold drafts, which can trigger respiratory illness quickly.
Troubleshooting common problems and what to do if parts don't match
Even with an "easy to assemble" cage, things go sideways. Here are the most common issues with the ZENY1206 and how to handle them: If you need step-by-step zeny 53 bird cage instructions for your specific kit, match the parts and hardware to the guide that came with your ZENY model ZENY1206.
| Problem | Likely Cause | Fix |
|---|---|---|
| Cage wobbles or rocks | Stand bolts not fully tightened, or one caster not fully seated | Tighten all stand bolts in a diagonal pattern; re-press each caster until it clicks; check that the cage body is flush on the stand frame |
| Door drags or won't close flush | Hinge pin not fully seated, or door panel slightly bent | Lift the door to reseat the bottom hinge pin; if the panel is bent, gently work it flat with both hands before rehanging |
| Latch does not catch | Latch is misaligned with the receiver slot | Loosen the latch mounting screw slightly, shift it to align, retighten; test 5 to 6 times before finishing |
| Sliding tray binds or sticks | Bent tray lip or debris in the guide rails | Remove the tray, inspect the lip edge for bends, straighten gently; wipe out the guide rails before reinserting |
| Bar spacing inconsistent | Shipping distortion on one panel | Gently push the bars back to 0.5 inch spacing with your thumbs; if a bar is deeply bent, request a replacement panel from the seller |
| Hardware bag has extra or unrecognized parts | Shared hardware kit for 61" and 68" models | Refer to your instruction sheet step by step; set aside unused hardware but keep it in case you misidentified a part |
| Parts clearly missing | Packaging error | Contact ZENY or the retailer with your order number and model ZENY1206; do not assemble an incomplete cage |
One thing worth knowing: because ZENY sells both 61" and 68" versions sometimes within the same product listing, the hardware kit can include a few extra bolts or brackets meant for the taller variant. If you have leftover hardware after a complete assembly, that is usually why. Keep it in a labeled bag in case you ever need it for a repair.
If you have assembled other large wire cages before, like the Yaheetech 52" or similar models from other brands, you will notice the ZENY 61" uses a very similar panel-clip-and-bolt system. The main difference is the taller stand and the dual-tray floor, which means you have a bit more hardware to sort through up front. Take your time on the tray guides specifically since that is the spot most people rush past and then regret during cleaning week two.
Once you are done and everything checks out, do a final roll-test with the casters before moving the cage to its permanent spot. Lock all four wheels, do the push test one more time, and only then introduce your bird. A cage that passed every check on this list is genuinely ready to use.
FAQ
How do I tell if the bar spacing is safe for my specific bird?
0.5 inch spacing is generally fine for cockatiels, conures, and small to medium parrots, but if your bird is a strong chewer or you suspect it can squeeze through, measure the widest gap between two adjacent bars at multiple points (not just one spot). If any area exceeds 0.5 inch due to bending, stop using the cage until you replace or correctly realign that panel.
What should I do if I assembled the stand but the casters do not lock properly?
Recheck that each caster is fully seated (it should click or thread in firmly). If the lock tab does not hold when you press down, remove the affected caster and inspect for debris or a bent bracket edge. Do not keep using a loose wheel during assembly, it can cause tipping while you’re lifting the cage body onto the stand.
The cage panels do not clip together cleanly, what usually causes this?
Most commonly, the corner tabs are not fully engaged or a panel is rotated 180 degrees. Dry-fit two corners first, confirm the locking tabs face inward the same way on all corners, then press and listen for a full lock. If a tab looks crushed or misaligned, force-free assembly is critical, forcing can create gaps that later affect door alignment.
How should I handle leftover bolts or brackets after finishing the ZENY 61" build?
Leftovers can happen because some shipments include parts intended for the 68" version, especially in mixed listings. Keep leftovers in a labeled bag, but do not ignore a mismatch if a required part seems to be missing from a critical step (like cage-to-stand mounting bolts or door hinge hardware). If anything is missing, pause and confirm with the seller.
How do I know the main door latch is secure if my bird is a fast learner?
After assembly, test the latch both from inside and outside by applying light, realistic pull force on the door handle area. If it can be opened easily with a finger, add a secondary safety attachment only in a way that does not interfere with hinge movement, for example a clip or small carabiner that sits on the latch area without contacting the bars where the bird can chew it off.
Can I use paper or liners in the trays, and what sizes work best?
Yes. For the top floor tray, cut liners to fit about 18 by 18 inches. If your liner is too small, it can shift and create edges where droppings land and get scraped during cleaning. Also avoid soft liners that tear easily, because torn pieces can fall into corners and are harder to remove during routine tray cleaning.
What if a sliding tray binds or does not sit flush?
Check for a bent tray lip or misaligned guide, then gently straighten by hand. Do not apply force, if you push a binding tray in, you can bend the guide or deform the lip so it later gets stuck permanently. After fixing, slide the tray in and out several times before using it with your bird.
Where should I place the perches relative to the bowls to reduce mess?
Place perches so droppings are less likely to fall directly into the water or food. A practical approach is one mid-height perch for active climbing and a second perch higher for resting, then position food bowls near the main door at a height your bird can reach without stepping on bars above the bowl holder area.
Is powder coating damage right out of the box really a deal-breaker?
If you see chips or flaking, yes, it is worth contacting the seller before using the cage. Birds chew, and chipped coating can become sharp edges or expose material underneath. Take clear photos of the damaged panel and the exact location so the replacement part request is faster.
How should I clean the cage during the first month without damaging the finish?
Start with dry removal and mild, non-abrasive cleaning so you do not scratch powder-coated surfaces. Since the trays slide out, focus cleaning on tray liners and the tray area first, then spot-clean bowls and the bars. Avoid harsh scrubbing on any area that already shows coating wear, that’s where birds chew most frequently.
What is the safest way to move or reposition the cage after it is assembled?
Do a lock check first, lock all four wheels, then do a quick roll-test in the new room before setting it in the final position. Lift strategy matters too, if you need to move it over uneven flooring, grab the stand frame not the cage door. Only introduce the bird once the cage is stable and pass-through roll has been tested at least once.
Next Articles
How to Make a Temporary Bird Cage Step by Step
Step-by-step DIY guide to build a safe temporary bird cage now, with sizing, bar spacing, materials, and safety checks.
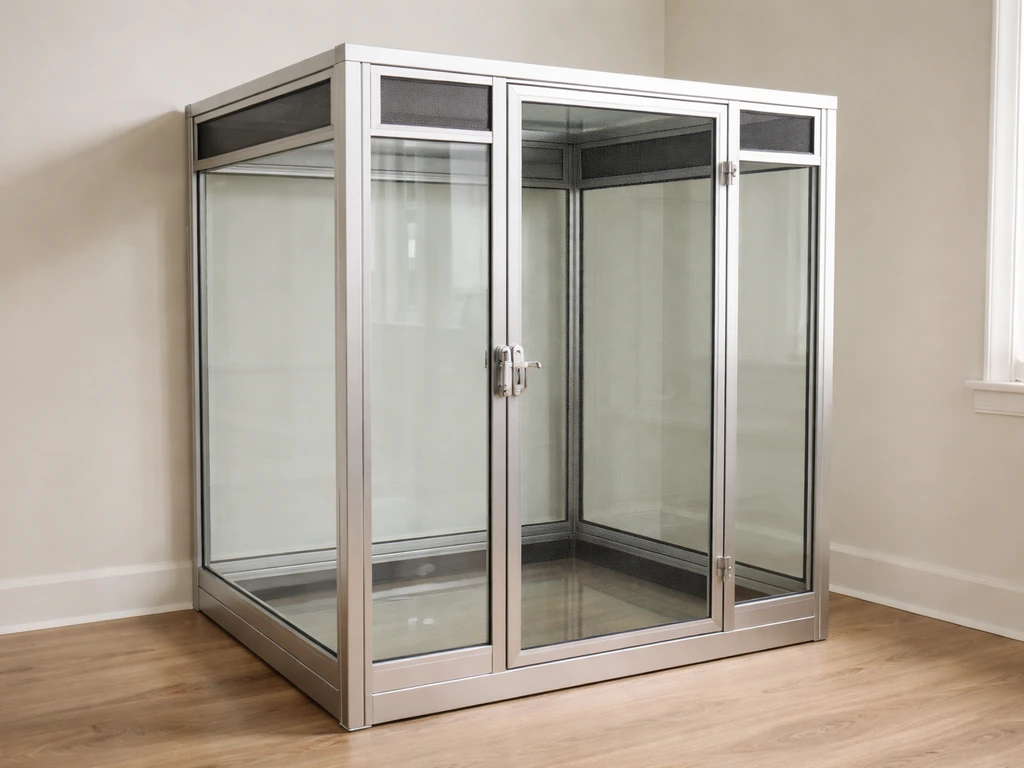
How to Make a Glass Bird Cage: Step-by-Step DIY Guide
Step-by-step DIY for a safe glass bird enclosure: materials, escape-proof design, ventilation, assembly, and maintenance
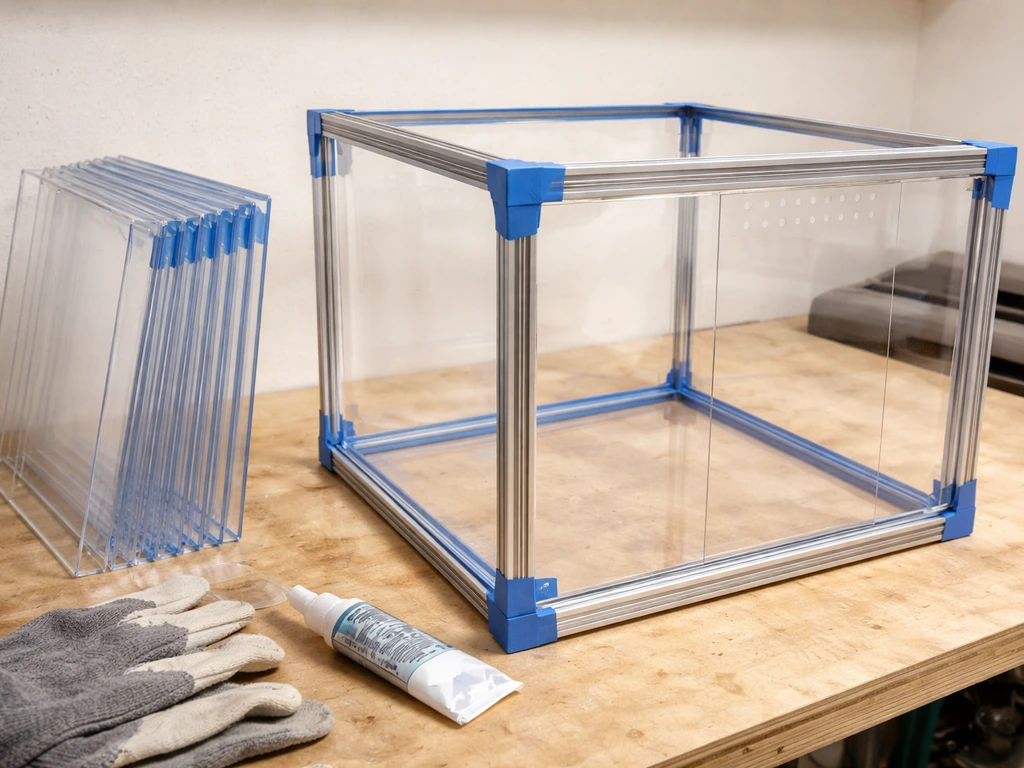
How to Build a Plexiglass Bird Cage Step by Step
Step-by-step DIY guide to build a safe plexiglass bird cage: materials, dimensions, cutting, sealing, doors, airflow, an