Assembling a Pet Republic bird cage is straightforward once you confirm your exact model, lay out every part before you start, and follow the base-first sequence. The included instruction sheet covers the basics, but this guide fills in what those sheets often skip: how to level the rolling stand, get the latch hardware aligned on the first try, install accessories without blocking the bird's movement, and troubleshoot the wobble or misaligned door that's stopping you right now. As a related option, review pets alive bird cage instructions for a quick checklist of safe assembly, placement, and daily care steps.
Pet Republic Bird Cage Instructions: Step-by-Step Setup

Maya Bennett
3 Jul 2026
Verify your exact Pet Republic cage model and what's included
Pet Republic makes more than one cage, and the hardware layouts are genuinely different between models. The 53-inch rolling wrought-iron model (overall size 25.2 in L x 16.5 in W x 53.3 in H) comes with one large front door plus four smaller side doors, a slide-out metal grate, a slide-out tray, and four detachable 360-degree rolling casters. The 68-inch model adds a 2-in-1 playtop roof, has 0.5-inch bar spacing suited for smaller parrots, and also rides on four 360-degree rolling casters. Knowing which version you have changes everything about where each part goes.
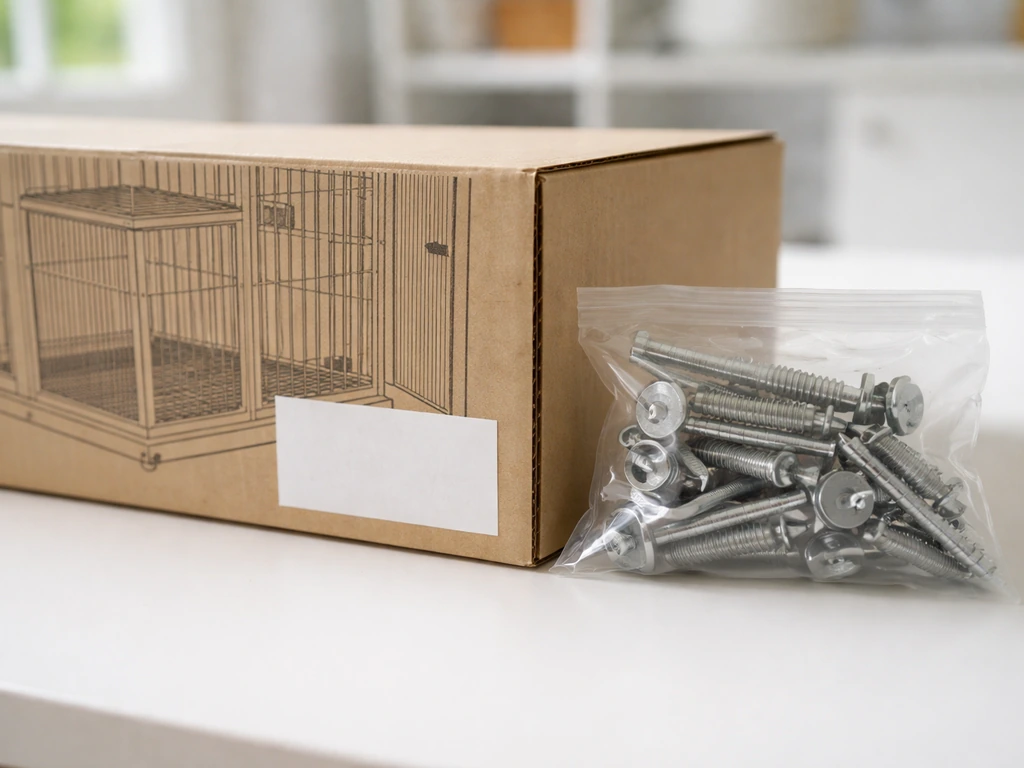
Find your model number on the box end panel or on a sticker on the cage frame near the base. Once you have it, search the exact model number alongside 'Pet Republic bird cage instructions PDF' on your retailer's product page. If you want the exact steps for your model, use the A&E bird cage instructions as a companion reference while you assemble and fit accessories Pet Republic bird cage instructions PDF. Petco and similar retailers sometimes host assembly PDFs directly on the product listing page (look for a link under 'Additional Documents' or 'Specifications'). Pet Republic also has a regional corporate web presence where documents are sometimes posted. If you hit a dead end, the OnBuy listing for Pet Republic cages confirms that some versions ship with a single instruction paper rather than a full manual, so what you're looking for may be a single folded sheet inside the box, not a booklet.
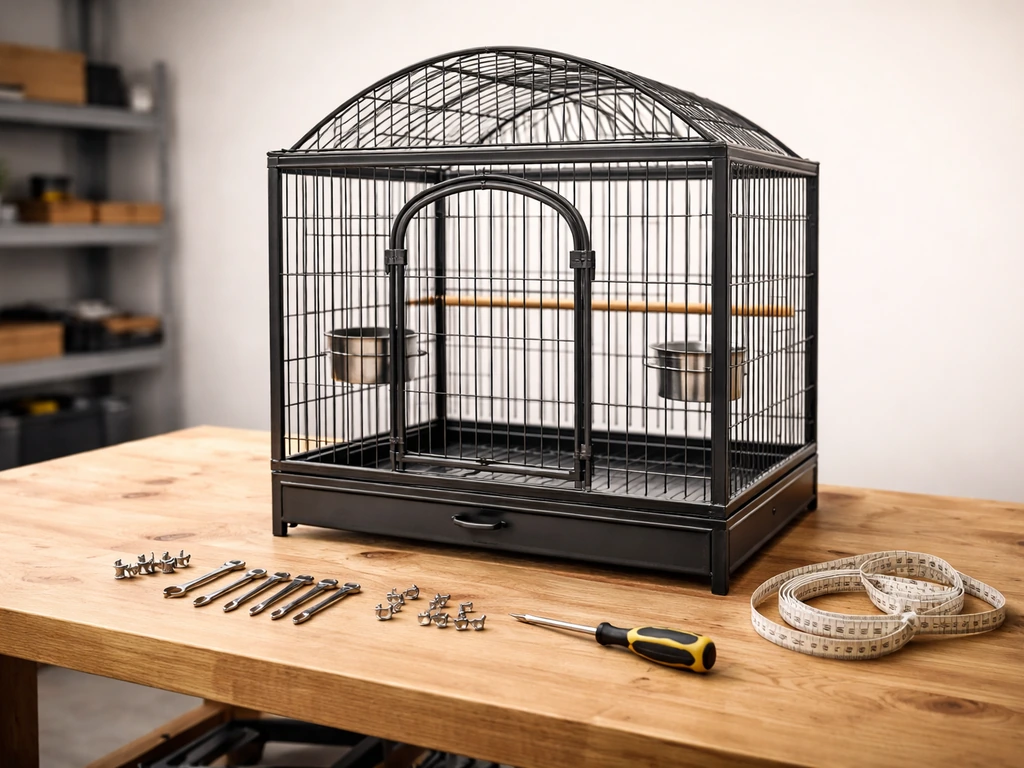
Before anything else, do a parts count. Lay every component on a clean floor and match it against the parts diagram in your instruction sheet. For both major Pet Republic models, you should see: base frame panel(s), side bar panels, top panel or playtop section, door panel(s), door hinges and latch hardware (usually small bolts or spring clips), the grate, the pull-out tray, caster wheels, perch dowels, feed cups with cup holders, and a bag of fasteners. Flag any missing or damaged piece before assembly, not after.
Tools and setup checklist before you start
Pet Republic cages are designed to assemble without power tools. That said, having the right items on hand prevents frustration mid-build.
- Phillips-head screwdriver (medium size fits most Pet Republic bolt heads)
- Flathead screwdriver (useful for prying stubborn latch clips into position)
- Needle-nose pliers (for tightening J-clips or ring connectors if your model uses them)
- Rubber mallet or a towel-padded hammer (for seating bar panels without scratching the finish)
- A level (a small torpedo level works; a free smartphone level app also works in a pinch)
- Tape measure (confirm the assembled cage footprint clears your chosen location)
- Cleaning cloth and mild dish soap (wipe down all parts before assembly; factory coatings can carry residue)
- Small container or zip-lock bag to hold loose fasteners so nothing rolls away
- Your instruction sheet or a photo of the parts diagram on your phone
Set up on a hard, flat floor with enough room to walk around all four sides. Carpet makes it harder to feel wobble and harder to roll casters into position. If you're assembling indoors, keep the bird in a separate room until the cage is fully built, all fasteners are tightened, and you've wiped it down again, because any metal shavings or residue from new hardware can be harmful.
Step-by-step bird cage assembly: base, bars, doors, and latch systems
Step 1: Attach the casters to the base frame
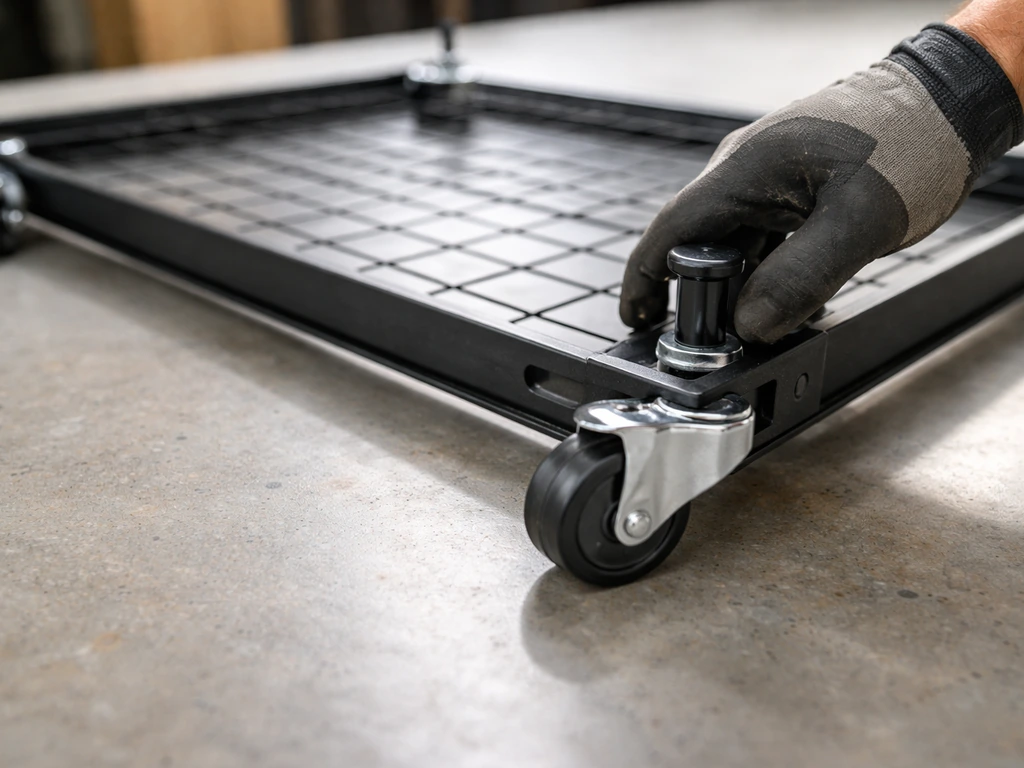
Both the 53-inch and 68-inch Pet Republic models use four detachable 360-degree rolling casters that click or bolt onto the base corners before you build upward. Flip the base frame upside down on a padded surface. Align each caster stem with its socket at each corner and press or thread it in according to your instruction sheet (some versions use a push-lock, others use a small bolt). Tug each caster firmly before flipping the base right-side up. If any caster spins but doesn't hold weight without wobbling, check that the stem is fully seated and retightened. If a caster still won’t roll smoothly, inspect the caster and its housing for debris or hair, as shown in the Vivohome bird cage instruction troubleshooting examples check that the stem is fully seated and retightened.
Step 2: Set the base tray and grate
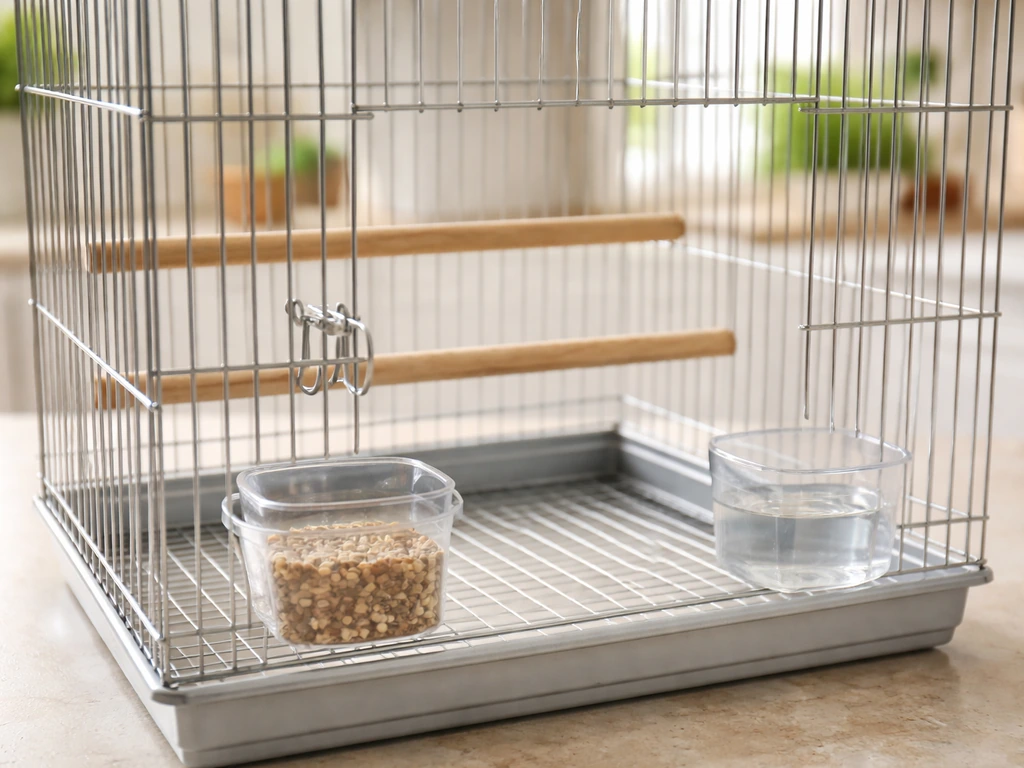
Slide the pull-out tray into the base channel from the front. It should glide smoothly and sit flush. On top of the tray, lay the metal grate (the grid panel that keeps the bird off the waste tray). The grate usually drops into corner slots or rests on lip tabs inside the base frame. Make sure it sits flat, with no corner lifting. A raised corner can catch a bird's toe.
Step 3: Assemble the bar panels around the base
Start with the back panel, then add the two side panels, and finish with the front panel. Each panel has connector tabs or hooked wire ends that slot into the base frame's corner channels and interlock with the adjacent panel. Work one panel at a time: hold the panel vertical, seat the bottom edge into the base channel first, then press the side edges together at the corner until you hear or feel the interlock click. Use the rubber mallet on a towel to tap stubborn joints flush, never hit bare metal directly. Once all four side panels are up, fit the top frame or playtop section down onto the top edges of the side panels and lock it with the same method.
Step 4: Install the doors and latch hardware
Doors on Pet Republic cages are hinged panels that drop into or bolt onto the bar framework. For the large front door on the 53-inch model, align the hinge slots on the door frame with the hinge pins on the cage front panel and press down until both pins are fully engaged. The door should swing freely without dragging on the frame. If it drags, the hinge pin isn't fully seated; lift slightly and press straight down again.
The latch is the part that causes the most trouble. Pet Republic's large front door typically uses a spring-loaded slide latch that hooks a catch plate on the cage frame. To install: thread the latch bolt or clip through the door frame's pre-drilled hole from the inside face, then press the spring clip or thread the nut onto the outside until it is snug but not overtightened (overtightening cracks the plastic sleeve on some models). Test it: the latch should engage the catch plate with one thumb push and release cleanly. If it misses the catch plate, the door hinge is slightly off; loosen the hinge pin, shift the door a few millimeters, and reseat. The four small access doors on the 53-inch model use the same basic hinge-and-spring-latch method at a smaller scale.
Install stands, wheels, or hangers safely and level the cage
Both main Pet Republic cage models incorporate the rolling stand as part of the base structure rather than as a separate bolt-on stand. The four casters you installed in Step 1 are the stand's feet. This is actually simpler than a bolt-on stand, but leveling still matters because an unlevel cage on casters will drift and could roll against a wall or tip if a large bird lands hard on one side.
After the cage is fully assembled, roll it to its final location and engage the locking mechanism on at least two opposing casters (most 360-degree casters have a small tab you press down with your foot to lock the wheel). Place your torpedo level on the top frame: check front-to-back and side-to-side. If the cage rocks, the floor is uneven rather than the cage itself. Slide a thin rubber furniture pad or a furniture leveling wedge under the low-side caster. Do not use a loose folded paper or cardboard as a shim as it will compress over time and the cage will shift.
If you have a hanging version of a Pet Republic cage (some smaller models are designed for ceiling hooks), the hook must be rated for at least three times the cage's loaded weight (cage plus bird, food, water, and toys). Use a stud finder to locate a ceiling joist, drive a screw-in hook rated for the load directly into the joist, and hang a short length of chain rather than a rope. Chains don't fray and are easier to inspect for wear. Once hung, the cage should not swing more than an inch when the bird moves inside.
Add accessories correctly: liners, perches, feeders, waterers, and toys
Cage liner
Line the pull-out tray with plain, unscented paper: newspaper (black ink only, not colored inserts), paper towels, or cage liner paper cut to fit. Avoid cedar or pine shavings because the aromatic oils irritate bird respiratory systems. Avoid corn-cob bedding in the tray because it grows mold quickly in a humid environment. The liner should cover the tray completely so you can pull it out cleanly for daily changes without waste dropping onto the floor.
Perches
Fit perches at two different heights so the bird has high and low options. The highest perch should sit at least two inches below the top of the cage interior so the bird doesn't have to hunch. The lowest perch should be high enough that tail feathers don't brush the grate. Stagger perches so none is directly above another (this keeps droppings off lower perches and food cups). Thread each perch through the bar grid and secure the end nut or bolt finger-tight plus a half turn. Wiggle each perch after installation: it should not rotate or slide sideways under the bird's weight.
Feeders and waterers
Clip cup holders onto horizontal bars at a height the bird can reach comfortably without straining, typically mid-cage level. Position food and water cups near a perch but not directly below another perch (again, droppings contamination). The Pet Republic cages include access doors specifically sized for cup holders, so use those doors rather than the main door for daily feeding. Confirm each cup snaps into its holder with a solid click and cannot be flipped by an active bird. Heavy ceramic cups are more stable than lightweight plastic ones if your bird is a strong chewer.
Toys
Hang toys from the top bars using quick-link connectors rather than loose loops of rope, which can catch toes or beaks. Leave at least one-third of the cage interior free of hanging toys so the bird has clear flight or hop paths between perches. For the 68-inch model with the playtop, the roof area is designed for out-of-cage play: attach toys to the playtop stand rather than crowding the interior.
Placement, airflow, and seasonal protection for bird welfare
Birds need stable temperatures, indirect natural light, and consistent social contact. Place the cage against a solid wall (not in the center of a room) so the bird has a sense of security on at least one side. Position it so the bird gets natural light for part of the day but is not in direct sun for extended periods, since a glass window can focus heat and overheat even a large cage very quickly.
Keep the cage out of the kitchen. Cooking fumes, including smoke and vapors from overheated non-stick cookware, are acutely toxic to birds. This is not a minor precaution: birds have extremely sensitive respiratory systems and fume exposure can be fatal within minutes. Bathrooms are also poor choices due to aerosol product use and humidity swings.
For airflow, the cage should have good air circulation around it but no direct drafts from air conditioning vents, fans, or open windows. A draft hitting the cage at night when the bird is less active and unable to move away is one of the most common causes of respiratory illness. In winter, if the cage is near an exterior wall, check for cold air seeping around window frames or baseboards at cage height.
Cage covers for nighttime use are fine if the bird needs a consistent dark period. Use a breathable fabric cover (cotton or canvas) that does not restrict airflow. Never use plastic sheeting or tightly fitted covers that trap humid air. In summer, if your home gets above 85 degrees Fahrenheit (29 degrees Celsius) near the cage, use a fan to circulate air in the room, but angle it so it isn't blowing directly onto the cage bars.
Common assembly problems and quick fixes
| Problem | Likely cause | Quick fix |
|---|---|---|
| Door won't close flush | Hinge pin not fully seated | Lift door, align hinge pin straight, press firmly down until it bottoms out |
| Latch misses the catch plate | Door is sitting 2-4mm too high or low | Re-seat hinge at correct depth; some models allow sliding the catch plate slightly up or down before final tightening |
| Bar panel gaps at corners | Interlock tabs not fully engaged | Press corner inward by hand and tap with rubber mallet on a towel; check that the bottom edge is fully into the base channel first |
| Cage wobbles on casters | One or more casters not fully seated, or uneven floor | Remove the low caster, clear any debris from socket, re-press until flush; use rubber furniture pads under low-side casters for floor imperfections |
| Grate catches bird toes | Grate corner tab not seated in base lip | Lift grate, re-seat all four corners in their tabs, press flat |
| Loose bars rattle after assembly | Bar panel not interlocked at top as well as base | Re-check top frame is pressed down onto all four side panel tops and fastened at each corner |
| Caster won't lock (rolls freely) | Locking tab broken or not pressed fully | Test all four casters by pressing the tab firmly with your foot; if tab is broken, replace the single caster (they are standard 2-inch furniture casters available at hardware stores) |
A note on missing or incorrect fasteners: Pet Republic cages from different production runs occasionally ship with extra bolts of one size and not enough of another. Before contacting the seller, check the parts bag twice (small fasteners hide in bag corners). If you are genuinely short a bolt, a matching M4 or M5 stainless steel bolt and nut from a hardware store is a safe substitute. Stainless steel won't rust or corrode near water cups and won't add a zinc or lead risk the way some unknown-alloy hardware can.
Ongoing care to keep the cage safe
Daily and weekly cleaning
Pull and replace the tray liner daily. Wipe down perches and cup holders every few days with a damp cloth. Weekly, remove all accessories and scrub them with warm water and plain dish soap, rinse thoroughly, and let them dry fully before returning them to the cage. Soap and water is effective for routine cleaning and does not carry the fume risk that disinfectants do.
When you do need to use a disinfectant (after illness, for example), move the bird to another room, apply the product, allow full drying and ventilation time as directed on the label, rinse all surfaces with clean water, and do not return the bird until you cannot detect any smell and the cage is fully dry. Birds are extremely sensitive to fumes from disinfectants and even some cleaning sprays. Disinfectant fumes can hurt pet birds because their respiratory systems are especially sensitive fumes from disinfectants and even some cleaning sprays. Err on the side of more ventilation time rather than less.
Corrosion and rust checks
Inspect the cage bars and tray monthly by running a white cloth along the bars: rust shows as orange-brown streaks. Pay extra attention to the bottom sections of the bar panels and the tray edges, since waste moisture collects there. Surface rust on powder-coated wrought iron can be addressed by lightly sanding the spot with fine-grit sandpaper and applying a bird-safe cage touch-up paint (sold at pet suppliers). Deep rust that pits the metal means that bar or panel section should be replaced, because pitted rust is hard to remove fully and a bird will pick at flaking metal.
Pest prevention
Feather mites and red mites can establish in cage joints, under the tray, and in wooden perch cracks. As part of your weekly clean, pull the tray completely out and inspect the underside of the grate and the corners of the base frame. Mites look like tiny red or black moving dots, often seen at night or in the dark. If you spot them, remove the bird, strip the cage completely, and wash every surface with boiling water where possible plus a vet-approved mite treatment. The slide-out tray on Pet Republic cages makes this much easier than cages with fixed bases. Replace wooden perches when they develop deep cracks, since mites hide inside the crevices and are nearly impossible to eliminate from porous wood.
If you're also researching assembly for other cage brands, the build sequences for models like the Vivohome and A&E cages follow a similar base-first, panels-second logic, though their hardware and latch systems differ. If you’re working from vivohome bird cage instructions, check the door hinge and latch hardware alignment before you tighten everything down. Pet Republic's latch system is particularly straightforward once the hinge depth is correct, which is where most assembly trouble starts and ends.
FAQ
My Pet Republic front door won’t align with the latch, what should I check first?
Use the model number to identify the exact latch style, then do the door test before fully tightening hinge hardware. With the door closed, the gap around the latch side should look even, and the door should lift a millimeter at most when you push up with two fingers. If it drags or the latch misses, reseat the hinge pins first (shift the door a few millimeters), then re-test the catch plate engagement before adding accessories that might flex the frame.
One caster spins freely or won’t lock, how do I fix it during assembly?
After installing the casters, confirm each wheel locks and holds under real load by doing a gentle push on each corner (with the cage still empty). If a caster spins in free mode but does not resist when locked, the stem may not be fully seated in its corner socket, or the lock tab may be installed upside down. Don’t shim under a caster that is loose, reseat and re-tighten first, then level.
The cage wobbles after I assemble it, how can I tell if it’s the floor or the frame?
If the cage rocks on a level floor, assume the floor is uneven before blaming the frame. Place a level on the top frame, not the base, and use a single thin furniture leveling wedge or rubber pad under only the low-side caster. Avoid layering shims, loose paper, or cardboard, because they compress and the cage will drift back out of level when the bird moves.
My pull-out tray won’t slide smoothly, what are the most common causes?
If the slide-out tray does not glide smoothly, check that it is fully seated in the base channel and that the grate is installed flat, with no corner lifting. Also verify the tray liner is cut to size and not bunching up near the front edge, because that can change how the tray tracks. If you assembled base panels in the wrong order, the channel can be slightly twisted, so confirm panel fit and interlocks at the corners.
What liner should I use in the pull-out tray, and what should I avoid?
For a safe setup, start with liners that you can remove in one pull without leaving fibers behind. Use plain paper liners that cover the tray completely, then wipe any stray residue off the bottom of the tray edges before returning it. Avoid scented or oily materials (cedar or pine shavings) and avoid corn-cob, because moisture and odor control issues show up quickly in the tray area.
Can a slightly raised grate corner be dangerous, and how do I check for it?
If your bird can wedge a foot or nail between bars, the door or grate alignment may be slightly off. Inspect the grate corners for any raised edges and ensure the grate sits flat in its slots or lip tabs. Then test by gently pushing the grate with a gloved hand to see if any corner lifts, and correct it before introducing toys that add extra foot traffic.
How should I position perches and prevent droppings from contaminating food and water?
Install perches so droppings cannot land directly onto lower food or water points by staggering heights and offsetting their positions along the interior. Keep the top perch at least about two inches below the interior top so your bird does not hunch, and keep the lowest perch above the grate so tail feathers do not contact it. After tightening, wiggle each perch firmly to confirm it cannot rotate or slide sideways.
Where should I place the food and water cups, and how do I use the access doors correctly?
When clipping cup holders onto bars, place them so the bird can access without stretching up to the ceiling bars or bending down to the tray level. Use the small access doors made for cup holders rather than opening the main door daily, because repeated main-door use can loosen hinge alignment over time. Confirm the cups click into holders and cannot be flipped by a strong chewer.
What’s the safest way to hang toys inside a Pet Republic cage?
For hanging toys, avoid loose loops that can tangle a beak or toe. Use quick-link connectors, then leave at least one-third of the interior open for hopping or short flights between perches. If you have the playtop model, attach toys to the playtop area instead of crowding the main interior, since that roof space is designed for out-of-cage enrichment.
Where should I place the cage in my home, and what locations are highest risk?
Even if you leave the cage out in a quiet room, avoid placing it where cooking fumes can reach the bird, including smoke and vapor drift. Bathrooms are also risky because humidity and aerosol sprays can linger around the cage area. Aim for indirect light, with at least one solid wall behind the cage, and keep it away from direct airflow from vents or fans.
Is it safe to use a cage cover at night, and what kind should I use in hot or humid rooms?
Covering can be fine, but the cover must breathe. Use a cotton or canvas breathable cover, and never use plastic sheeting or a tightly fitted cover that traps humid air. If the room is hot (above about 85°F near the cage), use a fan for air circulation but angle it so it does not blow directly onto the bird’s perch area.
I used a substitute bolt or I think I have the wrong fastener size, is that okay?
If the cage was assembled with substitute hardware, only use stainless steel bolts and matching nuts so you get consistent fit and corrosion resistance near water. If you suspect wrong-size fasteners from a production run, re-check the bag corners and compare against the parts diagram before ordering new parts. Don’t overtighten latch hardware, overtightening can crack some plastic sleeves used on the latch.
How long should I wait after using disinfectant before putting my bird back?
After a disinfectant, do not return the bird until the cage is fully dry and you cannot detect any remaining chemical smell. Birds are extremely sensitive to fumes, and residual product can cling to corners, grate edges, and latch areas. After rinsing, allow extra ventilation time beyond the label if you can still smell the product.
What do I do if I find rust on the bars or tray?
Rust checks are easiest using a white cloth wipe, and you should focus on bottom bar sections and tray edges where moisture sits. If you see orange-brown streaking but the coating is not pitted, you can lightly sand and apply bird-safe touch-up paint. If metal is deeply pitted or flaking, replace the affected panel or bar section, because birds will pick at it and removal will be incomplete.
How do I catch feather or red mite issues early, and what should I inspect weekly?
Yes, mites can live in joints and under grate edges, so a surface-only wipe is not enough. In weekly inspection, pull the tray out completely and inspect the underside of the grate and base corners. If you see moving tiny red or black dots, remove the bird, strip the cage, wash surfaces with boiling water where possible, and use a vet-approved mite treatment before reassembling.
Next Article
Pets Alive Bird Cage Instructions: Safe Setup Checklist
Step-by-step Pets Alive bird cage instructions: safe sizing, assembly, placement, interior setup, and maintenance checkl