
To assemble an A&E bird cage, start by finding your model number on the box or manual (common ones are 800-3628, 800-3223, and 900-3628), lay out every part against the box list, attach the wheels to the front and back wire panels first, then bolt the four side panels together to form the body, slide on the top wire mesh, drop in the tray and grill from the front, clip the seed guards above the bar, and finish by tightening every screw before you put a bird inside. That sequence works across most A&E configurations, but the details below will help you handle door alignment, stand fitment, accessories, and the few spots where things commonly go wrong.
A&E Bird Cage Instructions: Step-by-Step Assembly Guide

Maya Bennett
6 Jul 2026
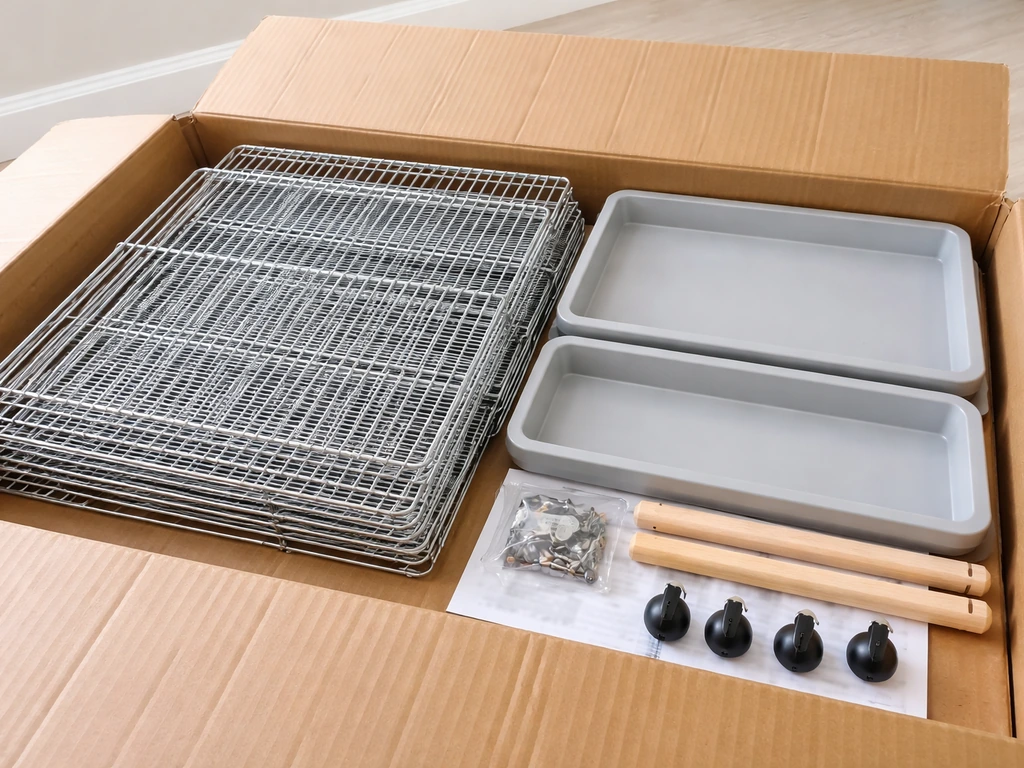
Identify your exact A&E cage model and parts
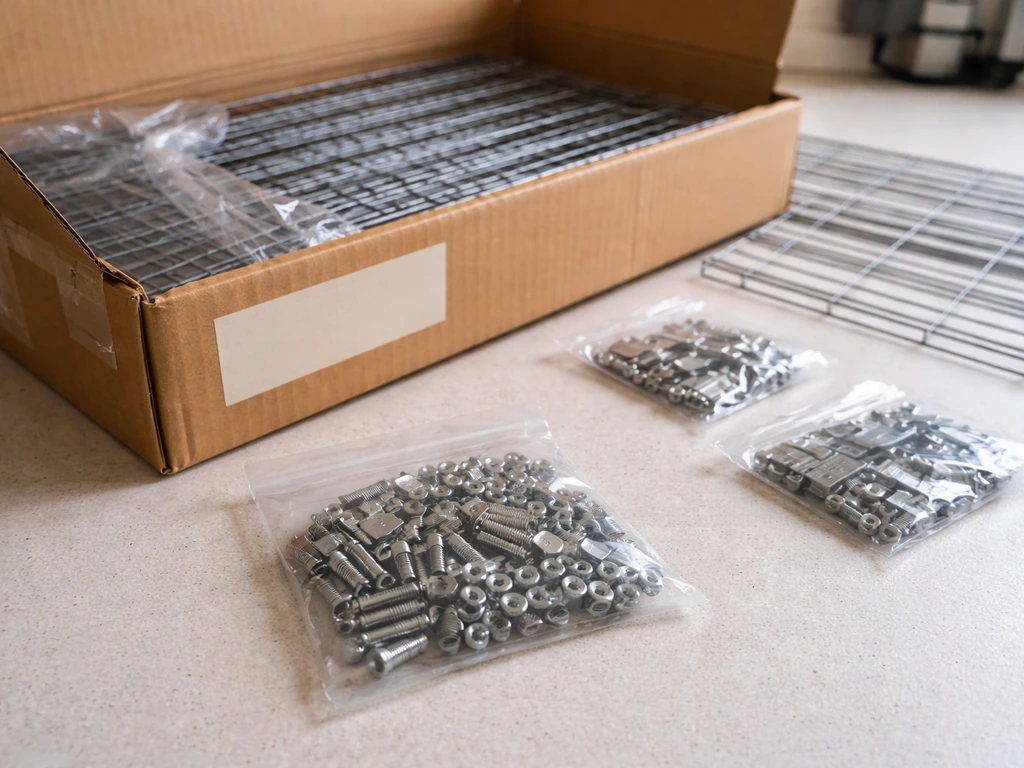
Before you touch a screwdriver, figure out exactly which cage you have. A&E makes dozens of models, and the hardware bags, feeder sizes, and panel counts differ between them. The model number is usually printed on the outer box flap or on a small sticker on the instruction sheet. Common ones you'll encounter are 800-3628, 800-3223, and 900-3628. The first digits roughly correspond to cage series, and the last four digits indicate footprint size, so a 900-3628 is a larger footprint version of the 800-3628 body style.
Once you have the model number, pull the instruction sheet out of the screw bag (it's usually folded inside or taped to the bag, not loose in the box). If yours is missing, Bastropcages hosts a collection of A&E assembly instruction PDFs organized by item number, so you can download the right one-page sheet in a few minutes. Don't skip this step and try to wing it from memory of another cage, because feeder cup sizes and tray slide directions do vary.
Now lay every single part on the floor next to the box list. Here's what a typical A&E playtop cage includes, so you can check off yours:
| Part | 800-3628 | 800-3223 | 900-3628 |
|---|---|---|---|
| Front/Back/Left/Right wire panels | 1 each | 1 each | 1 each |
| Top wire mesh panels | 2 pcs | 1 pc | 1 pc |
| Grill (dense mesh / bottom grate) | 1 | 1 | 1 |
| Seed guards | 4 | 4 | 4 |
| Trays | 2 pcs | 2 pcs | 2 pcs |
| Wheels | 4 | 4 | 4 |
| Stairs | 2 | 2 | 2 |
| Playtop tube / toy hook stand | 1 | 1 | 1 |
| Upper perch | 1 | 1 | 1 |
| Bottom perch | 1 | 1 | 1 |
| Feeder cups (large) | 6-inch x4 | 5-inch x3 | Varies by listing |
| Feeder cups (small) | 5-inch x2 | 4-inch x2 | Varies by listing |
| Feeder holders / rings | Matching set | Matching set | Matching set |
| Screw bag (M8x35 bolts + extras) | 1 | 1 | 1 |
If anything is missing, stop and make note before assembly. You'll need those parts before the cage is safe for a bird. Jump to the troubleshooting section at the end for what to do about missing hardware.
Tools and safety checks before you start
Tools you'll need
- Phillips-head screwdriver (medium size, fits M8 screws)
- Adjustable wrench or 13mm open-end wrench (for tightening nuts on wheel axles)
- Needle-nose pliers (helpful for reaching bolts inside the frame)
- A clean flat floor space at least 6 feet by 6 feet
- A small bowl or tray to hold screws while you work
- Pen and paper or your phone to photograph parts before assembly
Safety checks before a single screw goes in
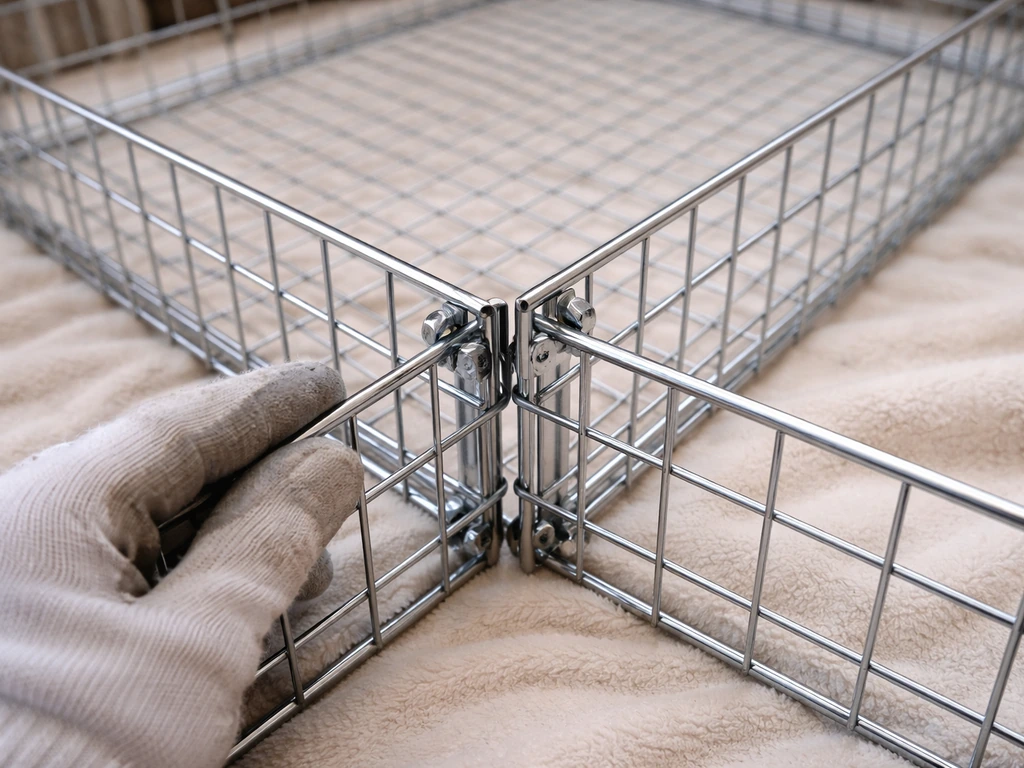
A&E Cage Company has been making cages for over 30 years and uses a non-toxic powder-coated finish on its wire, which is the main reason these cages are generally considered safe for parrots and other pet birds. That said, it's worth doing a quick physical inspection when you unbox, because shipping damage happens and a bent bar can create a gap wide enough for a toe or beak to get trapped.
- Run your hand along every wire panel and check for sharp edges, protruding wire ends, or bent bars. Bent bars are the most common shipping damage. If a bar is bent enough to widen the gap significantly, don't use that panel.
- Check the powder coating. Look for chips or bare metal spots, especially on corners. Small chips are usually fine; large areas of bare zinc or metal warrant a call to A&E before using the cage with a bird.
- Inspect the screw bag. Count the M8x35 bolts. Most models ship a few extras, but you should have at minimum enough for all four panel-to-panel connection points (usually 8 to 12 bolts depending on panel height).
- Check that door hinges and latch mechanisms move freely and aren't bent. Open and close each door before you assemble the body, because it's much harder to adjust hinges once the panels are bolted together.
- Verify feeder cups fit their holders. Cups that don't sit flush in the holder ring leave gaps around the rim, which can trap toes. If a cup wobbles or sits high, it's the wrong size for that holder.
One note on the heavy-metal question: there has been community discussion online about whether certain A&E cage colors or coating batches could have lead or zinc content. A&E's official position is that their finish is non-toxic, but if you want extra peace of mind, you can wipe panels with a damp cloth and let them air-dry thoroughly before use. If you're seriously concerned, contact A&E directly using their contact page to ask about the specific batch or color you received.
Step-by-step cage assembly order
The assembly order below reflects the common sequence across the 800-3628, 800-3223, and 900-3628 models. After you confirm the right model and parts, follow the pet republic bird cage instructions to finish assembly safely. Stick to this order because it's much harder to attach wheels after the body is formed, and sliding the tray in is impossible once the grill is locked down.
- Attach wheels first. Take the front wire panel and screw two wheels onto its bottom corners. Then attach two wheels to the bottom corners of the back wire panel. Use the bolts from the screw bag and hand-tighten for now.
- Stand the front and back panels upright on a flat surface. Position them parallel to each other, roughly the width of the left or right panel apart.
- Attach the left wire panel between the front and back panels using M8x35 bolts. The holes will align at the vertical corners of each panel. Insert bolts from the outside and thread the nut on the inside, or follow the direction shown on your instruction sheet (some models use a wing-bolt assembly).
- Attach the right wire panel the same way. You now have a four-sided body. Check that it sits level on its wheels before going further.
- Slide the top wire mesh panel(s) onto the top of the body. On models with two top panels (like the 800-3628), they slide together from opposite sides and meet in the middle. On single-top models (800-3223, 900-3628), the single panel slides on from the front or back edge.
- Slide the tray into the body from the front wire opening. It should glide in horizontally on the interior ledge or channel. Don't force it. If it catches, pull it back and check that the body panels are squared up (see troubleshooting below).
- Install the four seed guards. These clip or slide into the slots above the horizontal bar that runs around the lower portion of the cage body, one on each side. They should sit flush against the outside of the cage and hang down to catch stray seeds.
- Slide the grill (dense mesh bottom grate) into the body from the front. It sits above the tray and below the perch level. On most models it slides along the same channel as the tray but at a higher level, or it drops in from the top before the top mesh is fully closed.
- Assemble the playtop stairs and toy hook stand onto the top. These typically use a slip-fit or bolt attachment to the top wire mesh or the playtop tube. Refer to your instruction sheet for the exact angle.
- Open the front door and slide the perch from left to right through the perch holes on the left and right panels. The perch should be snug but not forced. If it doesn't reach the far side, the panels may not be fully squared.
- Open each dish door and drop feeder cups into their matching holders. The cup rim should sit flat in the holder ring with no visible gap around the edge.
- Now go back and tighten every single bolt and screw. Do not skip this step. Hand-tight is not enough. Use your wrench or screwdriver to snug everything down. Give the cage a firm shake test: grab opposite corners and apply gentle pressure. Nothing should shift, click, or rattle.
Door, tray, and stand alignment troubleshooting
Door won't close or latch properly
This is almost always caused by the body panels being slightly out of square. Loosen the bolts at the two corners closest to the problem door, push the panel into true alignment by eye, and re-tighten. If the door hinge itself is bent, use needle-nose pliers to gently straighten the hinge leaf before reassembling. Never leave a door that doesn't latch fully: a bird can push it open.
Tray doesn't slide in or gets stuck halfway
The usual cause is that one or both side panels are slightly bowed inward, narrowing the channel. Loosen the side panel bolts, slide the tray in, and then re-tighten while the tray is in place to let the panels settle around it. This technique works on most models. If the tray still binds, check whether it's upside down: most A&E trays have a slight lip on one edge that faces upward.
Stand wobble and uneven feet
If your A&E cage came with a stand, pay attention to how the cage body sits on the two horizontal tube bars that form the top of the stand. According to assembly guidance for A&E flight cage stands, the small metal tabs welded to the sides of those tube bars must face away from the stand frame, not inward. The cage base rests inside those tabs. If the tabs face the wrong way, the cage will rock. Flip those bars 180 degrees, re-seat the cage, and the wobble disappears. Also check that all four wheel locks (if present) are engaged when the cage is in its final position.
Panels don't align at the bolt holes
If bolt holes between two panels don't line up, don't force a bolt through at an angle. Lay the cage body flat on its back on a soft surface, loosen all bolts, re-seat the panels, and reassemble from scratch in the correct order (front and back first, then sides). Forcing misaligned bolts stresses the wire frame and creates sharp edges over time.
Install perches, feeders, and safe accessories
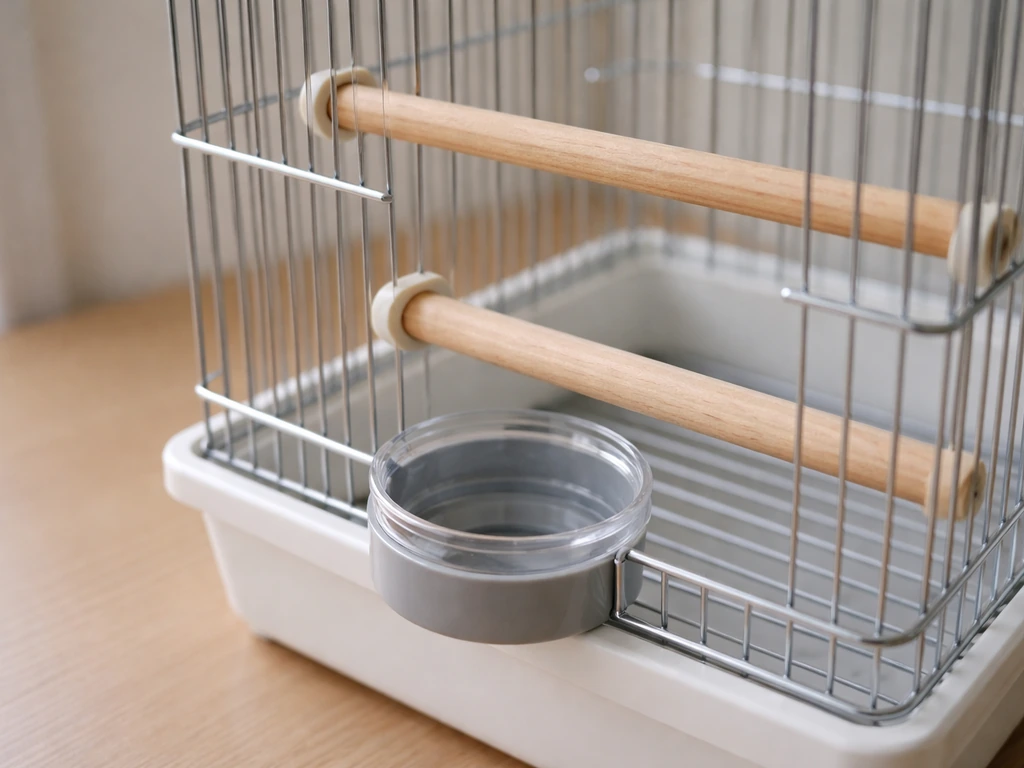
Once the cage is assembled and passes the shake test, you can set it up for your bird. The goal here is variety and safety, not just filling space.
Perches
Start with the included wooden perches (upper and lower positions). Slide them through the side holes left to right as described in the assembly step. For most parrots, add one or two additional natural wood or rope perches at different heights and diameters. Varying diameter helps prevent pressure sores on the feet. Place at least one perch at a comfortable height near the feeder cups so the bird can eat without hanging. Avoid placing any perch directly above a feeder or water cup, because droppings will contaminate the food and water.
Feeder cups and water
Drop each feeder cup into its holder ring through the dish door. If you want Vivohome bird cage instructions instead, look for the manual steps that match your exact cage model and tray style before you attach any feeder cups or water system. The cup rim needs to sit flush with no gap around the edge. A cup that sits too high in the holder leaves a crescent-shaped gap at the rim where a bird can get a toe or nail caught. If the included cups don't fit flush, you likely have a mismatched cup size, which does happen occasionally with multi-size models. Use only the cup size that matches the holder ring diameter. For water, a second cup works fine for most small to medium parrots; water bottles are an option but must be checked daily because the ball valve can stick.
Toys and cage accessories
The playtop toy hook stand on A&E models is designed for hanging toys. A&E Cage Company also sells a range of bird cages and cage accessories like the playtop toy hook setup shown on its site. Use stainless steel or nickel-plated quick-links to hang toys, not galvanized snap hooks, which can have zinc content. Inside the cage, attach toys to the top wire mesh or horizontal bars using the same safe hardware. Don't overcrowd the cage. A bird needs room to move between perches without brushing against toys constantly. Two or three appropriately sized toys for the species is a good starting point. Rotate them weekly to maintain interest.
Placement, covers, and seasonal protection
Where you put the cage matters as much as how you build it. Birds are sensitive to temperature swings, air quality, and drafts in ways that most owners underestimate.
- Place the cage against a solid wall on at least one side. This gives the bird a sense of security and reduces the number of directions from which drafts or sudden movements can startle it.
- Keep the cage out of kitchens. The CDC specifically recommends not housing pet birds where food is prepared or served, and the fumes from non-stick cookware (PTFE/Teflon) can be lethal to birds even at normal cooking temperatures.
- Avoid direct sun on the cage for more than an hour or two at a time. A cage in full south-facing window sun in summer can overheat quickly. If you want natural light, position the cage so only part of it is in direct sun, giving the bird a shaded retreat.
- Keep the cage away from exterior doors and air conditioning vents. The burst of cold air every time a door opens or AC cycles on is hard on respiratory health.
- In winter, if the room temperature drops below 60°F (15°C) overnight, add extra insulation with a cage cover. In summer, ensure ventilation is adequate and the room doesn't exceed 85°F (29°C) for extended periods.
- Use a breathable fabric cage cover at night to give the bird 10 to 12 hours of darkness for proper sleep. Purpose-made covers that fit the cage footprint work best; a loose sheet can bunch and create entrapment risks.
Mess control, cleaning, and pest and maintenance basics
Tray liners and daily mess
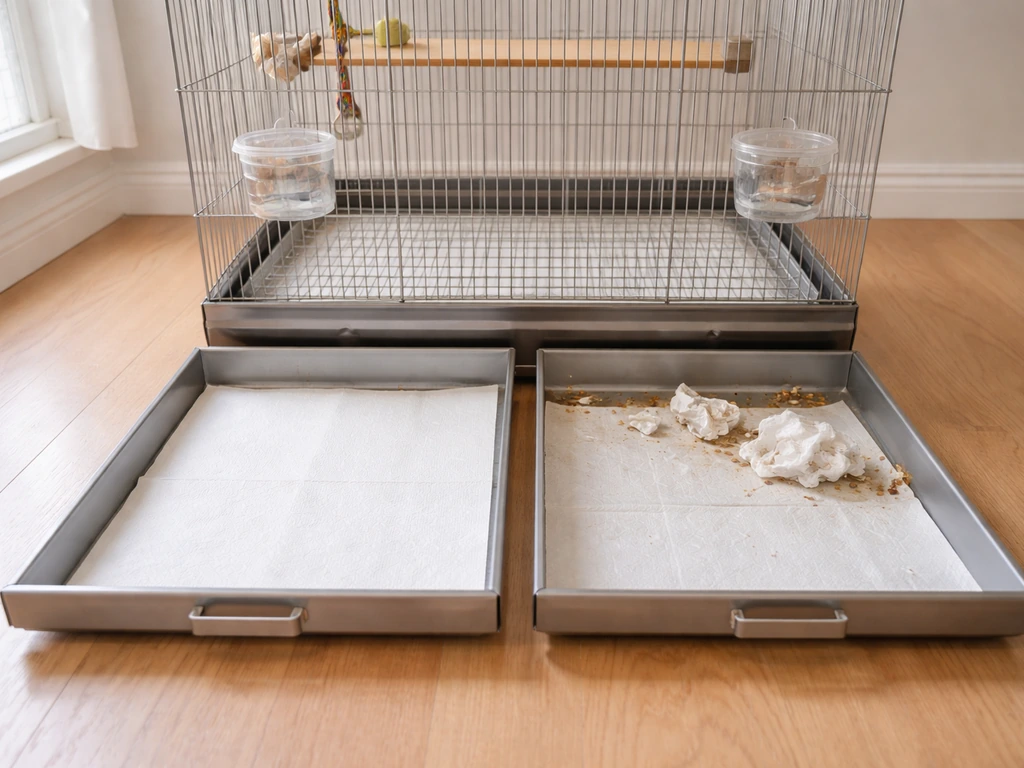
The dual-tray setup on A&E cages makes daily cleanup fast. Line the trays with plain unscented paper towels, plain newsprint (fully dried ink only), or paper cage liners cut to size. Avoid scented or dyed paper, cedar shavings, and any liner with artificial fragrance. Corn cob and walnut shell beddings trap moisture and grow mold quickly, which is a respiratory hazard. Swap out the liner daily and wipe the tray itself every few days. The CDC recommends using a safe, sturdy enclosure/cage for pet birds and avoiding keeping pet birds where food or drinks are prepared, served, or stored, and cleaning cage and equipment when moving or adopting birds or introducing health risks.
Weekly cleaning routine
- Remove the bird to a safe temporary space.
- Pull out both trays, the grill, and feeder cups.
- Wash the trays, grill, and cups with hot water and a small amount of dish soap. Rinse thoroughly.
- Wipe down all wire surfaces with a damp cloth. For dried droppings, let a damp cloth sit on the spot for a minute before wiping.
- If you need a disinfectant, a diluted bleach solution (one part bleach to 32 parts water) works, but rinse every surface completely and allow it to air-dry fully before the bird goes back. Bleach fumes are a serious respiratory danger to birds, so never use it in a closed room or at higher concentrations.
- Check every bolt and fastener while the cage is empty. Tighten anything that has worked loose.
- Inspect the powder coat for new chips or rust spots, especially at bolt contact points.
Pest prevention
Red mites and feather mites are the main pests to watch for in bird cages. They hide in crevices, joints, and under the tray during the day and feed on the bird at night. If your bird seems restless at night or you see tiny reddish-brown specks in the tray or on white paper, suspect mites. Strip the cage completely, wash every part with hot soapy water, and consult an avian vet for a bird-safe treatment. Do not use general household insecticide sprays near birds. Keep the cage away from wild bird contact through windows, which is a common introduction route for mites.
Long-term hardware maintenance
Every month or two, check the wheels for free movement and re-tighten axle nuts if they've vibrated loose. Check door latches for spring tension. Latches that feel loose or springy should be replaced before they fail. If the powder coat develops rust at a corner bolt point, remove the bolt, clean the spot with a dry brush, apply a touch of bird-safe paint or a dab of beeswax to the bare metal, and reinstall.
What to do if parts are missing or instructions don't match
If you open the box and parts are missing or the instruction sheet doesn't match your cage's panel count or feeder sizes, here's the fastest path forward: For owners who need birds to stay safe long-term, follow pets-alive bird cage instructions like daily cleaning and careful hardware checks pets alive bird cage instructions.
- Check Bastropcages first. They maintain a collection of A&E PDF instruction sheets by item number, and they also offer a replacement-parts ordering service. You call them to confirm part availability and shipping cost, then pay via PayPal invoice. It's not instant, but it's the most reliable source for OEM parts.
- Contact A&E Cage Company directly. Their website has a contact page with their address and contact details. They can confirm what hardware should have been in your kit and often ship missing screws or small parts quickly.
- For generic fasteners (bolts, wing nuts), any M8x35mm stainless steel bolt from a hardware store is a compatible substitute for assembly while you wait for OEM replacements. Don't use galvanized hardware inside the cage where it could contact the bird.
- If the feeder cups don't fit the holders, measure the internal diameter of the holder ring before ordering a replacement. A&E uses two common cup diameters (roughly 4-inch, 5-inch, and 6-inch), and mixing them is an easy mistake when reordering.
- If your model number doesn't appear on Bastropcages, search the A&E Cage Company product page directly. The brand sells through Chewy and other retailers, and product pages often include assembly tips specific to that model.
A few other brands like Vivohome and Pet Republic sell cage styles that look similar to A&E models and have their own instruction quirks, so if you're helping someone else with a cage that looks A&E but doesn't match any model number, it may be a different brand entirely. The assembly logic is similar across most wire playtop cages, but feeder sizes and tray channels are brand-specific enough that it's worth confirming before ordering replacement parts. For little live pets bird cage instructions, use the same approach: confirm the exact model, then follow the parts order and tray orientation for your setup assembly instructions.
FAQ
Can I keep the shipping ties and labels on while I assemble the cage?
Most A&E cages are safe to assemble without removing the packaging tag labels, but you should remove any twist ties holding the tray or grill in place. Leave the bag labels on until you have laid out parts beside the box list, then remove ties so you do not pinch wire edges during final bolt tightening.
What should I do if a wheel rubs or won’t roll smoothly on my A&E cage?
If a wheel does not swivel freely after assembly, re-check that the axle nuts are tight but not over-compressed, and confirm the wheel is seated on the correct side of the front and back wire panels. For some models, wheel brackets swap side-to-side, and the wrong orientation causes rubbing against the wire.
My tray slides in at first but gets stuck later, why?
If the tray will slide in but later binds, the cage is often out of square or the tray is inserted with the wrong edge facing up. Loosen side bolts slightly, re-seat the tray, and tighten with the tray in place, then confirm the tray lip faces upward.
Is it okay to force a bolt through if the holes don’t line up?
No. If a bolt hole does not align, forcing it can create stress points that loosen later and can leave sharp edges. Lay the body flat on a soft surface, loosen all bolts, re-seat panels in the correct order, then re-tighten.
What if my feeder cups do not sit flush in the holder rings?
Use only parts that match your exact model and holder ring diameter, because feeder cups that do not sit flush often leave a gap where a toe or nail can catch. If the included cups do not fit correctly, do not enlarge the holder opening, instead verify the correct cup size for your model.
How can I tell whether my door problem is hinge damage or panel misalignment?
For doors that latch partially, check both the hinge leaf and the alignment of the two closest corner panels. A slightly bent latch can be a sign of misalignment, so fix square first, then straighten the hinge only if needed, and confirm the door fully locks before introducing a bird.
My cage rocks when placed on the stand, what’s the fastest check?
If you have a stand and the cage rocks, re-seat the cage so it sits in the welded tabs correctly, with the tabs facing away from the stand frame as the stand design intends. Also confirm all wheel locks are engaged, because unlocked wheels can mimic stand wobble.
Can I use any snap hook or chain to hang toys on an A&E cage?
Yes, but choose hardware carefully. Stainless steel or nickel-plated quick-links are safer for hanging toys, and avoid galvanized snap hooks because some coatings can involve higher zinc content. Also make sure toys do not block feeder access or snag on the tray when you pull it out.
What if my A&E cage has a strong odor or looks different than expected?
If you suspect coating issues, do a simple wipe test first, then let the cage fully air-dry before placing the bird inside. If anything smells strongly, sheds flakes, or has visible rust scaling, stop using the spot and contact the manufacturer with your model and color code to confirm the finish batch.
Can I change liner type mid-week if I run out of the recommended liners?
For daily care, paper liners and paper towels are usually preferred, and you should avoid scented or dyed paper. If you switch materials, introduce one change at a time so you can tell whether the bird shows any irritation from dust, inks, or odors.
How do I prevent mites if I don’t see them yet?
Yes. Besides checking mites by visual clues, watch for behavioral signs like increased scratching or restlessness at night. For prevention, keep the cage away from windows where wild birds can contact the area, and do not spray insecticide around the bird even if it is “off to the side.”
What’s the safest way to handle missing screws or clips for my A&E cage?
If you’re missing hardware, do not substitute random bolts because wire thickness and thread sizing matters for safety. Identify the exact missing piece from the instruction sheet for your model, then contact the seller or manufacturer for the correct replacement hardware rather than using generic hardware store parts.