Vivohome bird cages go together faster than you might expect, but the manual is sparse and a few steps trip up almost everyone. This guide walks you through the full assembly of Vivohome models (including the popular VH433 162 cm / 64" play-top cage), covers every part and tool you need before you open the box, and layers in the safety checks, species sizing, placement rules, and maintenance routines that the manufacturer manual skips entirely. If you own a Pets Alive, A&E, Little Live Pets, or Pet Republic cage, most sections apply directly to you too since those brands share the same powder-coated iron panel construction and metric hardware conventions.
Vivohome Bird Cage Instructions: Complete Setup & Care Guide

Maya Bennett
12 Jul 2026
Who this guide is for and what it covers
This is a hands-on reference for first-time bird owners assembling a Vivohome cage out of the box, experienced keepers switching models or replacing worn hardware, and DIYers adapting these steps to compatible consumer cages from other brands. I have assembled multiple Vivohome units and have pulled together measurement data from the official manuals, veterinary sizing standards, and real owner feedback to give you the complete picture in one place. By the end you will have confirmed your model, passed every safety check, assembled the cage correctly, chosen the right setup for your species, and know exactly how to keep it clean and safe long term.
Identify your Vivohome model and read the manual first
Before you touch a screw, find your model number. It is printed on the box end flap and on a sticker on the base frame of the cage itself. The two most common full-size models are the VH433 (sold as the 162 cm / 64" play-top with rolling stand) and a shorter 54" variant. The part counts, screw sizes, and panel configurations differ between them, so using the wrong manual diagram is one of the most common reasons assemblies go wrong. Pull up your model's PDF manual on the Vivohome support page or via the QR code in the box, and keep it open on a tablet or printed beside you. If your manual is missing, email [email protected] or [email protected] and quote your model number, they will send a replacement PDF and can confirm part availability under the 1-year warranty.
Take five minutes with the manual before touching anything. Locate the exploded diagram, the parts list table, and the numbered assembly steps. On the VH433 the manual explicitly calls out M4×35 and M4×16 screws as separate items, they look similar but are not interchangeable, and mixing them up causes loose panels or stripped threads. Circle or highlight each fastener type in your manual now, not mid-build.
Printable parts and tools checklist
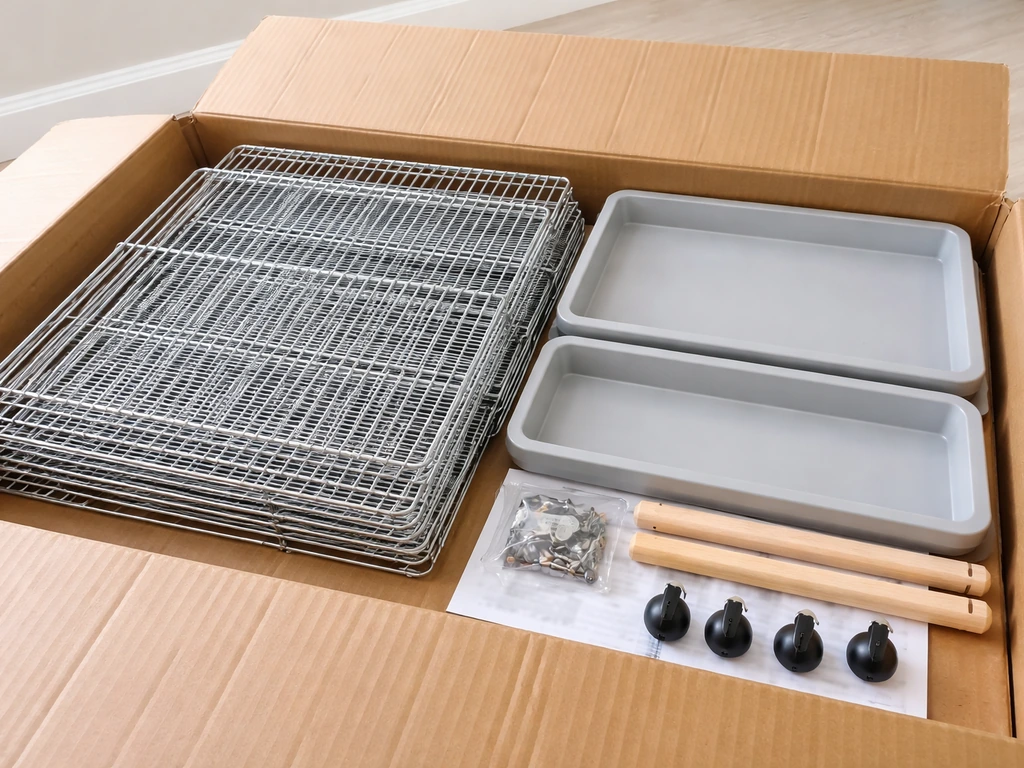
Print this section or screenshot it before unpacking. Lay every item from the box out on a clean floor and tick it off against the list before assembly begins. Discovering a missing part after you are halfway through is far more frustrating than a two-minute count at the start.
Included parts (VH433 / 64" play-top reference model)
| Part | Qty | Notes |
|---|---|---|
| Base tray / slide-out tray | 1 | Check that tray slides smoothly in both directions before assembly |
| Tray grate / grid panel | 1 | Sits above tray; check for bent wires |
| Lower body panels (side + front + back) | 4 | Note orientation arrows stamped into frame |
| Upper body / play-top frame panels | 2–3 | Varies by model; check manual diagram |
| Roof / play-top assembly | 1 | Includes top perch mount points |
| Caster/wheel rolling stand legs | 4 | Includes mesh shelf bracket |
| Mesh shelf for stand | 1 | Slots into lower stand frame |
| Wooden perches | 4 | Check for splinters or cracks out of the box |
| Plastic feeding cups | 4 | Check each cup for cracks; replacements crack under UV |
| Bird swing | 1 | Inspect hook ends for sharp burrs |
| M4×35 screws | Per manual count | Longer screws; used for panel-to-panel joints |
| M4×16 screws | Per manual count | Shorter screws; used for door hardware and smaller brackets |
| Hex key (Allen wrench) | 1 | Usually 3 mm; confirm size against your M4 hardware |
| Instruction manual / parts diagram | 1 | Download backup PDF before starting |
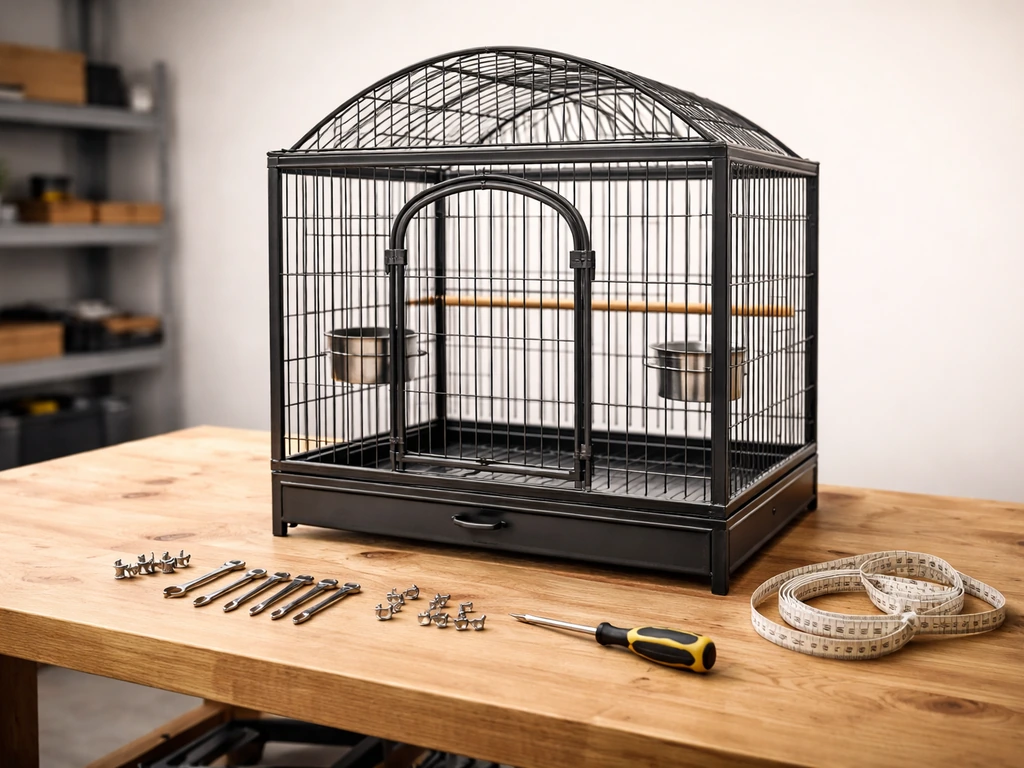
Tools to have ready (not always included)
- 3 mm hex key (Allen wrench) — the included one is fine but a T-handle version is easier on your hand
- Phillips-head screwdriver (PH2) — for any door-latch plate screws
- Adjustable wrench or 7 mm open-end spanner — for caster lock nuts
- Rubber mallet or padded hammer — for persuading snap-fit panel tabs without scratching the finish
- Zip ties (a handful) — useful for temporarily holding panels plumb while you insert screws
- Fine-grit sandpaper (220 grit) — to smooth any sharp wire ends found during inspection
- Bird-safe disinfectant or dilute bleach solution — to wipe all surfaces before first use
- Permanent marker — for marking screw locations on diagram if your manual diagram is unclear
Inspecting parts, hardware, and finish before you assemble anything
This step is not optional. Birds interact directly with every surface in the cage, and problems that are easy to fix before assembly become serious safety issues once the cage is built and occupied. Work through each part systematically in good light, ideally near a window.
Wire and welded joints
Run a gloved hand across every wire panel. You are feeling for sharp wire ends at weld points, protruding burrs at corners, and any wires that are bent out of the plane of the panel (a bird can work a misaligned wire into a gap and trap a toe or a beak). Smooth any minor burrs with 220-grit sandpaper. If a weld joint is cracked or a wire is kinked badly enough to leave a gap larger than the stated bar spacing, do not use that panel, contact Vivohome for a replacement.
Powder-coat and finish condition
Vivohome cages use a powder-coated iron frame. The powder coat is your bird's barrier against bare metal, and bare metal is a toxicity risk. Zinc and lead are the two most clinically significant heavy-metal poisonings in pet birds, and chipped or flaking coatings on cheaply finished cages can expose galvanized wire or plated hardware underneath. Inspect every panel under strong light for chips, bubbles, or flaking areas. A small chip on an external-only surface can be touched up with a bird-safe appliance epoxy paint; any chipping on interior bar surfaces means that panel should be replaced or the cage should not be used until it is. Discard any brass or copper-plated decorative hardware from third-party accessories, these are confirmed risks.
Hardware and fasteners
Count every screw against the manual parts list before you start. The M4×35 and M4×16 screws look almost identical in poor light, sort them into two separate containers right now. Check that screw threads are clean (no cross-threading from the factory is rare but does happen in batch-produced flat-pack cages). Reject any screw that shows rust spots or has a rough, uncoated finish on the shank.
Perches and feeder cups
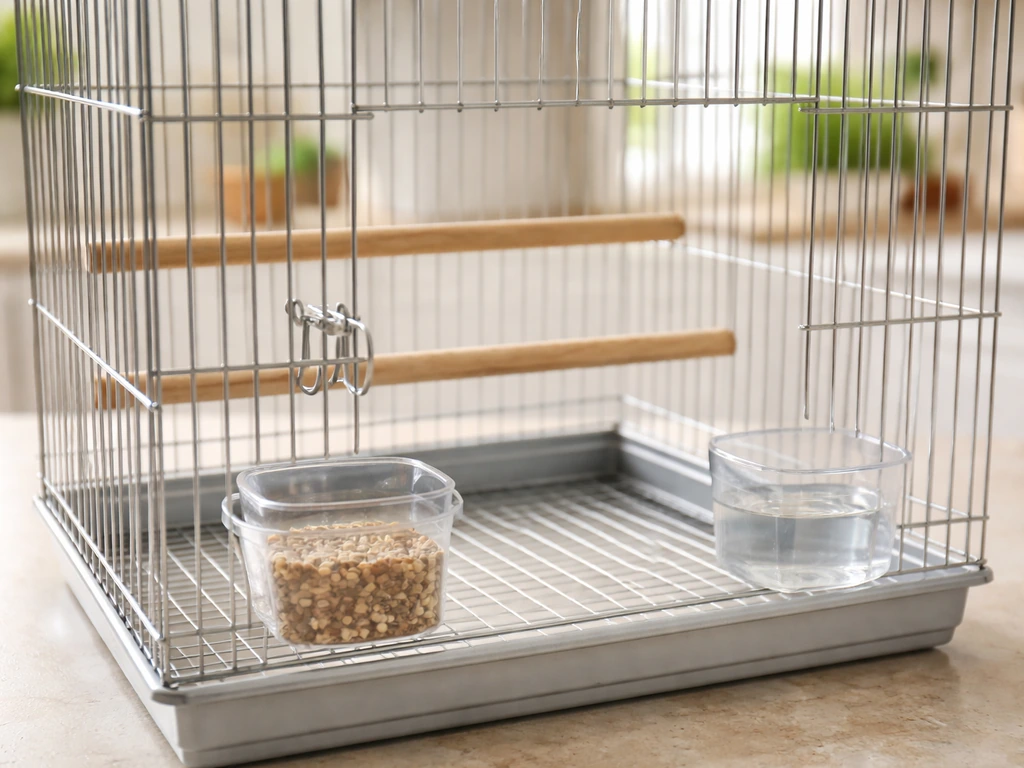
Flex each wooden perch gently. Cracks along the grain are a foot-trap risk and a splinter source, discard and replace any cracked perches before first use. Check plastic feeder cups for hairline cracks, particularly at the rim where they clip onto the cage wire. Cracked cups are a pinch point for toes and also make cleaning impossible. Replacement cups are inexpensive and widely available in standard sizes.
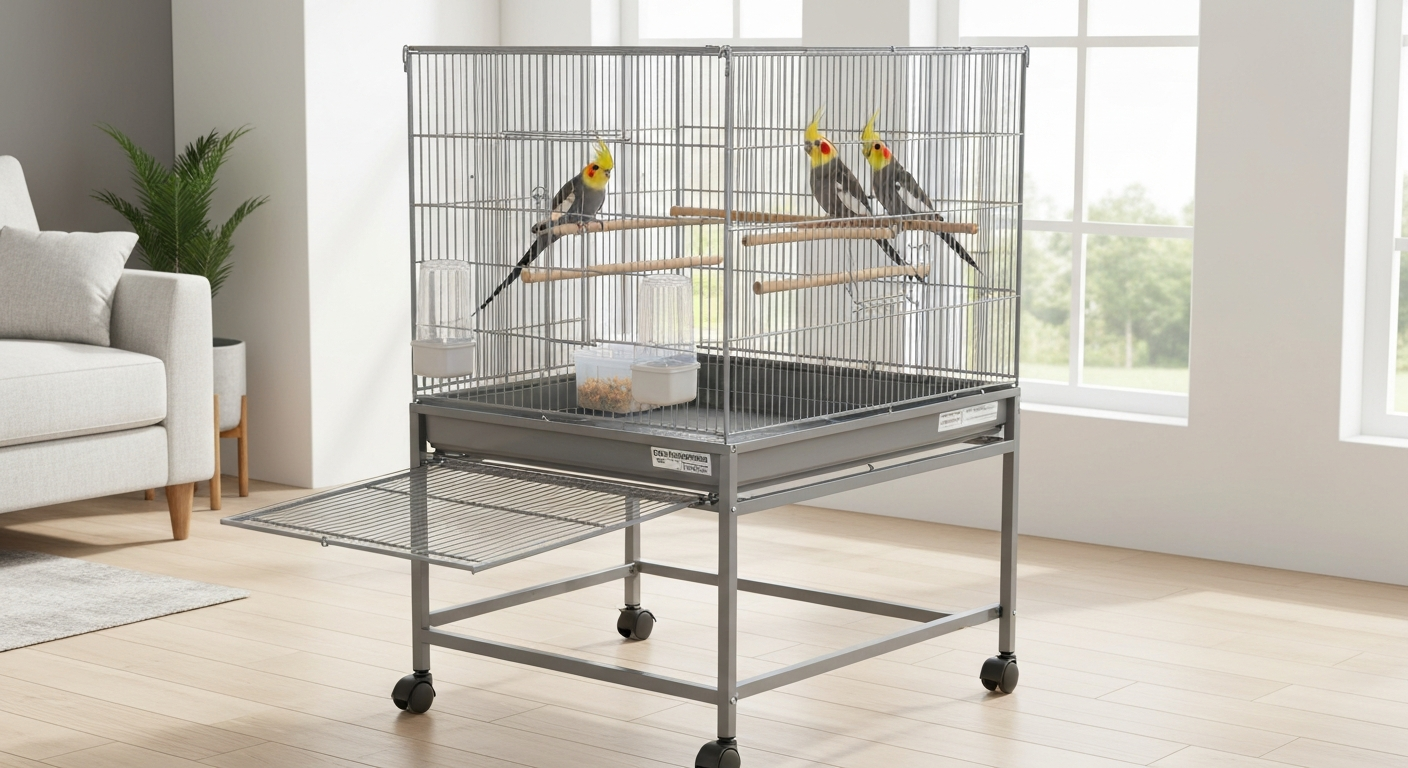
Quick decision aid: species-appropriate cage size, bar spacing, and accessories
The VH433's stated bar spacing is 12.7 mm (0.5 in). That makes it appropriate for cockatiels, small conures, and similar mid-sized birds, but too wide for finches and budgies (who need 6–12 mm / 1/4"–1/2" spacing to prevent head entrapment) and too narrow for larger parrots who need heavier-gauge bars and wider spacing. Use the table below alongside the AAV wingspan rule: minimum cage length should be at least 1.5 to 2 times your bird's wingspan, with government welfare guidance recommending length = 2× wingspan, depth = 1. Scottish government guidance (Annex C: Minimum cage/enclosure sizes, gov.scot guidance for animal welfare establishments) recommends practical minimum internal dimensions using length = 2× wingspan, depth = 1.5× wingspan, and height = 1.5× wingspan Annex C: Minimum cage/enclosure sizes — gov.scot guidance for animal welfare establishments. 5× wingspan, and height = 1.5× wingspan as working minimums. Measure your bird's wingspan and check it against the interior cage dimensions stated in your specific model's manual before purchasing or setting up.
| Species | Bar Spacing | Min. Interior Length | VH433 Suitable? | Perch Diameter |
|---|---|---|---|---|
| Finches / canaries | 6–12 mm (1/4"–1/2") | 45–60 cm (18–24") | No — spacing too wide | 8–10 mm |
| Budgerigars (budgies) | 6–12 mm (1/4"–1/2") | 45–60 cm (18") | No — spacing too wide | 10–12 mm |
| Cockatiels | 12–16 mm (1/2"–5/8") | 60–90 cm (24–36") | Yes | 15–19 mm |
| Small conures (green cheek, etc.) | 12–16 mm (1/2"–5/8") | 60–75 cm (24–30") | Yes | 15–19 mm |
| Caiques / medium conures | 16–19 mm (5/8"–3/4") | 75–90 cm (30–36") | Check model interior dims | 19–25 mm |
| African Greys / Amazons | >19 mm (3/4"+), heavy gauge | 90–120 cm (36–48"+) | No — gauge too light | 25–35 mm |
| Macaws / large cockatoos | >25 mm (1"+), heavy gauge | 120 cm+ (48"+) | No | 35–50 mm |
For perch choices: vary diameter across the perches in the cage rather than using four identical wooden dowels. Natural wood branches (untreated apple, willow, or manzanita) in varying diameters promote foot health far better than uniform dowels. Remove at least two of the included identically-sized wooden perches and replace them with branches or rope perches of different diameters appropriate to your species.
Pre-assembly safety checklist
Go through this list once before you build. It takes under ten minutes and it covers the failure modes that cause real harm. Tick each item physically, do not just read through it.
- All wire panels inspected for sharp ends, protruding burrs, and bent/misaligned wires — smooth or replace before proceeding
- Powder coat on all interior surfaces is intact — no chips, bubbles, or flaking areas exposing bare metal
- No brass, copper-plated, or galvanized hardware included among accessories — discard or replace
- All M4 screws counted and sorted by length (M4×35 vs M4×16 separated into different containers)
- No PTFE (Teflon/non-stick) coated items near the planned cage location — oven, air fryer, non-stick grill, or self-cleaning oven use in the same air space can be acutely lethal to birds
- Assembly surface is stable and flat — assembling on carpet can hide unlevel panels that cause rocking when the cage is moved to its final position
- Planned final placement confirmed: minimum 15–20 cm clearance from exterior walls (for air circulation), away from kitchen cooking areas, away from direct HVAC vents and exterior doors
- Floor surface under planned cage location can support the assembled weight (the VH433 with stand is a substantial unit — confirm your flooring is rated appropriately and use the caster brakes once positioned)
- Any children or pets are kept clear of the assembly area — loose screws and wire panels are a hazard during the build
Step-by-step assembly walkthrough
I recommend assembling in the room where the cage will live, not in a hallway or garage. The assembled cage is large and difficult to move through doorways. Clear a floor area roughly 1.5× the cage footprint and lay down a moving blanket or flattened cardboard to protect both the floor and the powder coat. Have your sorted screws, hex key, and manual diagram within reach.
Step 1: Build the rolling stand base
Connect the four stand legs to the lower cross-frame members first. Each leg receives an M4×35 screw through the frame bracket into the leg post. Finger-tighten all four connections before fully tightening any of them, this lets you square the frame before you lock it. Once all four legs are connected and the frame sits flat, tighten each screw with the hex key. Aim for hand-tight plus a quarter-turn (roughly 1.5–2.0 N·m on M4 hardware in this material). See a Metric screw torque chart (example torque values for M4), fastener supplier torque chart for typical M4 hand‑tool torque ranges (~1.2–3.0 N·m) See a Metric screw torque chart (example torque values for M4) — fastener supplier torque chart for typical M4 hand‑tool torque ranges (~1.2–3.0 N·m).. Do not over-tighten: the powder-coated iron brackets are cast and will crack if you force them. Insert the caster wheels into the bottom of each leg and lock the bolt. Do not lock the caster brakes yet, you still need to move the stand.
Step 2: Attach the mesh shelf to the stand
The mesh shelf slides onto horizontal bracket arms on the lower stand frame. Orient it so the folded lip faces downward (it rests on the arms rather than clipping over them on most models). Check your manual diagram for the specific hook direction on your model. Once seated, the shelf should have no side-to-side movement. This shelf will hold cage accessories and feed storage, confirm it is fully engaged before loading it.
Step 3: Set the slide-out base tray and tray grate
Place the slide-out tray into the tray channel at the bottom of the cage base frame. It should move in and out smoothly with no binding. If it binds, check that the tray is oriented correctly, the handle end faces the front of the cage (the side with the main door). Lay the wire grate on top of the tray inside the base frame. It sits flat and is not screwed in place; it lifts straight out for cleaning. Confirm the grate drops fully into the frame with no raised edges.
Step 4: Raise and connect the lower body panels
This step is much easier with a second person. Stand the four side panels around the base tray frame. Many Vivohome panels have a stamped orientation arrow or a top/bottom designation on the frame edge, find it before you raise the panel, not after. On the VH433 the front panel carries the main access door, so orient it facing you. Align the corner posts of adjacent panels and insert M4×35 screws through the corner bracket holes. Again, finger-tighten all corner screws on the lower body before fully tightening any. Once all four corners are connected and the body feels square (check by measuring corner-to-corner diagonals, they should match within a few mm), tighten all corner screws to hand-tight plus a quarter-turn.
Step 5: Attach lower body to stand
Lower the assembled body frame onto the stand top rails. The base frame of the cage body has locating tabs or bolt holes that align with corresponding points on the stand top. Insert the connecting M4 screws (check manual for length at this joint, it varies between models) and tighten evenly, working opposite corners in sequence (front-left then rear-right, then front-right then rear-left) to keep the assembly square.
Step 6: Add upper body panels and play-top frame
On play-top models like the VH433, the upper body panels attach to the top edge of the lower body via corner brackets and M4×16 screws. The play-top frame then connects to the upper body. Refer closely to your manual diagram here because the feeder door and access door positions on the upper body are asymmetric on some models, getting an upper panel on backwards will misalign the door hinges. Use the door hinge side as your orientation reference: the hinge-side frame rail has a slightly different bracket profile to the latch side on most Vivohome panels.
Step 7: Attach the roof panel
The roof panel sits on top of the upper frame and is secured with M4×16 screws along the four top rails. Lower it square onto the frame and insert all screws loosely before tightening any. On the VH433 the roof has perch mount points for the play-top, confirm the perch hooks are accessible and face upward before tightening the roof down fully. Once tightened, test roof rigidity by applying gentle lateral pressure, no rocking or creaking should be felt.
Photo callout tips for each stage
- Photograph your sorted screw piles before assembly — a before/after shot confirms you used everything
- Shoot each panel's orientation arrow before it goes vertical — helps if you need to disassemble
- Photograph corner brackets at the finger-tight stage and at the fully-tightened stage to document the correct seating depth
- Take a top-down photo of the base tray and grate seated correctly — useful reference for cleaning reinstallation
- Photo the door hinge pin orientation before closing the door for the first time — hinge pins can be knocked out during assembly and are easier to reinsert when you can see the original position
Attaching doors, sliding trays, and caster assemblies
Main access doors and feeder doors
Vivohome doors hang on hinge pins that slide vertically into the frame. Lower the hinge-side of the door onto the lower hinge pin first, then guide the upper pin through the upper hinge loop. The door should swing freely with no binding at the top or bottom of the arc. If it binds, the hinge pins are not fully seated, lift the door slightly and reseat. Do not force the latch side closed until the hinges are confirmed seated; forcing it bends the latch bracket.
Latch security, this matters more than it looks
The single-hook latches on Vivohome and most similarly priced cages are one of the most reported failure points among owners. Cockatiels and conures routinely learn to lift a single-hook latch within days. Before your bird goes in, test every latch by pushing the door firmly outward from the inside (simulate what a bird pushing up and outward would do). If the latch releases under finger pressure, add a secondary lock immediately. Simple options include a carabiner clip through the latch ring, a Chicago screw through the latch plate drilled holes, or a commercially available cage lock designed for this size class. Photograph each latch closed, latched, and with secondary lock engaged so you have a reference for the correct secure state.
Sliding tray reinstallation and cleaning access
The slide-out tray should pull straight out from the front (or side, on some models) with the bird still in the cage. Test this motion fully before your bird moves in. If the tray binds or tips, the lower body frame may be slightly out of square, loosen the lower body corner screws, realign, and re-tighten. Never force the tray while a bird is standing on the grate above it.
Caster wheel assembly and brake engagement
Once the cage is in its final position, engage all four caster brakes by pressing the brake tab down with your foot. Test stability by pressing firmly on each side of the cage, there should be no roll or tip. If the cage rocks, check that all four casters are in full contact with the floor. On uneven floors, use thin rubber pads under the non-braking casters to level the unit. A loaded bird cage with perches, food, and water has significant top weight; never leave the brakes disengaged when the cage is occupied.
Photo tips for doors and hardware
- Shoot the hinge pin from the side before the door swings — the seated depth is visible in profile
- Photograph the latch in the open, closed-unlatched, and closed-latched positions before adding any secondary lock
- Document your secondary latch solution from the outside and the inside of the cage — if someone else needs to open the cage quickly, they need to see both views
- Photo the slide-out tray handle position relative to the body frame so cleaning helpers know exactly which way to pull
Placement and environmental safety
Where you put the cage matters as much as how you build it. Position the cage against an interior wall (not an exterior wall, which transmits cold and drafts), at a height where the bird's eye level is roughly at or slightly below human eye level. This placement reduces stress. Maintain at least 15–20 cm of clearance behind the cage for air circulation and to allow cleaning access.
Keep the cage out of the kitchen or any room where non-stick (PTFE-coated) cookware is used regularly. PTFE fumes released during normal cooking and especially during oven self-clean cycles or overheating of non-stick pans are acutely lethal to birds. This is not a mild risk, birds have died within minutes of exposure in the same home. Air fryers and non-stick grills carry the same risk. If your only practical location is near a kitchen, install a solid-door barrier between the rooms and ensure strong independent ventilation before cooking, every time.
Cleaning and mess control routines
Daily and weekly tasks
| Frequency | Task | Product / Dilution | Notes |
|---|---|---|---|
| Daily | Remove and wipe slide-out tray | Paper towel + warm water | Replace tray liner if used |
| Daily | Rinse and refill water dishes | Fresh water only | Never leave water >24 hours |
| Daily | Wipe feeding cups and perch ends near cups | Damp cloth | Check cups for cracks each time |
| Weekly | Full tray wash + grate scrub | Bleach 1:100 dilution (0.5–0.6% sodium hypochlorite) OR F10 SC at 1:500 | Rinse thoroughly; allow to dry fully before reinserting |
| Weekly | Wipe all interior surfaces and perches | Same dilution as above | Remove bird during cleaning |
| Monthly | Full cage disassembly wipe-down | Bleach 1:100 or F10 SC 1:500; F10 SC 1:250 for heavier soiling | Inspect coating condition during this clean |
| As needed | Heavy organic soiling (droppings buildup) | Bleach 1:10 (10%) for non-contact hard surfaces; F10 SC 1:250 | Prepare fresh solution daily; never store diluted bleach |
On bleach dilutions: household bleach (sodium hypochlorite) at 1:100 means 10 ml bleach in 990 ml water for routine surface disinfection. The stronger 1:10 ratio (100 ml bleach in 900 ml water) is for heavy soiling on surfaces not in direct bird contact. Always prepare bleach solutions fresh, diluted bleach degrades quickly and loses efficacy. Rinse all surfaces thoroughly with clean water after any disinfectant contact and allow to dry fully before the bird returns. F10 SC veterinary disinfectant at 1:500 (general) or 1:250 (heavier soiling) is a widely used bird-safe alternative with lower residual toxicity, follow label contact times and rinse as directed.
Mess control around the cage
- Place a fitted cage apron or seed catcher skirt around the lower body perimeter — this collects seed hulls and feather debris within a manageable radius
- Use a splatter guard mat (washable vinyl or silicone) under the cage and stand — protects flooring and takes minutes to wipe down
- Position food dishes away from the main perch flight path — birds scatter food most when launching and landing directly above dishes
- Use feeder cup covers or hooded dish designs to reduce tossing of pellets and seed mix
Troubleshooting and common problems
| Problem | Likely Cause | Fix |
|---|---|---|
| Door opens on its own | Single-hook latch lifted by bird | Add carabiner or cage-specific secondary lock to every latch immediately |
| Panels rock or creak after assembly | Corner screws not fully tightened or assembly done on uneven surface | Loosen corner screws, square the frame on a flat surface, retighten working in an X pattern |
| Slide-out tray binds or tips | Lower body frame slightly out of square | Loosen lower body corner screws, realign, retighten before testing tray again |
| Powder coat chipping on interior bars | Normal aging, impact, or low-quality factory finish | Stop use; touch up external chips with bird-safe appliance epoxy; replace panel if chipping is on interior bars |
| Plastic feeder cups cracked | UV degradation or rough handling | Replace with stainless-steel cups of the same clip diameter — more durable and non-toxic |
| M4 screws stripped or cross-threaded | Over-tightening or wrong screw length used | Use an M4 thread tap to clean the hole; replace with fresh M4 screw; do not use a larger screw as a shortcut |
| Cage wobbles despite brakes engaged | Uneven floor or one caster not fully seating | Place rubber pads under non-braking casters to level; confirm all four caster brakes engage flush |
| Manual diagram unclear for screw locations | Common issue with batch-printed manuals | Email [email protected] for updated diagram PDF; cross-reference with online community photos of same model |
When original parts are missing or need replacing
Vivohome's 1-year warranty covers missing or defective parts, contact [email protected] or [email protected] with your model number and a photo of the issue. For out-of-warranty or immediate replacement needs, M4 screws in the correct lengths (M4×35 and M4×16) are available at any hardware store; specify stainless steel for corrosion resistance. Replacement plastic feeder cups are available in the standard clip-on bird cage size (most Vivohome cups use a 70–75 mm diameter cup), buy stainless steel versions rather than plastic replacements. Wooden perches can be replaced with untreated natural wood branches (apple, willow, or manzanita are safe choices) cut to the cage interior width and fitted with the same end screw or clip the originals used.
Welfare-safe customizations
The cage as it ships is a starting point, not the finished setup. A few targeted upgrades make a real difference without compromising the structural integrity of the cage. Replace the uniform wooden dowel perches with at least two natural wood perches of different diameters and one rope perch, the diameter variation exercises foot muscles and reduces pressure sore risk. Add foraging opportunities: fold a piece of bird-safe paper or palm frond into a loosely wrapped bundle around a treat and clip it to the cage bars. This adds behavioral enrichment that a bare cage with four identical perches simply cannot provide.
Avoid attaching anything to the cage bars with twist ties, rubber bands, or craft wire. Use only bird-specific stainless-steel quick links or manufactured bird-toy hooks. Never add painted wooden toys unless the paint is confirmed bird-safe (lead-free and zinc-free), the same metal toxicity risks that apply to the cage coating apply equally to toy hardware and decorative accessories.
Notes on Pets Alive, A&E, Little Live Pets, and Pet Republic cages
If you are assembling a Pets Alive, A&E, Little Live Pets, or Pet Republic cage, virtually every section of this guide applies with minor model-specific adjustments. These brands share the same powder-coated iron panel construction, similar metric M4 hardware conventions, and identical categories of reported problems (single-action latches, plastic cup cracking, coating chips). The main differences are in panel count, door configuration, and whether a rolling stand or play-top is included. Use the species sizing table, pre-assembly safety checklist, and troubleshooting table from this guide exactly as written, they are not Vivohome-specific. For model-specific part counts and screw locations, always cross-reference against your own model's manual before starting, and consult the Pet Republic bird cage instructions for their exact diagrams and replacement part guidance. For model-specific part counts and screw locations, always cross-reference against your own model's manual before starting. For step-by-step A&E bird cage instructions and model-specific diagrams, see the dedicated A&E bird cage instructions.
FAQ
What primary manufacturer documents and specs should I obtain before creating step‑by‑step photo assembly instructions for Vivohome cages?
Copies of the exact model user manual (parts diagram, part counts, hardware list with fastener sizes such as M4×35/M4×16), official product specification sheet (overall and interior dimensions, bar spacing, door sizes, weight, finish/coating), accessory list (perches, cups, tray, wheels), and any OEM warranty/after‑sale contact info ([email protected], [email protected]). These verify part names/quantities, confirm door/opening dimensions for photography staging, and give the correct hardware metric sizes to feature in printable lists.
Which dimensional and measurement data are essential to include for species‑appropriate fit checks?
For each cage model include: overall external dimensions; internal usable dimensions (length × width × height); floor area and internal volume; bar spacing and bar gauge; door opening dimensions and feeder‑door locations; perch‑to‑wall clearances; distance between perches. Use AAV and governmental guidance (AAV wingspan rule; gov.scot formula: length=2×wingspan, depth=1.5×wingspan, height=1.5×wingspan) to calculate minimum recommended species fits and present a quick conversion table (wingspan → minimum cage internal dimensions).
What materials and coating information must be audited for bird safety?
Identify all exposed metals and finishes (powder coat, paint, galvanized zinc), plastic types for cups/swing (identify BPA/lead‑free if possible), wooden perch species/finish (untreated hardwood vs painted), and any plated/brass decorative hardware. Highlight presence of galvanized or flaking coatings (zinc risk) and recommend avoiding or replacing suspect materials. Cite Merck/avian toxicosis literature on zinc/lead risks and explicitly flag PTFE‑coated items as acute hazards around heat sources.
Which safety standards and veterinary guidance should be referenced in the guide?
Reference Association of Avian Veterinarians (AAV) minimum cage size recommendations and welfare metrics, government animal‑welfare enclosure sizing guidance (example gov.scot formulas), Merck Veterinary Manual and peer‑reviewed avian toxicosis reviews for metal toxicity, and veterinary guidance on PTFE/Teflon toxicity (VCA). Also include CDC surface‑disinfection recommendations for cleaning protocols and manufacturer guidance for veterinary disinfectants (e.g., F10® SC) for low‑residual options.
What user‑sourced problems and failure modes should be documented and photographed?
Common owner‑reported issues to document: single‑action/insecure door latches (escape risk), birds learning to open simple hooks, powder‑coat chipping exposing metal, cracked plastic feeder cups, missing or ambiguous screw locations in some manuals, loosened casters or stand instability. For each, include clear photos (closeup and context), a short risk description, and recommended fixes or retrofit parts (secondary latch, stainless replacement cups, re‑coating or replacing exposed metal).
What hardware, tool, and torque details must be in the printable parts/tools checklist?
List every OEM part name and count as in the manual plus common alternative replacements: screws (metric sizes e.g., M4×35, M4×16), nuts, washers, casters, feeder cups, perches, tray, slide rails. Tool list: hex keys/Allen set, Phillips screwdriver, adjustable wrench, pliers, rubber mallet, tape measure, level, safety gloves, needle‑nose for small clips. Provide hand‑torque guidance for small metric fasteners (M4 hand‑tighten + quarter‑turn; typical safe torque range ~1.2–3.0 N·m) and instruction to avoid power tools unless low torque and controlled.