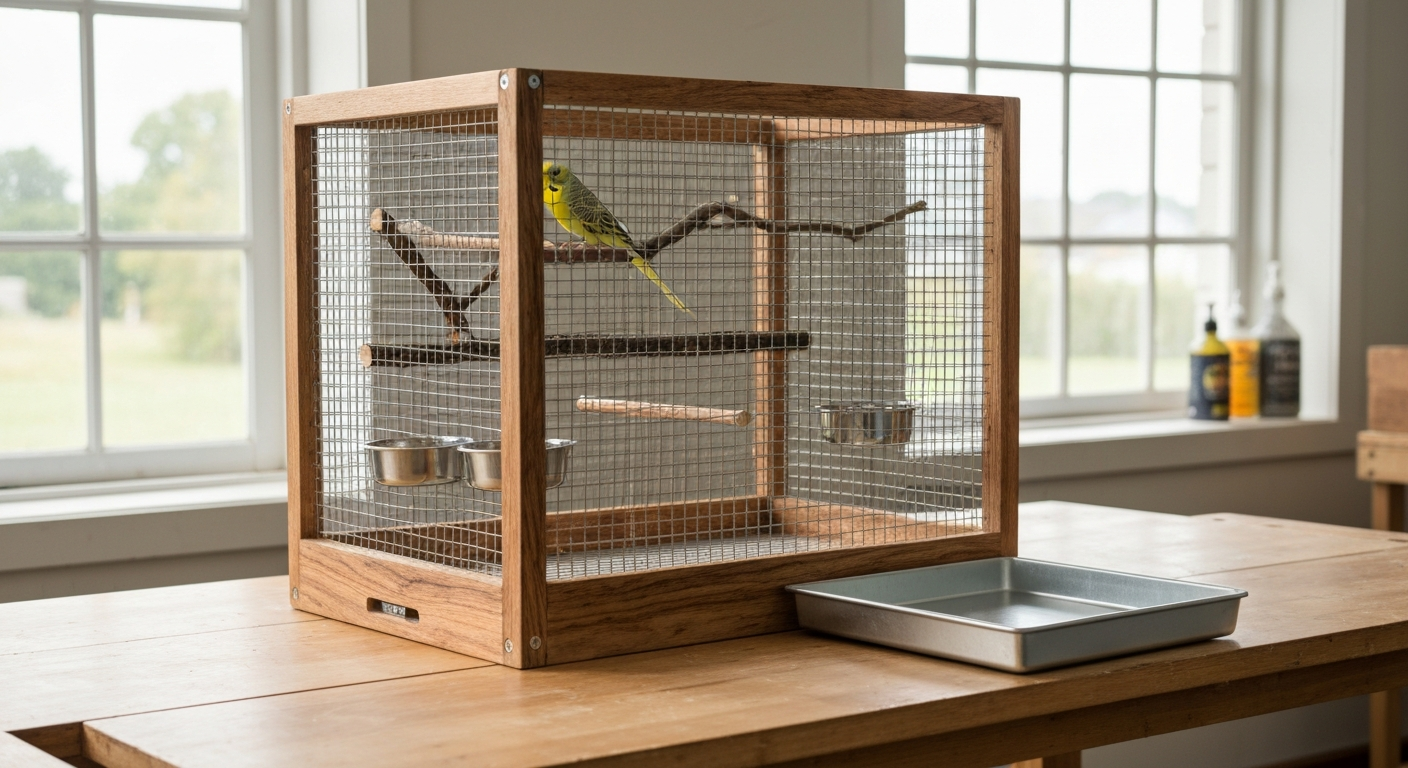
You can build a safe, species-appropriate bird cage from recycled materials as long as you vet every component for toxins before a single bar goes in. That means ruling out galvanized wire (zinc risk), any surface with old paint (lead risk), pressure-treated wood (arsenic), and PTFE-coated parts. Get those checks right and you can produce a cage from reclaimed timber, repurposed hardware cloth, salvaged hutch frames, and secondhand hardware that is every bit as safe as a store-bought unit and far more satisfying to build.
How to Make a Bird Cage from Recycled Materials: Safe DIY

Maya Bennett
15 Jul 2026
Why build a cage from recycled materials (and when you should think twice)
A recycled build is appropriate when you want to keep costs down, reduce waste, or produce a custom size that commercial cages simply do not offer. I have built cages this way for budgies, lovebirds, and cockatiels, and the results have been structurally sound, easy to clean, and cheaper than mid-range shop alternatives. The welfare-first principle is non-negotiable though: the cage must fit the bird, not the budget. Every material decision below is filtered through that lens. If a recycled part cannot be confirmed safe, it does not go in.
A recycled build is NOT appropriate as a quick weekend shortcut if you skip material testing, skip bar-spacing checks, or use whatever timber or mesh happens to be in the garage. It also is not appropriate as a permanent home for a species with bar-spacing needs you cannot meet with your available mesh. In those cases, buying a purpose-made cage is the right call.
Quick decisions checklist before you start
Run through these questions before sourcing any materials. They will determine your build scope, mesh size, and structural requirements.
- Which species will live in this cage? Bar spacing and minimum floor area are species-locked (see the dimension reference table later in this article).
- Indoor or outdoor? Outdoor builds need weatherproofing, predator-proof latches, and UV-stable coatings.
- How many birds? A pair of lovebirds needs at least 32 × 20 × 20 inches (81 × 50 × 50 cm) of interior space per MSPCA-Angell guidance.
- Is the bird a heavy chewer? Parrots, lovebirds, and cockatiels chew mesh and bars constantly. Galvanized wire is ruled out for these species.
- Do I have the tools to test salvaged materials? At minimum you need a lead test swab kit. For serious refurbs, professional XRF analysis is the gold standard.
- Is this a permanent home or a temporary/enrichment enclosure? Temporary use has more tolerance for imperfection, but welfare minimums still apply.
- Can I realistically meet the minimum dimensions with my available materials? If not, a purpose-built or commercial cage is the better choice.
Tools and materials: what to gather before you build
General tools
- Wire cutters and needle-nose pliers
- Drill with metal and wood drill bits
- Tape measure and carpenter's square
- Sandpaper (80-grit and 220-grit)
- Paintbrush for sealing cut wood edges
- Stainless-steel J-clips and a J-clip plier (or zip ties rated for outdoor use as a short-term alternative)
- Rivet gun and stainless rivets (for attaching mesh to metal frames)
- Hacksaw or angle grinder (for cutting metal framing)
- Safety glasses and heavy gloves
Vetted recycled and non-toxic materials
- Stainless steel mesh or welded wire (grades 304 or 316): the safest metal for any parrot or chewing bird; corrosion-resistant and easy to sanitize
- Untreated hardwood lumber (oak, maple, ash, manzanita): sand all surfaces smooth; do NOT use pine or cedar near birds as aromatic oils can cause respiratory issues
- Powder-coated steel bars or panels from reputable salvage: only acceptable if the coating is uncracked, fully cured, and tested lead-free
- PVC-free stainless hardware (hinges, bolts, wing nuts)
- Food-safe stainless-steel bowls repurposed as feeders
- Clean, dried natural branches (apple, willow, hazelnut): superb free perches; remove bark from any species you cannot positively identify as safe
- Untreated sisal rope (for perches and foraging toys)
- Recycled glass or ceramic tiles for easy-clean tray lining
- Newspaper or unbleached parchment paper for cage liners
Items to avoid completely
- Hot-dipped galvanized wire or mesh: zinc leaches with chronic chewing and causes metal toxicosis; avoid for all hookbilled species
- Any painted timber or metal surface that has not been lead-tested: even a quick swab test with an EPA-recognized kit (such as LeadCheck or D-Lead) is mandatory before use
- Pressure-treated or CCA-treated wood: contains arsenic and chromium compounds; never use where birds can chew or inhale dust
- PTFE/Teflon-coated components: PTFE fumes released above approximately 260°C cause acute fatal pulmonary edema in birds
- Rusty, pitted, or flaking metal: rust conceals zinc and other metals; if you see white-rust or flaking on galvanized parts, discard them
- Aromatic cedar, cherry, or unknown exotic timbers
- Adhesives or sealants that are not fully cured and confirmed bird-safe (construction adhesives, spray foam)
- Brass or copper hardware: copper-containing metals can leach into water bowls and food surfaces
Safety checks you must do before assembly
Test for lead and zinc
For any salvaged painted surface, use an EPA-recognized lead test kit (LeadCheck or D-Lead swabs are the most accessible options). These give a color-change result in under a minute. For serious refurb projects involving painted metal or older structural components, professional XRF analysis is the gold standard: it is fast, non-destructive, and accurate. If you cannot confirm a surface is lead-free, strip it back to bare metal or timber, sand it clean, and apply a verified food-safe sealant.
For metal mesh and hardware, visually inspect for white powdery rust (a sign that zinc is oxidizing and available for ingestion), pitting, or flaking. The Pet Poison Helpline advises discarding any rusty or flaking galvanized parts entirely. When in doubt, spend a little more on verified stainless mesh: it is the one material in this build where upgrading pays for itself in peace of mind.
Bar spacing: the non-negotiable measurement
Bar spacing determines whether a bird can trap its head, foot, or wing between bars. Too wide and the bird escapes or injures itself; too narrow and the spacing is fine but adds unnecessary mesh cost. Use the Merck Veterinary Manual recommendations as your baseline: 0. See Minimum and Bar Spacing Recommendations - Merck Veterinary Manual for the full table (example conversions: 0.5 in = 12.7 mm for budgerigar/cockatiel/lovebird/parrotlet; 0.75 in = 19.05 mm for conures/small parrots; 1.5 in = 38.1 mm for macaws/large cockatoos). 5 inches (12.7 mm) for budgerigars, cockatiels, lovebirds, and parrotlets; 0.75 inches (19 mm) for conures and small parrots; 1.5 inches (38 mm) for macaws and large cockatoos. Measure your mesh before cutting, not after.
Structural strength
The frame must hold the mesh taut under chewing pressure and the weight of climbing birds. For small birds up to cockatiel size, 19-gauge welded wire on a 2×2 timber or light angle-iron frame is more than adequate. For medium parrots such as African greys, use heavier 16-gauge mesh and a steel angle or square-tube frame. All joints should be mechanically fastened (J-clips, rivets, or bolts): never rely on glue alone.
Finish curing
If you apply any paint, sealant, or coating to timber components, allow the full manufacturer-stated cure time before birds are introduced. Most water-based non-toxic paints (such as verified zero-VOC latex) need at least 72 hours at room temperature. Partial curing means off-gassing is still happening. I always double the stated cure time and air out the cage outdoors before bringing it inside.
Scaling your project: from quick fixes to full builds
Not every project is a full cage build. Here is how to think about scope.
| Project type | Typical time | Materials needed | Skill level |
|---|---|---|---|
| Quick repair (replace a bar, patch mesh) | 30–60 min | Matching mesh offcut, J-clips, pliers | Beginner |
| Tray or liner replacement | 1–2 hours | Sheet metal, ceramic tile, or timber offcut | Beginner |
| Hutch conversion to bird cage | Half day to full day | Replacement mesh, locks, sealant, hardware cloth | Intermediate |
| Simple small cage from scratch | Full day | Timber frame, stainless mesh, hardware | Intermediate |
| Lovebird-specific custom cage | 1–2 days | Timber or steel frame, 0.5 in mesh, multiple access doors | Intermediate |
| Giant flight cage or aviary | Weekend+ | Steel framing, heavy gauge mesh, concrete footings (outdoor) | Advanced |
If you are new to cage building, start with the simple small cage walkthrough below, then work up to conversions and custom builds. Each project teaches you the safety checks and assembly techniques that apply at every scale.
Step-by-step build: simple small cage
This build is sized for a single budgie or a pair of small finches. Finished interior dimensions: 24 × 18 × 24 inches (61 × 46 × 61 cm). It uses a basic timber frame with stainless welded wire on all six sides, a hinged front door, and a removable tray bottom.
Materials for this build
- 4 lengths of 1×2 inch untreated hardwood at 24 inches (front and back verticals)
- 4 lengths of 1×2 at 18 inches (side horizontals top and bottom)
- 4 lengths of 1×2 at 24 inches (top and bottom rails front/back)
- 19-gauge stainless welded wire, 0.5 inch grid, approximately 8 sq ft
- Stainless J-clips (100-count pack is plenty)
- Two small stainless hinges and one slide bolt latch
- One sheet of galvanized or stainless tray metal or a repurposed sheet-metal offcut (18×24 in) for the pull-out tray
- Zero-VOC water-based sealant for all timber edges
- Sandpaper, drill, screws (stainless), tape measure
Build steps (photo callout points marked)
- [Photo 1: laid-out timber pieces before assembly] Cut all timber pieces to length and sand every surface to 220-grit smoothness. Seal cut ends with zero-VOC sealant and allow 72 hours to cure.
- [Photo 2: frame corners being drilled and screwed] Assemble two rectangular frames (front and back faces: 24 H × 18 W inches) from the vertical and horizontal 1×2 pieces. Pre-drill all joints to prevent splitting, then fasten with stainless screws.
- [Photo 3: side mesh being J-clipped to the frame] Connect the two face frames with the four 24-inch top and bottom rails to form the full box structure. Check for square with your carpenter's square before tightening.
- [Photo 4: measuring bar spacing on the mesh] Cut stainless mesh panels to size. Measure and confirm 0.5 inch grid spacing before cutting. Smooth all cut wire ends with pliers so no sharp points project inward.
- [Photo 5: J-clip tool in use at a corner joint] Attach mesh to all four side panels and the top using J-clips at 3-inch intervals. Pull the mesh taut as you go: loose mesh bows inward under a bird's weight.
- [Photo 6: door frame assembled with hinge detail] For the front door, cut a 10 × 12 inch opening in one face panel. Frame the opening with 1×2 offcuts, hang the door on stainless hinges, and fit the slide bolt. The door should open outward for easy feeding.
- [Photo 7: pull-out tray sliding into bottom rails] Fit the tray-bottom channel: two strips of 1×1 timber on the inside bottom edges act as slides for the pull-out tray. Slide in the sheet-metal or tray panel and confirm it moves freely.
- [Photo 8: completed cage on a bench before bird introduction] Wipe down the entire cage with a damp cloth, allow it to dry outdoors for 24 hours, then introduce it to the bird only after a final bar-spacing and structural check.
Step-by-step build: lovebird-specific cage
Lovebirds are active, strong-beaked, and intensely curious. They need more space than their small size suggests: MSPCA-Angell recommends a minimum of 32 × 20 × 20 inches (81 × 50 × 50 cm) for a pair. This build hits those minimums, uses 0.5 inch bar spacing throughout, and incorporates two access doors, a side foraging panel, and a deliberately horizontal layout that suits lovebirds' preference for side-to-side movement.
Materials for the lovebird cage
- Reclaimed 1×2 hardwood timber (oak or maple preferred): frame components as above, sized to 32 W × 20 D × 20 H inches interior
- 19-gauge stainless welded wire, 0.5 inch grid: approximately 14 sq ft
- Two stainless hinged doors (one 10 × 10 in front access, one 5 × 5 in side treat/foraging door)
- At least three natural branch perches of varying diameter (0.5 to 1 inch): apple or willow branches work well
- Two stainless steel feeding cups with cage-mount clips
- Stainless J-clips and slide bolt latches
- Pull-out stainless or sheet-metal tray for the base (32 × 20 in)
Build and species-specific notes
- [Photo 1: wider horizontal cage frame laid out] Build the frame to emphasize horizontal width (32 inches) over height. Lovebirds fly and climb laterally; a tall narrow cage is less suitable than a wide horizontal one.
- [Photo 2: 0.5 inch mesh measured and confirmed] Confirm 0.5 inch grid spacing on all mesh panels before cutting. Lovebirds can force their heads through wider spacings and get stuck.
- [Photo 3: side foraging door with two-step latch] Fit the side foraging door with a two-step or bird-proof latch. Lovebirds are notoriously adept at opening simple slide bolts: use a bolt that requires two simultaneous actions (push and slide) to open.
- [Photo 4: branch perches at different heights and angles] Mount three perches at different heights and at slight angles rather than perfectly horizontal. Vary the diameter between 0.5 and 1 inch so the bird's feet get different grip positions throughout the day.
- [Photo 5: feeding cups positioned away from perch lines] Position feeding cups away from perch lines so droppings do not contaminate food. Mount cups at mid-cage height so birds do not have to fly to the bottom to feed.
- [Photo 6: completed lovebird cage with tray pulled open] Fit the pull-out tray and line it with unbleached paper. Confirm all mesh edges are smooth and all joints are tight before introducing birds.
For a deeper dive into lovebird-specific dimensions, perch layouts, and pair housing, the dedicated lovebird cage guide on this site covers those details in full. For step-by-step instructions and exact measurements tailored to lovebirds, see how to make a bird cage for lovebirds.
Step-by-step conversion: turning a hutch into a bird cage
A repurposed rabbit or guinea-pig hutch is one of the best starting points for a DIY bird cage. The frame is already built, the footprint is usually generous, and the timber is already jointed and assembled. Your job is to make it safe and bird-specific. This guide covers the inspection, reinforcement, ventilation, and predator-proofing steps.
Inspection checklist before you start converting
- Check all timber for rot, soft spots, or damage: press a screwdriver into each joint; if it sinks easily, that section needs replacing
- Identify all painted surfaces and test every one with a lead swab kit: positive result means strip to bare wood before proceeding
- Check existing mesh type: most hutch mesh is galvanized; this MUST be replaced with stainless mesh for any bird that chews
- Confirm existing bar/mesh spacing: hutch mesh is often 1 inch or larger, which is too wide for small birds
- Check for existing wire staples or corrugated fasteners in the mesh: replace with J-clips or remove entirely
- Inspect latch hardware for brass or copper content: replace with stainless
- Check the floor: solid timber floors need ventilation gaps or a mesh insert so droppings fall through to a tray below
Conversion steps
- [Photo 1: hutch with old mesh stripped out] Remove all existing mesh from the hutch frame. Pull or grind out any staples flush with the timber. Sand the frame to remove paint residue from mesh-attachment areas.
- [Photo 2: lead test swab on painted frame rail] Swab all painted timber surfaces. If any test positive, sand back to bare wood and reseal with zero-VOC sealant. Allow 72 hours to cure.
- [Photo 3: new stainless mesh being cut to panel size] Cut stainless mesh panels to fit each opening. For budgies, lovebirds, and cockatiels, use 0.5 inch grid. Attach with J-clips at 2-inch intervals around the full perimeter.
- [Photo 4: ventilation gaps at top rail] Improve ventilation: on enclosed timber sections, drill a row of 0.5 inch holes along the top rail and cover with mesh internally so air flows without creating an escape point.
- [Photo 5: heavy-duty stainless carabiner added to door] Upgrade all door latches to bird-proof stainless hardware. A small carabiner threaded through the existing latch loop is a fast, inexpensive fix.
- [Photo 6: timber base with pull-out tray inserted] Fit a pull-out tray to the base. Repurpose a sheet of galvanized metal (check for zinc flaking: if present, use stainless instead) or ceramic tiles on a timber tray frame.
- [Photo 7: external predator-proofing mesh overlay for outdoor hutch] For outdoor use, add a second layer of 0.5 inch hardware cloth over the exterior of all mesh panels. This prevents predators from reaching through and injuring birds during the night.
- [Photo 8: finished converted hutch in position outdoors with shade cover] Place the converted hutch on a stand at a height that avoids ground-level moisture. Add a weather cover for the roof and one open side for ventilation.
The hutch-to-cage conversion is one of the most cost-effective builds in this guide. A full walkthrough with more structural reinforcement details appears in the dedicated hutch conversion article on this site.
Build variant: giant and prop cages
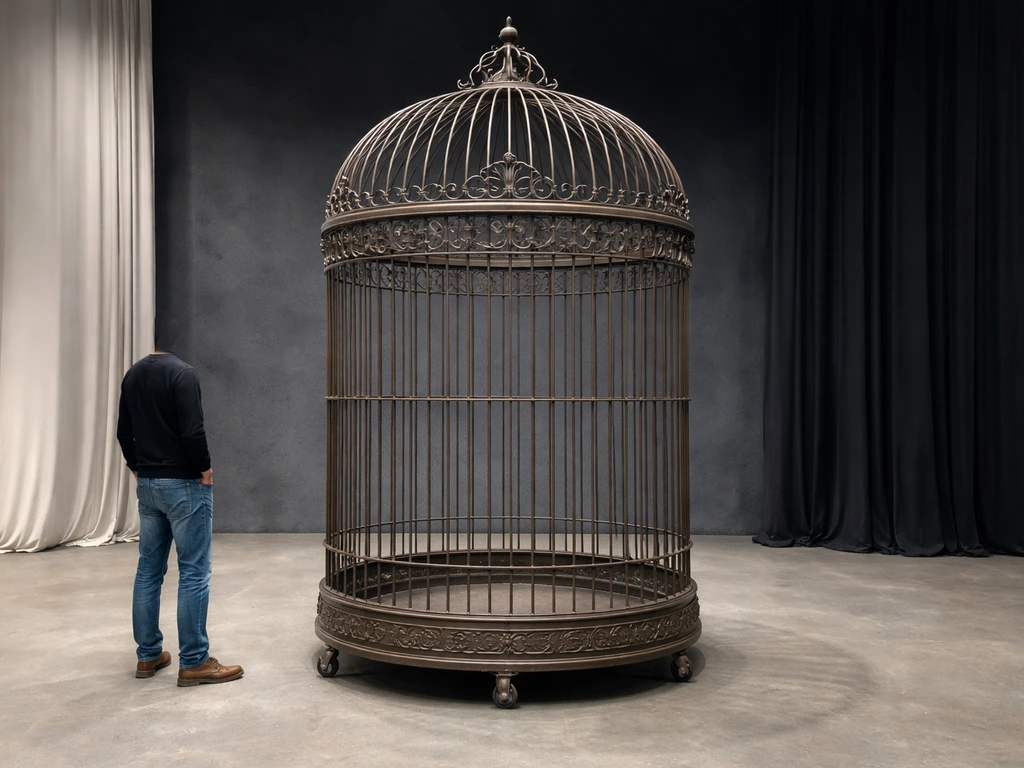
Giant cages and decorative prop cages get built for different reasons: an aviary or flight cage for multiple birds at one end, and a stage prop or photo-backdrop cage at the other. The construction logic differs significantly, and the safety rules for live birds are strict.
When a prop cage is never suitable for live birds
Prop cages are built for visual effect, not containment. They typically use wide-spaced decorative bars (often 2 to 4 inches apart), non-structural joints, lightweight stapled mesh, and decorative coatings that have not been tested for bird safety. A prop cage should NEVER house a live bird, even temporarily. The bar spacing alone creates an escape or entrapment risk, and decorative finishes are often toxic when chewed. If you are building a prop for a shoot or display, clearly label it 'NOT FOR LIVE BIRDS' and store it separately from your functional equipment.
What changes to make a giant cage live-safe
- Use verified stainless or powder-coated steel framing, not lightweight decorative tubing
- Replace any wide decorative bar spacing with species-correct mesh: 0.5 to 0.75 inch grid for small parrots
- Test or strip all surface coatings for lead and zinc before assembly
- Add structural cross-bracing so the cage does not rack or flex when birds land on the sides
- Fit multiple full-size access doors (at least one large enough for your arm to reach every corner for cleaning)
- Install a pull-out tray system under the full floor area
- For outdoor aviaries, add a double-door entry vestibule (a 'safety porch') so birds cannot escape when you open the main door
For a prop-specific build with measurements for common display sizes, the giant bird cage prop article on this site walks through construction in detail, including which materials are safe to use when the cage will never hold live birds.
Design details: doors, access panels, locks and hardware
Door design is the part most DIY builders underestimate. A door that is too small makes feeding and cleaning miserable; a door with a weak latch gets opened by a determined lovebird in under ten minutes. Here is what works.
- Main access door: size it so your full hand and forearm can reach the far corner of the cage. For a 24-inch-wide cage, a 10 × 12 inch door is the practical minimum.
- Feed/water doors: small 4 × 4 inch hatches next to each cup holder mean you can change water without fully opening the cage. Fit each with a separate latch.
- Two-step latches for parrots and lovebirds: use latches that require simultaneous push-and-slide action. Standard spring bolts can be worked open by hookbilled birds within days.
- Stainless carabiner back-up: thread a small carabiner through any slide bolt as a secondary security layer.
- Hinges: use stainless or nickel-plated hinges only. Brass hinges will eventually tarnish and introduce copper compounds.
- Avoid exposed bolt ends inside the cage: countersink or cap all bolt ends projecting into the interior so a bird cannot catch a toe on them.
Placement and seasonal protection
Indoor placement
Place the cage against a solid wall on at least one side so birds feel secure rather than exposed on all sides. Keep it away from kitchen areas where PTFE cookware may be used: PTFE fumes released by overheated nonstick surfaces above approximately 260°C are acutely fatal to birds. Also avoid placement directly in front of air conditioning vents or heater outlets: birds cannot thermoregulate through sudden temperature swings. Aim for a stable room temperature between 18 and 27°C (65 to 80°F).
Outdoor and seasonal protection
- Elevate outdoor cages at least 18 inches off the ground to reduce ground-predator access and moisture ingress
- Provide a solid weatherproof roof over at least half the cage footprint: corrugated polycarbonate sheet works well and is lightweight
- Place the cage so it receives morning sun (gentle) and afternoon shade: direct mid-afternoon summer sun can cause fatal heatstroke in small birds
- Fit a windbreak panel (solid timber or polycarbonate) on the prevailing-wind side
- In cold climates, bring small birds indoors below 10°C (50°F): most small companion parrots are tropical and cannot tolerate sustained cold
- Check for standing water in trays and at cage feet after rain: moisture accelerates timber rot and attracts mites
Mess control and cleaning design
The easiest cage to keep clean is the one designed for cleaning from day one. Build these features in rather than retrofitting them.
- Pull-out tray: the single most important cleaning feature. Size it to the full cage floor area and line it with newspaper or unbleached parchment paper. Change the liner daily.
- Seed skirt or mess guard: a 4- to 6-inch strip of clear polycarbonate or acrylic sheet attached to the bottom exterior perimeter of the cage catches scattered seed and feathers. Drill it directly to the frame.
- Smooth interior surfaces: sand all timber smooth and seal so droppings do not soak in. Rough timber absorbs waste and harbors bacteria.
- Removable perch mounts: fit perches in cup-hook or peg mounts so you can remove and wash them without disassembling the cage.
- Feeder cup position: place cups over the tray area rather than over perches so spilled water and food drop into the liner rather than onto a perch.
- Easy-clean tray material: ceramic tiles or stainless sheet on the tray surface clean faster than timber and resist moisture damage.
Perches, toys and enrichment using recycled materials
Safe perch designs
Natural branches are the best perches you can provide, and they are free. Apple, willow, hazelnut, and manzanita are the most commonly recommended species. Use two or three branches of varying diameter so the bird's feet work different muscle groups. Mount them at different heights and angles. Avoid placing any perch directly over food or water cups. Replace branches when they become heavily soiled or when the bird has stripped the bark down to bare wood.
Enrichment from recycled items
- Untreated cardboard rolls (toilet paper or paper towel): foraging toys; punch holes and stuff with treats. Replace every few days.
- Uncolored paper cups: crinkle and hang from cage bars for shredding enrichment.
- Natural sisal rope lengths: tie knots at intervals for climbing and foot exercise.
- Dried seed heads or herbs tied in small bunches: foraging interest and natural variation.
- Small stainless-steel bells (no clappers that can be swallowed) salvaged from key-ring or decoration supplies.
- Repurposed wooden spoons or untreated wooden blocks: chewing targets that protect cage structure.
Placement and rotation
Rotate enrichment items every two to three days. Novelty drives exploration, and a bird that stops investigating its cage is usually a bored bird. Keep two or three sets of enrichment items in rotation so each introduction feels new. Remove any toy that shows fraying rope, splintering wood, or broken parts immediately.
Decorative ideas that never compromise welfare
You can make a recycled cage look great without introducing any risk. The key rule is: every decorative element must be external to the cage or confirmed non-toxic if touched or chewed.
- Exterior timber panels: paint the outside faces of the frame with zero-VOC, water-based paint in any color. Let it cure fully before the cage goes into use. Interior timber faces remain sealed but uncolored.
- Fabric cage skirts or decorative covers: attach fabric to the exterior frame with velcro rather than clipped directly to bars. Choose untreated cotton or canvas; avoid synthetic dyes that may off-gas.
- Natural dried botanicals (lavender, chamomile, rose petals): can be hung in small bunches outside the mesh for visual interest and mild scent. Ensure they are pesticide-free.
- Reclaimed timber backdrops: a panel of clean pallet timber mounted behind and below the cage (not inside it) gives a warm visual backdrop for photos without touching the bird environment.
- Decorative tiles on the stand or base: ceramic or stone tiles around the base and stand look professional and wipe clean easily.
- LED fairy lights: run around the stand or backdrop exterior only, never attached to the cage bars. Keep power cables well away from the cage.
Pest prevention and troubleshooting
Signs of infestation
- Red mites (Dermanyssus gallinae): tiny dark or rust-red specks on cage bars and in crevices, especially at night; birds appear restless and may lose feathers
- Feather mites: visible movement in feathers; bird preens excessively
- Ants or insects in food: check food cups and seed storage near the cage
- Rodent signs: gnaw marks on timber, droppings near the cage base, especially for outdoor builds
Bird-safe interventions and prevention
- For red mite: remove the bird, disassemble the cage, and clean all components with boiling water and a dilute bird-safe disinfectant. Allow to dry fully before reassembling. Apply diatomaceous earth (food grade) to cage corners and crevices (with birds out of the room) as a physical deterrent.
- For timber frames: minimize crevices by filling joints flush with bird-safe sealant. Mites colonize joints and gaps.
- For ants: place cage feet in cups of water to create a moat barrier. Use food-grade diatomaceous earth around the stand base.
- For outdoor predator prevention: double-layer the mesh as described in the hutch conversion section, and ensure all ground-level gaps are sealed.
- Regular cleaning schedule (see maintenance section below) is the most effective long-term prevention.
Covers, shades and night routines
Covering a cage at night can help birds get the 10 to 12 hours of darkness they need for good sleep, particularly in households with evening light or noise. Use a breathable cotton or canvas cover that drapes over three sides and the top, leaving the front partially open for airflow. A fully sealed cover in warm weather traps heat and moisture: always confirm the covered cage maintains reasonable ventilation. Remove the cover at the same time each morning to establish a consistent light-dark cycle, which supports hormonal balance and behavior regulation.
For daytime shade in outdoor cages, use a solid polycarbonate panel on one roof section and leave the rest open mesh. Shade cloth (50% density) can be clipped over mesh panels on intensely sunny afternoons but must not completely seal the cage.
Routine inspection and maintenance schedule
| Frequency | What to check or do |
|---|---|
| Daily | Change tray liner; check food and water; observe bird behavior for signs of illness or stress |
| Weekly | Wipe down all bars and interior surfaces with bird-safe disinfectant; replace perches if heavily soiled; inspect all latches |
| Monthly | Inspect all mesh for bent wires, rust spots, or broken J-clips; check timber joints for softness or cracks; test all door hinges for looseness |
| Every 3 months | Inspect sealant on all timber surfaces; reapply if peeling or worn; check external weatherproofing on outdoor cages; replace any corroded hardware |
| Annually | Full disassembly and deep clean; re-test any sealant or coating with lead swab if condition has degraded; assess structural integrity of frame; replace mesh if any rust or zinc oxidation is visible |
Troubleshooting common problems
Chewing damage to timber
Lovebirds and cockatiels will chew exposed timber frame rails. Protect frame rails by attaching a strip of stainless mesh over any interior-facing timber the bird can reach. Alternatively, fit L-shaped aluminum angle over the top edges of frame rails: cheap, effective, and tool-free to install.
Rust on mesh
Surface rust on stainless steel is rare but can appear as tea-staining, especially if the cage is in a coastal environment. Clean with a dilute white-vinegar solution and a soft cloth. If you see red-orange rust spreading along wires or at J-clip attachment points, the mesh may be lower-grade steel or have been contaminated during manufacturing. In that case, replace the affected panels. Do not use rust-converter products inside the cage.
Peeling finishes
If the timber sealant or exterior paint begins peeling, remove the bird, strip the affected area back to bare wood, re-sand, and reseal. Peeling paint represents both a lead risk (if the original coat was not tested) and an ingestion hazard if the bird can reach interior surfaces.
Escapes
If a bird escapes from inside the cage, work backward through the checklist: check bar spacing at every joint (mesh can bow apart at J-clip intervals if clips are too far apart), check door latches, and check for any gaps at frame corners where mesh does not sit flush. Adding J-clips every 2 inches rather than every 3 at corner joins prevents the most common bowing gap.
Structural movement or racking
If the cage feels wobbly or corners are pulling apart, add a diagonal timber or steel brace across the inside of the base frame. A single cross-brace halves the racking movement. For larger cages, add braces on two opposing sides.
Quick repairs and retrofit upgrades using recycled parts
- Broken bar or bent mesh section: cut out the damaged area leaving a 1-inch border, cut a patch from matching mesh, and J-clip it in place. Smooth all cut ends. This takes under 30 minutes.
- Damaged pull-out tray: replace with a ceramic tile cut to size (tile shops often have offcut bins) or a sheet of stainless metal from a kitchen supply offcut.
- Loose hinge: tighten screws with a longer stainless screw into a timber anchor block glued behind the joint.
- Worn latch: retrofit a stainless carabiner or a combination padlock clip for immediate security while you order a replacement.
- Degraded timber section: cut out the rotten or cracked section, sister a new length of matching timber alongside it with screws, and reseal.
The rule for deciding between repair and rebuild is simple: if more than 30% of the frame, mesh, or joints need attention at the same time, a rebuild is faster and safer than piecemeal patching.
Photo checklist and staging tips for a shareable step-by-step guide
If you want to document your build for sharing or reference, shoot these specific moments: laid-out materials before assembly, the lead swab test result, mesh spacing measured with a ruler, J-clip tool in use at a corner, the completed frame before mesh, the pull-out tray fitting, the finished cage from front and from one corner, and one shot with a ruler confirming interior dimensions. Good light and a clean background (a sheet of white cardboard behind the cage) make even phone photos look clear and instructional.
Species dimension reference and bar-spacing summary
| Species | Minimum cage size (interior) | Bar spacing | Notes |
|---|---|---|---|
| Budgerigar (budgie) | 20 × 20 × 30 in (51 × 51 × 76 cm) | 0.5 in (12.7 mm) | Minimum for one bird; pair needs more width |
| Lovebird | 32 × 20 × 20 in (81 × 50 × 50 cm) | 0.5 in (12.7 mm) | MSPCA minimum for a pair; prioritize horizontal width |
| Parrotlet | 20 × 20 × 30 in (51 × 51 × 76 cm) | 0.5 in (12.7 mm) | Same as budgie group per Merck |
| Cockatiel | 20 × 20 × 30 in (51 × 51 × 76 cm) absolute minimum; 60 × 60 × 90 cm recommended | 0.5 in (12.7 mm) | Larger is strongly preferred; wingspan-based formula suggests 56 × 42 × 42 cm minimum |
| Conure / small parrot | 36 × 24 × 48 in (91 × 61 × 122 cm) | 0.75 in (19 mm) | Active climbers; height matters |
| African grey / Amazon / small cockatoo | 40 × 30 × 60 in (102 × 76 × 152 cm) | 0.75 in (19 mm) | Stainless steel mesh strongly recommended for chewers |
| Macaw / large cockatoo | 48 × 36 × 66 in (122 × 91 × 168 cm) | 1.5 in (38 mm) | Heavy-gauge steel or stainless only; DIY build is advanced-level |
These figures are based on Merck Veterinary Manual recommendations and MSPCA-Angell guidance. The Scottish government guidance uses wingspan-based formulas for minimum enclosure dimensions (e.g., L = 2 × wingspan; D = 1.5 × wingspan; H = 1.5 × wingspan) with species examples such as a lovebird (wingspan ≈28 cm) → minimum cage ≈56×42×42 cm. Always treat these as minimums: a bird that can fully extend its wings and flap without touching the sides is the practical welfare benchmark, regardless of what any table says.
Related guides worth reading alongside this one
Several guides on this site go deeper on individual topics covered here. If you are building specifically for lovebirds, the dedicated lovebird cage guide covers pair housing, enrichment scheduling, and species-specific dimension nuances in more detail. If you are working with an existing rabbit hutch, the hutch conversion guide includes structural reinforcement photographs and a full hardware checklist. For those building a large decorative structure for events or photography, the giant bird cage prop guide explains which materials are safe for prop use and what additional steps are needed before any live bird goes near it. And if you want a simpler starting point focused purely on a compact build, the small bird cage guide keeps the scope tight and the materials list short.
FAQ
What are the core safety principles when building a bird cage from recycled materials?
Prioritize non‑toxic materials, correct internal space and bar spacing for the species, secure construction (no sharp edges or loose parts), chew resistance for hook‑billed birds, and finishes that do not off‑gas or flake. Never use materials with lead paint, hot‑dipped galvanized fittings that can be chewed, pressure‑treated or creosote/CCA‑treated wood, or items with PTFE coatings. Use stainless steel, solid hardwood (untreated), or verified avian‑safe coatings when possible, and inspect recycled metal for pitting, flaking or white rust (zinc).
Which recycled materials are generally safe to use for bird cages or cage components?
Safe choices: stainless steel wire or welded panels (304/316), nickel‑plated steel from reliably coated sources, solid untreated hardwood offcuts (avoid treated lumber), food‑grade stainless bowls and hardware, hardwood dowels for perches (maple, apple, manzanita), thick acrylic sheets (for splash guards) verified PTFE‑free, and reclaimed hardwood frames if free of old paint/coatings. Always test finishes and any painted surfaces for lead before use.
Which recycled materials and items are unsafe or require extreme caution?
Avoid: hot‑dipped galvanized wire or mesh for chewers, items with flaking paint (possible lead), older pressure‑treated wood (CCA, creosote), anything with PTFE/flourochemical coatings (nonstick pans, some laminates), rusty/pitted metal, unknown electroplated items with flaking plating, and household hardware reclaimed without verification of materials. If in doubt, encapsulate nonmetallic surfaces with new, certified‑safe materials or replace them.
What are the recommended minimum cage dimensions and bar spacing for common pet species?
Use species‑appropriate minima (sources converge): budgerigar/cockatiel/lovebird/parrotlet — minimum example 20×20×30 in (50×50×75 cm) and bar spacing ~0.5 in (≈12.7 mm). Many authorities recommend slightly larger for comfort; MSPCA suggests ~32×20×20 in (81×50×50 cm) for a pair of lovebirds. Conures/mini macaws/similar — ~36×24×48 in and bar spacing ~0.75 in (≈19 mm). African grey/Amazon/small cockatoo — ~40×30×60 in and ~0.75 in spacing. Large macaw/large cockatoo — ~48×36×66 in with ~1.5 in (≈38 mm) spacing. Prefer larger than minimum; allow full wing extension and flapping.
What tools and materials checklist should I prepare for a basic recycled‑materials cage build?
Essential tools: measuring tape, pencil, metal snips or angle grinder with cutoff wheel (for metal), hacksaw, drill with bits, rivet gun or stainless bolts & nuts, file or deburring tool, clamps, sandpaper, staple gun (stainless staples) or stainless screws, wire brush, protective gloves/eye protection. Materials: verified stainless steel or avian‑safe coated wire/panels, untreated hardwood for frame/perches, stainless bowls, non‑toxic bird‑safe paint or food‑grade sealers (if needed), silicone (bird‑safe) for seals, recycled hardwood or plywood only if lead/tested and untreated. Lead test kit/XRF recommended for painted parts.
Step-by-step: How do I build a simple small cage from recycled materials (photo‑ready walkthrough)?
1) Plan: choose final internal dimensions based on species and sketch panels. 2) Source panels: select clean stainless or safe‑coated wire panels or form a welded frame. 3) Cut frame pieces to size and square up. 4) Deburr/clean metal edges and wood pieces; sand wood and remove old finishes or test for lead. 5) Assemble base and sides using stainless bolts/rivets; ensure gaps < bar spacing and no escape routes. 6) Install door: cut opening, create reinforced perimeter, attach with stainless hinges and a secure latch. 7) Add floor grate or removable tray lined with stainless mesh or safe plywood with a removable washable tray beneath. 8) Fit perches and feeders, then smooth and round all corners. 9) Test: push/pull, weight test, and inspect for sharp points; photograph each step for a photo‑ready guide. 10) Clean, condition perches, and place a safety card with dimensions and materials in photos.
Next Article
How to Make a Giant Bird Cage Prop for Film or Theater
Step-by-step DIY guide to build a giant bird cage prop, with safe design, sturdy frame, and camera-ready scale.