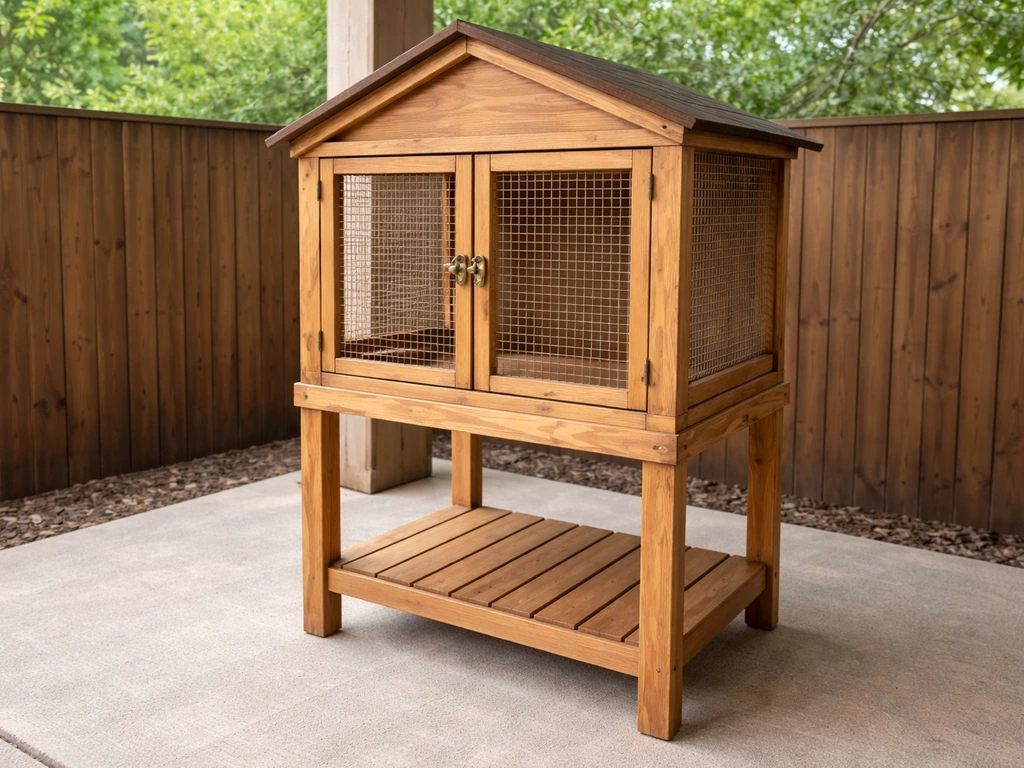
You can build a safe, solid wooden bird cage at home in a weekend with basic tools, the right wire, and a few smart material choices. The key is planning before you cut: nail down your bird's species, the minimum dimensions it needs, and the correct bar spacing before you buy a single board. Get those three things right and the rest of the build flows naturally.
How to Build a Bird Cage from Wood: Plans and Steps

Maya Bennett
10 Apr 2026
Start with your bird's size and required cage dimensions
Dimensions are not optional design choices. They are species-specific welfare requirements, and getting them wrong is the most common DIY mistake. The Merck Veterinary Manual lists minimum cage dimensions for budgies (parakeets) and cockatiels at 20 × 20 × 30 inches (length × width × height). UK statutory guidance for selling animals as pets puts the minimum for a budgerigar at 60 × 45 × 45 cm, and stresses that you need to increase that footprint for every additional bird you house. A 2025 caged-bird care information sheet breaks it down even further: at least 30 × 25 × 40 cm for a budgie, canary, or finch, and 60 × 40 × 40 cm for a cockatiel or lorikeet.
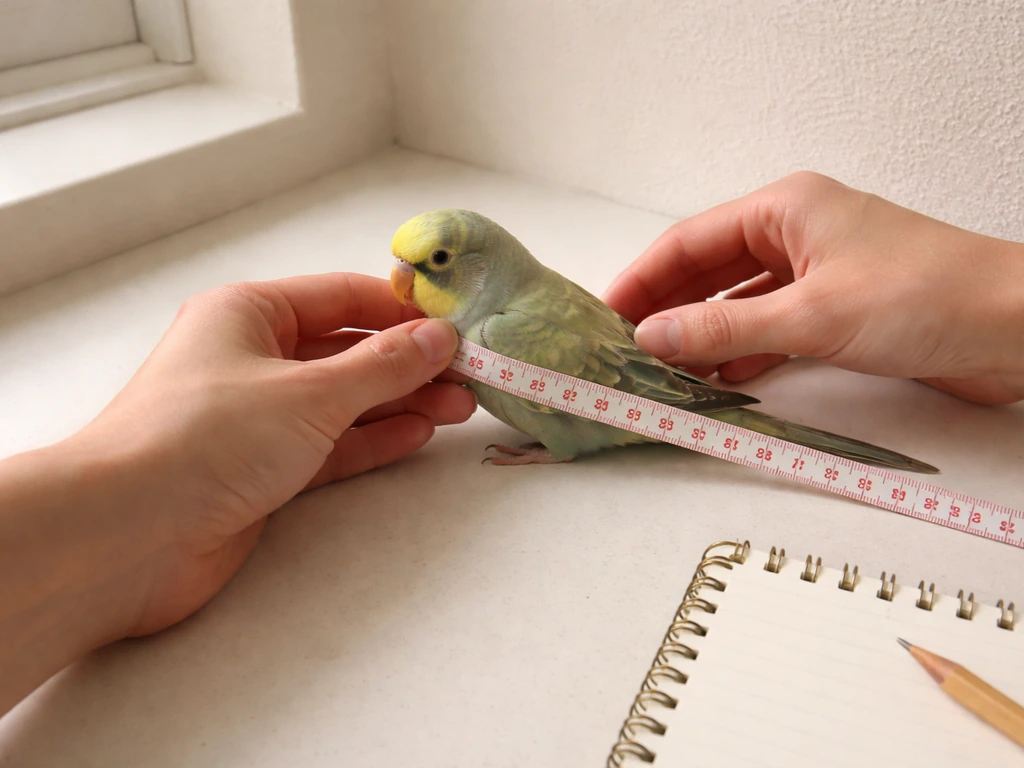
A simple sizing method from the NCA UK: measure your bird from beak tip to tail tip, then make sure the cage width is at least 1.5 times that length. This guarantees the bird can turn and spread its wings without the tail dragging on the wire. The Merck table also ties bar spacing directly to species category. For budgies, cockatiels, lovebirds, and parrotlets, the correct bar spacing is 0.5 inches (12.7 mm). A cockatiel checklist from a US avian care resource confirms the same figure: 1/2 inch spacing prevents a bird from getting its head through the bars and becoming trapped.
If you are building for a specific species, check the dedicated guides on this site. There is a detailed walkthrough on how to build a bird cage for cockatiels and a separate one covering how to build a bird cage for parakeets, both of which go deeper on species-specific spacing and perch height. For canaries, the sizing priorities differ again, so look at how to build a canary bird cage before you finalise your cut list.
Choosing wood and wire that won't hurt your bird
Wood is where most DIY cages go wrong. Pressure-treated lumber is an absolute no: the preservatives used contain arsenic compounds and other chemicals that are acutely toxic to birds. Conventional plywood and particle board are almost as bad because they use formaldehyde-based adhesives that off-gas into the enclosure. Untreated pine boards are a safer structural choice than those alternatives, with one caveat: fresh pine contains sticky resin that irritates birds' feet and respiratory tracts, so you need kiln-dried pine or a hardwood like maple, ash, or birch for anything the bird will contact directly.
For the wire mesh panels, the safest option is powder-coated or stainless steel welded wire mesh. Galvanized wire is the most widely available but poses a real zinc toxicity risk: the galvanizing process deposits zinc on the wire surface, and birds that chew the bars (which most parrots and cockatiels absolutely will) can ingest toxic levels. Multiple avian vet sources flag galvanized wire as a leading cause of heavy-metal poisoning in pet birds. If you must use galvanized mesh, scrub it thoroughly with a dilute white vinegar solution, rinse it completely, and let it dry before assembly. Better yet, source stainless steel welded mesh. It costs more, but it is rust-resistant, non-toxic, and will outlast any other option.
Once the frame is built, you need to seal the wood to protect it from droppings, moisture, and chewing. Water-based sealers marketed as low-VOC (such as products in the AFM Safecoat Safe Seal category) are a good choice because they do not release solvent fumes after curing. If you use a polyurethane-based sealant, be aware that full curing can take significantly longer in cool conditions, sometimes several times longer than the manufacturer's standard cure time. A DAP-type polyurethane construction sealant may state a 24-hour water-ready window, but that does not mean it is safe for a bird to live with immediately. Ventilate the cage in a bird-free space for at least 72 hours, and ideally a full week, before housing your bird inside. Products rated zero-VOC and formulated for indoor pet-safe use are worth the premium precisely because they reduce that off-gassing wait.
Tools, parts, and your materials cut list
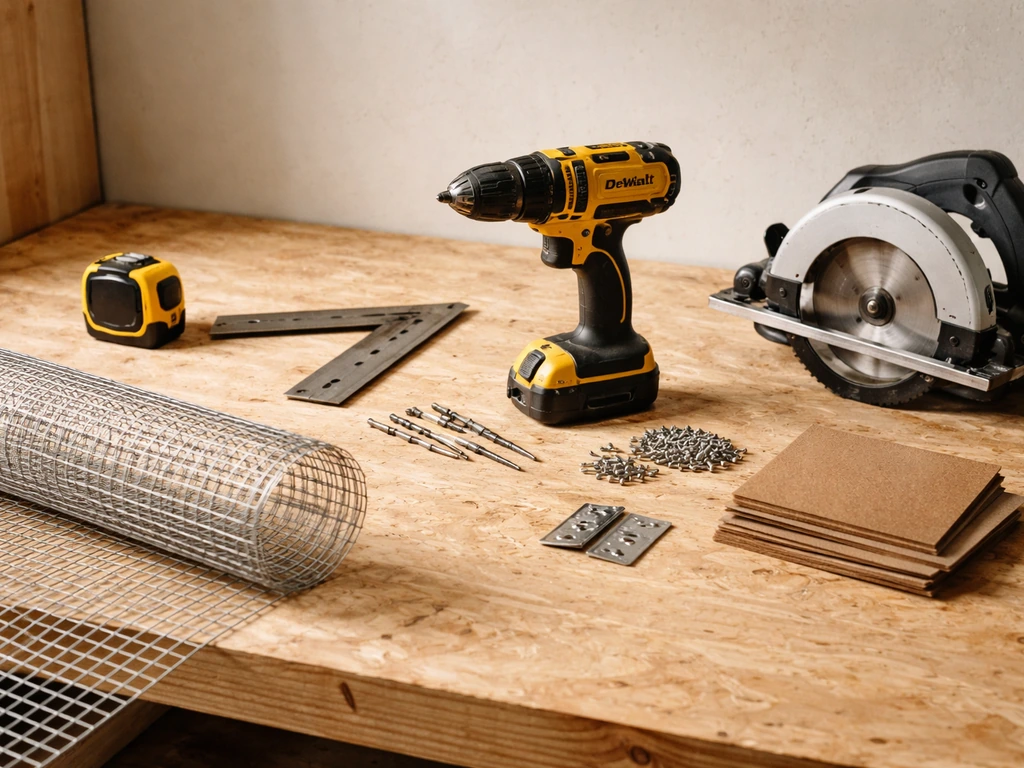
Keep your tool list honest. You do not need a full workshop to build a functional cage. Here is what you actually need:
- Tape measure and carpenter's square
- Circular saw or hand saw (for cutting frame boards)
- Power drill and drill bits (including a 1/4-inch bit for pilot holes)
- Wire cutters and heavy-duty pliers (for cutting and bending mesh)
- Staple gun with heavy-duty staples (for attaching mesh to the frame)
- Sandpaper (80 and 220 grit) and a sanding block
- Paintbrush or foam roller (for applying sealer)
- Clamps (4 to 6 bar clamps help enormously during frame assembly)
- Safety glasses and gloves (wire ends are sharp)
For a standard single-bird cage sized at approximately 24 × 24 × 36 inches, here is a working cut list for the wooden frame components:
| Component | Dimensions (inches) | Qty | Material |
|---|---|---|---|
| Top and bottom frame rails | 24 × 1.5 × 1.5 | 4 | Kiln-dried pine or maple |
| Vertical corner posts | 36 × 1.5 × 1.5 | 4 | Kiln-dried pine or maple |
| Mid-height horizontal braces | 21 × 1.5 × 1.5 | 4 | Kiln-dried pine or maple |
| Tray/grate support rails | 21 × 1 × 1 | 4 | Kiln-dried pine or maple |
| Door frame surround | Cut to opening size | 1 set | Kiln-dried pine or maple |
| Welded wire mesh panels | Cut to each face opening | 4–6 panels | Stainless steel or powder-coated, 1/2-inch spacing |
| Drop tray (bottom liner tray) | 24 × 24 × 1.5 deep | 1 | Untreated plywood sealed both sides |
| Wire grate (above tray) | 22 × 22 | 1 | Stainless or coated 1/2-inch mesh |
| Hardware: hinges, latches, screws | As required | Assorted | Stainless steel bird-safe hardware |
For fasteners, go with stainless steel screws and bird-safe hardware throughout. Standard zinc-plated or galvanized screws carry the same zinc toxicity concern as galvanized wire. Stainless steel fasteners are rust-resistant and non-toxic, which matters in a humid cage environment where droppings and cleaning products accelerate corrosion.
Design your layout before you build: doors, ventilation, and the stand
Sketch your cage design before making a single cut. You need to decide on three things: door placement, ventilation openings, and stand height. Get these right on paper and you will avoid awkward retrofits later.
Door placement
Most small-bird cages need at minimum two openings: a large access door on the front (at least 6 × 8 inches for easy hand access with a cockatiel or similar bird) and small feeder ports on the sides so you can swap food and water without opening the main door. Hinge the main door to swing outward. An inward-swinging door can startle the bird and risks catching a perched bird on the swing path. Add a secondary latch or bird-safe snap clip to every door: parrots and cockatiels are escape artists and a simple friction latch will not hold them.
Ventilation
Wire mesh panels provide natural ventilation, but if you include any solid wood or plywood panels in the design (for a back panel or side panel for a wall-mounted cage), cut ventilation slots at the top and bottom of those panels. Hot, humid air rises; stale ammonia-laden air accumulates at the bottom. Slot openings of at least 1/2 inch wide cut across the top and bottom of any solid panel will keep airflow moving without creating a direct draft that chills the bird.
Stand height and positioning
Stand height has a direct effect on the bird's stress levels. Guidance from Mypets suggests that a stand height that brings the main perch level close to your chest height tends to produce calmer birds, as it puts them at or slightly above human eye level rather than on the floor where they feel exposed and vulnerable. It also recommends positioning the cage so at least one or two sides are near a wall or corner, which gives the bird a sense of security without completely enclosing it. Plan your stand before you build the cage so you can calculate the final combined height correctly.
Step-by-step assembly: frame, panels, hardware, and lining
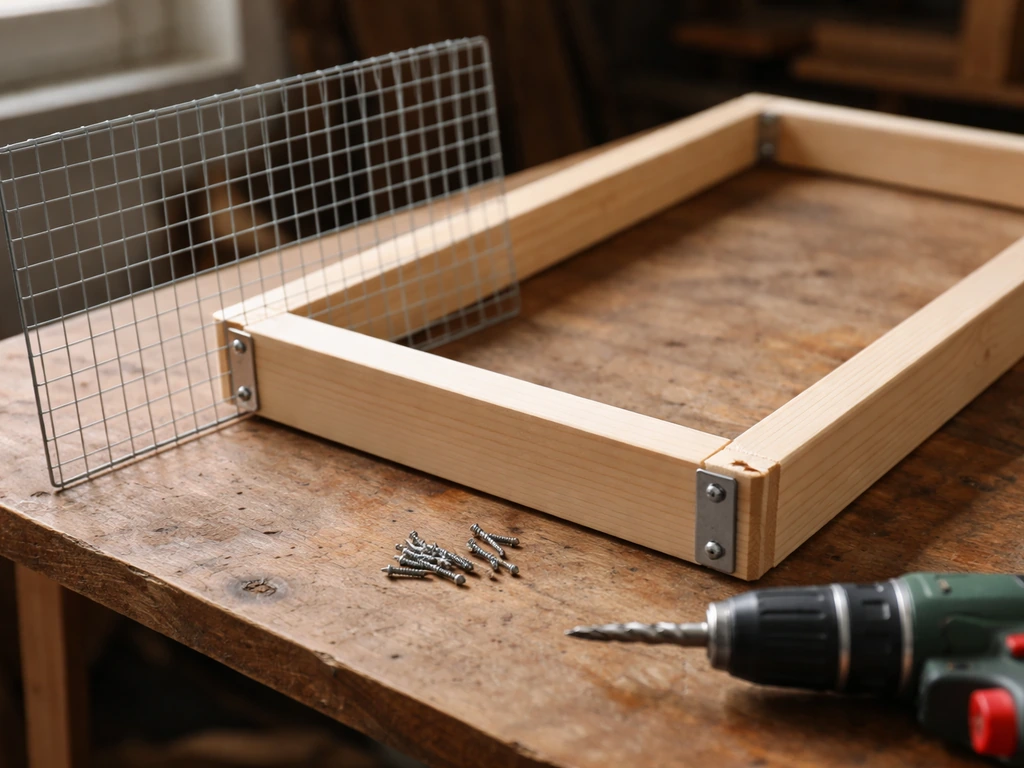
- Cut all frame components to length and sand every surface smooth, paying special attention to any edge the bird might contact. Start with 80 grit, finish with 220 grit.
- Drill pilot holes at every joint to prevent splitting. Assemble the bottom rectangle first (two long rails and two short end pieces) using stainless steel screws and wood glue. Check for square with your carpenter's square before the glue sets.
- Attach the four vertical corner posts to the bottom rectangle. Clamp each post in place, check it is plumb with the square, then drive two screws per joint.
- Add the mid-height horizontal braces on all four sides. These are structural and also serve as a mounting point for internal perch supports if you add them later.
- Attach the top rectangle frame the same way as the bottom, checking the overall structure is square before driving the final screws. A racked (twisted) frame will make fitting mesh panels extremely difficult.
- Apply two coats of your chosen water-based low-VOC sealer to all wooden surfaces, including the inside faces of all frame members. Let each coat dry fully before applying the next. Leave the sealed cage to cure in a ventilated, bird-free area for at least 72 hours (one full week is better with polyurethane products).
- Cut wire mesh panels to fit each face opening. Add 1 inch of overlap on all sides so you staple into solid wood rather than at the very edge. Use heavy-duty staples every 2 inches around the perimeter. Follow up staples with small cage clips or U-clips pinched over the mesh edge for extra security where the bird can reach them.
- Build and attach the drop tray: a shallow plywood tray that slides into the bottom of the cage on the tray support rails. Seal both sides of this tray thoroughly since it will take the most moisture. The tray should slide in and out smoothly for daily liner changes.
- Install the wire grate above the tray. This keeps the bird off the soiled liner and is especially important for smaller birds. Check that the grate sits level and does not flex when the bird lands on it.
- Hang doors using stainless steel hinges, and fit latches and any feeder cup ports. Test every door and port by opening and closing it at least 20 times; any binding or gaps wider than 1/2 inch needs to be fixed before the bird goes in.
- Install perches at staggered heights so the bird can move up and down. Ensure no perch is positioned where the bird's tail will press against the wire when it is perched, as this causes feather damage and stress. Use natural hardwood branches (pesticide-free) or untreated wooden dowels.
Building the cage stand
A wobbly stand is a welfare issue, not just an annoyance. If the cage rocks, the bird is constantly startled and stressed. Build the stand as a separate, bolted-together unit rather than attaching fixed legs directly to the cage bottom. This lets you level it on uneven floors and replace the stand without rebuilding the cage.
Use 2 × 2 or 2 × 3 lumber for stand legs and add a full-perimeter base frame at floor level plus a top frame that the cage sits on. Cross-brace the stand diagonally on at least two faces: without cross-bracing, a four-leg stand will rack under lateral load (the bird hopping side to side adds more lateral force than you'd expect). Aim for a total stand height of around 28 to 36 inches so the cage top ends up somewhere around 5 to 6 feet from the floor, putting the main perch near chest height. Add rubber feet to the stand legs to prevent sliding on hard floors and to slightly dampen vibration. Bolt the cage to the top frame of the stand using at least four bolts with large washers so the cage cannot tip or slide off the platform.
Small cage vs. walk-in cage: how to scale your build
The method above covers a standard single-bird cage, but the same principles scale in both directions. If you are building a compact cage for a single small bird in a limited space, keep all the same proportions but reduce the footprint to the species minimum (no smaller than the figures in the dimension section above). Do not be tempted to reduce bar spacing below 1/2 inch for small birds thinking it is safer: excessively fine mesh traps toes and restricts airflow. The structure can be lighter (1 × 1 lumber instead of 1.5 × 1.5 posts) but the joinery principles remain the same.
At the other end of the scale, a walk-in or large flight cage is essentially the same build repeated at room-size dimensions, but with a few extra structural requirements. Anything over about 4 feet in any dimension needs intermediate vertical posts (not just corner posts) every 24 to 36 inches to prevent the mesh panels from bowing outward over time. The frame lumber should step up to 2 × 3 or 2 × 4 for the top and bottom rails. You also need a proper door system large enough for a person to walk through (typically a 24-inch-wide, 72-inch-tall framed door with multiple latches). For that scale of project, it is worth reviewing the full guidance on how to build a bird flight cage and how to build aviary bird cage before finalising your plans, as both cover the structural and safety requirements that differ significantly from a standard tabletop build.
If the cage is going outside at any point, the material requirements change considerably. Outdoor exposure means you need wood species with better moisture resistance (cedar is fine for exterior framing since the bird is not perching on it), proper roof coverage to prevent waterlogging, and hardware that is rated for outdoor use. The full guide on how to build an outdoor bird cage covers those differences in detail. And if your goal is a dedicated space for breeding pairs rather than a single pet bird, check out how to build bird breeding cages for partitioned layouts and nest box integration.
Finishing setup: placement, covers, pest control, and mess management
Before your bird goes in, run through this checklist. A finished cage that fails a safety check is not a finished cage.
Placement
Place the cage away from kitchens (non-stick cookware releases fumes that are lethal to birds), away from direct exterior doors where cold drafts come in, and away from direct sunlight for more than a few hours a day. Position it with at least one side near a wall, as discussed in the design section. Never place it directly on the floor: low placement increases exposure to drafts, predator stress from pets, and access by household pests.
Cage covers and light cycles
Birds need 10 to 12 hours of darkness for healthy sleep. A cage cover made from breathable cotton or fleece does the job. Avoid synthetic fabrics that do not breathe: heat builds up inside a non-breathable cover and creates a humid, bacteria-friendly environment. Make the cover large enough to drape fully to the floor on at least three sides while leaving the fourth side slightly open for airflow.
Liner and mess control
Line the drop tray with newspaper or plain paper towels and replace the liner daily. This is the single most effective disease-prevention step you can take. Avoid cedar shavings and many pine shavings as liner material: cedar contains aromatic oils that irritate the respiratory tract, and most pine shavings carry similar risks. Aspen shavings are safer if you want absorbency beyond flat paper, but plain newspaper works well and lets you monitor droppings (color and consistency changes in droppings are an early health indicator). Avoid corn-cob bedding, cat litter, walnut shell, sand, and sandpaper liners: most of these are either abrasive to feet, dusty, or create an impaction risk if ingested. The wire grate you built above the tray keeps the bird off the soiled liner, which is especially important for preventing bacterial infections from fecal contact.
Pest and mite prevention
Red mites hide in crevices during the day and feed on birds at night. The best prevention is eliminating hiding places: sand all wood joints smooth, seal every crevice with your low-VOC sealer, and avoid decorative wooden ornaments inside the cage that have deep grain cracks. Clean the cage thoroughly once a week with a dilute bird-safe disinfectant, reaching into all corners of the frame. Remove and wash the drop tray daily. If you spot mites (look for tiny red or black dots on the cage frame at dawn or dusk), the cage will need a full strip-down and treatment before the bird goes back in.
Final safety check before housing your bird

- Run your hand across every mesh panel: no sharp wire ends protruding inward
- Check every latch opens and closes cleanly, and test whether it can be pushed open from inside by applying firm thumb pressure
- Confirm the cage does not rock on the stand (press each corner firmly)
- Sniff the interior: no solvent smell means the sealer has off-gassed sufficiently
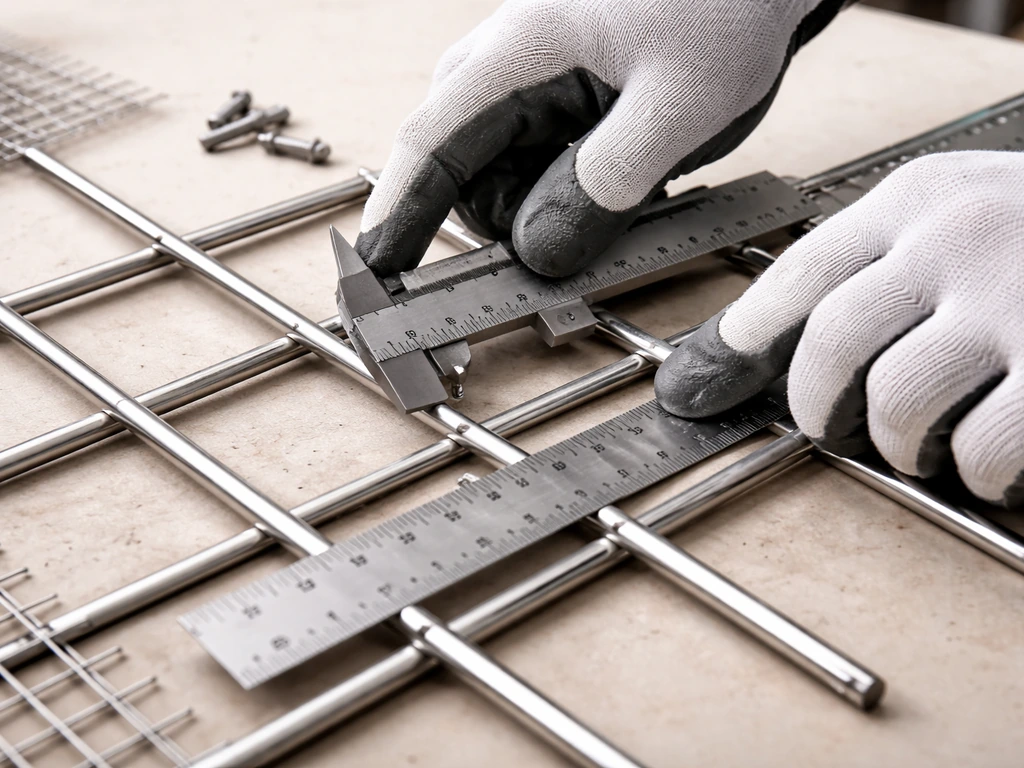
- Check bar spacing with calipers or a ruler at multiple points: consistent 1/2-inch gaps throughout
- Verify the tray slides out and back in without catching, and sits flush with no gaps a bird could get a foot caught in
- Make sure perches are secure: grab each one and apply lateral force; it should not rotate or pull free
One final note: if you ever need to catch a bird that has escaped rather than house one, the techniques and materials involved are completely different from a permanent cage build. The guide on how to build a bird trap cage covers that use case separately. The two projects look similar on the surface but have very different safety and design priorities, so do not try to adapt a permanent pet cage into a trap.
FAQ
Can I use scraps or dimensional lumber that is already cut down for the frame?
Yes, but only if every contact surface is safe (no pressure-treated wood, no formaldehyde-based boards) and the final frame is rigid. Focus on stiffness, especially around the door and corners, because sagging panels can widen gaps in the wire and create toe-trapping risks.
How do I confirm the wire mesh bar spacing is correct before assembling everything?
Measure the installed mesh itself, not just the wire spec. Use a caliper or ruler to check the clear opening between bars at multiple points (corners can shift slightly), then do a quick “fit test” using a flat strip of cardboard sized to your target spacing to catch any assembly distortion.
What should I use for the perch supports and perches, so the bird does not chew the structure?
Use removable, chew-safe perches (like hardwood branches) mounted to the interior frame with stainless hardware, and avoid letting birds access unfinished wood. If the bird can reach and chew the frame beam near the perch, seal it and consider adding a small chew guard or relocating the perch.
Is it okay to paint or stain the wood to match furniture?
Only if the product is bird-safe after full cure and low in odor during the drying period. Avoid finishes that remain tacky or strongly aromatic, and do not apply any coating to areas the bird can chew unless the finish is specifically rated for indoor pet use and you are willing to run the bird-free off-gassing ventilation window.
How should I size the door opening for different birds and avoid stress during daily care?
Aim for a door that lets your hand and the smallest required items (food container, water cup, perch removal if needed) move in smoothly without scraping the bird. For larger parrots, consider a wider front door and a secondary access panel if you need frequent quick checks to reduce prolonged handling.
What is the safest way to clean the cage without contaminating the bird?
Use a diluted bird-safe cleaner, rinse if the product requires it, and dry thoroughly before the bird returns. Keep strong cleaners away from the cage during curing, especially acids, ammonia-based products, and anything with lingering fumes, because even brief residue can irritate airways.
Do I need to line the bottom with newspaper if the drop tray already has a grate?
Yes. The grate reduces fecal contact with the bird, but it does not stop droppings from accumulating and off-gassing. A paper liner still provides daily removal, which is the main disease-prevention step and also makes it easier to monitor droppings.
How can I prevent the cage from becoming a draft chamber near windows or vents?
Even with good ventilation, you want airflow to circulate, not blow directly at the bird. If the cage is near a window or HVAC vent, angle the placement so the airflow hits the side panels rather than the front door area, and verify there are no strong air streams after the system runs.
If I build a smaller cage, can I still keep the same 1/2 inch bar spacing?
You should keep bar spacing at or above the minimums for the species, but you must also preserve indoor airflow and wing movement. In smaller enclosures, the risk is not only entrapment, it is restricted circulation and increased humidity from droppings, so do not “tighten” the design beyond the species footprint.
What should I do if my bird chews the wood joints or sealant edges?
Sealant failure usually means either the bird can reach raw edges, the surface is not durable enough, or the bird is under-stimulated. Re-seal after confirming the bird-free curing time, smooth any rough seams, and add appropriate safe chewing items and foraging opportunities to reduce destructive chewing.
Can the cage be wall-mounted, and what changes in the build?
It can, but only if the mount uses a stable backing and the stand or wall bracket prevents lateral rocking. Wall mounting also changes cleaning access, so design removable trays and ensure ventilation slots are not obstructed by the wall, with at least top and bottom airflow clearance.
How long should I wait before putting the bird in after sealing, if the temperature is low?
Plan for longer than the label cure time in cool conditions. Ventilate a bird-free space for at least 72 hours, and if you can still smell the coating or see any tackiness, wait longer until there is no noticeable odor and the surface feels fully cured.
What’s a safe emergency plan if the bird escapes but the cage is already finished?
Do not reuse any “trap-like” setup that could injure the bird. Instead, use the right approach for escapes (a separate temporary capture plan) so the bird is coaxed safely, since permanent-cage door geometry and latch positions are not designed for quick, low-stress retrieval.
Next Articles

How to Make a Door for a Bird Cage: Step by Step
Step-by-step guide to build a safe bird cage door with tools, cut-and-fit measurements, secure latches, and no gap or pi
Pets Alive Bird Cage Instructions: Safe Setup Checklist
Step-by-step Pets Alive bird cage instructions: safe sizing, assembly, placement, interior setup, and maintenance checkl
How to Make Bird Cage Bars Smaller Safely DIY Guide
Safely reduce bird cage bar gaps: measure spacing, choose fixes or upgrades, add barriers or replace sections, and verif