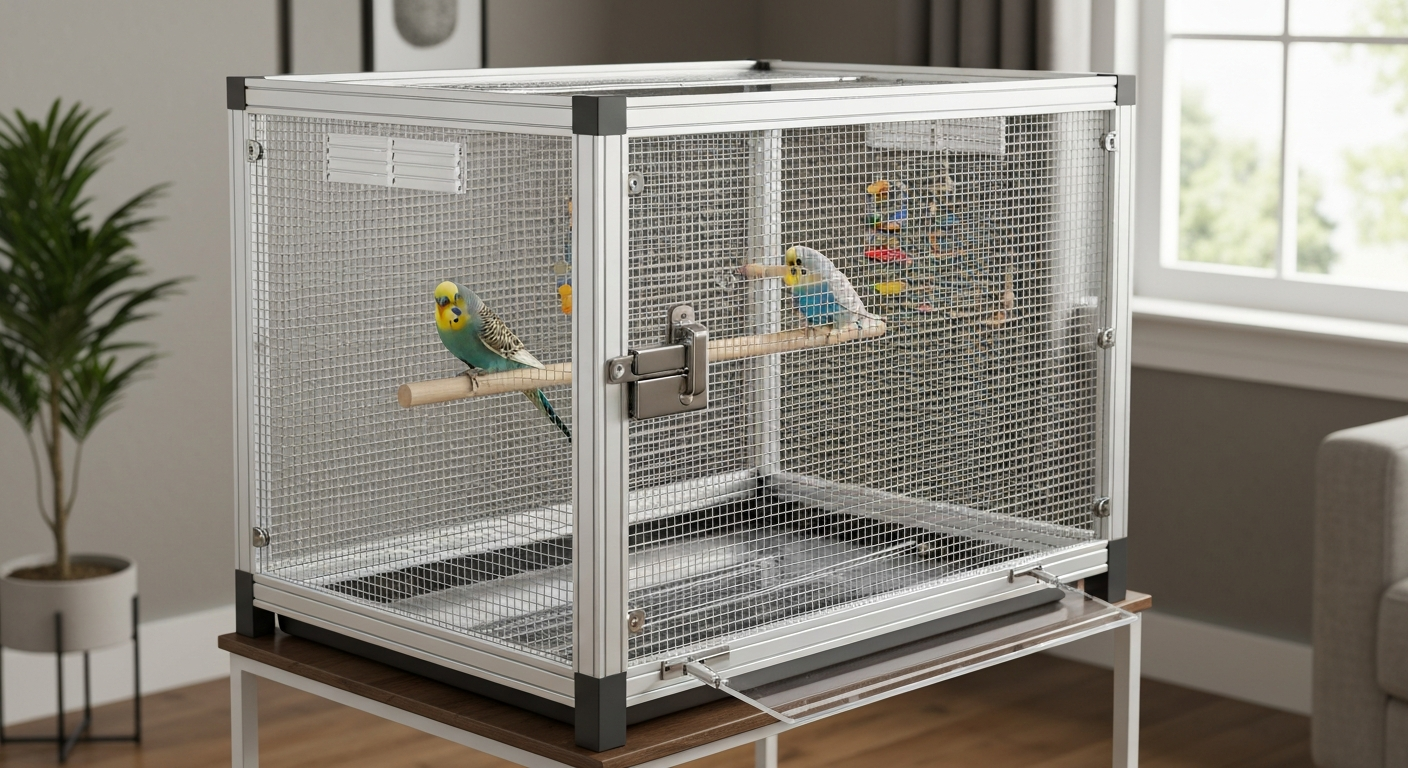
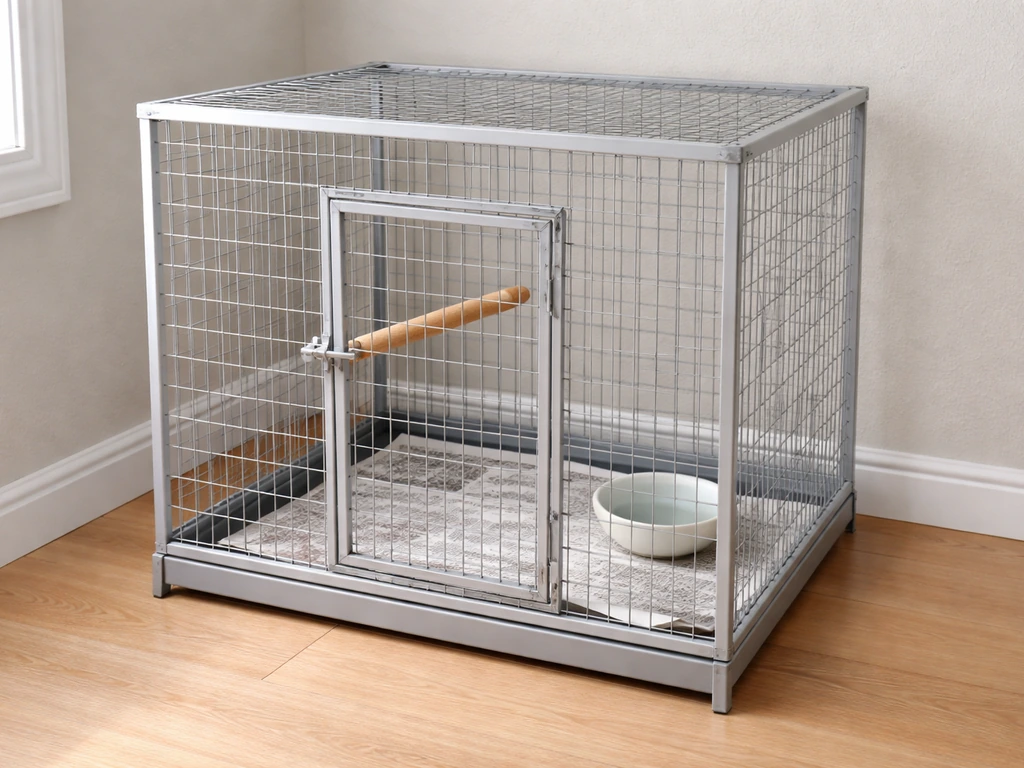
Wire rope in bird cages fails for seven core reasons: mechanical wear from repeated loading, bird chewing that unravels individual wires, corrosion from moisture and droppings, poor installation that creates kink points, environmental exposure to salt air or UV, chemical damage from bleach-based cage cleaners, and pest or debris build-up that traps corrosive material against the metal. Once you know which of these is hitting your setup, fixing or replacing the affected rope is straightforward, and preventing a repeat is mostly a matter of picking the right material and keeping a quick inspection routine.
Wire Rope Bird Cage Causes: Inspection, Repair & Prevention

Maya Bennett
6 Aug 2026
Who this guide is for and what you'll get out of it
I wrote this for three groups: bird owners who noticed something wrong with their cage and want to know if it's dangerous, DIYers building or modifying an enclosure who want to choose the right wire rope from the start, and cage builders who need a repeatable inspection and maintenance protocol. By the end you'll have a clear definition of what wire rope actually is in a cage context, a complete breakdown of every root cause of failure, a practical inspection checklist you can run in minutes, and step-by-step repair and replacement procedures with tool lists. I've also tied in pest control and cleaning considerations because those two things are behind more wire rope failures than most people expect.
What wire rope actually means in a bird-cage context
Wire rope sounds industrial, but it shows up in bird setups more often than you'd think. In cage-building and aviary work, 'wire rope' (also called cable, strand or stainless cable depending on who's selling it) refers to multiple individual wires twisted together into strands, with those strands then twisted around a central core. That's different from solid wire (a single rod), welded wire mesh (a grid of individual wires spot-welded at crossings), or chain. The key benefit of wire rope is that it combines tensile strength with some flexibility, which makes it useful for perch supports, hanging hardware, tensioned aviary panels, door tension systems and structural ties in large flight cages.
You'll see it labelled by its construction: the notation is 'strands × wires per strand,' so a 1×19 rope has one strand of 19 wires (very rigid, behaves almost like a solid rod), a 7×7 has seven strands of seven wires each (noticeably more flexible), and a 7×19 has seven strands of nineteen wires (the most flexible of the common small-diameter types and the best choice anywhere the rope needs to bend repeatedly). The core inside the strands is either a fiber core (FC) or an independent wire-rope core (IWRC); IWRC is stiffer and more crush-resistant. For cages and small aviaries, 7×7 and 7×19 constructions in small diameters (1/16" up to 3/16" is the typical range) cover most practical needs. The Landmann Stainless Steel Wire Rope catalog (sizes and breaking strengths) lists commonly stocked small diameters from about 1/32" up through 1/4", with typical retail railing sizes such as 1/16", 3/32", 1/8", 3/16" and 1/4".
Wire rope materials, constructions and coatings
Getting the material right upfront saves a lot of grief later. Here's how the main options stack up for bird-cage use.
| Material | Best use case | Watch out for | Bird safety notes |
|---|---|---|---|
| Type 316 stainless steel | Outdoor aviaries, coastal/humid environments, indoor setups where cleaning chemicals are used | Higher cost than 304; still needs rinsing after bleach contact | Safe when intact; no zinc risk; preferred for chewing-prone species |
| Type 304 stainless steel | Dry indoor cages, low-humidity rooms, budget builds where 316 isn't practical | Susceptible to pitting in chloride environments and from hypochlorite cleaners | Safe when intact; avoid prolonged bleach contact |
| Galvanized (zinc-coated) steel | Not recommended for any bird application | Parrots and other chewers can ingest zinc from the coating, causing zinc toxicosis ('new-wire disease') | Avoid for all cage and aviary wire work with birds |
| PVC/vinyl-coated stainless | Panels where abrasion resistance or aesthetics matter | Coating chips under UV, mechanical wear or chewing; fragments become ingestible | Monitor constantly for coating damage; avoid if birds chew on structural cables |
| Synthetic rope (polyester/Dyneema) | Low-load decorative hanging, toy attachments | UV degradation, chewing, no corrosion resistance needed | Check regularly for fraying; not structural |
The galvanized issue is serious enough to call out plainly: avian veterinary literature is explicit that galvanized wire is a common source of zinc toxicosis in parrots. Avian Medicine: Principles and Application documents zinc toxicosis from galvanized mesh and hardware and recommends avoiding galvanized wire for birds that chew Avian Medicine: Principles and Application (textbook; discussion of 'new wire' zinc toxicosis). Blood zinc levels above roughly 2 mg/kg whole blood indicate clinical poisoning. If your current setup uses galvanized cable or hardware, replacing it with stainless is not optional if you have a bird that chews. For indoor cages in dry rooms, 304 stainless is fine. For anything outdoors, near the coast, or regularly cleaned with bleach-based products, pay the small premium for 316.
Construction choice matters too. For any application where the rope will flex repeatedly (a hanging door, a swinging perch support, a tensioned panel that vibrates in wind), go with 7×19 rather than 1×19. The 1×19 construction has low bend-fatigue tolerance; bend it repeatedly at the same point and individual wires will snap. The 7×19 construction distributes stress across far more wires and handles repeated movement without premature breakage.
Every root cause of wire rope failure in cages
Most failures aren't mysterious once you know what to look for. Here are all seven root causes, what they look like, and what drives them.
1. Mechanical wear and fatigue
This is the most common structural failure mode. Any point where the rope runs over a hardware edge, through a tight eyelet, around a sharp bracket corner, or bends repeatedly under load is a fatigue hotspot. You'll see individual outer wires snap first, then more follow. Flattened, shiny, abraded patches on the outer wires are also a wear signature. In industry, wire ropes are pulled from service when there are six or more broken wires in one rope-lay length, or three broken wires in a single strand over one lay length. That's the standard I use as a ceiling for cage hardware too. Diameter reduction is another indicator: if the rope looks noticeably thinner at one spot compared to adjacent sections, internal wire breakage or corrosion is already well advanced.
2. Bird chewing
Parrots and other hook-billed species will work on anything they can reach. Wire rope is particularly vulnerable because the gaps between outer wires give a beak a purchase point. What starts as cosmetic surface scratching can quickly progress to individual wire removal, unraveling of an outer strand, and a bird ingesting metal fragments or coating chips. With galvanized rope that means a zinc toxicosis risk. With coated stainless it means PVC fragment ingestion. With bare stainless, the structural hazard is the exposed broken wire tips that can catch and injure a bird. Any cage component a bird can reach and chew should be periodically inspected, and bare wire rope should be considered a chewing target for any parrot species.
3. Corrosion
Stainless steel is corrosion-resistant, not corrosion-proof. Pitting corrosion (small, deep pits that are hard to see until the rope is weakened) is triggered by chloride exposure, including salt air, pool chemicals, and sodium hypochlorite in bleach. Crevice corrosion forms under fittings, sleeves, and anywhere debris traps moisture against the metal. Type 304 is significantly more vulnerable to pitting in chloride environments than 316. Bird droppings are another active corrosive: uric acid residue has been shown in peer-reviewed studies to cause measurable mass loss and pitting in steel and aluminum when left to sit. The practical takeaway is that droppings left on cable hardware for days or weeks are actively attacking the metal.
4. Poor installation
Kinking is the installation failure I see most often. A kink is a permanent deformation that happens when wire rope is allowed to loop tightly under load, or when it's coiled too tightly during storage and then tensioned. Once a rope is kinked it cannot be straightened back to safe working condition; the internal wire structure is distorted and fatigue resistance is dramatically reduced at that point. 'Bird-caging', the technical term for the outer strands ballooning outward from the core, which looks exactly like a tiny bird cage, is usually caused by a sudden compressive shock load or by twisting the rope against its lay during installation. It's irreversible; a bird-caged rope must be replaced.
5. Environmental exposure
Outdoor and partly sheltered aviaries face UV radiation, temperature cycling, rain, humidity, and in coastal areas salt spray. UV degrades coatings and synthetic materials. Thermal cycling works hardware connections loose over months. Salt spray accelerates pitting on 304 stainless dramatically; 316 holds up far better. Aviaries exposed to salt air more than a few kilometers from the coast should use 316 as a baseline, not an upgrade.
6. Cleaning and chemical damage
Bleach is the most-used cage disinfectant and one of the worst things you can leave on stainless wire rope or hardware. Sodium hypochlorite promotes pitting corrosion on 304 stainless in particular, and lab studies confirm that even chlorhexidine solutions can accelerate localized corrosion on stainless steel. The damage isn't from a single wipe-down; it accumulates with repeated exposure and inadequate rinsing. The fix is simple: if you use bleach-based cleaners, rinse thoroughly with clean water afterward and dry the hardware before the bird goes back in. Switching to dilute hydrogen peroxide or commercial bird-safe cage cleaners eliminates the chemical corrosion risk entirely.
7. Pest and debris-related hygiene issues
Ants, mites, and other cage pests often establish themselves in the gaps around wire rope terminations and under hardware fittings, exactly where debris, seed husks, and droppings accumulate. That organic material traps moisture and creates the humid, low-oxygen crevice environment that accelerates crevice corrosion. It also makes cleaning harder because the debris has to be removed before you can even see the metal condition underneath. Pest problems and wire rope condition are directly linked: a cage with an active ant or mite problem almost always has debris accumulation around fittings that needs addressing as part of any wire inspection.
Inspection checklist: what to look for and when
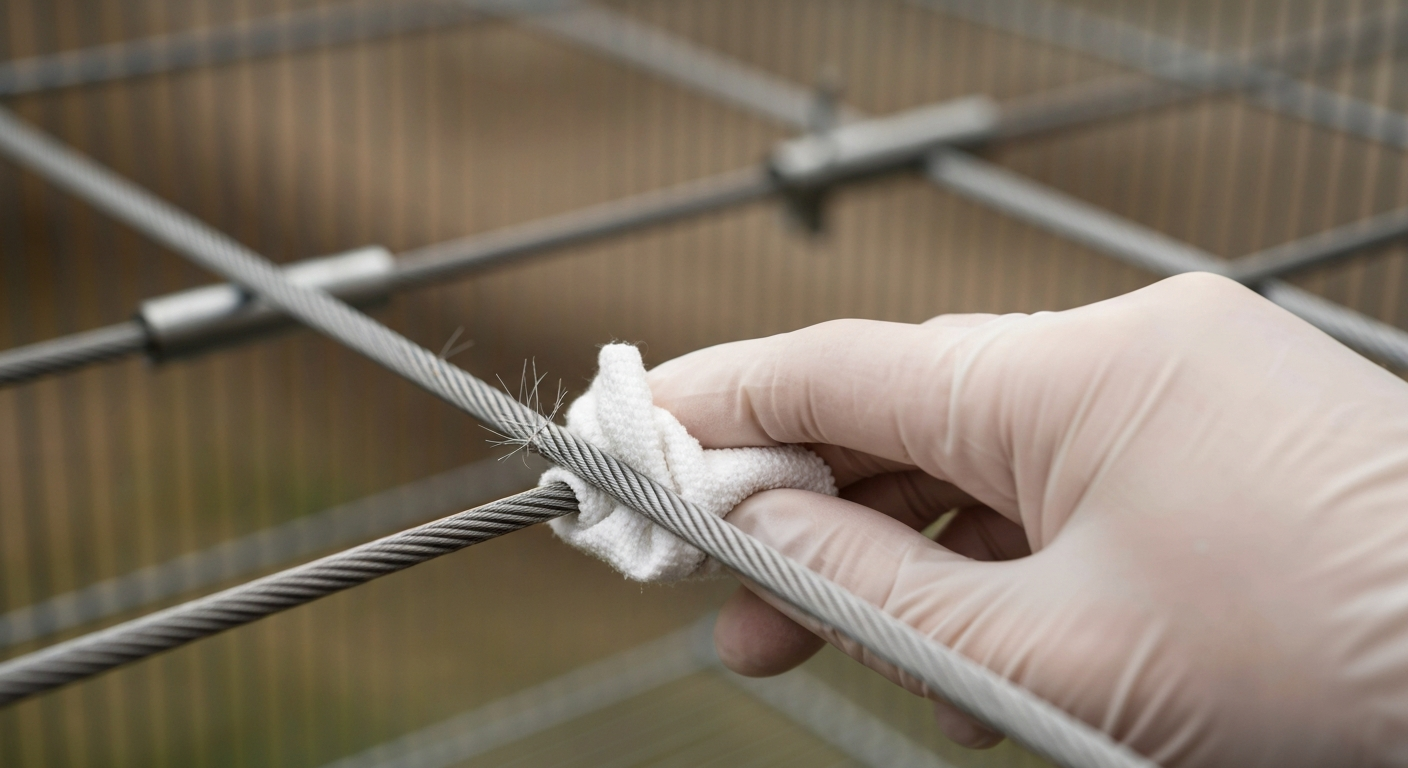
A good inspection takes about ten minutes once you know the signs. The most important thing I learned from rigging inspection guides is to clean the rope before you inspect it. Grease, debris, and coatings hide broken wires and corrosion pitting. Run a clean dry cloth or wooden dowel along the rope length; broken wire tips will snag. Here are the visual and tactile checks to run at each frequency.
What to look for
- Fraying or fuzzing: individual broken wires standing proud of the rope surface (the most obvious sign of fatigue failure)
- Bird-caging: outer strands ballooned away from the core, creating a barrel or cage shape at one point along the rope
- Kinks: sharp angular bends that are permanent, not springy
- Corrosion: rust discoloration on carbon steel or galvanized rope; reddish or dark pitting on stainless that doesn't wipe off
- Diameter reduction: use calipers to compare the rope diameter at suspect points to an unsuspected section; localized thinning means internal wire breakage or heavy corrosion
- Coating damage: chips, flakes, or peeled sections on PVC-coated rope, especially near fittings and bend points
- Loose or pulled hardware: swaged sleeves, ferrules, or end fittings that have shifted or that show a gap between the fitting and the rope
- Debris and moisture accumulation: seed husks, droppings, or wet organic material packed around fittings or along the rope run
Remove from service immediately if you find
- Six or more broken wires in one rope-lay length (the lay length is roughly 6-8 times the rope diameter for small stainless cable)
- Three or more broken wires in a single strand within one lay length
- Any kink, bird-cage distortion, or crushing
- Visible corrosion pitting at or near a load-bearing fitting
- Any diameter reduction that is visible to the eye without measuring tools
- A swaged or crimped sleeve that has cracked, shifted, or can be pulled toward the rope end by hand
Hands-on inspection checklists for owners and builders
Tape this schedule somewhere near your maintenance tools or add it to your phone. The goal is to catch problems early when they're still a repair job, not a full replacement.
| Frequency | Task | What you're catching |
|---|---|---|
| Daily (30 seconds) | Visual scan of all visible wire rope runs and hardware while the cage is lit | Obvious new fraying, bird-chewing damage, displaced fittings |
| Weekly (5 minutes) | Wipe rope with dry cloth or gloved finger; feel for wire tips snagging; check fittings are firm | Early fatigue wire breaks, loose hardware, coating damage |
| Monthly (10 minutes) | Full clean of rope and hardware, then inspect; measure diameter at any suspect point with calipers; photograph any changes | Corrosion pitting, diameter reduction, debris accumulation, progressive chewing damage |
| Before cleaning | Remove bird, check rope condition before applying any cleaners so you don't mask damage with product residue | Baseline condition before chemical exposure |
| After cleaning | Rinse all rope and hardware with clean water, dry thoroughly, re-inspect for any coating lifting or pitting that the cleaning exposed | Chemical damage, coating separation, new pitting |
| Seasonal (outdoors) | Full inspection after winter or storm season; check all terminations and any UV-exposed coatings | Corrosion from salt/humidity cycling, UV coating degradation, fatigue at vibration points |
Step-by-step repair procedures
Some wire rope problems are fixable without full replacement. Here's how to assess and carry out the two most practical repairs: protecting a mildly corroded section and stabilizing a fitting that's started to shift before full replacement is ready.
Tools and parts you'll need for repairs
- Stainless steel wire brush (small, soft-bristle)
- Clean dry cloths or paper towels
- Digital calipers (to measure rope diameter)
- Magnifying glass or loupe (10x is ideal for checking wire breaks)
- Nitrile gloves (broken wire tips are sharp)
- Replacement aluminum or stainless stop sleeves/ferrules in the correct size for your rope diameter
- Hand swaging tool or bench swager sized to your ferrule
- Electrical tape or self-amalgamating tape (for temporary stabilization only)
- Bird-safe cage cleaner or dilute hydrogen peroxide solution
- Spray lubricant (PTFE-based, not petroleum oil) for non-load-bearing moving parts only
Repair procedure: corroded or debris-fouled hardware
- Move the bird to a safe temporary space and close it securely before touching any cage hardware.
- Photograph the affected area before you start — this gives you a before/after record and helps identify if the problem progresses.
- Put on nitrile gloves. Use the stainless wire brush to scrub away surface corrosion, droppings, and debris from the rope and surrounding hardware. Work along the rope lay, not across it.
- Wipe clean with a damp cloth, then dry thoroughly. Now inspect with your magnifying glass: count any broken wire tips you can see or feel.
- If the damage is surface corrosion only (no pitting deeper than the wire surface, no broken wires), the rope can stay in service. Clean the area thoroughly, rinse with clean water and dry completely. This removes the active corrosive material.
- If you find a fitting (sleeve, ferrule, thimble) that has shifted slightly but hasn't opened a gap larger than 2mm and the rope hasn't pulled through at all, you can apply a temporary wrap of self-amalgamating tape over the fitting to flag it and prevent further movement until you can replace it. Label this as a temporary fix and schedule replacement within the week.
- Never apply tape over broken wires as a permanent fix. Tape is only appropriate to prevent a marginally shifted fitting from worsening before you source replacement parts.
- Re-inspect the repair point at your next daily check and again after 48 hours.
Common mistakes during repair
- Inspecting without cleaning first: debris hides wire breaks and pitting; always clean before you count damage
- Using petroleum-based lubricants on rope near birds: these can transfer to feathers and cause health issues; stick to PTFE spray if lubrication is needed at all
- Calling a kinked or bird-caged rope 'repairable': it isn't; replace it
- Using galvanized replacement hardware on a stainless rope: mixing metals and introducing zinc hazards at the same time is a double problem
Step-by-step safe replacement procedures
When the rope has passed the removal-from-service threshold or when you're building fresh, here's how to do a complete replacement cleanly and safely.
Tools and parts for replacement
- Tape measure and permanent marker
- Wire rope cutters (aviation snips work for small diameters up to 3/32"; a dedicated cable cutter gives a cleaner cut on 1/8" and above)
- Digital calipers
- Replacement wire rope in the correct diameter and construction (see material selection section above)
- Stainless steel or aluminum ferrules/stop sleeves matched to your rope diameter
- Hand swaging tool or bench swager
- Thimbles if the rope will terminate around a shackle or pin (thimbles prevent the rope from kinking around the hardware)
- Electrical tape for end whipping before cutting
- Stainless steel cable ties or locking carabiner clips as appropriate to your cage hardware
- Sandpaper (220 grit) for deburring cut ends on hardware
- Nitrile gloves
Replacement procedure
- Move the bird and secure it in a safe temporary enclosure. Don't rush this step; loose birds and sharp wire ends are a serious combination.
- Photograph the existing installation from multiple angles before disassembly. You'll want to reference the routing, termination points, and any specific bend orientations when you reinstall.
- Wrap electrical tape tightly around the rope on both sides of each planned cut point. This prevents the strands from unraveling once cut, giving you a clean working end.
- Cut the old rope with wire rope cutters at the taped points. Don't unravel the ends; keep the tape on until the ferrule is ready to go on.
- Measure the old rope length, or measure the run directly with a tape measure, adding 150mm (about 6 inches) to each termination end to allow for forming the loop and seating the ferrule correctly.
- Cut your replacement rope to length with the same taped-then-cut method. Inspect the cut end: all wires should be cleanly cut, not crushed or bent. If the end is crushed, cut again 10mm back.
- Thread the rope through any routing hardware (eyelets, thimbles, guides) before forming terminations — it's very easy to forget this step and have to cut the termination off to rethread.
- For each loop termination: form the loop around a thimble (use a thimble wherever the rope contacts a bolt, pin or shackle to prevent kinking), slide the ferrule onto both rope tails, pull the loop to the correct size, and swage the ferrule firmly per your swager instructions. For small cage cable (1/16" to 1/8"), most hand swagers require two full compressions at different rotations on each ferrule.
- Tug-test each termination by hand with your full body weight if the fitting is structural. For cage decorative hardware, a firm pull in the working direction is sufficient.
- Trim any rope tail extending beyond the swaged ferrule to within 5mm. Smooth the cut end with 220-grit sandpaper to remove any sharp wire tips.
- Photograph the finished installation, note the date and rope specification in your maintenance log, and return the bird after confirming all hardware is secure and no sharp ends are accessible inside the enclosure.
Choosing the right replacement rope
Match the replacement construction to the application. If the original rope was rigid and rarely moved, 1×19 in 316 stainless is a reasonable like-for-like replacement. If it failed at a bend point or the application involves any repeated movement, step up to 7×7 or 7×19 in the same diameter. Never step down the diameter from the original without recalculating the load; even in low-load cage applications, undersizing hardware creates failure points and sharp edges as smaller-diameter rope wears faster at fittings.
Prevention: stopping the same problems from coming back
Most repeat failures come down to three things: wrong material for the environment, inadequate post-cleaning rinsing, and ignoring early inspection signals. The material fix is straightforward: use 316 stainless for anything outdoors or regularly cleaned with bleach, and eliminate all galvanized wire and hardware from any cage with a bird that chews. For cleaning, rinse thoroughly with clean water after any disinfectant contact and dry the hardware before the bird goes back in. If you're managing cage hygiene problems like ants establishing near fittings or organic debris building up around rope runs, the wire rope inspection has to be part of the same routine as pest control and debris removal, they're not separate jobs.
For species-specific guidance: hook-billed parrots are the highest-risk group for chewing-related failures and zinc ingestion, so they need the strictest material standards (bare 316 stainless, no galvanized, no coated rope within reach) and the most frequent inspections. Softbills and finches are less of a chewing concern but their cages often run wetter, which increases corrosion risk. Cage builders working across species should default to 316 stainless throughout and design cable routing so no rope bend occurs at an angle tighter than ten times the rope diameter.
Repair vs replace: a simple decision framework
| What you found | Decision | Reasoning |
|---|---|---|
| Surface corrosion only, no pitting, no broken wires | Clean and monitor | Rope is structurally sound; remove the corrosive material and improve cleaning/rinsing practice |
| 1-2 broken outer wires, no diameter reduction, no corrosion | Monitor closely; plan replacement within 30 days | Below removal threshold but a trend is established; source replacement rope now |
| 3+ broken wires in one strand or 6+ in one lay length | Replace immediately | At or above the industry removal threshold; continued use risks sudden failure |
| Kink or bird-cage distortion at any point | Replace immediately | Irreversible structural damage; no safe repair exists |
| Diameter reduction visible to the eye | Replace immediately | Advanced internal corrosion or wire breakage; structural integrity is compromised |
| Fitting (ferrule/sleeve) visibly shifted | Temporary tape wrap, replace within 7 days | Termination is failing; tape stabilizes temporarily but is not a permanent repair |
| Coating damage (chips, flakes) within bird reach | Replace with uncoated stainless or physically restrict bird access | Ingestible fragments are an active hazard; monitoring is insufficient for chewing species |
| Galvanized rope in any cage with birds that chew | Replace immediately with stainless | Zinc toxicosis risk; no safe service life for galvanized wire where chewing is possible |
Connecting wire rope maintenance to your wider cage care routine
Wire rope condition doesn't sit in isolation from the rest of your cage maintenance. Pest problems, specifically ants establishing nests around cage fittings, are a direct driver of debris accumulation and moisture trapping at exactly the points where crevice corrosion starts. See our guide on bugs in bird cage for identification and safe removal methods. If you're dealing with ants or other insects in the cage, treat the pest problem and do a wire inspection in the same session. Similarly, whatever cleaning protocol you're using for the rest of the cage (diluted disinfectants, enzymatic cleaners, or simple soap and water) affects the wire hardware. The cage cleaning frequency and product choice you've settled on for hygiene needs to account for the hardware it's contacting, not just the surfaces you're trying to disinfect. Integrating wire inspection into your regular cleaning routine, check before you clean, rinse after, re-check when dry, adds only a few minutes and catches the majority of problems before they become safety issues. For practical bird cage cleaning tips that minimize chemical and corrosion risks, see the linked care guide.
FAQ
What exactly is 'wire rope' in bird‑cage contexts and how does construction affect performance?
In aviaries and cages, 'wire rope' means stranded metal cable (not solid rod or chain) used for perches, hanging hardware, aviary nets or structural ties. Constructions are described as 'strands × wires per strand' (e.g., 1×19, 7×7, 7×19). 1×19 is very rigid; 7×7 and 7×19 are progressively more flexible and tolerate repeated bending better. Core type (fiber core vs independent wire‑rope core) and stainless grade (304 vs 316) also influence flexibility and corrosion resistance. Choose construction to match expected bending, load and bird‑chewing behavior.
What are the root causes that make wire rope fail or cause problems in cages?
Common root causes are: mechanical wear and abrasion (flattened wires, diameter loss), repeated bending/fatigue (broken internal wires), corrosion from moisture, salt or bird droppings (pitting or rust), bird chewing (exposing bare metal or ingestible fragments), poor installation or overloaded fittings (kinks, bird‑caging), environmental exposure and UV damage to coatings, cleaning chemicals (bleach/NaOCl and some disinfectants accelerate pitting), and hygiene/pest issues where debris or droppings hide damage and attract ants/bugs.
What visual and tactile signs should I inspect for during routine checks?
Look for fraying or broken wire ends, flattened or shiny abraded outer wires, discoloration/rust/pitting, reduction in nominal diameter, localized distortion (bird‑cage shape), kinks or unlaying strands, loose or sharp wire tips at fittings, coating chips or flaking, and accumulation of droppings/debris. Tactilely run a gloved hand or soft block along the rope to feel for burrs, roughness, or soft spots; use a cloth to wipe away grime before close inspection.
What step‑by‑step inspection checklist should I use (quick and photo‑friendly)?
Inspection checklist (photo steps): 1) Photograph entire installation for baseline. 2) Remove birds to a safe temporary area. 3) Clean the rope section with a soft brush and damp cloth to remove droppings — photograph pre‑ and post‑clean. 4) Run a gloved hand or a wooden/soft plate along the rope length while photographing any raised broken wires. 5) Measure rope diameter with calipers at several points and note any localized reduction. 6) Inspect fittings, crimps, swage sleeves, turnbuckles and anchor points for deformation or corrosion; photograph close‑ups. 7) Look under coatings for pinholes or chips. 8) Note any nearby pest trails or ant activity. 9) Compare against replacement criteria (broken‑wire counts, diameter loss, severe corrosion or distortion). Save photos for future comparisons.
What objective decision criteria should I use to choose repair vs replace?
Replace if any of the following apply: • Multiple broken wires per lay length (industry guidance: e.g., three or more broken wires in one strand lay length or six in a rope‑lay length for small ropes). • Visible diameter reduction beyond a small fraction of nominal size or severe flattening. • Bird‑caging, kinking, severe corrosion/pitting, or exposed core. • Coating chewed into friable fragments or large areas of flaked coating. • Hardware/fittings are deformed or failing. Repair (temporary) only for minor, isolated surface frays with no diameter loss, no corrosion, and secure fittings. If in doubt, replace — safety and bird health take priority.
What tools and replacement parts do I need for safe replacement of wire rope in cages?
Tools/parts list: stainless‑steel wire rope (choose construction and grade appropriate for use, see species guidance); suitable swage sleeves/ferrules (stainless 316 where exposure is high); stainless thimbles, eye fittings, marine grade turnbuckles or shackles (316 for coastal/humid); cut‑resistant gloves; wire cutters or cable cutters sized for the rope; hydraulic swager or crimping tool plus calibrated dies or correctly sized ferrule crimper; calipers for diameter checks; soft cloths/brush; stainless cleaner and fresh water for rinsing; optional temporary protective sleeves (rubber or silicone) and non‑toxic cage‑safe vinyl for covering edges during work. Avoid galvanized hardware on chewers.