
You can build a round bird cage at home, but before you cut a single wire or drill a single hole, you need to know that round cages come with real welfare tradeoffs for most parrots and hook-bills. They look beautiful, and for canaries, finches, and doves they work just fine, but for parrots and cockatiels, round cages remove the corners birds rely on to feel secure. If you are building for a parrot, I would strongly encourage a flight-style rectangular build instead. That said, if a round cage fits your species and setup, this guide walks you through every step: safe materials, exact sizing, a full tool list, assembly from frame to door, non-toxic finishes, and how to keep the finished cage clean and pest-free.
How to Make a Round Bird Cage: Safe DIY Plans & Sizing

Maya Bennett
11 Aug 2026
Who this guide is for (and an honest welfare note)
This guide is written for DIY bird owners, hobbyist woodworkers, and metalworkers who want to build a safe, species-appropriate round cage from scratch, or adapt an existing round frame into a proper enclosure. It also works as a reference if you are converting a decorative round cage into something actually liveable. I have built rectangular and round cages and worked through a lot of trial and error on bar spacing, door hinges, and base trays, so the advice here is based on real builds, not just theory.
One thing I want to be upfront about: the Association of Avian Veterinarians and many avian clinics actively discourage round cages for companion parrots. The reason is straightforward. Parrots feel most secure when they can back into a corner. A round cage gives them nowhere to do that, and it also limits how you can arrange perches and enrichment in a meaningful layout. If you are building for a budgerigar, canary, finch, dove, or lovebird kept in a well-furnished setup with regular out-of-cage time, a round cage can be done well. For cockatiels, small conures, and larger parrots, please weigh the rectangular alternative seriously.
Essential safety and welfare rules before you build anything
A cage is a life-support system. Getting the welfare rules right before you touch materials is more important than any construction technique. These are the non-negotiables I check on every build.
Toxins in materials and the environment
Zinc and lead are the two most common and serious heavy-metal toxicoses in pet birds, and both are easy to accidentally introduce through cage materials. Galvanized wire is the most common culprit: the zinc coating on galvanized mesh can be chewed or ingested, and clinically documented zinc poisoning cases in parrots regularly trace back to cage wire, cheap clips, solder, and old paint. The rule is simple: use stainless steel wire or explicitly verified lead-free and zinc-free powder-coated steel. Never assume a powder coat is safe just because it looks intact. Coatings chip, and if the base wire is galvanized underneath, the bird will eventually reach it.
PTFE (Teflon and related fluoropolymer coatings) is a separate, acutely fatal hazard. When PTFE overheats above roughly 280°C, it releases carbonyl fluoride, hydrogen fluoride, and perfluoroisobutylene gases that have killed pet birds in documented incidents. This means no PTFE-coated hardware anywhere on the cage, and never keep a bird cage in or near a kitchen where non-stick cookware is in use. This is a placement rule as much as a materials rule.
Bar spacing: the most critical measurement
Bar spacing that is too wide allows a small bird to push its head between bars and get stuck, which can be fatal. Bar spacing that is too narrow for a large hook-bill is frustrating and can cause beak damage. I measure every bar gap with calipers before any bird goes near the finished cage. Use the species-specific ranges in the sizing section below and verify them against the bar spacing table.
Flight space and usable volume
The Merck Veterinary Manual sets the minimum at 1.5 times the bird's wingspan in every direction, just so the bird can stretch and flap. The RSPCA sets a higher bar: if the bird spends most of its time in the cage, every dimension (height, width, depth) should be at least twice the wingspan. For a round cage, diameter is your limiting factor for width and depth at the same time, which is actually a disadvantage compared to a rectangle where you can compensate by extending one axis. Build as large as your space and budget allow. The minimums are floors, not targets.
Perches, enrichment, and mental welfare
Every cage needs a minimum of two perches at different heights and, ideally, different diameters. Uniform wooden dowels are the worst perch setup you can provide because the bird's foot never changes grip position, which leads to pressure sores. Natural branches of varied diameter are better. Avian clinicians recommend avoiding sandpaper perch covers as a primary surface. Enrichment items (foraging toys, shreddable materials, and rotating items) should be added without blocking flight paths between perches. In a round cage this is harder to arrange well, which is another reason to build large.
Exact sizing by species: dimensions and bar spacing
The table below gives minimum round-cage diameter and height, correct bar spacing, and recommended perch diameter ranges for the most common pet bird species. All minimum dimensions are based on the RSPCA's 2x-wingspan guideline for birds spending significant time caged, cross-referenced with published wingspans. Round-cage diameter must be at least equal to twice the wingspan to give the bird enough usable space in the horizontal plane. If your bird gets six or more hours of supervised out-of-cage flight daily, you may use 1.5x wingspan as a floor, but I always build larger when possible.
| Species | Typical Wingspan | Min. Cage Diameter (2× WS) | Min. Cage Height | Bar Spacing | Perch Diameter |
|---|---|---|---|---|---|
| Budgerigar | 25–30 cm (10–12") | 60 cm / 24" | 60 cm / 24" | 9–13 mm (3/8"–1/2") | 8–12 mm |
| Lovebird | 25–28 cm (10–11") | 56 cm / 22" | 56 cm / 22" | 9–13 mm (3/8"–1/2") | 8–14 mm |
| Parrotlet | 22–25 cm (9–10") | 50 cm / 20" | 50 cm / 20" | 9–13 mm (3/8"–1/2") | 8–12 mm |
| Canary / Finch | 20–25 cm (8–10") | 50 cm / 20" | 50 cm / 20" | 9–12 mm (3/8"–1/2") | 8–12 mm |
| Cockatiel | 30–35 cm (12–14") | 70 cm / 28" | 80 cm / 32" | 12–16 mm (1/2"–5/8") | 13–20 mm |
| Small Conure | 35–42 cm (14–17") | 84 cm / 33" | 90 cm / 36" | 12–16 mm (1/2"–5/8") | 13–20 mm |
| African Grey / Amazon | 46–56 cm (18–22") | 112 cm / 44" | 100 cm / 40" | 16–19 mm (5/8"–3/4") | 20–30 mm |
| Large Macaw | 90–120 cm (35–47") | 240 cm / 94" (aviary scale) | 180 cm / 71" | 25–38 mm (1"–1.5") | 30–50+ mm |
A note on large macaws: a round cage at the diameter shown above is essentially an aviary. For any bird larger than a small conure, a round cage becomes impractical as a primary enclosure unless you are building a walk-in aviary structure. The sizes above are listed for reference, but I would not recommend a round cage as a primary housing solution for African greys, Amazons, or macaws.
Choosing your materials: metal, hardwood, bamboo, and mesh
Material choice affects safety, cost, longevity, and how difficult the build is. Here is how the main options compare, with practical notes from real builds.
| Material | Safety Rating | Durability | Workability | Best For | Avoid If |
|---|---|---|---|---|---|
| 304/316 Stainless Steel Wire | Excellent (no zinc/lead risk) | Very high, rust-resistant | Harder to cut, needs wire snips or angle grinder | Any species, especially hook-bills | Budget is very tight (most expensive option) |
| Powder-coated Steel (verified lead/zinc-free) | Good if certified | High if coating intact | Easy, pre-made panels available | Small to medium birds, decorative builds | You cannot verify coating certification |
| Galvanized Wire | Poor (zinc toxicity risk) | High | Easy | Nothing — avoid for any bird cage | Always avoid |
| Hardwood (solid maple, oak, beech) | Good with non-toxic finish | Moderate (absorbs moisture) | Easy to cut and shape | Frame, base tray, door frame | Species that heavily chew wood (large parrots) |
| Bamboo (dried, cured) | Good with sealant | Moderate | Easy, lightweight | Canaries, finches, small doves | Large hook-bills that will chew through it quickly |
| Aluminium Wire/Sheet | Good (non-toxic) | Moderate | Easy to cut, lighter than steel | Lightweight builds, small birds | Large parrots (too soft, can be deformed) |
My default recommendation is 304 stainless steel welded wire mesh for the bars and panels, combined with a kiln-dried hardwood frame for the ring structure. Stainless steel is the only option where I do not need to worry about coating wear, zinc leaching, or rust over time. Yes, it costs more upfront, but a well-built stainless cage lasts indefinitely. If your budget is tight, powder-coated steel panels from a verified supplier are an acceptable alternative for small birds, but get the specification sheet confirming the coating is lead-free and zinc-free, and inspect every panel carefully before use. Manufacturers and avian experts caution that powder-coated cages can be safe only if the coatings are genuinely lead- and zinc-free and the underlying wire is not galvanized; chipping or wear can expose toxic base metals, so inspect new cages and avoid chipped or old coatings (see What's That Cage Made Of?, For The Birds DVM (avian vet practice guidance)) What's That Cage Made Of? — For The Birds DVM (avian vet practice guidance).
The bamboo option
Bamboo makes a beautiful round cage for canaries, finches, and small doves. It is lightweight, easy to work with hand tools, and gives the cage a natural aesthetic. The build process uses dried, cured bamboo canes as vertical bars set into circular top and bottom rings made from either steamed-bent bamboo or routed hardwood. The critical steps are: use only fully dried and cured bamboo (green bamboo contains moisture and can crack as it dries, creating sharp edges), apply two coats of a bird-safe water-based sealant to all surfaces, and verify bar spacing with calipers after assembly because bamboo canes can shift slightly during gluing. Bamboo is not suitable for any parrot species that will chew it, as the splintered ends can be sharp and the canes will be through within weeks. For a step-by-step bamboo-specific build guide, see how to make a bird cage with bamboo.
Non-toxic finishes and coatings: what is safe and what to avoid
Any finish applied to a bird cage will eventually be chewed, so it needs to be non-toxic when ingested, not just when dry. The safest approach is to use no finish on stainless steel components (they need none) and to seal wood and bamboo with a water-based, zero-VOC finish that is explicitly labelled non-toxic and food-safe once cured.
- Water-based, zero-VOC acrylic sealers (look for 'food-safe when cured' on the label): safe for wood and bamboo frames
- Beeswax or carnauba wax polish: safe for wood surfaces, good for the base tray
- Linseed oil (raw, not boiled): safe when fully cured (boiled linseed oil contains metallic driers — avoid it)
- Bird-safe, water-based paints labelled non-toxic when dry: safe for decorative touches on the frame only, not on bars
- Oil-based paints and varnishes: contain solvents and metallic compounds that are toxic
- Any paint containing lead or zinc (older paints, some primers)
- Polyurethane varnish: can contain isocyanates and solvents; not safe
- Spray paints unless explicitly labelled bird-safe and fully cured with ventilation: fume risk during curing
- PTFE-based non-stick coatings: acutely toxic to birds when heated
- Galvanized hardware cloth used as a cheap substitute for stainless: the zinc coating is the hazard
Always allow full cure time (usually 72 hours minimum, longer in humid conditions) before placing any bird near finished surfaces. Cure in a well-ventilated space away from birds. After curing, do the sniff test: if you can smell the finish at all, it is not ready.
Complete tools and parts list
Hand tools
- Tape measure and marking pencil (metric and imperial both useful)
- Wire cutters / aviation snips (for mesh panels)
- Needle-nose pliers (for bending and shaping wire ends)
- Jigsaw or coping saw (for cutting circular ring pieces from plywood or hardwood)
- Hand plane or spokeshave (for smoothing circular ring edges)
- Mallet and chisels (for mortise-and-tenon or dado joints if building a hardwood frame)
- Drill bits: 3 mm, 5 mm, 8 mm, and a step-drill bit for hinge holes
- Sandpaper: 80, 120, 180, and 240 grit
- Compass or trammel points (for marking accurate circles)
- Caliper (for verifying bar spacing precisely)
Power tools
- Drill/driver (cordless preferred for mobility)
- Jigsaw with fine-tooth blade for curved cuts
- Angle grinder with a metal cut-off disc (for cutting stainless steel mesh — wear eye and hand protection)
- Random orbital sander (speeds up ring and base prep)
- Router with a round-over bit (optional but makes a much cleaner ring edge)
Fasteners and hardware
- Stainless steel J-clips and J-clip pliers (primary fastener for attaching mesh to frame rings)
- Stainless steel hog rings and hog-ring pliers (alternative for mesh-to-mesh joins)
- Stainless steel screws 4 × 20 mm and 4 × 40 mm (frame assembly)
- Stainless steel bolts M5 × 20 mm with nylon-lock nuts (door hinges and latches)
- Stainless steel hinges × 2 (door)
- Bird-safe cage latch or carabiner-style bolt latch (a simple hook latch is not secure enough for parrots)
- Stainless steel eyebolts M5 × 2 per perch position (for mounting natural-branch perches)
- Stainless steel wing nuts (for removable tray clips)
- Food-grade rubber or silicone gasket strip (base tray seal to reduce mess escape)
Materials by build stage
- Stage 1 (Frame rings): 18 mm or 25 mm kiln-dried hardwood plywood or solid hardwood blanks, cut into ring segments and laminated, OR bent hardwood or bamboo ring stock
- Stage 2 (Vertical bars/mesh): 304 stainless steel welded wire mesh, bar spacing matched to species (see table)
- Stage 3 (Base tray): 18 mm exterior-grade (non-toxic finish) plywood or stainless steel sheet with 25 mm raised lip
- Stage 4 (Door): Matching wire mesh panel on a stainless steel or hardwood frame, sized at minimum 1× bird body length + 5 cm on each dimension
- Stage 5 (Perches): Natural hardwood branches (apple, pear, willow, hazel — avoid cherry laurel, yew, and avocado wood), 2–4 per cage
- Stage 6 (Finish): Water-based zero-VOC sealer for wood parts, no finish needed for stainless components
Cost estimates and materials template
Costs vary by region and supplier, but the table below gives realistic per-size build estimates based on my own sourcing in 2025-2026. Prices are in USD and represent mid-range, quality materials. Stainless steel wire is the biggest variable: 304 stainless welded mesh costs two to four times more than powder-coated alternatives. If you are building for a small bird and budget is a concern, verified powder-coated panels are an acceptable trade-off, but do not compromise on fastener quality.
| Cage Size (Diameter × Height) | Target Species | Frame Materials | Wire/Mesh | Hardware | Finish | Approx. Total (USD) |
|---|---|---|---|---|---|---|
| 50 cm × 50 cm (20" × 20") | Budgie / Parrotlet / Finch | $15–20 | $20–30 (SS mesh) | $10–15 | $5–8 | $50–75 |
| 70 cm × 80 cm (28" × 32") | Cockatiel | $25–35 | $35–50 (SS mesh) | $15–20 | $8–10 | $85–115 |
| 84 cm × 90 cm (33" × 36") | Small Conure | $40–55 | $55–80 (SS mesh) | $20–30 | $10–12 | $125–175 |
| 60 cm × 60 cm (24" × 24") Bamboo | Canary / Finch | $10–15 (bamboo canes) | $0 (bars are the canes) | $8–12 | $10–15 | $30–45 |
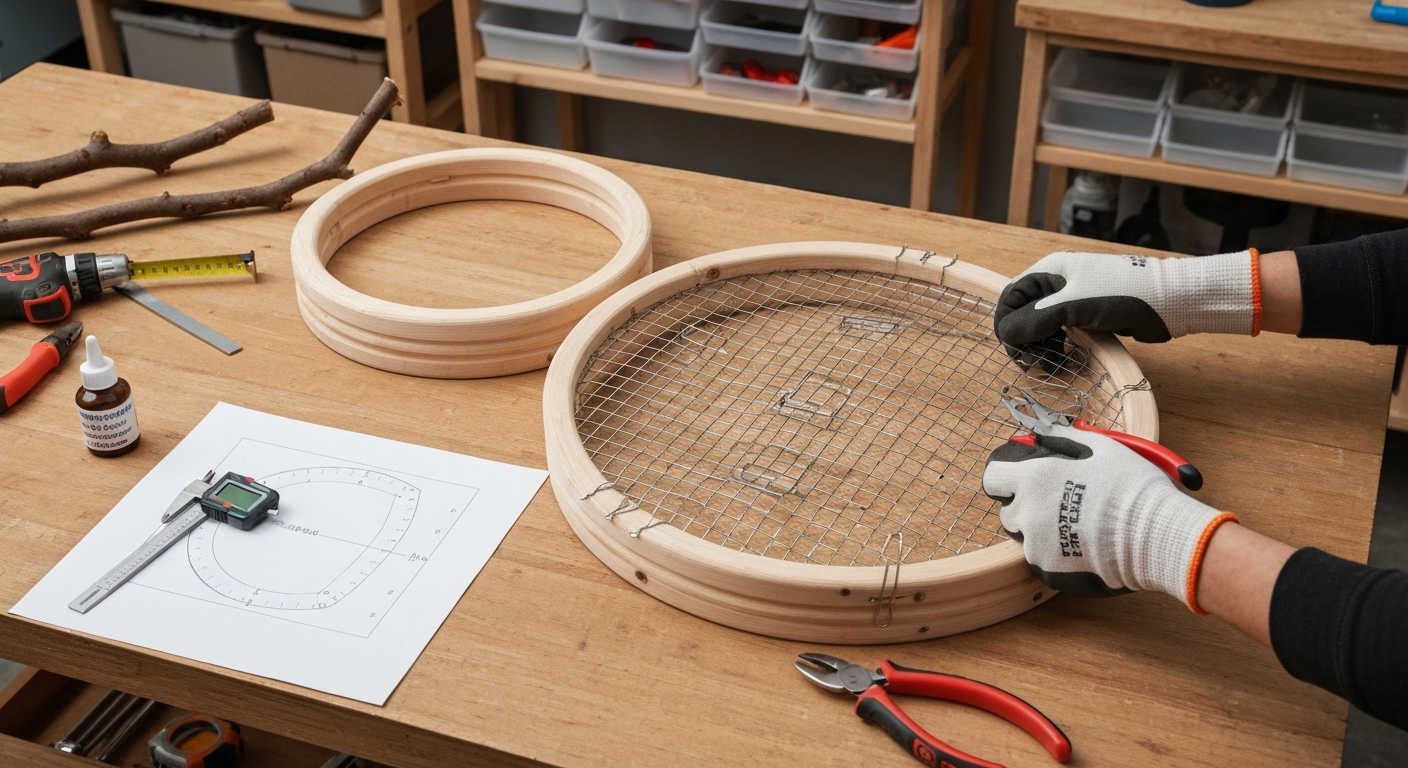
For your measurement templates, print the ring pattern at full scale using a large-format printer or a tiled print from any standard printer. The ring template needs the outer diameter, inner diameter (outer minus twice the frame thickness), and a chord-length reference mark every 15 degrees around the circumference for bar spacing layout. I keep a laminated measurement sheet for each build size taped to my workbench throughout the project. A basic template for a 70 cm diameter cage: outer ring radius 35 cm, inner ring radius 32 cm (for a 30 mm frame), chord length between bar centres at the inner radius for 16 mm bar spacing equals 16 mm (mark with dividers set to 16 mm, walk around the inner circle).
Planning your round cage: geometry, proportions, and layout
The geometry of a round cage is simple but has some real tradeoffs compared to a rectangle. Understanding them before you build saves a lot of rework.
Diameter vs. height: the key tradeoff
In a round cage, diameter controls the horizontal flight space and is the dimension that most constrains the bird. Height matters for vertical movement and perch placement but does not compensate for a narrow diameter. A tall, narrow round cage is one of the most common design mistakes I see: it looks impressive but gives the bird almost no usable horizontal flight room. As a rule, build your cage at least as tall as it is wide, and for birds that move primarily horizontally (finches, canaries, budgies), prioritise diameter over height. For birds that climb vertically (conures, cockatiels), height matters more but diameter is still the floor.
Laying out bar positions on the rings
After cutting your top and bottom rings to diameter, mark the bar hole positions using a divider set to the target bar spacing. Walk the divider around the inner edge of each ring and mark each position with a punch. The number of bars (N) equals the inner circumference divided by the bar spacing. For a 70 cm cage (inner circumference ≈ 204 cm) with 14 mm spacing, you need approximately 145 bars. Round down to keep spacing at or slightly above minimum. Drill all holes to the bar wire diameter plus 0.5 mm clearance before assembly.
Safety checkpoints before you start cutting
- Confirm species bar spacing against the table and verify with a caliper on your chosen mesh before purchasing
- Verify all wire, mesh, and hardware is stainless steel or certified lead/zinc-free powder-coated steel
- Check that your finished cage diameter meets the 1.5× (minimum) or 2× (recommended) wingspan rule for your species
- Confirm no PTFE-coated components are included anywhere in the build
- Check that door dimensions allow the bird to enter and exit without wing contact on the frame
- Verify that all wood and bamboo materials are untreated and from non-toxic species before cutting
Layout templates for common sizes
For a 50 cm diameter cage (budgie/finch): cut two rings 50 cm outer diameter, 44 cm inner diameter (30 mm frame). Inner circumference 138 cm. At 11 mm bar spacing: 125 bars. Door opening: 15 cm wide × 15 cm tall minimum. Base tray: 50 cm diameter with 25 mm lip.
For a 70 cm diameter cage (cockatiel): cut two rings 70 cm outer diameter, 64 cm inner diameter. Inner circumference 201 cm. At 14 mm bar spacing: 143 bars. Door opening: 20 cm wide × 22 cm tall minimum. Base tray: 70 cm diameter with 30 mm lip. Add a mid-ring at the halfway height point for rigidity on cages over 75 cm tall.
Step-by-step assembly: from frame to finished cage
Step 1: Cut and finish the frame rings
Mark your ring diameters on your hardwood sheet using a compass or trammel. Jigsaw along the line, staying 2 mm outside to allow for sanding. Sand progressively from 80 to 240 grit. Route a small round-over on all exposed edges. Apply your first coat of water-based zero-VOC sealer, let dry fully (minimum 4 hours), lightly sand with 240 grit, and apply a second coat. Photo callout: take a photo of the finished rings next to a ruler to confirm dimensions before drilling.
Step 2: Drill bar holes and door opening
Transfer your divider-marked bar positions to drill points. Clamp the ring securely and drill all holes perpendicular to the ring face. Drill the door opening corners first with a 10 mm bit, then jigsaw between them. Sand the door opening edges smooth and apply a third coat of sealer to all cut edges. Safety check: verify with calipers that the drill spacing matches your target bar spacing exactly. Any variation over 1 mm should be corrected now, not after bars are set.
Step 3: Set the vertical bars
For a mesh-panel build: cut your stainless steel mesh to a rectangle, height of cage plus 20 mm for folding into the ring grooves. Roll the mesh into a cylinder and join the seam with stainless J-clips every 50 mm. Seat the top edge into the top ring groove and secure with J-clips. Repeat for the bottom ring. For a bar-by-bar build (bamboo or individual wire rods): insert each bar into the drilled holes, check spacing with calipers, and secure with stainless steel epoxy or by peening the bar ends if using metal rods. Photo callout: get a top-down shot of the completed bar/mesh cylinder before fitting it to the base to confirm uniform spacing.
Step 4: Build and hang the door
Cut a mesh panel to the door opening size plus 10 mm on all sides (for the fold-over frame). Attach to a stainless steel or hardwood border frame using J-clips or screws. Mount two stainless steel hinges on the left side of the opening. Fit the bolt latch on the right side. For parrots, use a two-step latch (a basic push-bolt plus a secondary pin or carabiner) because most parrots figure out single latches quickly. Test the door by opening and closing it 20 times: it should open without binding and close flush with the cage curve.
Step 5: Build and fit the base tray
Cut a circle of 18 mm plywood or stainless sheet to the cage inner diameter plus 2 mm. Attach a 25–30 mm lip around the perimeter using hardwood strips or a folded stainless edge. This lip contains substrate, droppings, and debris. Line the tray with a non-toxic cage liner paper cut to size. Fit the tray into the base of the cage using stainless wing-nut clips so it slides out for cleaning without tools. Seal the base tray completely with your water-based sealer if using wood.
Step 6: Fit perches and enrichment
Install a minimum of two perches at different heights, using natural branches of the correct diameter for your species (see the sizing table). Mount perches so they do not sit directly over food or water bowls, and orient them so the bird can comfortably turn around on the perch without touching the bars. In a round cage, mount perches as chords across the diameter rather than as radial spokes: chord mounting gives longer perch runs and better flight clearance. Add one foraging toy and one shreddable item to start. Avoid filling the cage with toys to the point where flight between perches is blocked.
Placement, cleaning, and mess control
Where you place the finished cage matters almost as much as how you built it. Place the cage with its back against a solid wall so the bird has one secure, non-exposed side. Avoid windows (drafts, temperature extremes, direct sun for extended periods), radiators, and any kitchen space where PTFE cookware is used. The RSPCA specifically recommends against kitchen placement for exactly this reason. Height should put the main perch at or slightly above your eye level when you are seated nearby, which makes the bird feel secure and socially connected without being too elevated.
For daily cleaning, the slide-out base tray is your best tool: pull it out, replace the liner, and slide it back in. Wipe the bars and perches weekly with a solution of dilute white vinegar and water (no chemical cleaners inside the cage). Do a full disinfection monthly: remove the bird, remove all perches and toys, scrub all surfaces with a bird-safe disinfectant, rinse thoroughly, and allow to dry completely before returning the bird. The lip on the base tray and a skirt fitted around the bottom of the cage reduce scattered substrate and droppings on the floor significantly. A well-fitted cage cover for overnight use also reduces mess and keeps the bird calmer. For step-by-step instructions on how to make bird cage covers, see how to make bird cage covers.
Pest prevention and troubleshooting
Red mites (Dermanyssus gallinae) are the most common pest issue in bird cages. They are tiny, feed on birds at night, and hide in cage joints and perch crevices during the day. Prevention is mostly structural: avoid cage joints with deep crevices, sand all perch ends smooth, and inspect new perches (especially natural branches) before fitting them. If you find mites, remove the bird, disassemble the cage completely, and treat every surface with a bird-safe mite spray or a steam cleaner. Do not use pesticide sprays near birds.
Common build problems and fixes: bars pulling out of the top ring (solution: increase the hole depth to at least 15 mm and use a small stainless steel set screw or pin perpendicular to the bar); door binding on the curved frame (solution: relieve the hinge-side bar two millimetres inward); base tray leaking substrate through the lip gap (solution: fit the silicone gasket strip I listed in the hardware list around the tray perimeter); mesh panel loosening at the J-clip joins (solution: add a second row of J-clips 20 mm above the first along the ring join).
Cage covers, skirts, and seasonal protection
A fitted cover serves two purposes: it signals sleep time to the bird, and it reduces drafts overnight. For a round cage, a cover is a simple cylinder of breathable fabric with a drawstring top and a weighted hem to stop it lifting. For details on materials, pattern cutting, and fit, see our guide on how to cover bird cage (internal reference: 04784f3b-56d2-47b0-8fdb-4409f8b53139) how to cover a bird cage. Use a tightly woven, breathable cotton or canvas (not polyester fleece, which can be chewed and ingested). Cut the fabric panel to the cage circumference plus 5 cm seam allowance, and make it tall enough to reach from just below the top ring to the base tray. Leave the front third uncovered to allow air circulation: full blackout covers can cause CO2 buildup in smaller cages. A skirt fitted around the base of the cage (essentially a short, stiff fabric or clear-acrylic panel) controls substrate scatter and is one of the most practical accessories you can add to a round cage.
In winter, position the cage away from exterior walls and cold windows. A cover helps retain warmth overnight. In summer, ensure the cage is never in direct sun for more than one to two hours, and keep a fan in the room (never pointed directly at the cage) for air movement. Birds are sensitive to rapid temperature changes, so place the cage in the most thermally stable spot in your home.
Decorative upgrades that do not compromise welfare
A round cage already has a strong visual presence, and there are a few additions that improve the look without affecting the bird. Natural branch perches styled with a slight curve look much better than straight dowels and are better for the bird. A fitted bamboo or woven-reed skirt panel around the base gives a natural aesthetic and handles mess. Painted hardwood ring sections (with a bird-safe, cured finish) in a contrasting colour to the bars can look striking. Avoid decorative finials on top of the cage that include metal alloys, painted items with unknown coatings, or anything the bird can reach and chew. The rule I use: if it is on or adjacent to the cage, assume the bird will chew it and only include it if it is safe when ingested.
FAQ
What primary authoritative sources should I consult to ensure welfare‑first, species‑appropriate cage specifications and safety guidance?
Use peer‑reviewed veterinary resources and leading animal‑welfare authorities: Association of Avian Veterinarians (AAV) minimum cage guidance, Merck Veterinary Manual (housing, toxicoses, PTFE/metal poisoning), RSPCA and national animal‑welfare guidance (placement/flight time), and national/regional government annexes that give conversion formulas and species tables (e.g., Scottish Government Annex C). Supplement with clinic‑facing education from avian veterinary providers (LafeberVet, university avian units) for perch/behavior specifics. Cite any standards or studies you rely on.
Which precise dimensional rules and formulas should I include so sizes are species‑appropriate for round cages?
Provide both formulaic and species‑table guidance: — Minimum rule (conservative): for birds that spend most time in the cage use 2× wingspan (length/width/diameter) and 1.5× wingspan (height) or equivalent usable internal diameter for round cages; if birds have daily flight time outside, a minimum of 1.5× wingspan in each dimension. — Include a species table (example entries): budgerigar/parrotlet: wingspan ≈ 18–20 cm → round internal diameter ≥ 36–40 cm; cockatiel: wingspan ≈ 30–33 cm → diameter ≥ 60–66 cm; conure/small conure: wingspan ≈ 35–40 cm → diameter ≥ 70–80 cm; African grey/Amazon: wingspan ≈ 60–70 cm → diameter ≥ 120–140 cm (prefer larger); macaws: wingspan ≈ 90–120+ cm → aviary or very large round cage/flight enclosure (diameter ≥ 180–240+ cm). Note: always state wingspan ranges used and advise consulting an avian vet for individual variation.
What are safe bar‑spacing standards I must publish for common pet bird sizes?
Provide ranges and rationale for head‑entrapment and strength: — Very small birds (budgies, parrotlets, lovebirds): 9–13 mm (3/8"–1/2"). — Small cockatiels/small conures: 12–16 mm (1/2"–5/8"). — Medium parrots (African grey, Amazon, medium conures): 16–19 mm (5/8"–3/4"). — Large parrots (large cockatoos, medium macaws): 25–38 mm (1"–1.5"). Emphasize using the smallest safe spacing by species to avoid entrapment, and for large hook‑bills use thicker wire/gauge and structurally robust spacing. For round cages note that curved frames can change perceived spacing—measure and specify inside face‑to‑face distances.
Which materials and finishes are safe or unsafe for building a bird cage (including bamboo option)?
Recommend primary safe materials: stainless steel (best), certified lead/zinc‑free powder coat over non‑galvanized steel (only if manufacturer documentation available), solid hardwoods (untreated) for external wooden elements and perches, and natural branches for perches (properly cleaned). Bamboo option: use untreated, well‑dried bamboo (no pesticides, no chemical preservatives); seal cut ends and join with stainless fasteners. Avoid: galvanized zinc‑coated wire, lead‑containing solders/paints, uncertified cheap powder coatings, and any PTFE/Teflon‑containing finishes or kitchen appliances nearby. Emphasize verifying coatings with lab/certification and avoiding materials that can chip or flake.
How do I test or verify that metal coatings and hardware are bird‑safe?
Advise documented verification: request manufacturer test data or certification showing coatings are lead‑ and zinc‑free and powder coat formula. For small projects test suspect metal parts with a home lead test kit as a screening step (not definitive). Use stainless‑steel fasteners and bowls when possible. Avoid galvanized wire entirely unless it has documented sealed, certified coating. Inspect for chips, wear, or exposed base metal; discard or recoat damaged pieces.
What exact perch diameter and placement specifications must I include?
Give species‑based diameter ranges and placement principles: — Budgies/parrotlets: perch diam. ≈ 8–14 mm. — Cockatiels/conures: ≈ 13–20 mm. — African greys/Amazons: ≈ 20–30 mm. — Macaws/large cockatoos: ≈ 30–50+ mm. Include guidance to provide multiple perch diameters and textures in every cage, place perches so birds can move between them without obstructing full wingflaps, keep food/water away from heavy droppings, and avoid sandpaper abrasive perches. For round cages show diagrams (photo‑friendly) of staggered perch placement to create flight paths and resting spots without blocking circulation.