You can build a safe, functional bird cage from bamboo in a weekend using basic hand tools, some stainless steel wire or hardware cloth, and a handful of fasteners. The key is choosing mature, properly dried bamboo, sizing the cage correctly for your species, and finishing everything smooth enough that no beak or toe can catch a splinter. I've built several of these, from a compact budgie cage to a larger conure enclosure, and the method I walk through below is the most reliable approach I've found for a first build.
How to Make a Bird Cage with Bamboo: Complete DIY Guide

Maya Bennett
16 Jul 2026
What you'll build and what to expect
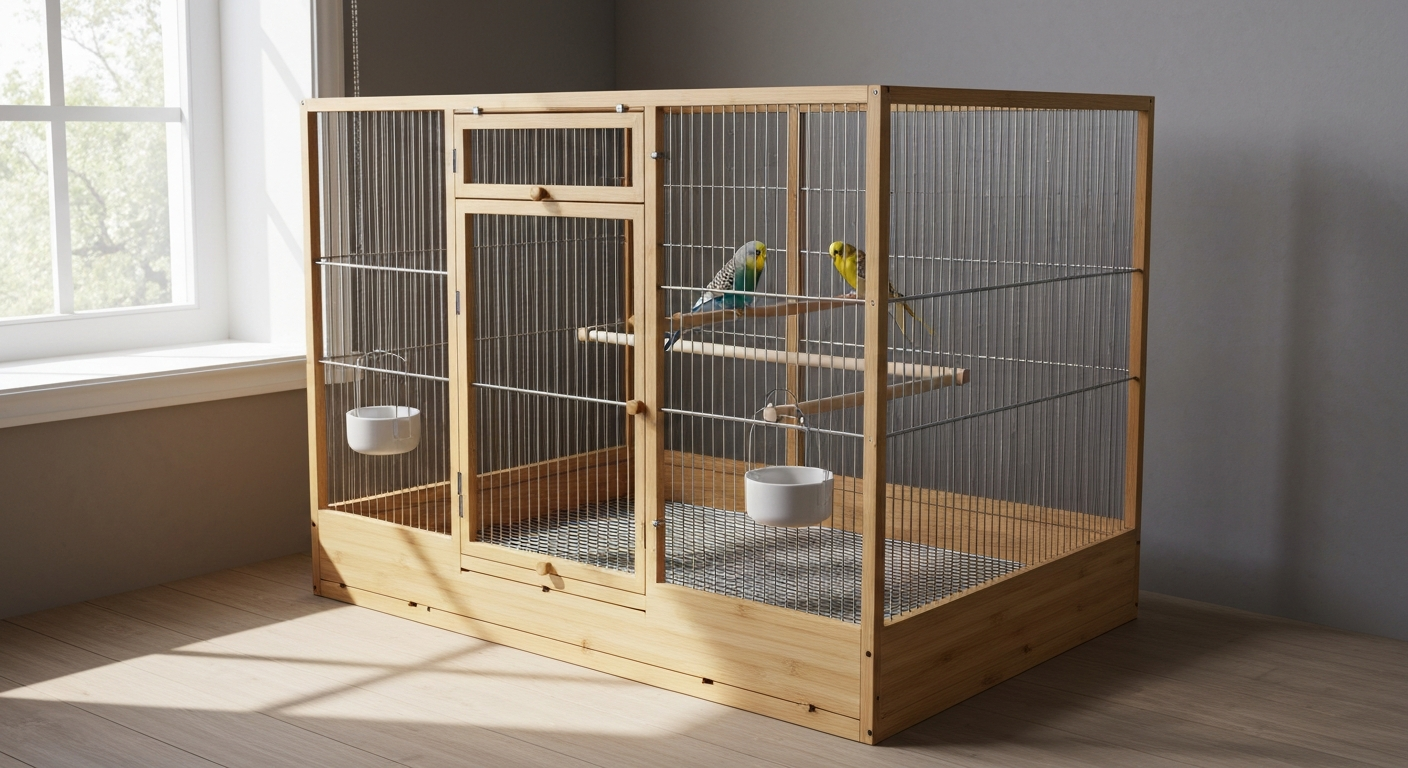
This guide covers a basic rectangular bamboo cage suitable for small to medium pet birds. The core structure uses bamboo culms for the frame and either stainless steel hardware cloth or closely spaced bamboo slats for the enclosure panels. I'll also point you toward an optional round variation if that's the shape you're after. Expect the build to take one full weekend: Saturday for prep and frame, Sunday for panels, perches and finishing. Skill level is beginner-to-intermediate. You don't need woodworking experience, but you do need patience during the bamboo prep stage, because rushing that step is how most builds end up with loose joints and chewing hazards.
Photo checkpoints throughout the build are: (1) dried and smoothed culms laid out before cutting, (2) the completed base frame before uprights are added, (3) wire or slat panels tacked into place before final fastening, (4) finished exterior before any coating is applied, and (5) the interior fitted out with perches and feeders. If your build looks roughly right at each of those five stages, you're on track.
Why bamboo is a good choice (and when it isn't)
Bamboo is lightweight, genuinely strong for its weight, renewable, and aesthetically natural inside a home. Dense, mature culms of species like Moso (Phyllostachys edulis) reach tensile strengths and moduli of elasticity that make them more than adequate for a cage frame. Research into bamboo mechanical properties puts density in the range of roughly 400 to 900 kg/m3 depending on species, culm age, and moisture content, so a well-dried culm is a real structural material, not just a craft novelty. Engineered Bamboo Building Materials: Types, Production, and Applications, MDPI (peer‑reviewed review) summarizes mechanical-property studies showing common construction bamboos have densities roughly 400–900 kg/m3 and tensile strengths/moduli that make species such as Phyllostachys (Moso) and Bambusa spp. suitable for light structural uses Engineered Bamboo Building Materials: Types, Production, and Applications — MDPI (peer‑reviewed review). It also gives birds a surface that's closer to natural branch material than powder-coated steel.
The limits are real, though. Bamboo chews. Any bird with a serious beak, think conures, caiques, or larger parrots, will work through bamboo framing faster than you'd expect. For heavy chewers, bamboo works better as an accent or perch material than as the primary cage structure. Bamboo also absorbs moisture, which makes it vulnerable to mold and fungal attack in humid or outdoor settings unless it's been properly treated. Finally, raw bamboo can harbor insects in the culm walls if it was harvested too young or dried improperly. I'll cover how to handle all of that below. If your bird is a destructive chewer or the cage will live in a genuinely wet outdoor space, a bamboo frame with stainless steel mesh panels is a safer compromise than bamboo slats alone.
Bar spacing and sizing: getting it right for your bird
Bar spacing is the single most critical safety dimension in any cage build. The rule from the Association of Avian Veterinarians is simple: a bird must never be able to fit its head between the bars. If a bird gets its head through and panics, it can break its neck or strangle. Beyond that, the cage needs to be large enough that the bird can fully extend both wings simultaneously without touching the sides. The RSPCA goes further and recommends aviary dimensions at least four times the bird's flying wingspan for active fliers. For a cage rather than a full aviary, a practical working method from Scottish animal welfare licensing guidance derives minimum dimensions directly from wingspan: length at least 2 times wingspan, depth at least 1.5 times wingspan, and height at least 1.5 times wingspan. Use those as your floor, not your target.
Dimension table for common pet species
The table below combines Merck Veterinary Manual minimum cage dimensions with bar spacing guidance from the AAV and applies the wingspan-based formula from Scottish welfare standards. The 'recommended build size' column is what I'd actually build, because minimum dimensions leave no enrichment room.
| Species | Avg Wingspan | Min Bar Spacing | Max Bar Spacing | Merck Min Cage (L×D×H inches) | Recommended Build Size (inches) | Notes |
|---|---|---|---|---|---|---|
| Budgerigar | ~12 in (30 cm) | 0.4 in (10 mm) | 0.5 in (12 mm) | 20 × 20 × 30 | 24 × 18 × 30 (pair) | Horizontal bars preferred; needs flight length |
| Cockatiel | ~14 in (35 cm) | 0.5 in (12 mm) | 0.6 in (15 mm) | 20 × 20 × 30 | 30 × 20 × 36 | Wider door opening; tall cage for climbing |
| Green-cheek conure | ~16 in (40 cm) | 0.6 in (15 mm) | 0.75 in (19 mm) | 24 × 24 × 30 | 36 × 24 × 36 | Heavy chewer; reinforce bamboo joints or use wire panels |
| Zebra/society finch | ~8 in (20 cm) | 0.35 in (9 mm) | 0.4 in (10 mm) | 18 × 18 × 24 | 36 × 18 × 24 (flight cage) | Flight length matters most; narrow bar spacing critical |
A quick note on adding birds: the RSPCA advises adding roughly 5 percent extra floor space per additional bird under 50 g, and 10 percent per additional bird in the 50 to 100 g range. So a two-budgie cage should be about 10 percent larger in footprint than the single-bird minimum.
Choosing the right bamboo
Species and culm size
For structural frame members, Moso (Phyllostachys edulis) is the best all-around choice in temperate climates: it's dense, straight, and widely available in culm sizes from pencil-thin to several inches in diameter. Bambusa oldhamii and Bambusa vulgaris are good alternatives in tropical and subtropical regions and are commonly used in lightweight construction. For thinner slat work and bar material, any straight, mature culm that splits cleanly will work. What you want to avoid is juvenile bamboo (harvested before two to three years of age), which is weak, prone to splitting unpredictably, and harbors more sugars that attract insects and mold.
For frame uprights and horizontal rails, choose culms with an outer diameter between 1 and 1.5 inches (25 to 38 mm) and a wall thickness of at least 6 mm. For bar slats (if you're not using wire mesh), use culms that split into strips roughly 6 to 8 mm wide. The bars themselves should be round or gently oval in cross-section after splitting, with no sharp ridges.
Toxicity considerations
Plain, untreated bamboo is not toxic to birds. The concern is what gets added to it. Never use bamboo that has been treated with unknown preservatives, painted with oil-based or solvent-based finishes, or coated with anything containing PTFE (non-stick coatings). PTFE decomposition fumes are acutely lethal to birds, causing fatal pulmonary hemorrhage even at low exposure levels. Bamboo sold for construction may have been treated with chromated copper arsenate or other industrial biocides: ask the supplier explicitly and, if you can't confirm, don't use it. Craft-grade bamboo from reputable suppliers is generally safe. When in doubt, start from raw, untreated poles.
Preparing your bamboo: drying, splitting and smoothing
Drying
Green bamboo must be dried before use. Build a cage from green culms and you'll end up with a cracked, warped mess within weeks. For air drying, stack culms horizontally under a covered outdoor area with good airflow, separated by spacers so air circulates around every culm. Expect four to eight weeks for thin culms and up to three months for thicker frame material in temperate weather. ISO 22157 and craft industry guidance both recommend bringing moisture content down to 10 to 15 percent before final use. You can check this with a cheap pin-type moisture meter: aim for a reading below 15 percent before you cut to length.
Splitting and straightening
Split bars by scoring the culm with a craft knife along a chalk line and then working a flat chisel or bamboo splitting wedge along the score. Split with the grain, not against it. For straightening, gentle heat from a heat gun or careful use of a hot-air oven at around 100 degrees Celsius for short periods softens the lignin in bamboo, letting you flex and hold a bent piece straight while it cools. Steaming is the traditional craft method: hold the bent section over steam for two to three minutes, then clamp straight and let it cool completely.
Smoothing and safety checks
Every surface a bird will contact needs to be smooth. Start with 80 to 100 grit sandpaper to remove raised fibers and any rough nodes, then move to 180 to 220 grit for a final smooth finish. Use a cabinet scraper or flat file on the nodes, which are the hardest raised sections and the most common source of splinters. After sanding, run a bare hand firmly along every bar and frame member in the direction a bird claw would grip. If you feel anything catch your skin, sand it again. Blow or wipe off all dust before the cage goes near a bird.
Preservation treatment
For any cage that will be used in a humid room or outdoors under shelter, treat the bamboo with a borate solution before assembly. Boric acid and borax mixtures penetrate the culm wall and significantly reduce fungal and insect attack. A hot-bath treatment works well for small quantities: dissolve borax and boric acid in hot water at roughly 100 degrees Celsius, immerse the bamboo pieces for one to two hours, then allow a cold-bath soak for another few hours to drive the solution in. Let pieces dry completely before assembly. Borate-treated bamboo is low toxicity and is used in food-contact contexts, but always let it dry fully and ventilate the workspace during treatment.
Tools, fasteners and materials checklist
Below is everything you'll need for a standard rectangular cage build. Quantities are based on a 30 x 20 x 36 inch cage (cockatiel size). Scale up or down proportionally.
| Item | Spec / Size | Quantity | Notes |
|---|---|---|---|
| Bamboo culms (frame) | 1–1.5 in OD, 3–4 ft lengths | 12–16 pieces | Moso or Bambusa; dried to <15% MC |
| Bamboo strips (bars/slats) OR stainless wire mesh | 6–8 mm wide strips OR 16 gauge 0.5 in welded mesh | As needed for all 4 sides + top | Wire mesh preferred for chewing species |
| Stainless steel machine screws | M4 × 20 mm, 304 SS | 60–80 | Indoor builds; use 316 SS for outdoor |
| Stainless steel nuts and washers | M4, 304 SS | 60–80 sets | Lock nuts preferred at joints |
| Stainless steel wire (binding) | 22–24 gauge, 304 SS | 1 × 30 m roll | For supplemental joint wrapping |
| Stainless steel hinge | 2 in, 304 SS | 2 (for door) | No zinc-plated or galvanized hardware |
| Stainless steel cage latch | Parrot-safe clasp | 1–2 | Conures and above need a locking latch |
| Drill with bamboo/wood bits | 3–6 mm brad-point bits | 1 set | Pre-drilling prevents splits |
| Handsaw or pull saw | Fine-toothed | 1 | For clean culm cuts |
| Craft knife and splitting wedge | Standard | 1 each | For splitting bar strips |
| Flat file and cabinet scraper | Fine cut | 1 each | Node smoothing |
| Sandpaper | 80, 120, 180, 220 grit sheets | 6 sheets each grit | |
| Moisture meter | Pin-type | 1 | Check culms before cutting |
| Measuring tape and square | Steel, 1 m | 1 each | |
| Clamps (bar or spring) | 6–8 in reach | 6–8 | Holding joints during assembly |
| Wire cutters / pliers | Stainless-compatible | 1 pair each | |
| Non-toxic wood glue (PVA) | Water-based | 1 small bottle | Optional joint reinforcement; not structural |
| Beeswax or food-safe mineral oil | Pure, unscented | Small quantity | For finished surface sealing |
A note on fastener materials: never use galvanized or zinc-plated hardware in a bird cage. Zinc toxicosis from ingestion of galvanized wire or fittings is a well-documented condition in pet birds, presenting with gastrointestinal and neurological signs. It's called 'new wire disease' in avian veterinary practice, and it can be fatal. Stainless steel is the correct choice throughout. For indoor cages, AISI 304 stainless steel is appropriate for all hardware. If the cage will be in a damp or outdoor environment, upgrade to 316 stainless, which contains molybdenum and offers substantially better resistance to pitting and crevice corrosion.
Joinery and fastening options: pros, cons and bird safety
How you join bamboo determines how long the cage holds together and how safe it is. Here are the main methods, with honest assessments of each.
| Method | How it works | Strength | Bird-safe? | Best used for | Weakness |
|---|---|---|---|---|---|
| Bamboo dowel pegs | Pre-drilled hole through joint; bamboo peg glued in place | Good for compression joints | Yes, if flush-cut and smooth | Corner joints, T-joints in frame | Can loosen as bamboo dries further; needs periodic checking |
| Stainless screws (pre-drilled) | Drill pilot hole; drive screw through overlapping culms | High; best structural method | Yes, if countersunk and recessed | All main frame joints | Requires precise pre-drilling to avoid splitting |
| Stainless wire ties (binding) | Wrap 22–24 gauge SS wire at joint; twist tight and tuck ends | Moderate; good supplemental strength | Yes, if ends are fully tucked flush | Supplemental wrapping at screw joints | Wire ends must be fully hidden; sharp ends are dangerous |
| Lashed cord (natural fiber) | Natural twine or waxed linen wrapped and knotted | Low to moderate | Only if bird cannot access cord; avoid synthetic twine | Decorative outer wrap over screw joints | Chewing hazard; must be covered or inaccessible to bird |
| Bamboo fish-mouth joint | Culm end shaped to cup around intersecting culm; pegged | Good in shear | Yes if smooth | Frame corner intersections | Labor intensive; requires sharp tools and practice |
| PVA wood glue (supplemental) | Applied at joint surfaces before clamping | Low structural strength alone | Yes (water-based PVA is non-toxic when dry) | Filling gaps at joints only | Not reliable as primary fastener; cracks under load |
My recommendation for a first build: use pre-drilled stainless M4 machine screws as the primary fastener at every structural joint, add a wrap of 24-gauge stainless wire over each joint for redundancy, and finish with a lashed decorative cord only on the outside of the cage where the bird can't reach it. This combination is the most durable and safest approach I've used.
Step-by-step assembly: rectangular cage
Step 1: cut frame members to length
Mark all cuts with a pencil and square. For a 30 x 20 x 36 inch cage (cockatiel size from the dimension table), you need: four horizontals at 30 inches for top and bottom long rails, four horizontals at 20 inches for top and bottom short rails, and eight verticals at 36 inches for uprights. Cut with a fine-toothed pull saw for a clean, square end. Immediately file and sand all cut ends to 180 grit.
Step 2: build the base frame
Lay the four base rails into a rectangle on a flat surface. Drill pilot holes at each corner, slightly undersized relative to your screw diameter to avoid splitting. Drive M4 screws through the overlap, then wrap each corner with three to four tight turns of 24-gauge stainless wire. Check the frame is square by measuring diagonals: they should match within 2 mm. This is your photo checkpoint 1.
Step 3: add uprights
Stand an upright at each corner of the base frame. Drill and screw each upright to the base rails from two directions (once through the long rail, once through the short rail). Clamp while drilling so the upright doesn't shift. Use a square to verify each upright is plumb before the second screw goes in.
Step 4: attach the top frame
Fit the top four rails between and over the uprights the same way as the base. Measure diagonal dimensions again at the top frame before final tightening. The frame should not rock on a flat surface. This is photo checkpoint 2.
Step 5: fit wire mesh or bamboo bar panels
Cut stainless wire mesh panels to fit each face of the cage (minus the door face). Fold all cut edges back with pliers so no raw wire end faces inside the cage: this is a critical safety check. Attach mesh to the frame using stainless staples or small stainless screws through the mesh border, spaced every 2 to 3 inches. If you're using bamboo slat bars instead of wire mesh, space and fasten each slat at both the top and bottom rails using drilled-through screws. The spacing between slats must match the bar spacing in the dimension table for your species. This is photo checkpoint 3.
Step 6: build and hang the door
Build a door frame from smaller-diameter bamboo to fit a planned opening on one side panel. The door should be tall enough for your hand to enter with the bird perched. Hinge it with two 2-inch stainless hinges, and fit a parrot-safe latch. For conures and any larger bird, use a latch the bird cannot manipulate: these birds are smart and they will figure out a simple hook-and-eye in under a day.
Step 7: final sanding and safety check
Before any finish goes on, do a complete safety pass. Run your hand across every surface inside the cage. Check every wire end is folded back. Check every screw is countersunk or sits flush and has no sharp protrusion inside. Check all bar spacing with calipers or a small ruler. This is the step most people rush and most often regret. Take 30 minutes here and you'll save yourself a vet visit later.
Non-toxic finishes, waterproofing and seasonal protection
Once the cage passes safety inspection, seal the bamboo to protect against moisture and prolong its life. The safest options are pure beeswax (applied warm and buffed in), food-grade mineral oil (odorless, colorless), or a water-based shellac. Avoid linseed oil, tung oil, varnishes, lacquers and anything that lists solvents or driers on the label: those outgas compounds that are harmful to birds. Absolutely avoid any non-stick or PTFE-containing product. Apply the chosen finish to the outer frame only; leave interior bar surfaces uncoated or use only beeswax, which is inert.
For seasonal protection outdoors or in humid rooms, move the cage away from direct rain and condensation sources. A fitted cage cover at night helps maintain warmth and reduces drafts. If the cage will spend any time outdoors, the borate pre-treatment and 316 stainless hardware are essential. Inspect joints and bar surfaces monthly during damp seasons and re-apply beeswax or mineral oil to any areas that look dry or are beginning to gray.
Installing perches, feeders, toys and interior layout
Perches are as important as cage size for foot health. The RSPCA specifically recommends multiple perch diameters of natural wood, smooth to the touch, placed at different heights. Install at least two perches of different diameters: for a cockatiel, one at around 12 to 15 mm diameter and one at 18 to 22 mm works well. Bamboo itself makes a fine perch material: cut a culm section to width, sand it smooth including the nodes, and fit it through the wire mesh or between slats at opposite sides of the cage at roughly two-thirds height. Vary the heights so the bird has choices.
Position feeders and water dishes low enough that the bird can access them from a perch without reaching uncomfortably, but not directly below a perch where droppings will contaminate food. Toys should hang from the top frame and be positioned so they don't block the flight path between perches. Leave at least one clear horizontal flight path the full length of the cage.
Cage covers, skirts and access accessories
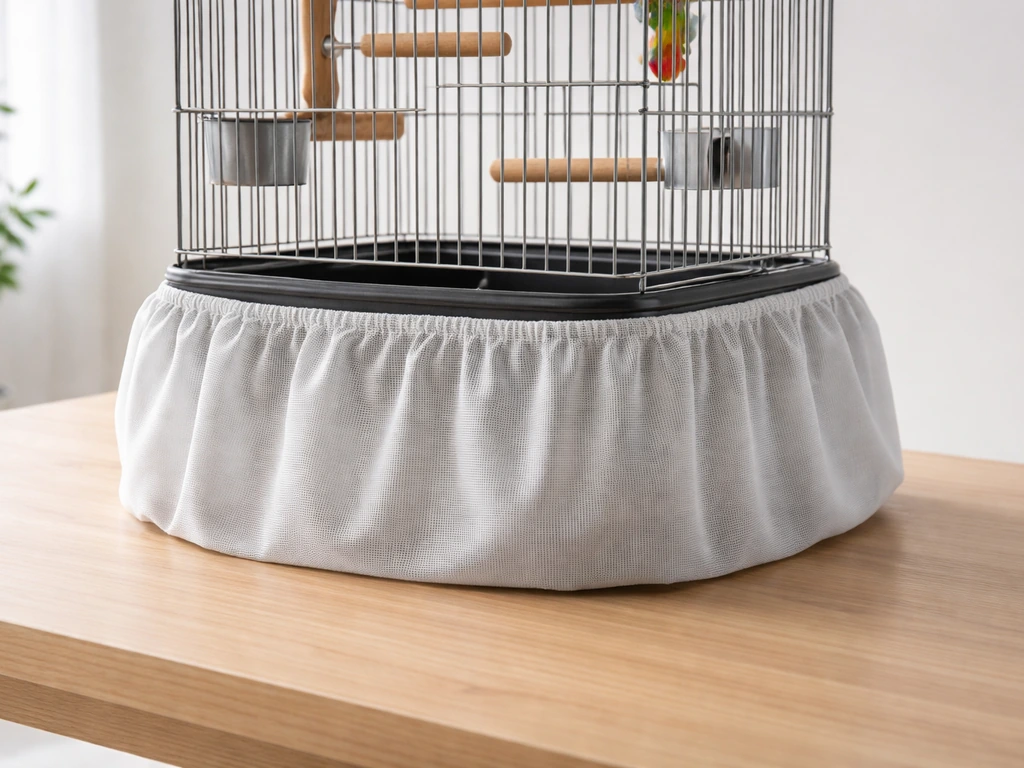
A fitted cage cover for nighttime use helps regulate light cycles and reduces stress, particularly for cockatiels and budgies. A cover also protects against drafts. A simple cover is a rectangle of breathable fabric with a hook-and-loop or tie fastening at the base. For bamboo cages, measure the outer dimensions of the cage plus about 2 inches on each side for a drape fit, and leave the front partially open or use a panel that can be rolled up for ventilation. A cage skirt fitted around the base catches seed husks and feathers and makes daily cleanup much faster. The skirt attaches to the lower frame rails and extends a few inches out from the cage perimeter.
Placement, mounting and environment
Place the finished cage against a solid wall on at least one side: this gives the bird a sense of security and reduces 360-degree exposure stress. Keep it away from kitchen cooking fumes (PTFE cookware is a genuine hazard), air conditioning vents, and windows with direct afternoon sun that can cause overheating. For indoor use, the ideal position is at roughly human eye level or just below, in a room where the family spends time but where there's also a predictable quiet period in the evening.
For sheltered outdoor placement, choose a spot protected from prevailing wind, direct rain, and direct midday sun. A covered porch or shed with good natural ventilation is ideal. Never place a bamboo cage in direct sustained rain without a weatherproof cover: even borate-treated bamboo will degrade faster if it stays wet. Mount the cage on a stand or shelf rather than the floor to reduce rodent access and cold-floor drafts.
Cleaning, mess control and pest prevention
Bamboo cages need more regular inspection than metal ones, but daily cleaning is the same: remove and replace the cage tray liner, wipe down perches, and check that no food debris is lodged in joints. Weekly, wipe down all bamboo surfaces with a damp cloth and allow to dry fully before replacing the bird. Never soak a bamboo cage or use chemical disinfectants with phenols or quaternary ammonium compounds directly on the bamboo: these can leave residue and damage the culm surface. A dilute white vinegar solution is safe and effective for surface cleaning.
For pest prevention, the borate pre-treatment handles most insect and fungal risk at the bamboo level. Inspect joints and enclosed sections monthly for mold (gray or green fuzz) or insect frass (fine powder from borer activity). If you find either, disassemble the affected section, treat again with borate solution, dry fully, and reassemble. Red mite is a common pest in bird cages generally: inspect the joints and covered areas weekly, since mites hide in crevices during the day. Bamboo's joinery details (wrapped wire, screw holes) create more hiding places than smooth metal cages, so weekly checks matter more here.
Troubleshooting common problems
- Loose joints after a few weeks: bamboo shrinks slightly as it reaches equilibrium moisture content indoors. Re-tighten all screws and add a secondary wire wrap. If a joint is truly loose, drill a new pilot hole at a slight angle and add a second screw.
- Bird chewing through bars: this is more common with conures and quakers. Replace bamboo slat bars with stainless wire mesh panels on the most-chewed faces, and add foraging toys to redirect the behavior.
- Bird escaping: check that all bar spacings match the table above. A bird that consistently escapes is finding a gap you haven't spotted. Check door latch alignment and add a clip-on backup latch.
- Mold on bamboo: if caught early, sand off the affected surface, treat with dilute borate solution, dry fully. If mold has penetrated deeply into the culm wall, replace that member: it won't recover well.
- Splinters appearing over time: bamboo surface fibers can raise with repeated wetting and drying. A monthly rub with beeswax or mineral oil prevents this. If splinters appear mid-use, remove the bird, sand smooth, clean the dust off completely, and return the bird only when dry.
- Warping of frame members: caused by uneven moisture exposure. Rotate the cage position to even out moisture exposure and apply a uniform coat of beeswax to the drier side to slow moisture uptake on that face.
Build variations: the round cage option
Round bamboo cages follow the same prep and fastening principles but require more flexible, thinner bamboo strips for the curved uprights and a circular top and base frame. The base and top rings are formed by soaking or steaming thin culm strips, bending them around a circular form, and lashing the overlap with stainless wire before it dries. Round cages look striking and work well for finches and small softbills, but note that veterinary behaviorists generally advise against housing parrots in round cages because the lack of corners can increase stress. If you want to explore the round cage construction in more detail, there's a dedicated guide on building a round bird cage elsewhere on this site. For step-by-step instructions, see how to make a round bird cage. For tips on covering and weatherproofing a bird cage, see our how to cover bird cage guide.
Final thoughts before your bird moves in
Before placing any bird in the finished cage, do one final full inspection using the checklist below. This takes ten minutes and is the most important ten minutes of the whole build.
- Check all bar spacings with a ruler against the species table. Every gap, not just the planned ones.
- Run your hand over every interior surface. Zero snags or splinters allowed.
- Verify all wire cut ends are folded fully inward or covered.
- Confirm all screws are flush or recessed, with no sharp protruding tip inside the cage.
- Test the door latch by attempting to open it yourself with one finger. If it's easy, add a secondary latch.
- Check the cage stands stable on its stand with no rocking.
- Confirm the finish on any interior surface is fully dry and odor-free.
- Smell the inside of the cage with your nose close to the bamboo. There should be no chemical odor at all, only faint natural bamboo scent.
Once it passes all eight checks, add perches, food and water, and introduce your bird. A bamboo cage that's well-made and properly maintained will last several years for smaller species and can be a genuinely beautiful addition to a room. The prep work, especially the drying, smoothing and hardware selection, is what separates a cage that's safe and durable from one that causes problems. Get that right and the rest of the build is genuinely enjoyable.
FAQ
What are the key reasons to choose bamboo for a DIY bird cage, and when is it appropriate?
Bamboo is lightweight, strong for its weight, renewable and visually attractive. Use it for indoor or sheltered-outdoor cages and aviaries when you select appropriate species/culm grade, properly dry and preserve the culms, and avoid exposed toxic hardware. Avoid fully outdoor, permanently unprotected installations in wet, salty or high‑UV exposure unless you use proven preservation (e.g., borate treatments + protective finish) and marine‑grade hardware.
How do I choose the right cage dimensions and bar spacing for budgies, cockatiels, conures and finches?
Design cages so each bird can fully extend wings and move normally. Use published guidance: derive dimensions from wingspan (RSPCA & gov.scot methods) or minimum tables (Merck/AAV). Typical minimums: - Budgerigar (budgie): ~20×20×30 in; bar spacing 1⁄2 inch (0.5") - Cockatiel: ~24×24×36 in; bar spacing 1⁄2–5⁄8 in - Conure (small/medium): ~24×24×36–40 in; bar spacing 5⁄8–3⁄4 in - Finches (grouped): horizontal flight space prioritized; wider bases, e.g., 30–36 in length, bar spacing 1⁄4–1⁄2 in Always size up for multiple birds; follow AAV rule that spacing must prevent the bird from fitting its head through the bars and allow full wing extension.
Which bamboo species and culm selections are best for cage building?
Choose mature (typically 2–4 years old) culms from structural bamboo species with adequate wall thickness, such as Bambusa spp. or Phyllostachys where available. Thicker-walled culms (larger diameter) give better stiffness and durability. Use cleaned, seasoned culms with no active rot or insect galleries. If you need exact mechanical specs for structural design, consult INBAR/ISO data (ISO 22157) or published species tables.
How should I prepare bamboo culms so they’re safe and durable for birds?
Harvest mature culms, then season: air‑dry under cover or kiln dry to stabilize moisture content and reduce cracking. Remove nodes/splinters, split or trim as needed. Smooth all perches, frame members and slats by progressive sanding (start coarse, finish ~180–220 grit). Preserve against insects/fungi with low‑toxicity borate (hot/cold baths or vacuum impregnation) followed by a bird‑safe sealer to reduce leaching. Fully cure finishes and allow adequate ventilation before introducing birds.
What joinery, fasteners and hardware are bird‑safe?
Use stainless steel hardware (304 for indoor; 316 for outdoor/aviary) for screws, bolts, wire ties and mesh attachments. Avoid galvanized metals and cheap plated hardware that can contain zinc or lead. Joinery options: - Mechanical: stainless screws/bolts with washers and lock nuts - Traditional: lashing with natural‑fiber cord (sealed) or stainless wire ties - Wood joinery: mortise/tenon reinforced with stainless fasteners All metal exposed to birds should be stainless; avoid painted/coated hardware that can flake.
How do I attach wire or slats to create a secure enclosure without exposing birds to toxins?
Attach stainless steel mesh or low‑gauge stainless wire to a bamboo framework using stainless staples, U‑clips or ties. If using slats, space them according to species bar spacing. Avoid galvanized mesh; if using metal mesh, choose 304/316 stainless. Fastenings should be flush or trimmed/smoothed to remove sharp ends. Secure doors with stainless latches that birds can’t manipulate (double‑latch if necessary).
Next Article
How to Make a Bird Cage Skirt Step by Step DIY Guide
Step-by-step instructions to make a bird cage skirt with bird-safe materials, secure fit, and easy cleaning.