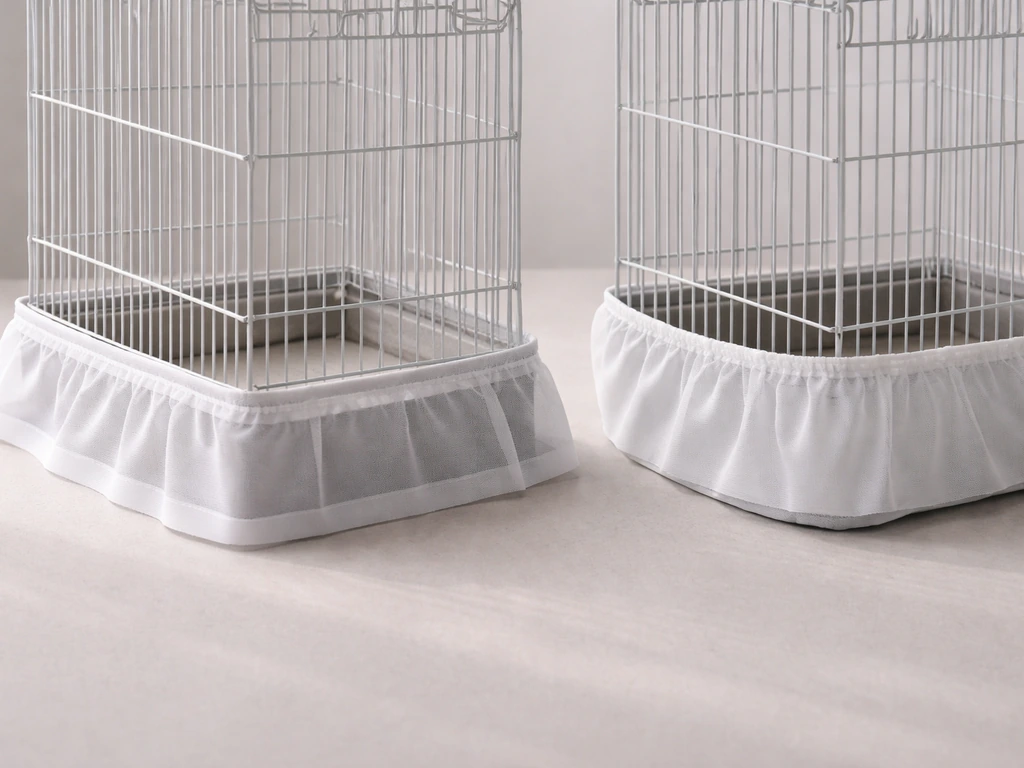
You can make a bird cage skirt in an afternoon using basic sewing or no-sew methods. Measure each side of your cage at its widest point, cut a strip of bird-safe fabric to that circumference plus 2 inches for overlap, hem the edges, and attach it with Velcro, clips, or sewn loops so it sits below the cage bars with at least 3 to 4 inches of clearance from any bar or perch.
How to Make a Bird Cage Skirt Step by Step DIY Guide

Maya Bennett
24 May 2026
The whole point is to catch seed hulls, feather dust, and droppings before they hit the floor, without creating any chewing, entanglement, or tangle hazard for your bird. HereBird also describes the removable-tray approach as helpful because it reduces the effort needed for cleaning, since you do not have to bend into larger cages a removable-tray approach saves effort during cleaning.
Choosing the right skirt style for your cage
Before you cut a single piece of fabric, you need to match the skirt style to how your cage is actually built. A skirt that works perfectly on a flat-bottomed cage sitting on a shelf will be a nightmare on a cage with a pull-out tray or wheeled stand. There are three main styles to consider.
| Style | Best for | How it attaches | Watch out for |
|---|---|---|---|
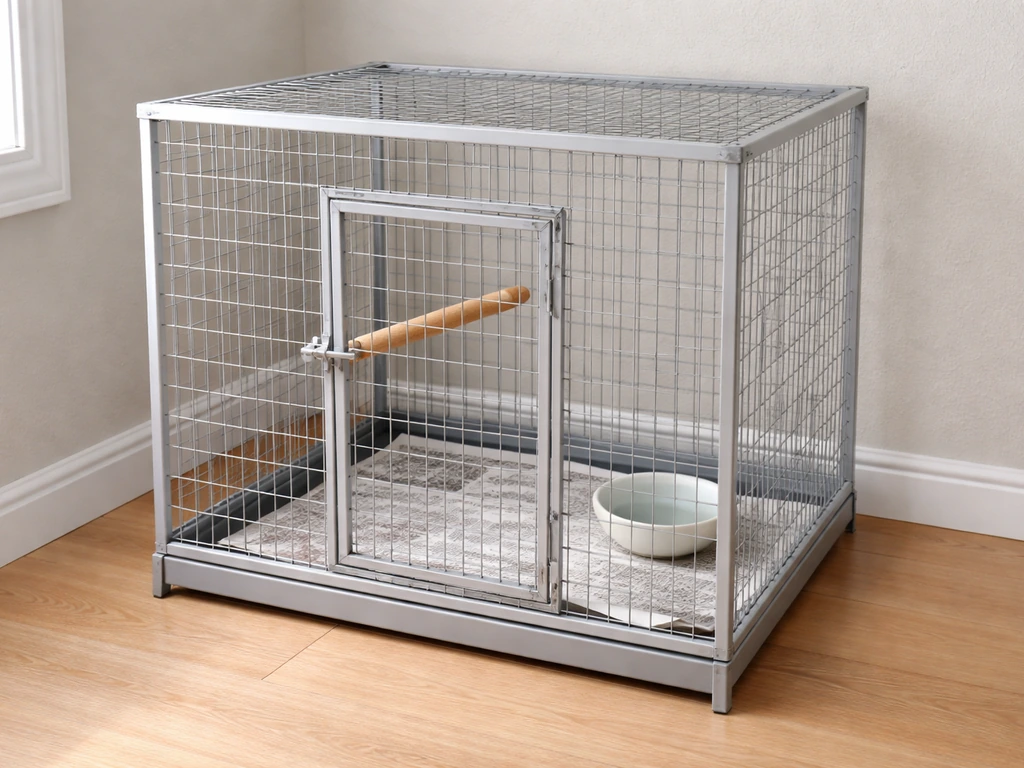
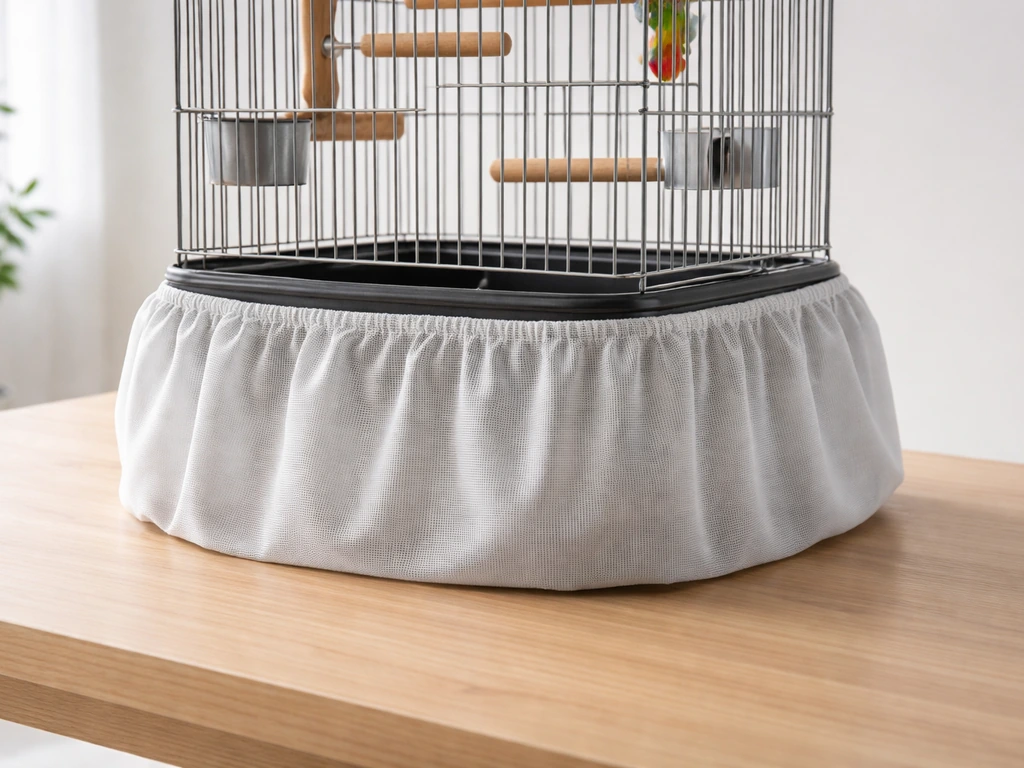
| Wrap-around band skirt | Rectangular cages with a tray or grate at the bottom | Velcro strip or clips around the cage base | Must not block tray removal |
| Stand-wrap skirt | Cages on a dedicated stand or cabinet base | Ties or elastic around stand legs or base frame | Wheels must stay accessible if the cage rolls |
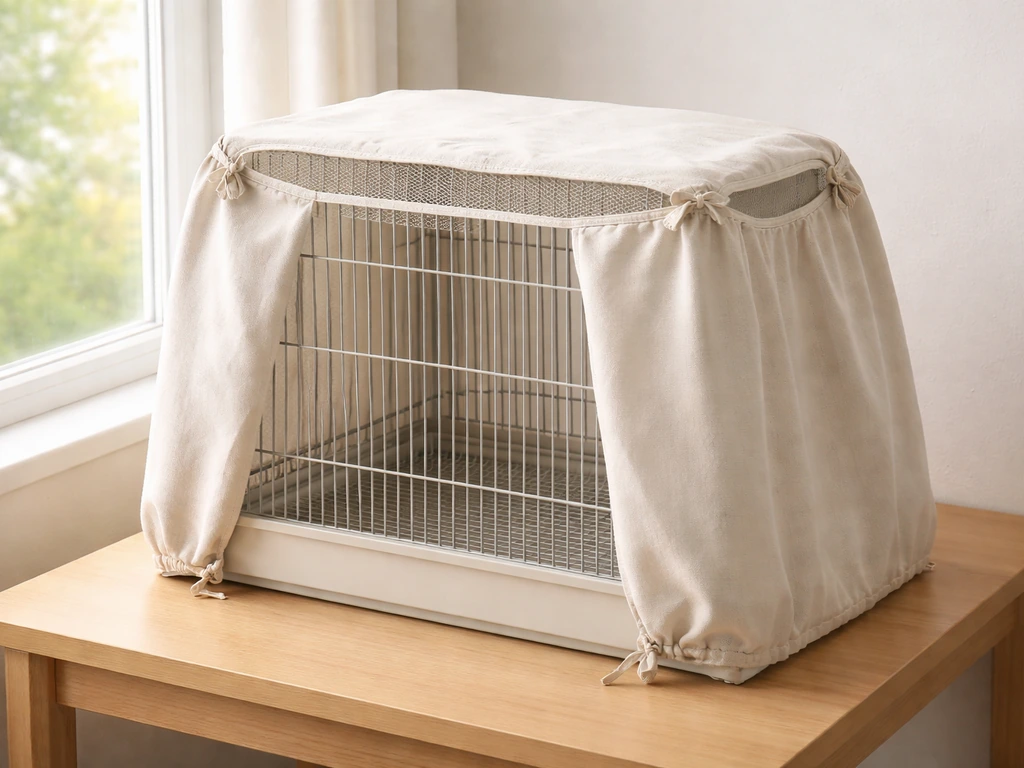
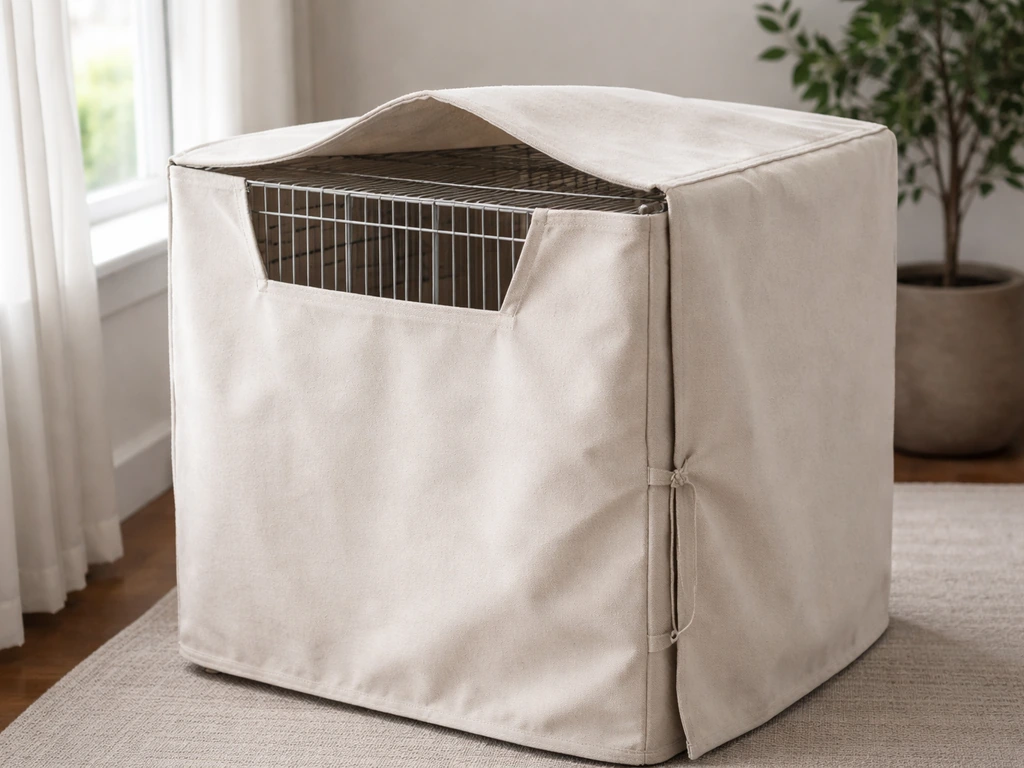
| Curtain-panel skirt | Large flight cages or square cages needing full side coverage | Rod pocket or clip rings on a tension rod run through cage bars | Rod and rings must be outside bird's reach |
If your cage has a pull-out tray (and most modern cages do), the wrap-around band style is your best bet. It sits just below the bottom grate and above the tray edge, so you can still slide the tray out without removing the whole skirt. Cages on wheeled stands need a stand-wrap that clears the wheel height by at least an inch so the cage can still roll. Curtain-panel skirts look great on large aviaries but are more work to make and require extra vigilance about keeping hardware outside the bird zone.
Materials and safe fabric choices for bird areas
Fabric choice is where most people get this wrong, and it genuinely matters for your bird's safety. The biggest risks are loose fibers, toxic finishes, and anything that shreds into string-like threads. The U.S. Fish & Wildlife Service specifically warns that string, twine, and loose threads can wrap around a bird's legs or neck and cut off circulation. The RSPCA echoes this, flagging ribbon, string, and thread components as serious choke and tangle hazards. Your skirt fabric needs to hold its edge cleanly when cut and washed.
- Tightly woven cotton canvas (10 oz or heavier): holds edges well, washes easily, no chemical coatings
- Ripstop nylon: lightweight, very easy to wipe down, edges don't fray if heat-sealed or folded under
- Solution-dyed acrylic canvas (like Sunbrella): colorfast, water-resistant, ideal if the cage is near a window or in a humid room
- Polar fleece (without fringe): doesn't fray at cut edges, so it works for no-sew versions, but inspect regularly for pilling
- Heavyweight polyester canvas: durable and easy to clean, check that it has no rubberized or PVC-type backing
Fabrics to avoid: anything with a metallic or glitter print (fine particles), open-weave burlap or linen (loose fibers everywhere), stretchy jersey knit (loops form at the edges and birds hook toes in them), and anything described as 'stain-treated' or 'wrinkle-free' without confirming the finish is water-based and non-toxic. If you're using canvas with any wax or eco-finish, wash it twice before using it near your bird and let it air out fully. When in doubt, plain unbleached cotton canvas is the safest, most forgiving material to work with.
Measuring and cutting the cage skirt pattern
Accurate measuring saves you from the most common skirt problem: a panel that gaps at the corners or bunches up and sags. Here's exactly how to do it.
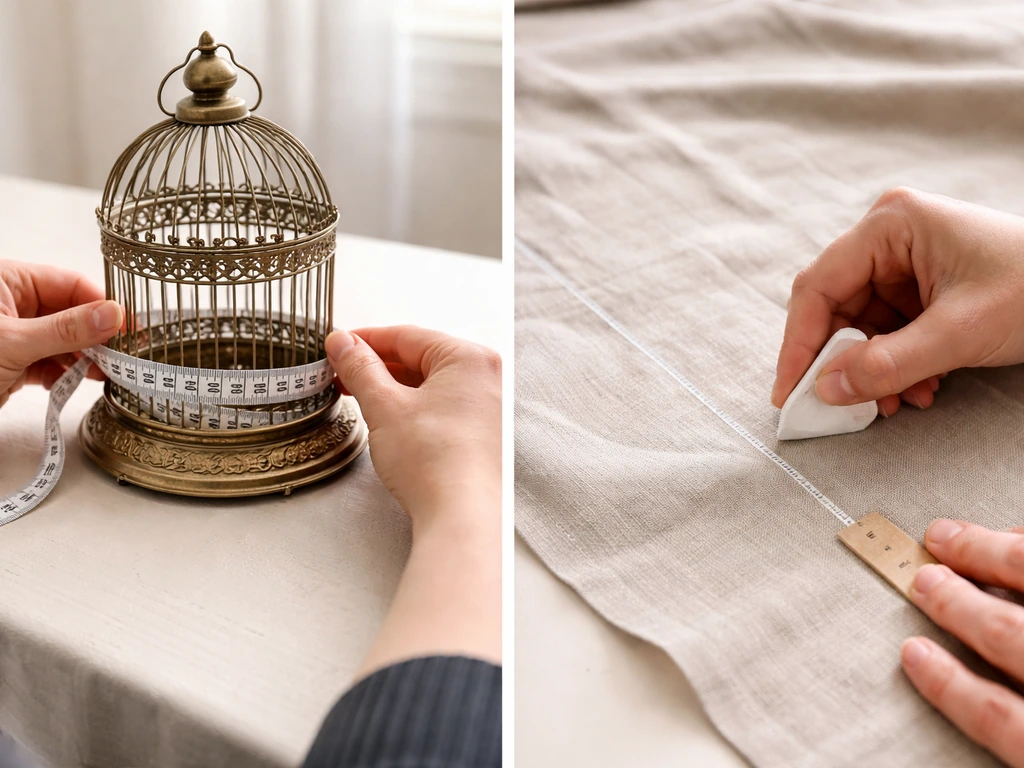
- Measure each side of the cage at its widest point, including any flared base trim or seed guard lip. For a rectangular cage, add all four sides together to get the total circumference.
- Add 2 inches to the total circumference for overlap at the attachment point, plus an extra 1 inch per corner if you want neat mitered corners.
- Decide on the skirt height: measure from just below the bottom grate or tray lip to wherever you want the skirt to end (usually 2 to 4 inches above the floor). Add 2 inches for top and bottom hems.
- If you can't get the measurement to match your fabric width exactly, cut two or three panels and plan seams at the cage corners where they'll be least visible.
- Mark and cut on a flat surface with fabric scissors or a rotary cutter and cutting mat. Mark your hem allowance lines in fabric chalk before you cut.
A quick note on sizing: if you're making a skirt for a round cage, measure the full circumference with a flexible tape measure run around the outside of the bars at the widest point. If you are specifically learning how to make a round bird cage skirt, focus on measuring the full circumference and choosing safe, non-shredding fabric skirt for a round cage. Add 2 inches for overlap.
Round cages often have a flared seed guard at the bottom, so measure both above and below it and decide which level the skirt will sit at. When in doubt about fit, size up rather than down. It's much easier to take in a skirt that's slightly too wide than to re-cut one that's too narrow.
Step-by-step sewing and no-sew attachment options
The sewn version (most durable)
- Fold and press a 1/2-inch hem on the top and bottom edges of each panel. Iron the seam allowances flat before you sew, but be careful not to catch an already-pressed allowance in the next seam (a common mistake that creates a lumpy edge).
- Sew the bottom hem first with a straight stitch at 3/8 inch. Backstitch at each end.
- Sew the top hem, but leave it open as a channel if you're using a rod pocket or tension rod style, or sew it flat if you're attaching Velcro.
- Sew the short side edges together (if you're making a full wraparound) or fold and hem them individually (if you're making separate panels). Press seams open.
- Cut self-adhesive or sew-on Velcro into 3-inch strips. Sew the soft (loop) side of the Velcro along the top back edge of the skirt. Attach the hook side to a strip of ribbon or bias tape and tie or clip that to the cage bars. This keeps the scratchy hook Velcro off the cage metal.
The no-sew version (good for beginners)
- Cut your fabric panel to size. If you're using polar fleece, you don't need to hem the edges since fleece doesn't fray.
- For woven fabric, use iron-on hem tape along all four edges. Press firmly with a hot iron and let it cool completely before handling.
- Apply self-adhesive Velcro strips along the top edge of the fabric on the back side. Press firmly and let the adhesive cure for 24 hours before hanging.
- Attach binder clips or cage-safe S-hooks to the top edge of the skirt and clip directly onto the lowest bar of the cage that sits outside the bird's accessible area.
- Overlap the short ends by 2 inches and secure the join with a binder clip or a small Velcro tab.
Both methods work. The sewn version holds up much better through repeated washing and is worth the extra hour if you plan to keep the skirt long-term. The no-sew version is perfect if you want to test a design before committing, or if sewing is not in your skill set. Either way, avoid using glue guns anywhere near the finished product since hot glue creates lumpy, brittle ridges that crack off with washing and can leave hard plastic splinters on the fabric surface.
Securing, fit checks, and safe clearance for birds
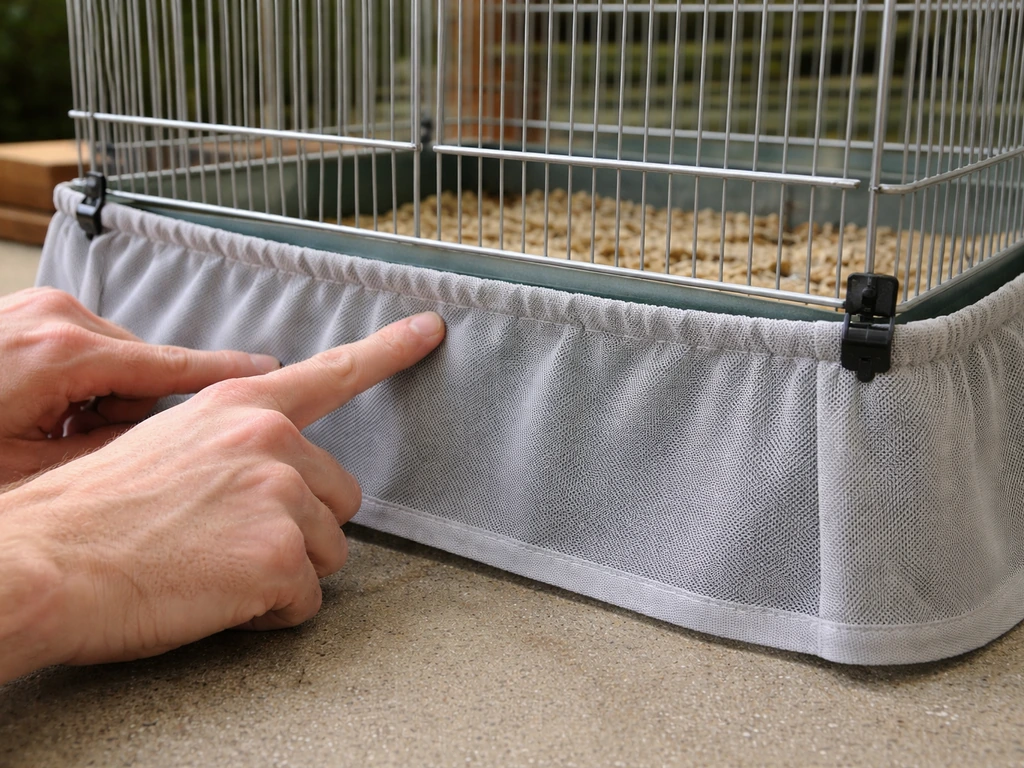
Once the skirt is attached, run through this safety check before your bird goes anywhere near it. This is the step most DIY guides skip, and it's the most important one.
- Clearance check: the top edge of the skirt must sit at least 3 to 4 inches below the lowest perch, bar, or area your bird can reach from inside the cage. If your bird can reach it, assume it will try to pull it.
- Thread check: run your fingers along every seam and both cut edges. Any thread end longer than 1/4 inch should be trimmed flush. Loose threads are an entanglement risk for toes, claws, and beaks.
- Tug test: grab the skirt firmly at three or four points and pull. If any section pulls free easily, re-secure it before letting your bird out for supervised time near the cage.
- Tray clearance: slide the pull-out tray all the way out. The skirt should not catch on the tray, compress against it, or get dragged along when the tray moves.
- Wheel clearance: if your cage is on wheels, roll it forward and back. The skirt hem should clear the floor by at least 1/2 inch so it doesn't snag and tear.
- Gap check: walk around the cage and look for any spot where the skirt is pulling away from the cage frame. Even a 2-inch gap is enough for your bird to get a beak or claw caught if it lands on the outside of the cage.
After the initial fit check, do a second check after 48 hours of normal use. Fabric settles, Velcro compresses, and clips shift. A quick visual inspection at this point catches problems before they become hazards. If you notice any section drooping, re-attach it rather than leaving it until the next cleaning day.
Maintenance: cleaning, replacing, and pest and mess control
A cage skirt collects exactly what you built it to collect: droppings, seed hulls, feather dust, and food debris. That means it needs regular cleaning or it becomes a hygiene problem faster than the floor would have. VCA recommends scrubbing the cage itself with non-toxic disinfectant soap and hot water at least once or twice a month (some sources say weekly, especially if you have multiple birds or messy species). Your skirt should be on the same schedule.
- Daily: shake or lightly brush off any accumulated dry debris. A soft brush works better than a vacuum near birds since suction can pull fine fabric fibers loose.
- Weekly: remove the skirt completely, shake it out outdoors, and spot-clean any droppings with a damp cloth and a drop of mild dish soap. Rinse thoroughly.
- Monthly: machine wash the skirt in hot water with unscented, dye-free detergent. Do not use fabric softener (it coats fibers and makes them harder to disinfect). Rinse twice. Air dry fully before reattaching.
- After disinfection: if you've used a cage disinfectant spray near the skirt, rinse the fabric well with clean water and let it air out completely before reattaching. VCA is clear that all chemical residues must be washed off before birds are exposed.
- Replace the skirt every 2 to 6 months: fabric rope toys are recommended for replacement on the same schedule by VCA, and a cage skirt takes similar abuse. Replace sooner if you see fraying, holes, or staining that doesn't wash out.
For pest control, the main risks are mites and moth larvae that can shelter in fabric folds near a warm cage. Washing monthly at 140 degrees Fahrenheit or above handles most of this. If you notice any evidence of feather mites, remove and bag the skirt immediately, wash it at the highest heat the fabric tolerates, and treat the cage separately before reattaching any fabric accessories. For odor, a second rinse cycle with a splash of white vinegar (fully rinsed out before use) works well on cotton canvas without leaving any chemical residue. PetPlace recommends daily cage cleaning plus a thorough weekly deep clean that removes bowls, toys, paper, and perches for cleaning (see PetPlace , The Safe Way to Clean a Birdcage) PetPlace — The Safe Way to Clean a Birdcage.
Customization and decorative ideas that stay bird-safe
There's plenty of room to make a cage skirt look good without adding any risk. The key rule is that anything decorative must either be sewn into a sealed seam or laminated flat against the fabric surface. Nothing should dangle, loop, or shed.
- Printed cotton canvas: choose patterns printed directly onto the fabric (not iron-on transfers, which can peel) for easy customization without any loose elements
- Contrast piping or binding: fold a strip of contrasting fabric over the bottom hem edge and sew it flat for a clean finished look, just make sure it's double-stitched and trimmed of all thread ends
- Seasonal fabric swaps: keep two or three pre-made skirt panels in different colors or weights (a lighter ripstop for summer, a heavier canvas for winter if the cage is near a drafty window) and swap them on a regular schedule
- Water-resistant lining: sew a layer of coated nylon to the back of a cotton skirt for extra protection against droppings soaking through, this makes spot-cleaning much faster
- Neutral or bird-calming colors: birds can be startled by high-contrast or very busy patterns at cage level, so save bold prints for the upper portion of the skirt and keep the area closest to the cage base calmer
- Embroidery or applique: only safe if the design is fully sewn down with no loose thread ends, use a satin stitch that locks all edges, and inspect after every wash
If you're interested in expanding this kind of DIY project, a cage skirt pairs well with a full cage cover for nighttime, or you might consider building a dedicated stand or base that integrates a seed-catching tray. Once you feel confident with these safe attachment principles, you can use the same approach to learn how to make a bird cage with bamboo DIY project.
If you want to go beyond a skirt, learn how to make bird cage covers with the same bird-safe materials and secure fit checks. The principles here (safe materials, secure attachment, regular inspection) apply just as well to any fabric accessory you add around your bird's space.
Start with a simple single-panel no-sew version, test the fit and safety for a week, and then invest the time in a properly sewn version once you know the dimensions are right for your cage.
FAQ
Can I hem the skirt instead of using Velcro or clips?
Yes, you can create fixed “sewn loops” or a channel that snaps over existing cage bars, but make sure the skirt can still be removed for washing. If you sew it permanently, you lose the ability to inspect for fraying after a few weeks and cleaning becomes much harder.
What clearance should I leave from the bottom bars, perches, and any seed guard?
Aim for at least 3 to 4 inches of free space from any bar or perch, and also account for the bird’s fluffed posture and wing movement. If your cage has a flared seed guard, decide the skirt height so the bird cannot reach the skirt edge from below or through gaps when they hop.
Is a no-sew bird cage skirt safe if I use iron-on fusible interfacing?
Iron-on interfacing can work only if it is fully bonded with no peeling edges after washing, and only if the product is labeled non-toxic and fabric-safe. Any layer that starts to lift can create loose fibers or small strips the bird may chew, so test by washing and tugging the seams before installation.
Can I use elastic at the top to keep the skirt snug?
Avoid elastic that can stretch into loops or snag points near the bird. If you want a snug fit, prefer a band with overlap plus a secure closure, and ensure elastic is enclosed inside a sealed channel and trimmed so no ends remain exposed.
How do I keep the skirt from twisting when the cage is moved or bumped?
Use two attachment points per side at minimum (for example, two Velcro tabs or two loops per panel) and keep the closure overlap symmetrical. After attachment, check that the skirt edge stays level by sighting across the front and sides, then re-tighten or re-attach any section that droops after a day of normal movement.
What’s the safest way to decorate the skirt?
Only use decorations that are fully sealed into seams or laminated flat against the base fabric. Skip dangling trims, tassels, buttons without shanks that can be pulled, and anything with loose borders or decorative stitching that can unravel into threads.
How often should I wash the skirt if I have multiple birds or a dusty species?
If you notice hulls or feather dust building up quickly, wash sooner than the monthly baseline. A practical rule is to inspect weekly, and if the fabric looks gray or feels gritty, wash immediately and let it dry completely before reattaching.
My skirt fabric frays at the cut edge after washing. What should I do?
Re-cover the edge with a proper hem or switch to a tighter weave fabric that holds cut edges cleanly. If fraying continues after multiple washes, that fabric is not suitable because loose fibers can be a tangling hazard even when the skirt otherwise fits well.
Can I spot-clean instead of washing the whole skirt?
Spot-cleaning is okay for quick messes, but it often leaves behind residues that attract mites and causes odor buildup in fabric folds. For safety and hygiene, do full washes on a regular schedule, and fully dry the skirt before returning it to the cage area.
What should I do if I find mites or suspect a parasite outbreak in the skirt?
Remove the skirt, bag it to prevent spread, and wash it at the highest temperature the fabric allows. Clean the cage separately, then re-check fit and clearance before reattaching, since repeated washing can compress Velcro or shift clips.
Do I need to remove the skirt every day for cleaning?
Not every day, but plan a quick daily check that includes the attachment points and the bottom edge for droop or twisting. Daily removal is usually unnecessary unless you have a very messy situation, but you should still vacuum or wipe loose debris from the cage area as needed.
Is it okay to use glue for tabs or attachment points?
Generally avoid hot glue near the finished skirt, because it can crack and shed brittle bits. If you need adhesive, use only fabric-safe, bird-safe products that form a flexible bond and are approved for use on items that contact pets, then verify there are no sharp ridges after the first wash.