Plain paper is what you should put on your bird cage floor. blank" rel="noopener noreferrer">Newspaper, paper towels, butcher paper, or purpose-made cage liner sheets are the safest, easiest-to-clean options recommended by veterinary organizations including the AAV, VCA, RSPCA, and Purdue University's vet program. You change them daily, they lie flat, they don't harbor bacteria the way loose bedding does, and they let you spot health changes in your bird's droppings at a glance. Everything else, including wood shavings, sand, corncob, and cat litter, comes with real risks and no meaningful upside for a pet bird. If you're wondering what to put at the bottom of a bird cage, start with paper-based liners and avoid anything that can harbor mold or toxic dust.
What to Put on Bird Cage Floor: Safe Liners and Setup

Best cage-floor liners by bird type and cage design
The right liner depends partly on your cage's bottom design and partly on your bird's habits. Here's how to match them up.
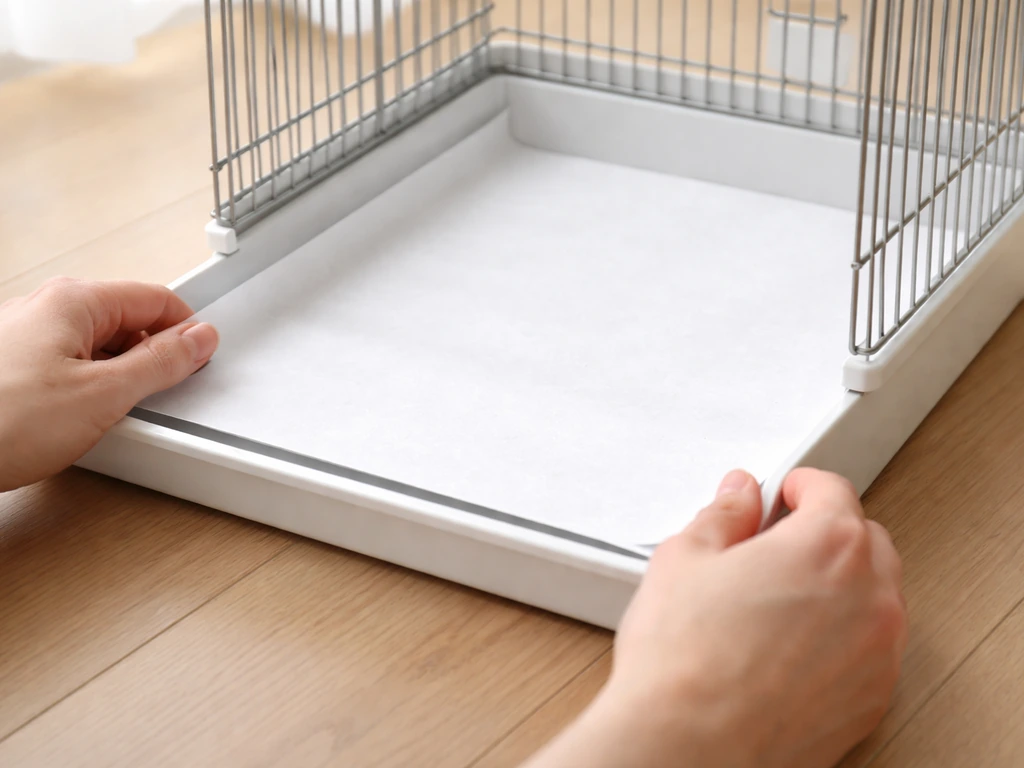
Cages with a slide-out tray
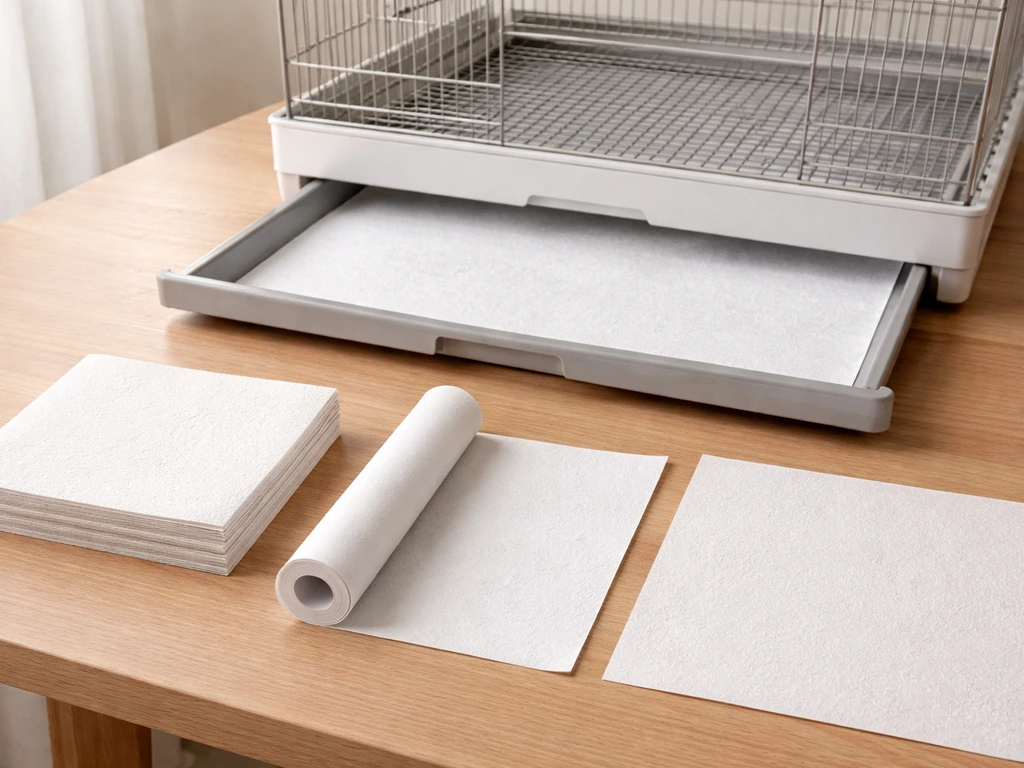
Most modern cages have a plastic or metal tray that pulls out from the bottom. This is the easiest setup to work with. Cut your liner paper to fit the tray snugly, lay it flat, and slide the tray back in. The tray walls hold the paper in place without any tape or clips. Newspaper works perfectly here because you can fold it to the right size. Butcher paper and purpose-made cage liner sheets (sold in rolls or pre-cut pads) are even cleaner to handle and don't transfer ink to your hands.
Cages with a wire grate above the tray
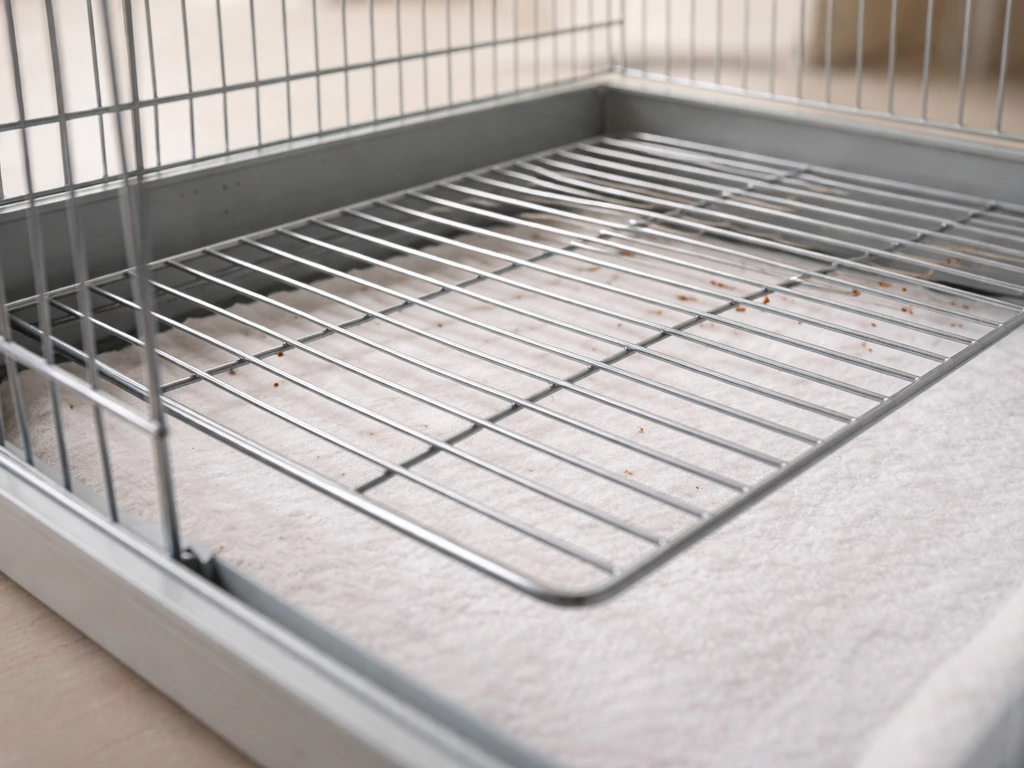
Many cages place a wire grate between the bird and the tray so droppings fall through and the bird can't access them. The liner still goes in the tray below the grate. Use the same paper options. If your bird is a forager who spends time on the cage floor (think cockatiels, parakeets, some lovebirds), the grate is especially useful because it keeps them away from accumulated waste.
Small birds: finches, canaries, budgies
Paper towels or plain printer paper cut to size work well for small cage trays. The AAV specifically names newspaper, paper towels, and plain cage liner papers as appropriate for canaries and finches, and calls out pine, cedar, and sand as unsuitable. For finches especially, the liner also acts as a health monitor since their droppings are small and easy to miss. Daily changes are non-negotiable at this scale.
Medium birds: cockatiels, conures, lovebirds
These birds produce more mess and are more likely to forage on the floor. Go with newspaper or butcher paper in the tray, and consider using multiple layers so you can peel off one sheet daily without replacing everything. A bird that regularly walks on the cage floor benefits from having the grate in place, since it prevents contact with droppings and soggy seed hulls.
Large birds: African greys, Amazon parrots, macaws, cockatoos
Big birds produce big messes. Pre-cut cage liner pads (sometimes sold as bird cage liners or parrot cage liners) are worth buying in bulk here because they fit large trays and you'll be using one per day at minimum. Some large-cage owners layer 3 to 5 sheets and peel one per day, doing a full tray scrub every week. Because large birds are messy eaters, the liner also catches seed debris, fruit pulp, and other food waste that can grow mold fast in a humid environment.
Comparison: which liner works where
| Liner Type | Best For | Pros | Cons |
|---|---|---|---|
| Newspaper | All cage sizes, slide-out trays | Free or near-free, easy to size, absorbent | Ink transfer to hands, can look messy |
| Paper towels | Small cages, spot lining | Very absorbent, no ink, easy to grab | Costs more over time, can bunch in large trays |
| Butcher paper / craft paper | Medium and large cages | Clean, no ink, cuts easily to any size | Sold in rolls, slight upfront cost |
| Purpose-made cage liner sheets | Any cage with standard tray sizes | Pre-cut, clean, often have odor-absorbing layer | Ongoing cost, may not fit non-standard trays |
| Washable fabric cage liners | Eco-conscious owners, stable birds | Reusable, no daily waste | Requires daily wash cycle to stay hygienic, not ideal if bird has loose droppings |
What to avoid putting on the cage floor
This list isn't just nitpicking. Birds have far more sensitive respiratory systems than humans, and several common bedding materials carry real health risks through fungal spores, dust particles, and toxic compounds. When thinking about what to put in the cage floor area, it helps to choose materials that are safe and easy to clean, not things like loose plants that can introduce pests or mold bird cage floor. Stick to this list and you'll avoid the majority of avoidable cage-related health problems.
- Wood shavings and chips: Cedar contains aromatic phenols that are toxic to birds' respiratory tracts. Pine shavings can cause similar issues. Both cedar and pine are specifically called out by the AAV, RSPCA, and MEAMS as unsuitable substrates.
- Corncob bedding: It holds moisture, grows mold and bacteria rapidly, and can be ingested. The RSPCA, VCA, and MEAMS all list it as unsuitable.
- Sand and gravel: Sand can be ingested and cause impaction. Sandpaper cage-floor liners, once marketed as a grit supplement, are now widely discouraged because birds ingest grit from them in uncontrolled amounts, causing digestive problems. The AAV, RSPCA, Vetwest, and SpectrumCare all advise against sand/gravel floor substrates.
- Cat litter (clay-based or clumping): Dust particles are a respiratory hazard. Clumping litter is especially dangerous if ingested. Both MEAMS and SpectrumCare flag this.
- Crushed walnut shells: Abrasive, can be ingested, and may harbor fungal spores. RSPCA and SpectrumCare list them as unsuitable.
- Shredded or recycled paper bedding: Unlike flat paper, shredded paper forms a loose mass that traps waste, stays moist, and is harder to change daily. VCA specifically notes this type is not recommended, partly because owners tend not to change it frequently enough.
- Scented or treated products: Any liner or substrate with added fragrance, deodorizer, or chemical treatment is a respiratory risk for birds.
- Loose particulate materials in general: Anything your bird can kick up into the air, inhale, or ingest in quantity carries risk. Flat paper eliminates this problem entirely.
How to choose the right liner for your goals
Once you've ruled out the unsafe options, the choice between the remaining paper-based liners really comes down to three things: how much mess your bird makes, how often you want to handle liner changes, and whether cost or waste matters to you.
Priority: mess control
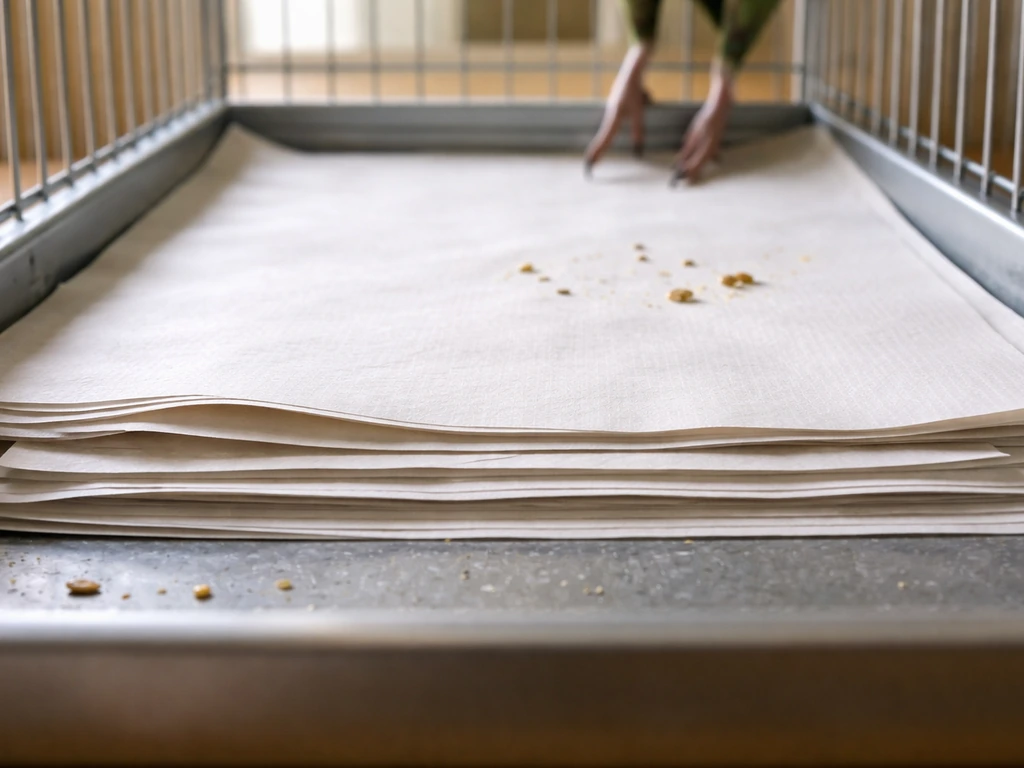
If your bird is a messy eater or a floor-forager, go with multiple layered sheets of newspaper or butcher paper. Lay 5 to 7 sheets at once and peel the top layer daily. This takes about 30 seconds per day and keeps the tray reliably clean without a full paper swap every time. For the heaviest messers (large parrots, birds on a mostly fresh-food diet), switch to daily single-sheet changes and do a tray wipe-down at the same time.
Priority: hygiene and health monitoring
Plain white paper towels or white butcher paper are best here because droppings show up clearly against the white background. The AAV specifically recommends daily changes not just for hygiene but because they let you see health changes in droppings early. Color, consistency, and volume shifts in droppings are one of the first signs of illness in birds. A dark or patterned liner makes this much harder to notice.
Priority: reducing waste and cost
Washable fabric cage liners are an option if you want to cut down on daily paper waste. They work best for birds that don't have loose or watery droppings, because the liner needs to go through the wash every day to actually stay hygienic. If you commit to washing it daily, it's a legitimate eco-friendly alternative. If there's any chance it sits a day or two, go back to disposable paper. Wet fabric holding bird waste breeds bacteria fast.
Priority: convenience
Pre-cut, purpose-made cage liner pads are the most convenient option if your tray is a standard size. You buy a stack, peel one off each morning, and you're done. They're slightly more expensive than newspaper but significantly less hassle for people who don't want to measure and cut paper every time.
Step-by-step: installing liners so they stay flat and secure
A liner that bunches, slides, or curls up at the edges is a foot-snag hazard if your bird accesses the cage floor. Here's how to install it properly the first time.
- Remove the tray completely from the cage and bring it to a clean work surface. Don't try to line it while it's inside the cage.
- Wipe the tray with a damp cloth or paper towel to remove any dried debris, then let it dry for a minute before adding fresh liner.
- Cut or fold your liner paper to match the tray dimensions. It should fit edge-to-edge with no overhang, since overhanging paper can curl upward when the tray is pushed back in.
- If you're layering multiple sheets for easy daily peeling, stack 5 to 7 sheets at once, aligned flat. Smooth each sheet down as you add it to prevent air pockets.
- For slide-out trays, the tray walls will hold the paper in place once it's seated. No tape needed and no tape should be used, since adhesive residue on the tray becomes a cleaning headache and tape itself could be chewed by the bird.
- If you have a wire grate that sits above the tray, check that the grate clicks or sits securely into place over the lined tray. The grate is what actually prevents your bird from accessing the liner directly.
- Slide the tray back in and make sure it locks or seats firmly. A loose tray that can be pushed out by a bored large bird is a common problem. If yours shifts, check the tray guides for wear or debris and clean them out.
- For cages where the bottom is solid (no slide-out tray), secure the liner with a light misting of water on the cage floor before laying the paper. The paper sticks slightly to the damp surface and lies flat while drying. Do not use tape on cage surfaces.
Cleaning routine and how often to change liners
Here's the honest truth: once a week isn't enough. Every veterinary source recommends daily liner changes, and for good reason. Purdue University’s VET guidance for general caged-bird husbandry advises changing cage-bottom coverings daily and notes that newspapers or paper towels are preferable blank" rel="noopener noreferrer">Every veterinary source recommends daily liner changes. If you are still shopping for a cage setup, you will also need to plan the basics for your bird cage, like the right type of liner and a safe way to clean it daily daily liner changes. Bird droppings contain urates (the white part), feces, and sometimes undigested food, all of which start growing bacteria and mold within hours in a warm cage. This matters even more because birds have sensitive respiratory systems and live in close contact with their cage floor debris.
Daily (non-negotiable)
Pull the liner, toss it, wipe the tray if there's any wet debris, and lay fresh paper. If you are also growing plants in and around the cage, make sure any plant setup for succulents stays separated from the cage floor and liner area so bird waste does not contaminate it how to plant succulents in a bird cage. This takes under two minutes once you have a system. If you've layered multiple sheets, just peel the top layer and you're done. SpectrumCare describes exactly this routine: remove old paper, wipe obvious debris, replace with fresh liner.
Weekly
Take the tray out and scrub it with warm water and a bird-safe cleaner (unscented dish soap or diluted white vinegar both work; avoid bleach unless you rinse extremely thoroughly and let it fully off-gas before returning the tray to the cage). Let the tray dry completely before relining it. Wet trays under paper liners are a mold risk. Chewy and Petco both outline weekly scrubbing as the standard interval for most bird setups.
Monthly
Do a full deep clean: tray, grate, cage walls, perches, and any accessories that have contact with the floor area. This is when you check for hairline cracks in plastic trays where bacteria can hide, and replace the tray if it's warped or deeply scored. Petco recommends this monthly schedule for most single-bird setups, with more frequent deep cleans if you have multiple birds or a particularly messy species.
Odor control tips
- The fastest odor fix is just changing the liner more often. If the cage smells, daily changes aren't enough, so try changing it twice a day.
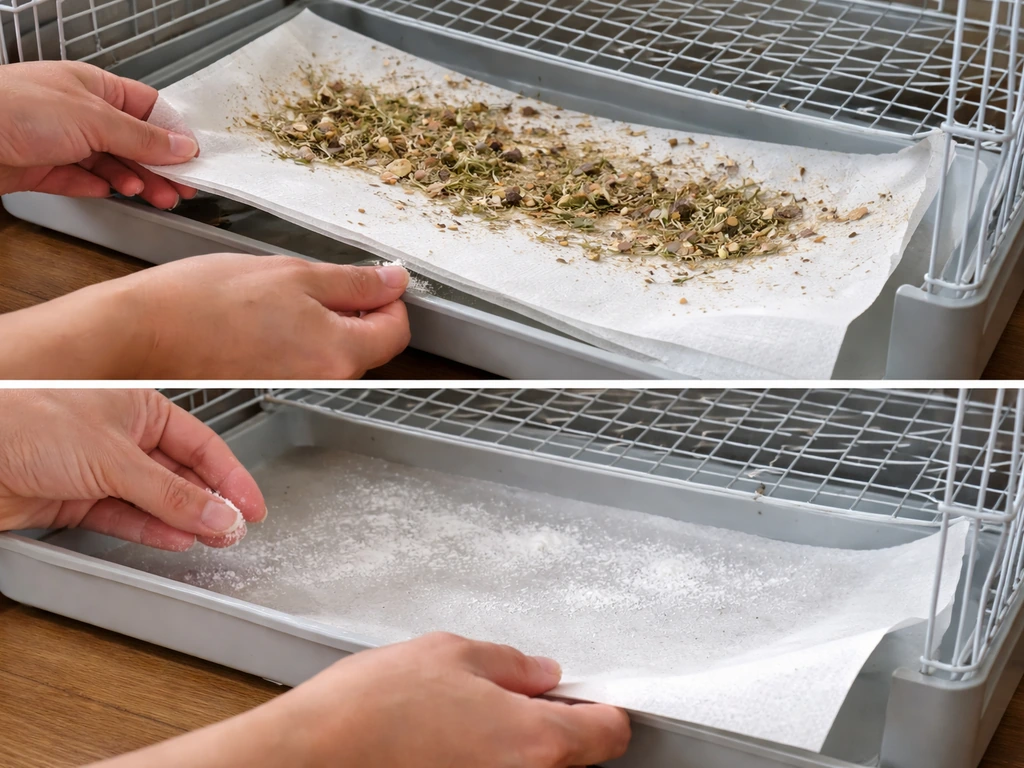
- A light sprinkle of plain baking soda on the tray before laying the liner helps absorb odor without any risk to the bird.
- White vinegar diluted 50/50 with water is an effective, bird-safe tray cleaner and deodorizer. Let the tray air dry completely before relining.
- Never use scented sprays, air fresheners, candles, or diffusers near a bird cage. Birds' respiratory systems are extremely sensitive to aerosolized chemicals and even pleasant-smelling products can cause serious harm.
- If odor is persistent despite daily changes, check the grate for caked debris and clean it separately. Built-up residue on the grate often holds more smell than the liner itself.
Dealing with common cage-floor problems
Seed hulls and food splatter
Seed hulls, pellet crumbs, and fruit splatter are unavoidable with most birds. The layered paper method handles this well since you peel the top layer and take the debris with it. If food is particularly wet (soft fruits, cooked foods), do a quick tray wipe before laying fresh liner so moisture doesn't seep through to the tray surface. Positioning food bowls away from the cage floor helps, and most birds will scatter seed hulls regardless of where the bowls are placed.
Stuck droppings on the tray
Dried droppings bond to plastic trays quickly. Soak the tray in warm water for 5 to 10 minutes before scrubbing and most of it lifts off without heavy effort. A silicone spatula or plastic scraper works well for stubborn spots without scratching the tray surface. Avoid metal scrapers on plastic trays since scratches create grooves that harbor bacteria. If you wipe the tray while it's still slightly warm from the room (right after removing the bird's old liner), debris comes off much more easily before it dries fully.
Liner slipping or bunching
This usually means the liner is cut too large. Trim the paper so it fits the tray exactly. For cages without a tray (open-bottomed designs), a very light mist of water on the surface before laying the paper helps hold it flat while it dries. Some bird owners use a small binder clip on the front edge of a slide-out tray liner, clipping it to the tray lip so it can't shift. Check that the clip is out of reach of the bird and has no sharp edges exposed.
Dampness and mold
Damp liners happen when water dishes are on or near the cage floor, or when the bird splashes bath water downward. If you notice the liner getting wet before daily change time, move water dishes higher in the cage or use a hooded water dispenser. When doing the weekly tray scrub, PawTracks recommends letting the tray dry completely before relining, not just wiping it dry since residual moisture under paper creates a mold layer fast. If you see any black or green spots on the tray, that's mold. Clean it with diluted white vinegar, rinse thoroughly, dry fully, and then reline.
Pests in the cage floor
Mites and small insects can establish themselves in cage floor debris if the liner isn't changed daily. The most common culprit is letting seed hulls and moist food debris accumulate. Daily liner changes eliminate the habitat these pests need. If you already have a mite problem, remove and dispose of all cage lining, scrub the entire tray and cage frame with diluted vinegar or a vet-recommended bird-safe cleaner, let everything dry fully, and restart the daily change schedule. Avoid using any commercial pesticide sprays in or near the cage. If the infestation is severe, talk to an avian vet about safe treatment options.
Optional add-ons: trays, grates, and DIY cage-floor upgrades
Basic paper lining is genuinely all most bird owners need. But if you want to optimize your setup for less mess, easier cleaning, or better hygiene, there are a few practical upgrades worth considering. To keep your bird safe and your living room tidy, use the same careful, cage-specific approach when adding plants plant flowers in a bird cage.
Extra replacement trays
Buying a second matching tray for your cage is one of the best low-cost upgrades you can make. While one tray is in the cage, the other is soaking or drying after its weekly scrub. You never have to rush a cleaning or return a damp tray to the cage. Check your cage brand for compatible tray sizes, or buy a close-fitting universal replacement tray and trim it if needed.
Removable wire grates
If your cage didn't come with a grate above the tray, you can add one. A piece of coated wire grid (like the type used in storage cube shelving) cut to tray size and placed above the liner keeps the bird physically separated from droppings. Make sure the wire gauge is appropriate: mesh openings small enough that claws can't get caught (roughly 0.5 to 1 inch spacing for small-to-medium birds). File or sand any cut edges smooth before placing it in the cage.
Pre-cut liner stacks
Cut a week's worth of liners at once and stack them somewhere accessible. This removes the daily friction of measuring and cutting, which is often why people skip changes. Even 30 seconds of prep matters when you're doing it every day. Store the stack in a clean, dry spot near the cage.
Seed catchers and skirts
Seed catchers are fabric or plastic skirts that attach to the outside of the cage at floor level and catch debris flung through the bars. They don't replace liner changes, but they dramatically cut the amount of mess on the floor outside the cage. For birds who scatter seed aggressively (many parakeets and cockatiels), these are a practical quality-of-life upgrade for the owner.
DIY tray liner pads
If you want the convenience of pre-cut pads without buying them, buy a roll of butcher paper or kraft paper and cut an entire roll's worth of tray-sized sheets in one session. Store them in a labeled stack. This takes about 10 minutes and gives you months of ready-to-use liners for a fraction of the cost of branded cage liner pads.
If you're also thinking about what else to put inside or around the cage itself, the same practical logic applies: keep materials non-toxic, easy to clean, and appropriate for your specific bird's size and behavior. When you plan decoration for a bird cage, stick to safe, non-toxic items that are easy to clean and won't interfere with floor hygiene what else to put inside or around the cage. The floor is just one part of a well-set-up cage, and getting it right makes every other aspect of daily care faster and cleaner.
FAQ
Can I use scented or dyed paper liners on a bird cage floor?
Avoid them. Stick to plain white or unprinted paper and unscented options only, since dyes and fragrance chemicals can irritate sensitive respiratory systems. If you only have colored paper, use it outside the cage and switch to plain paper for the tray.
Is it ever okay to use newspaper ink, or does it transfer to my bird?
Ink transfer risk is lower with liners that are laid flat and changed daily, but to minimize exposure choose butcher paper or purpose-made white liner sheets when handling convenience matters. If you use newspaper, avoid shiny inserts, glossy pages, or heavy color printing (like comics or ads).
What should I do if my bird pulls the liner out or tears it up?
First, confirm the liner fits snugly so it cannot bunch at the edges. If your cage has a wire grate, ensure it sits correctly above the tray. You can also use a properly placed, out-of-reach clip for tray liners, but only if there are no sharp edges the bird can contact.
My tray gets wet even though I change liners daily, what’s causing it?
The usual cause is water dishes placed too low, splashing during bathing, or wet food dripping onto the liner. Move the water source higher or switch to a hooded dispenser, and do a quick dry wipe when you see seepage before laying fresh paper.
How do I clean the tray when dried droppings are stuck?
Soak the tray in warm water for 5 to 10 minutes before scrubbing, then use an unscented dish soap or diluted vinegar. For plastic trays, use a plastic scraper or silicone spatula to avoid scratches, since grooves can trap waste and encourage odors and bacteria.
If I want fewer daily changes, can I switch to washable fabric liners?
Only if you can wash and dry the liner daily. Fabric that sits wet for even a day can grow bacteria, and it may increase odor and respiratory irritation risk. If you miss a day, revert to disposable paper so the tray does not stay contaminated.
Should I use liners under a wire grate, or only on the top level?
Use the liner in the tray below the grate. The grate’s job is to prevent direct access to droppings, while the liner protects the tray from bonding with waste and makes daily cleanup faster.
How often should I deep clean the tray and grate compared with liner changes?
Plan for daily liner replacement, then separate deep cleaning intervals: scrub the tray weekly (including removing debris and cleaning the grate if it contacts waste) and do a more thorough clean monthly for routine single-bird setups. If you have multiple birds or a very messy species, shorten the deep-clean schedule.
Is corncob, sand, or cat litter ever safe as a bird cage floor layer?
In most cases, no. Those materials are more likely to harbor mold, produce dust, or include additives that birds should not inhale. Even if they seem absorbent, paper-based liners give you safer hygiene control and clearer droppings monitoring.
What do I do if I see black or green spots on the tray?
Treat it as mold. Remove and discard the current liner, scrub the tray with diluted white vinegar, rinse thoroughly, dry completely, and only then reline. If mold keeps returning, reassess tray-drying time and whether the tray is staying damp under the paper.
Do I need to trim paper for a tray liner, or can I leave it oversized?
Trim it to fit. Oversized paper is a common reason liners shift, curl, or create gaps where moisture and waste get trapped. If the paper still needs a hand during drying (for open-bottom designs), use a very light mist of water just to keep it flat, then let it fully dry.

Bird cage checklist: must-haves perches, food and water, toys, safe bedding, and setup tips for year-round placement.
Bird-safe plants and fake options, plus setup, placement, and cleaning tips to avoid toxic, mold, and chewing hazards.

Safe decor for bird cages: chew-safe toys, natural perches, and liners under the cage to manage mess.