Assembling a Yaheetech bird cage is straightforward once you know the order of operations, but skipping steps or guessing at hardware placement is where most people run into trouble. If you want an easy checklist-style overview before you start, use these bird cage assembly instructions as a related next step alongside this guide. This guide walks you through the full build, from unboxing and counting parts to tightening the final fastener, with troubleshooting for the most common snags along the way. If you need bird cage assembly instructions for your exact model, follow the step sequence in the manual and use this guide as a companion checklist.
Yaheetech Bird Cage Assembly Instructions Step by Step

Maya Bennett
18 Apr 2026
Before you start: inventory, tools, and safety checks

The single best thing you can do before touching a single bolt is lay everything out on the floor and match it against the parts list in your manual. If you are following MCage rather than Yaheetech, use these mcage bird cage assembly instructions as the adjacent model-specific option so your step order and hardware match correctly. Every Yaheetech cage ships with a diagram page or table listing every component by number and quantity. The 611013 model, for example, includes: large side panel with door (x1), horizontal frame pieces (x2), a ladder (x1), shelf/platforms (x2), caster wheels (x4), long bolts (x18), short bolts (x4), screws (x8), nuts (x14), and an Allen wrench (x1). Your model's list will differ slightly, but the principle is the same: count everything before you start building.
For the 592056 model, the package contents section lists the base tray, side panels, top panel, front door, perches (x2), food/water cups (x2), bottom grate, connecting rods/screws, and the instruction manual itself. If anything is missing, contact Yaheetech support before assembly. Trying to build around a missing bracket or wrong-length bolt will cost you more time than the pause.
In terms of tools, Yaheetech includes an Allen wrench in the box, and for most models that is genuinely all you need. That said, having a small rubber mallet (for seating panels that are snug), a flathead screwdriver, and needle-nose pliers nearby saves frustration. More importantly: the 610958 manual explicitly recommends wearing protective gloves during assembly. Wire cage edges can have small burrs from the manufacturing process, so gloves are not optional in my view. Check every panel edge before handling it bare-handed.
- Allen wrench (included in box)
- Protective gloves (recommended in the Yaheetech 610958 manual)
- Small rubber mallet (optional, useful for tight panel fits)
- Flathead screwdriver (helpful for prying open bolt covers if present)
- Needle-nose pliers (for holding nuts during tightening)
- A clean, flat surface with plenty of room to lay out panels
Do a quick damage inspection before assembly. The manual is clear: do not use the cage if any part is bent, cracked, or visibly damaged. A warped panel will throw off your frame alignment from the very first step, and a cracked weld point is a structural and safety risk once a bird is inside.
Step-by-step assembly walkthrough
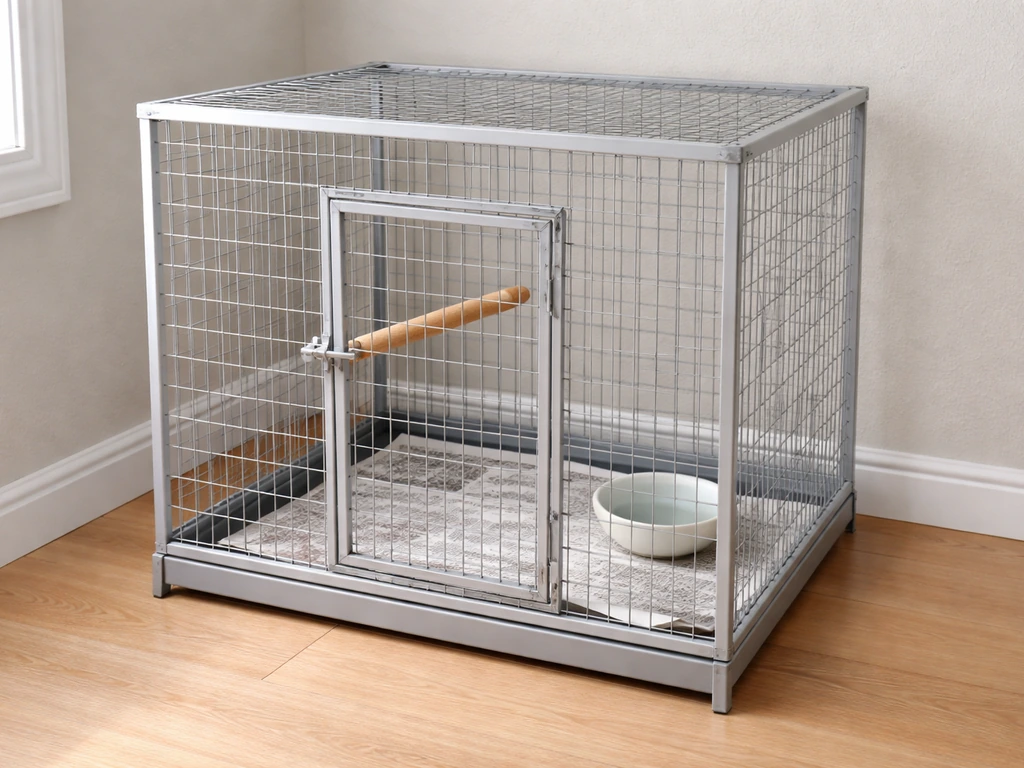
Yaheetech structures their assembly manuals into distinct numbered steps, and the 610958 model uses a four-step sequence that is representative of how most of their larger cages build out. I'll walk through that sequence in plain language below. If your model's manual numbers the steps differently, match the logic rather than the exact step numbers.
Step 1: build the main frame
Start by connecting the main vertical frame sections and the primary side panels. On the 610958, Step 1 specifically shows connecting side panels to establish the cage skeleton and integrating the base supports. Lay the frame pieces flat on the floor. Match the pre-drilled holes before inserting any fasteners. Insert long bolts through the frame joints and thread the corresponding nuts onto the other side by hand first, so nothing is fully tightened yet. Keeping everything hand-tight through the early steps lets you make alignment corrections before committing.
Step 2: add panels and reinforce the structure
With the basic skeleton standing, Step 2 involves attaching the remaining side panels and any frame reinforcement pieces. On larger models, this includes both the front and back panels. Slide each panel into its channel or hook it onto the frame connectors as your diagram shows. Check that the panel sits flush with the frame on all sides before moving on. A panel that is even slightly cocked at this stage will cause door misalignment later.
Step 3: attach shelves and the upper section
Step 3 on the 610958 focuses on the shelf or platform components and upper cage structure. If your model includes internal platforms (the 611013 ships with two shelf/platforms), slot them into place at this stage. They typically rest on bracket supports that you lock in with screws. Do not fully torque these down yet. The 611013 model also includes a top perch bar (part 16) and a side perch bar (part 17), which mount into the upper frame at this stage.
Step 4: base, tray, and wheels
The final major assembly stage deals with the base. On the 611013, Step 10 has you place the ladder inside the cage before closing out the base, because it is much harder to position once the grate is in. Step 11 then instructs you to insert the grate and the two bottom trays into the cage base, then attach the tray slider mechanisms using the provided fasteners. Once the base is fully seated, attach the caster wheels (x4 on the 611013) to the underside of the base frame. Now go back through every joint from Step 1 onward and tighten all bolts firmly with the Allen wrench. Do not overtighten to the point of stripping the threads, but every connection should be snug with no play.
Doors, latches, and hardware alignment troubleshooting
Door problems are the most common complaint after assembly, and they almost always trace back to panel misalignment in Steps 1 or 2. If your door issues feel similar to what you see during Zeny setups, use these zeny bird cage assembly instructions as a related comparison point for step order and panel alignment. If your door does not swing freely or the latch does not catch, here is how to diagnose it. For the related topic of how to date hendryx bird cage, start by confirming the model details and matching them to the correct ID resources.
The Yaheetech YA-00084371 troubleshooting section puts it simply: inspect the lock mechanism for obstructions or misalignment, and ensure the door is properly aligned with the frame. In practice, that means loosening the bolts on the panel surrounding the door, squaring the panel up so the door frame sits evenly within the opening, and re-tightening. If the latch pin is catching on the strike plate at an angle, the door hinge screws are usually the culprit. Loosen them slightly, let the door hang in its natural position, then re-tighten.
- Door won't close flush: loosen the surrounding panel bolts, re-square the panel, re-tighten
- Latch doesn't catch: check for debris in the latch mechanism, then inspect whether the strike plate is centered with the pin
- Door swings out of plane (twists): the hinge is not sitting flat against the frame, loosen and re-seat it
- Extra hardware left over: cross-reference your parts diagram; Yaheetech manuals label every piece by letter or number, so identify what you have before assuming it is a spare
- Missing hardware: document with photos and contact Yaheetech support; do not substitute random hardware sizes
One thing worth checking on every door: once the latch is working correctly, confirm it requires deliberate, two-step pressure to open. Some Yaheetech models include a secondary latch or spring lock. If yours does, test it with the cage empty. Parrots especially are skilled at working simple push latches open from the inside.
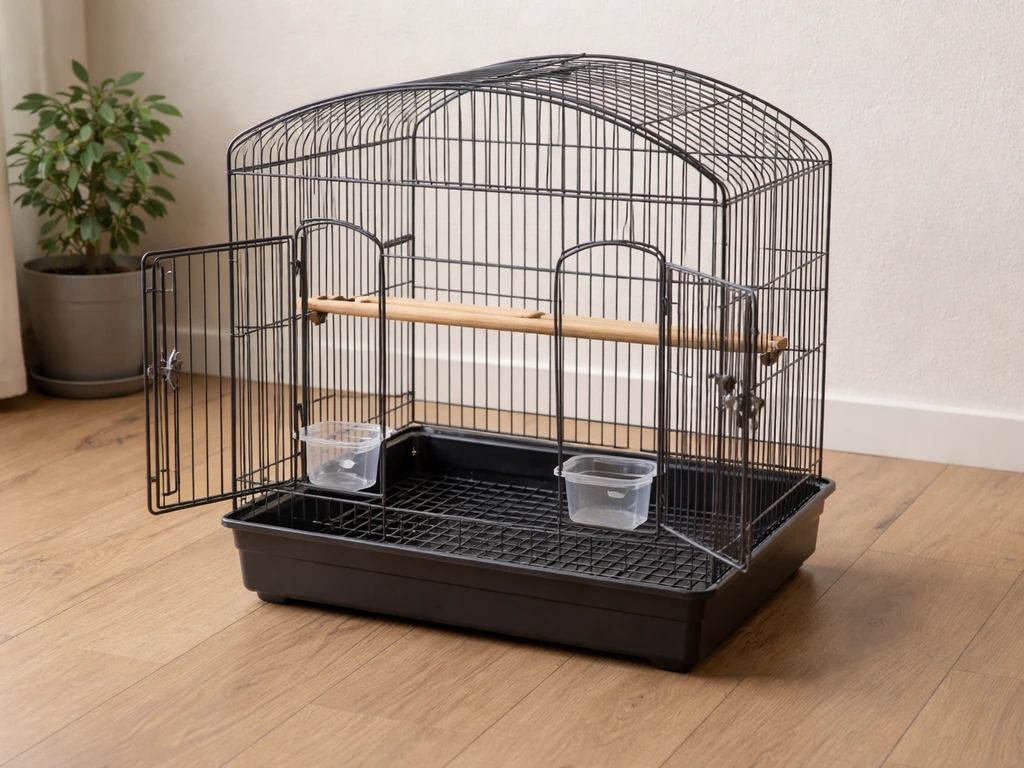
Perches and accessories: how to mount them safely
Most Yaheetech cages include at least two perches and two food/water cups in the box (as confirmed in the 592056 package contents). Larger models like the 611013 add a top perch bar, a side perch bar, and internal shelf platforms. Mount perches so they are horizontally level and positioned at different heights to give your bird movement options. Perches that are too close together vertically or that line up directly over food cups create a hygiene problem.
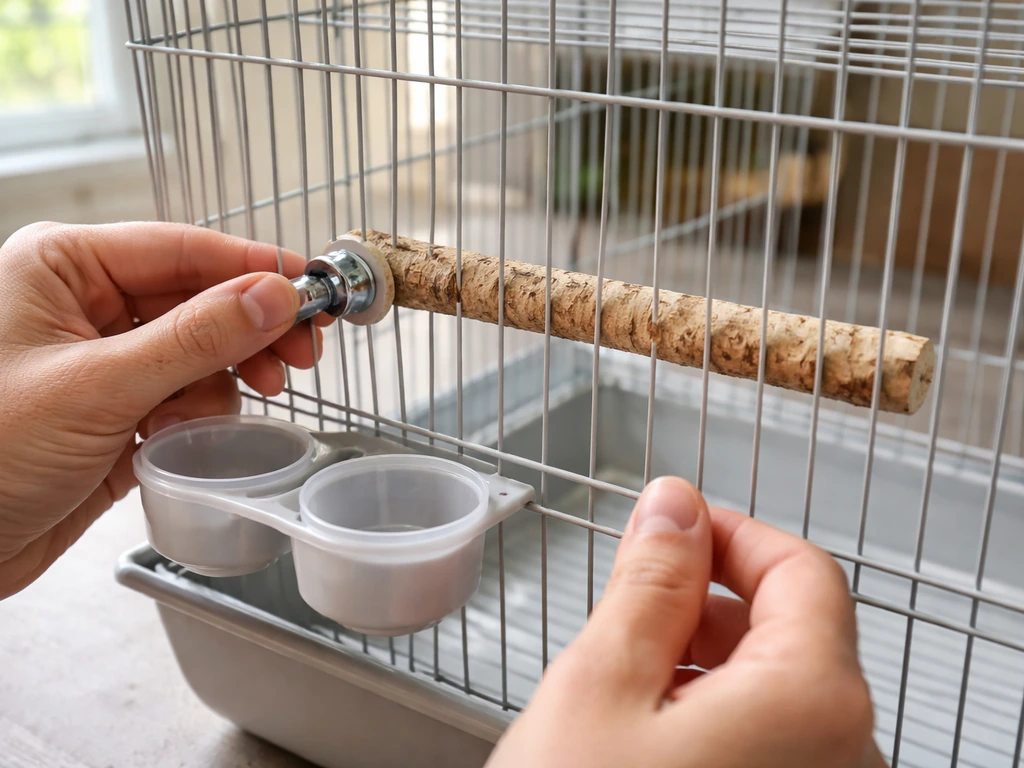
The included bolt-mount or tension-mount perches typically thread through the bar grid from outside and tighten with a wing nut or bolt inside. Insert the post through an appropriate-width bar gap, slide the cup or perch holder onto it, and tighten the interior nut finger-tight plus a quarter turn. Do not overtighten on plastic fittings because they will crack. Give each perch a firm lateral tug before placing a bird: it should not rotate or slide.
If you plan to add aftermarket perches, rope toys, or swings beyond what comes in the box, attach them to the cage bars using the manufacturer-intended hooks or cage clip hardware. Never drill into the cage frame to add mounting points, and avoid hanging accessories so heavily on one side that they create an imbalance. Check every mounted item weekly for looseness.
Securing the cage: stability, sharp edges, and bar-spacing checks
Once the build is complete, run through these three checks before anything goes inside the cage.
Stability and wobble
Place the cage on the flattest surface available and push gently on all four sides and the top. Any wobble means either a bolt is not fully tightened, a panel is seated incorrectly, or the surface itself is uneven. The Yaheetech YA-00084371 manual troubleshooting is direct on this: ensure all screws and connections are tightened and verify the cage is on a level surface. If you are using the included caster wheels, lock them once the cage is in its permanent spot. An unlocked rolling cage that shifts when a bird lands hard on a perch is both stressful for the bird and a tip-over risk.
Sharp edges
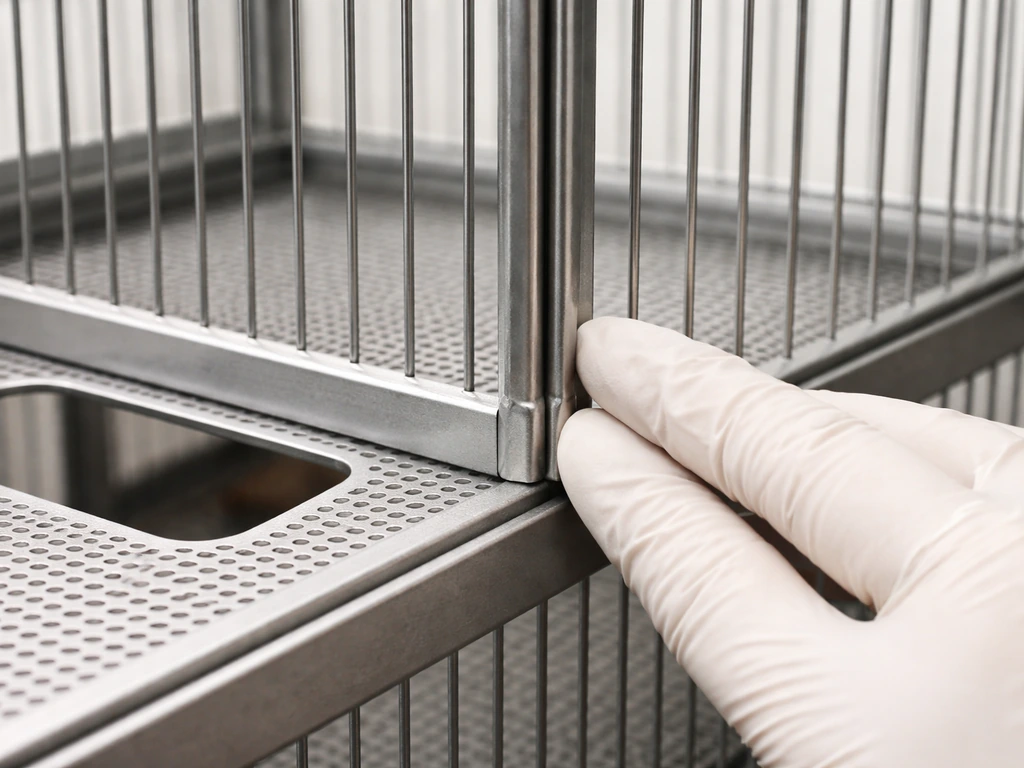
Run a gloved hand along every panel seam, the door edges, the bar ends at the top and bottom of the cage, and around any cutouts in the shelves or platforms. Any burr or sharp point that catches your glove needs attention. For small burrs, a metal file or fine sandpaper smooths the wire end without weakening the structure. For a bent or cracked panel, do not try to file it smooth: contact Yaheetech for a replacement part. A sharp wire point inside the cage can injure a bird's foot or beak.
Bar spacing
Yaheetech's 592364 model specifies 1 cm bar spacing, which is appropriate for small birds like budgies and cockatiels. For reference, bar spacing guidance from avian welfare sources recommends no more than 1/2 inch (about 1.27 cm) for smaller species like diamond doves, and a common range for small-to-medium parrots is 1/2 inch to 3/4 inch. If you are housing a small species, verify your specific Yaheetech model's bar spacing against species-appropriate guidelines before the bird goes in. If bars have shifted or bowed during assembly, that is a sign of a structural problem, not a cosmetic one.
Placement, cleaning before use, and seasonal considerations
The cage needs to be clean before any bird enters it. Manufacturing residue, metal dust, and packing materials can all be harmful. Wash all interior surfaces, bars, perches, and food/water cups with warm water and mild dish soap. Rinse thoroughly and let everything air-dry completely. Petco also advises removing toys, beds, and habitat items during thorough disinfection, then rinsing them thoroughly and fully drying them before putting them back in the bird’s environment rinsing thoroughly and letting everything air-dry completely. Avoid any cleaning products with strong chemical odors, bleach-based sprays used in an enclosed space, or anything labeled with fragrance. The Yaheetech 592364 manual specifically calls out keeping cleaning products away from the cage and birds, and that applies during initial cleaning too.
Placement inside your home matters more than most people expect. The 592056 manual and the 592364 manual both advise keeping the cage away from direct sunlight for extended periods, away from drafts, and away from heat sources. In practice: avoid positioning the cage in front of a window that gets direct afternoon sun, near an air conditioning or heating vent, next to an exterior door that opens frequently, or in the kitchen where cooking fumes and non-stick cookware off-gassing are genuine hazards to birds.
Seasonal adjustments matter too. In winter, drafts from windows and exterior walls are the main concern, and a cage placed against an exterior wall can be significantly colder than the ambient room temperature. In summer, a cage near a window can overheat quickly even without direct sun. If you need to move the cage seasonally, the caster wheels on most Yaheetech models make this straightforward. Just lock the wheels again once it is repositioned.
Customizing for mess control and covers without harming your bird
Yaheetech cages come with a pull-out bottom tray, which is the foundation of practical mess management. Line the tray with plain, unscented paper (standard newspaper or paper towel works well), cut to fit. Avoid cedar or pine shavings, which are toxic to birds, and skip any scented liners. The tray slider mechanism on models like the 611013 lets you pull the tray without opening the main cage door, which makes daily spot-cleaning fast.
For seed and debris that escapes through the bars, a seed catcher skirt is the most effective solution. These fabric or mesh aprons attach to the lower exterior of the cage bars with clips or ties. Choose one made from non-toxic, uncoated fabric, and wash it weekly. Do not use plastic seed guard attachments that require drilling or permanent modification to the cage frame.
Cage covers help with sleep schedules and can reduce drafts, but they introduce risks if chosen carelessly. Use a breathable fabric cover, not a plastic sheet or a cover so thick it cuts off airflow. The cover should drape over the cage without pressing against the bars or trapping heat. Uncover the cage at a consistent time each morning. Never cover a cage with a bird inside that is showing signs of illness: restricted airflow makes respiratory problems worse. If you want to block a draft specifically rather than cover the whole cage, positioning a freestanding room divider or bookshelf to buffer the airflow on one side is a safer approach.
If you are comparing Yaheetech's assembly process to other brands, the general workflow (frame first, panels next, base and tray last, accessories before closing the base) is similar across manufacturers. The key differences are in how Yaheetech uses Allen-bolt fasteners throughout rather than tool-free snap connections, which makes for a sturdier finished cage but requires more patience during the build. Other brands covered on this site use different fastener systems, so always work from the manual specific to your model.
FAQ
What should I do if the assembled Yaheetech cage still wobbles even after I tighten the bolts?
If your cage wobbles after tightening, re-check two things before adding any extra hardware. First, confirm the base tray and bottom grate are fully seated in their channels, an uneven tray will “lock in” a tilt. Second, tighten in the sequence from the manual, then re-run the level check after the wheels are attached and the cage sits on its final surface (uneven floors can mimic an assembly fault).
How do I fix perches that feel loose or spin after assembly?
Yes. Many perches and cup holders use post-and-nut or bolt-through designs where the fit is sensitive to bar spacing and hole alignment. Remove and remount the perch so the post sits straight through the intended gap, then tighten the interior nut only until snug (finger-tight plus a small increment). After tightening, test by pushing the perch laterally, if it rotates or slides, it is not seated correctly.
Can I file down a bent or cracked wire panel to make it fit?
Don’t. If a panel is cracked, welded joints show damage, or the cage bars look visibly bent, filing or reshaping can weaken the wire or create sharp edges. The safer approach is to pause assembly, contact Yaheetech support for the specific part, and only use the replacement once the frame alignment can be restored.
My door won’t latch smoothly. Should I adjust the latch or reassemble parts?
If the latch pin doesn’t align with the strike plate, treat it as an alignment problem rather than a latch “adjustment” problem. Loosen the fasteners around the door frame, allow the door to hang naturally, then re-square the frame so the gap is even along both sides. Tighten again and test with an empty cage first, repeated misalignment usually indicates Steps 1 or 2 panel seating was off.
What causes a pull-out bottom tray to stick, and how can I correct it?
If the tray slider sticks or won’t pull fully, check that the tray rails and the slider mechanism are installed in the correct orientation, then verify the tray is inserted without twisting. Avoid forcing, forcing can bend the rails and make the grate and door alignment worse. If needed, remove the tray, inspect for misaligned fasteners, and re-install before tightening everything firmly.
How tight should the fasteners be during Yaheetech bird cage assembly, and how can I avoid stripping threads?
Use the included Allen wrench only, and stop once the joint is snug and secure. Over-torquing thin wire grid connections can strip threaded inserts or stress plastic components used for perch mounts. As a rule of thumb, tighten in stages: hand-tight for early alignment, then firm tightening at the end, and re-check after the cage is fully loaded (with no bird) for a short stability test.
Where should I check for sharp wire points besides the door and main bars?
Most Yaheetech cages use cage-edge wire where burrs can appear after shipping or repeated handling. Run a gloved hand along every seam, then inspect inside cutouts around shelves, platforms, and tray openings. For minor burrs, smooth carefully with fine sandpaper or a small file on the burr only. If you find a sharp bend, snag point that keeps catching, or any structural damage, replace the part instead of removing material.
Is bar spacing the only factor I should consider for my bird’s safety?
Bar spacing is species dependent, and even within the same bird size category, claws and heads vary in width. If your model’s bar spacing is near your bird’s upper size limit, prioritize a smaller-grip-safe setup and add perches so the bird does not climb in a way that forces head-through pressure. Confirm bar spacing on your exact model before first use, and watch closely the first few days for any risk behavior.
What’s the safest way to clean a new Yaheetech cage before the bird goes in?
For cleaning the interior before the bird arrives, warm water plus mild dish soap is the default. Skip bleach, strongly scented products, and any fragrance-based sprays, residue can linger on bars and beaks. After washing, fully air-dry, if you can still smell chemicals after drying, rinse again and dry longer before placing food or water cups back in.
How can I reduce mess without constantly opening the main cage door?
For daily operations, avoid opening the main door every time you feed if your model has a slide-out tray and accessible cup placement. Use the tray for spot cleaning and slide-out access when possible, and handle birds near the cage only when the door is fully latched to prevent accidental gaps. If you use a seed catcher skirt, wash it weekly so it does not become a hygiene hotspot.
Next Article
How to Make a Temporary Bird Cage Step by Step
Step-by-step DIY guide to build a safe temporary bird cage now, with sizing, bar spacing, materials, and safety checks.