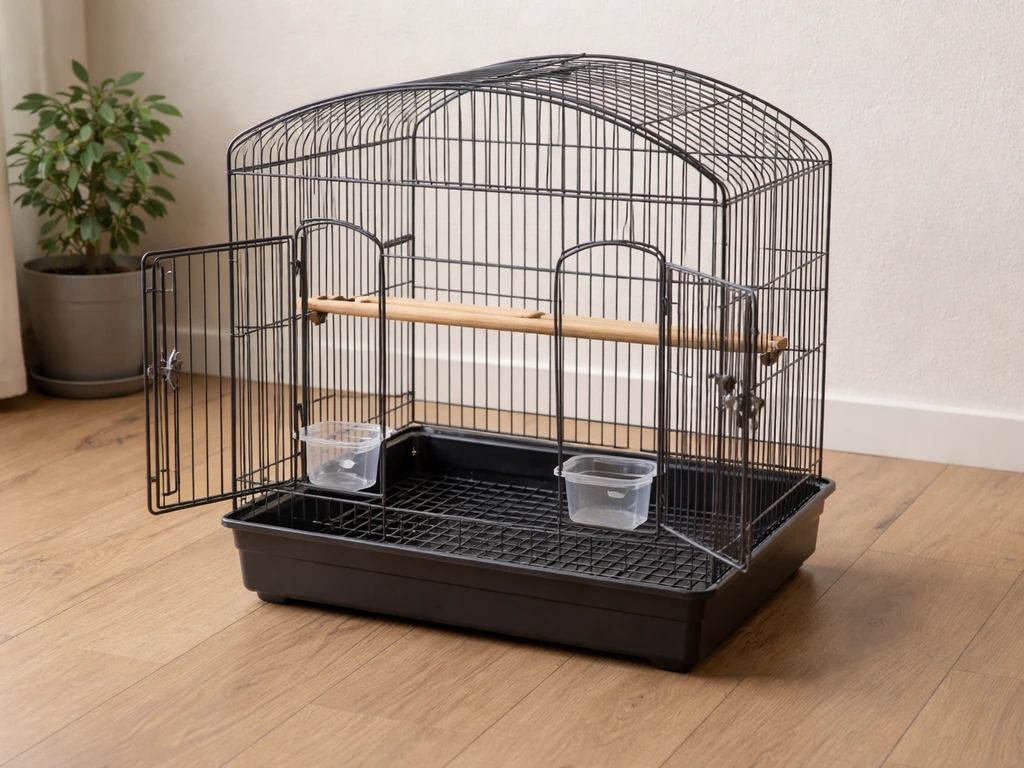
Before you touch a single bolt, pull out your cage's model number, count every part in the box against the included parts list, and download the model-specific PDF if you don't have a printed manual. Then work through frame, base, bars, doors, and locks in that order, do a firm shake-test when you're done, and only add accessories after everything is tight and square. That sequence covers about 90% of cages sold today, whether you have a Prevue Hendryx, Yaheetech, MCage, ZENY, or a generic wire cage from a pet shop.
Bird Cage Assembly Instructions: Step-by-Step Setup Guide

Maya Bennett
24 Apr 2026
Find your exact cage model and get the right parts
Assembly instructions are model-specific, not brand-generic. A Prevue Hendryx 3154 has a completely different parts count and assembly sequence than the Penthouse Suites Model 261, even though both come from the same company. Using the wrong manual is one of the most common reasons people end up with leftover hardware or misaligned panels.
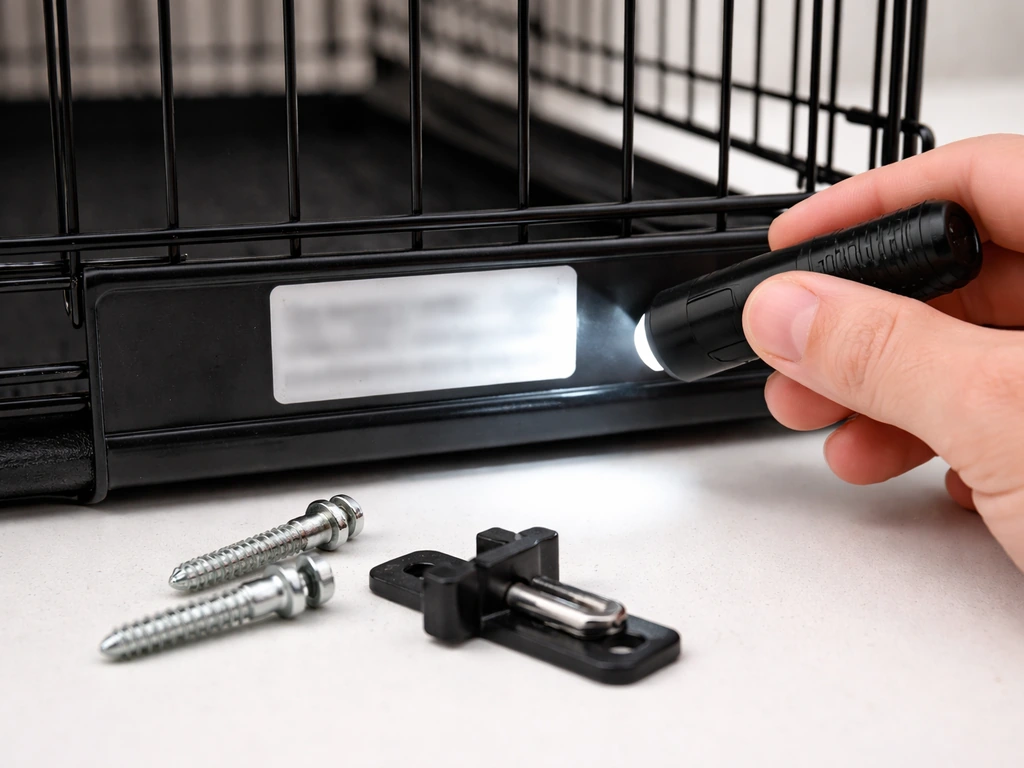
Your model number is almost always printed on a sticker on the outside of the box, on the bottom of the tray, or on a small card tucked inside the hardware bag. Write it down before you discard any packaging. With that number, you can pull the exact PDF from the brand's website or from ManualsLib, which hosts instruction sheets for most major cage brands.
Once you have the right manual open, do the parts count before anything else. Prevue, Midwest, and most other reputable brands include an explicit step that says 'Count Hardware and Review All Parts.' Lay everything out on a flat surface grouped by type: screws, bolts, clips, trays, door latches, casters, and any decorative hardware. If the screw count is short or a panel is missing, contact the brand's customer service now, not halfway through assembly. Most brands will ship replacement parts free.
- Check the box exterior, tray underside, and hardware bag for the model number
- Download or locate the model-specific manual before opening hardware bags
- Count every part type against the parts list and note any shortages immediately
- Take a photo of all laid-out parts before assembly as a reference
- Contact manufacturer customer service for missing parts before proceeding
Tools, workspace setup, and safety checks
Most cages need a Phillips-head screwdriver, a flathead screwdriver, and needle-nose pliers. Some heavier flight cages also benefit from an adjustable wrench and a rubber mallet for persuading tight-fitting bar connections. You rarely need power tools, and I'd actually recommend against using a power drill on cage bolts since it's easy to strip the threads or crack plastic connectors.
Set up on a hard, flat floor with good lighting. A tiled or hardwood floor works better than carpet because you'll feel immediately if the assembled cage wobbles. Spread a moving blanket or a few layers of cardboard under the work area to protect both the floor and the cage finish while you're flipping panels around.
Before you start connecting anything, run your hands along every wire panel and the cut edges of the tray. Wire cage edges can have sharp burrs left over from manufacturing. Use a small metal file or 220-grit sandpaper to smooth any rough spots, especially around door frames and tray edges where you and your bird will have the most contact. Check for pinch points at hinge locations too, and make sure no bar end is sticking inward where a bird's foot or toe could get caught.
- Phillips and flathead screwdrivers
- Needle-nose pliers (for c-clips and cotter pins)
- Adjustable wrench (for heavier cages with hex bolts)
- Rubber mallet (for snapping together tight panel connections)
- Small metal file or 220-grit sandpaper (for deburring sharp edges)
- Level app on your phone or a small bubble level
- Cardboard or a moving blanket to protect the floor and cage finish
Step-by-step assembly: frame, base, bars, doors, and hardware
Work through this sequence for virtually any wire cage. The exact bolt positions will differ by model, but the build order stays the same because each stage gives you a stable platform for the next one.
Step 1: Assemble the base and tray
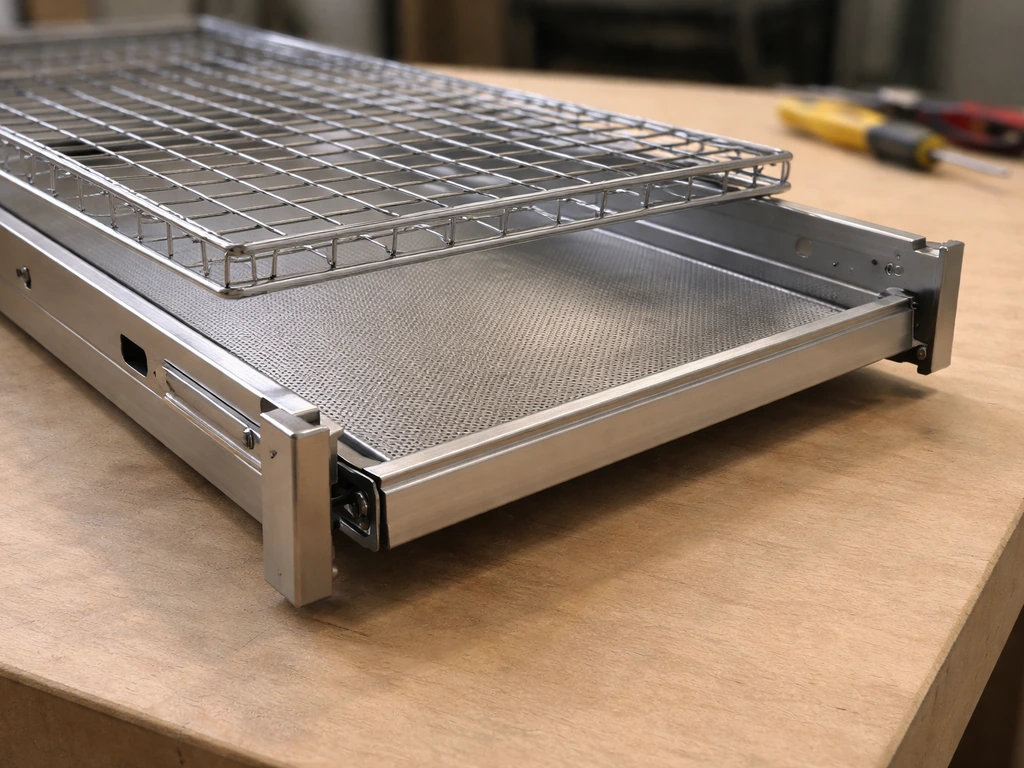
Start with the bottom tray and the grate or grid that sits above it. Slide the pull-out tray into its runners and confirm it moves smoothly before anything else is attached. If the cage uses a locking clip to hold the tray in place, snap or screw it in now. Prevue's instruction sheets often show a specific clip piece that locks the tray panel to the base frame, and it's much easier to install before the sides go up. Set the base section on your work surface and check it with the level app. If it rocks, adjust now.
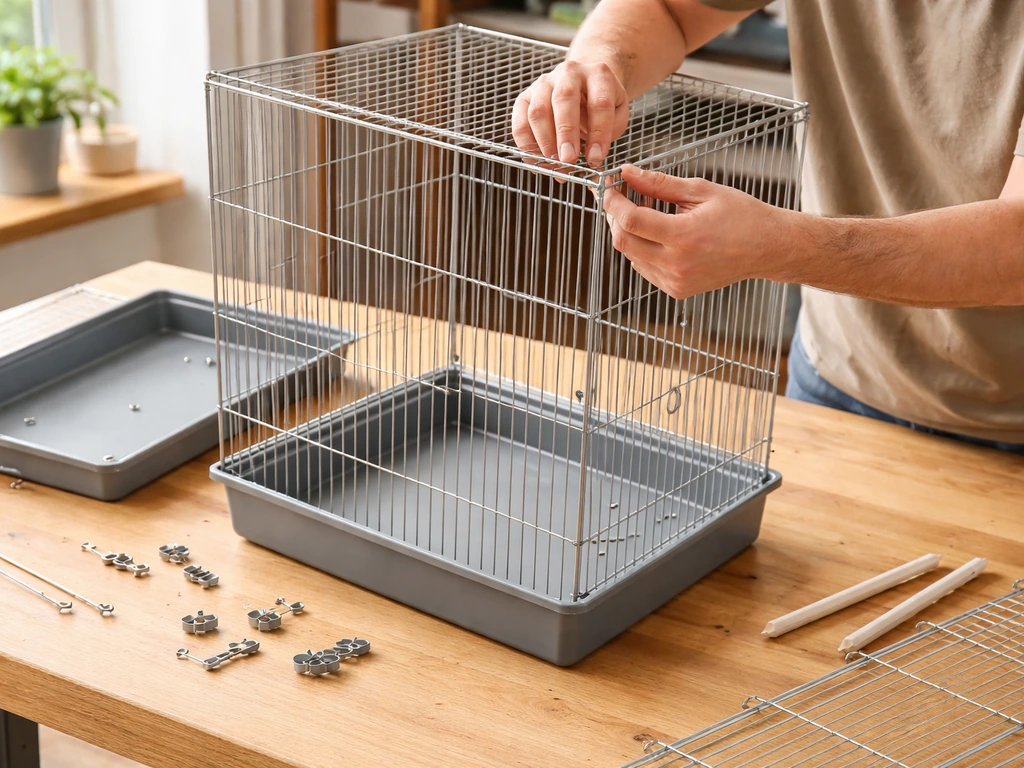
Step 2: Attach the side and back panels
Stand the side panels up against the base. Most cages use bolts and wing nuts, screws through pre-drilled holes, or plastic corner connectors to join panels. Finger-tighten all fasteners on a panel before fully tightening any of them. This lets you make small alignment adjustments before everything locks in. Once all fasteners are finger-tight and the panel sits square, go back and fully tighten with your screwdriver or wrench. Repeat for each panel before moving to the top.
Step 3: Set the top frame
Lift the top frame into position and align it with the side panel connection points. On larger cages, having a second person hold the top steady while you drive the fasteners saves a lot of frustration. If the cage has a domed or decorative top, that section typically clicks or bolts onto the flat top frame as a separate step after the main frame is closed and tightened.
Step 4: Install doors and lock hardware
Door assembly is the most model-specific part of the process. Cage doors typically hang on hinge pins or hook into a pre-formed wire loop at the top of the door opening. Once the door is hung, install the latch. On many Midwest and Prevue cages, this means locating a latch assembly with a latch bar and lock sleeve, then sliding the latch bar through the sleeve so it catches the door frame when pushed closed. Test the door a dozen times: it should click shut firmly, resist lateral wiggling, and open smoothly with one hand. If it doesn't latch on its own, check whether the latch bar is fully seated in the sleeve or whether the door hinge pin needs to be seated deeper.
Step 5: Attach casters or stand legs (if included)
Flip the assembled cage upside down or tilt it with help to access the bottom frame. Thread caster bolts in by hand first, then tighten with a wrench. Lock any wheel brakes by pressing them down before you flip the cage upright. Stand it up, press down firmly on the top, and check for any wobble. A slight rock usually means one caster isn't fully seated or a frame bolt near the base wasn't fully tightened.
Step 6: Final structural shake test
Grip the top of the cage with both hands and apply moderate pressure side to side and front to back. Nothing should flex, creak, or shift. Then open and close every door, check that all latches engage, and run your hand along every interior surface one more time for missed sharp edges. Only once the cage passes this test is it ready for accessories.
Installing accessories the right way

How you place accessories matters as much as whether you include them. Poorly placed perches, feeders, and toys are the number-one way a well-assembled cage becomes a welfare problem after setup.
Perches
Install at least two perches at different heights, but keep them away from directly above the food and water bowls to prevent fecal contamination. Diameter matters: a perch that's too thin forces a bird to grip with claws fully closed, straining the feet over time. Birdsprees lists perch diameter ranges by bird size category, such as finch/budgie and African grey or large parrot ranges. For budgies and cockatiels, 1/2 to 3/4 inch diameter works well. For conures and African Greys, aim for 3/4 to 1.5 inches. Natural wood perches or manzanita branches are preferable to smooth dowels because the irregular surface exercises feet. To install, push the perch bolt through the cage bar from outside, seat the perch, and tighten the wingnut on the inside just enough to hold it firmly without bending the bar.
Food and water bowls
Hook-on bowls should be positioned at a height the bird can reach comfortably while standing on the nearest perch. Never place them on the cage floor unless you have a ground-feeding species. Secure the bowl holders to the bar with the included lock ring or c-clip, and confirm the bowl can't be flipped out by a curious beak. Stainless steel bowls are the easiest to sanitize and won't harbor bacteria in surface scratches the way plastic does.
Ladders and toys
Hook toys from the top bars using quick-link connectors, not twist-open key rings that a bird can pry apart. Ladders should lean or attach at an angle the bird can climb without the rungs placing stress on toes. Keep the cage interior open enough that the bird can spread its wings fully in at least one clear spot. Overcrowding with accessories is a common beginner mistake.
Cage covers
A cover should drape over the outside of the cage without tucking inside where a bird can chew fabric. Lightweight breathable cotton or purpose-made cage covers work well. Avoid synthetic fabrics with loose threads. The cover goes on at the bird's designated sleep time and comes off when the bird wakes, usually matching natural light cycles as closely as possible.
Troubleshooting common assembly problems
| Problem | Likely Cause | Fix |
|---|---|---|
| Door won't latch closed | Latch bar not fully seated in lock sleeve, or door hinge pin too shallow | Reseat the hinge pin fully, push latch bar all the way through the sleeve, test again |
| Door swings open on its own | Hinge pin angled instead of vertical, or bent hinge loop | Straighten the hinge loop with pliers, ensure pin is straight and vertical |
| Cage wobbles or rocks | Base bolts loose, casters not fully seated, or floor is uneven | Re-tighten all base-frame bolts, fully seat casters, use a rubber furniture pad under uneven casters |
| Panel bars misalign or gap | Panels not square before tightening fasteners | Loosen fasteners, realign panels, finger-tighten all before fully tightening any |
| Rust spots on new cage | Bare metal exposed by shipping damage or manufacturing defect | Sand lightly with 220-grit, apply non-toxic touch-up paint or clear nail polish as a temporary seal |
| Missing parts or wrong screws | Packing error at factory | Contact brand customer service with model number and parts list; most ship replacements free |
| Gaps in bar spacing | Wrong panel for model, or bars bent in shipping | Compare to model diagrams; bars bent slightly can be straightened with pliers; wrong panels need replacement |
One issue that often gets missed is pest-prone gaps around the tray area. If the tray doesn't sit flush or the grate above it has gaps larger than 1/2 inch, seed hulls and droppings collect in corners where mites can breed. Push the tray fully in and check the seal around its edges. A thin bead of non-toxic silicone sealant on the tray frame (exterior side only, never inside the cage) can close small persistent gaps.
Cage placement, tray liners, and mess control
Put the cage against a solid wall, never in the center of a room or near an exterior door where drafts hit it directly. Position it at roughly chest height so the bird is at your eye level or slightly below when you're standing. Birds placed too high can become territorial; too low, they feel vulnerable. Keep the cage away from kitchens (cooking fumes and Teflon off-gassing are toxic to birds), direct sunlight for more than a couple hours, and heating or cooling vents.
For tray liners, plain unscented paper is the safest and cheapest option. Cut several layers to fit and pull one sheet off at each cleaning. Avoid cedar shavings (toxic to birds), scented paper liners, and anything with printed ink that could flake off. Change liners every 1 to 2 days for small birds, daily for larger messy species like macaws or Amazons.
Mess control outside the cage is easier with a seed guard: a fabric or plastic skirt that attaches to the lower bars and catches flung debris. If your cage didn't come with one, aftermarket skirts fit most standard bar spacings. Place a washable mat under the cage to catch what gets past the skirt, and expect to sweep or vacuum the area daily with active birds.
Maintenance, seasonal protection, and keeping it clean long-term
A good maintenance routine is what keeps a well-assembled cage safe for years. Set up three cleaning levels: daily, weekly, and monthly.
- Daily: swap tray liner, wipe food and water bowls with hot water, spot-clean any droppings on perches or bars
- Weekly: remove all accessories and wash them in hot water with dish soap, scrub the tray and grate, wipe down all bar surfaces with a diluted white vinegar solution (1 part vinegar to 3 parts water) and rinse thoroughly
- Monthly: do a full disassembly of the tray area, check every bolt and fastener for looseness or rust, sand and touch up any bare metal, check all latch mechanisms for wear
For seasonal protection, the main concerns are cold drafts in winter and heat exposure in summer. In winter, a breathable cage cover used at night helps retain warmth without blocking airflow. Don't wrap the cage in plastic or thick blankets since that reduces air circulation and can cause respiratory issues. In summer, keep the cage out of direct afternoon sun, and if indoor temperatures regularly exceed 85°F, use a small fan directed at the wall near (not directly at) the cage to improve air circulation.
Pest-proofing is an ongoing task. Red mites and feather mites can colonize cage seams and tray gaps, especially in warmer months. Every monthly cleaning should include a close inspection of all joints and seams with a flashlight. A fine white or gray powder in seams that wasn't there before is a red mite warning sign. Remove the bird, clean the cage thoroughly with a bird-safe mite spray, let it dry completely in sunlight if possible, and treat the bird separately with a vet-recommended product.
If you're working with a specific brand and want detailed guidance for that model, the assembly process for brands like Yaheetech, MCage, and ZENY follows the same general sequence covered here but has model-specific latch hardware, tray designs, and panel configurations that are worth looking up individually. For more detailed Yaheetech bird cage assembly instructions, use the model-specific manual that matches your exact parts count and latch hardware. For ZENY bird cage assembly instructions, use the model-specific manual that matches your exact parts count and latch hardware. Older cages from makers like Hendryx have their own quirks around dating and identifying the correct replacement parts, which is a separate process from standard modern cage assembly.
The bottom line is this: a safe, stable bird cage comes down to knowing your exact model, counting parts before you start, following the build order (base first, then sides, top, doors, hardware), and doing a shake test before a single perch goes in. Stick to that sequence, fix anything that isn't tight or square before moving forward, and you'll have a setup that's both safe for your bird and easy to maintain for years.
FAQ
What should I do if I only realize mid-assembly that I downloaded the wrong model’s bird cage assembly instructions?
Stop immediately and keep the parts you have sorted by type. Compare your current hardware count and any door latch pieces to the correct manual before tightening anything permanently. Tightened misaligned panels often force the wrong fasteners to “work” later, creating leftover parts and a cage that wobbles in the shake test.
How can I tell whether a missing part is actually a “replacement part request” versus something I can skip?
Use the manual’s hardware diagram and match each fastener location (especially tray locks, door latches, and caster brakes). If the missing piece is part of a locking mechanism, do not substitute. For minor decoration hardware, you may be able to omit it, but frame, hinge, latch, and tray retention parts should always be replaced if absent.
Why does my assembled cage wobble even after I tightened everything once?
Recheck caster seating (casters must be fully threaded and the top frame must sit flush on the base). Then confirm the tray runners are aligned and that the tray locks or clips are engaged. A loose tray or one runner not fully seated can make the whole cage feel unstable when you press near the top.
Is it okay to use a power drill to speed up bolt tightening for bird cage assembly instructions?
It’s not recommended. A drill can strip threads or crack plastic corner connectors, and over-torquing can pull door frames out of square. If you’re using tools, stick to hand control (screwdriver or adjustable wrench) and tighten until snug, then stop, after confirming the panel is aligned.
What’s the safest way to smooth sharp wire burrs or cut edges before my bird tests the cage?
Only smooth from the outside edge toward the metal, so you don’t create new sharp points on the inner face. Focus on door frame areas and tray edges, then wipe the surfaces with a damp cloth to remove metal dust before reintroducing the bird.
My cage has multiple doors, but one door won’t latch on its own. What should I check first?
First, verify the latch bar is fully seated in its sleeve or lock housing, then check that the hinge pin is seated to the same depth as the other door’s hinge. If the door shifts laterally, loosen and realign the door hinges or frame connection points rather than forcing the latch.
How tight should I make wing nuts and fasteners on a bird cage during assembly?
Tight enough to prevent any panel movement when you test by lightly pushing the frame, but not so tight that plastic connectors deform or bolts pull through the holes. A good workflow is finger-tight alignment on each panel, fully tightening only after all fasteners on that panel are correctly seated.
Can I assemble the cage on carpet, or do I need a hard floor?
Hard, flat flooring is strongly preferred. Carpet can hide wobble during the shake test and encourages rocking while you’re tightening bolts. If you must work on soft flooring, use a rigid board under the cage footprint so the cage rests on a level surface during tests.
Do I need to clamp or hold parts while tightening, and is a second person really necessary?
A second person is especially helpful when lifting the top frame into place, because one-sided pressure can twist the connection points. Even with help, finger-tighten first, then tighten in a pattern (near-to-far or alternating sides) so the frame closes squarely.
What spacing or placement rules should I follow when installing perches and bowls to avoid sanitation problems?
Place perches so that droppings do not fall directly into food and water, and keep bowls at a height the bird can reach while standing comfortably on a nearby perch. If you use bowl holders, verify the bowl cannot be flipped by a curious beak, since loose bowls are a common contamination and injury cause.
What tray liner is safest, and how often should I change it for different bird sizes?
Plain unscented paper is the safest general option, avoid cedar, scented liners, and printed-ink paper. Change liners more frequently for larger messy birds, small birds can often be managed at a shorter interval, but the trigger should be visible buildup or odor, not just the calendar.
If there are gaps around the tray area, is silicone sealant safe and where should I apply it?
A thin bead of non-toxic silicone can help close persistent gaps, but only on the exterior side of the tray frame. Never apply sealant inside the cage where a bird could chew it, and allow full cure time before introducing the bird.
How do I prevent pests like mites if my cage seems fully assembled?
Do not treat pest control as a one-time setup step. Include a monthly flashlight inspection of seams and joints, look for new fine white or gray residue, and if you find mites, remove the bird, clean the cage thoroughly, fully dry it, then treat the bird separately with vet-recommended products.
What’s the fastest way to confirm the cage is ready before adding accessories?
After assembly, run the shake test and a structured door test first (open and close every door, check latch engagement). Then do a final interior hand sweep for sharp edges, and only then install perches, bowls, and toys. This prevents rework later when you discover a latch misalignment.
Next Article
Yaheetech Bird Cage Assembly Instructions Step by Step
Step-by-step yaheetech bird cage assembly guide: parts check, build frame and doors, fix wobble, safe setup, and tips.