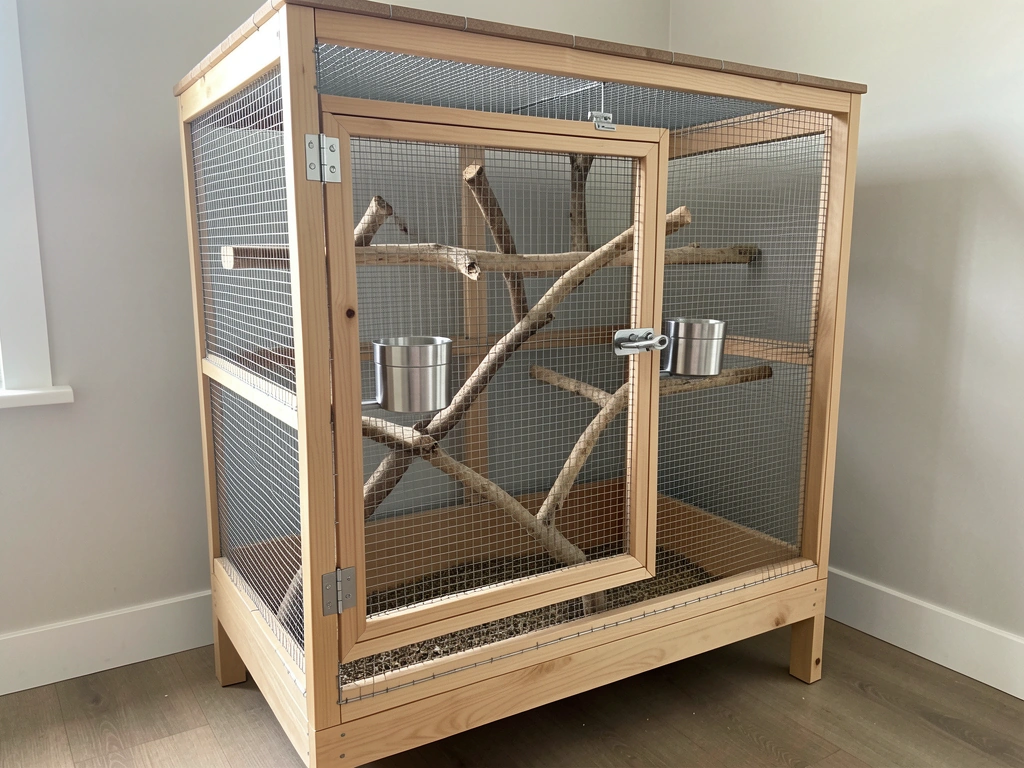
Yes, you can turn a cabinet into a bird cage, and done right it makes a roomy, attractive home for your bird. The key is replacing solid panels with safe wire mesh, building a secure front door, adding proper ventilation, lining the bottom with a removable tray, and making sure every material you use is non-toxic. It takes a weekend and some careful planning, but the result is a custom enclosure that beats most store-bought options in size and style. For a full walkthrough of building your own large enclosure, follow these steps on how to make a large bird cage.
How to Turn a Cabinet Into a Safe Bird Cage

Maya Bennett
22 Mar 2026
Planning your cabinet-to-bird-cage conversion
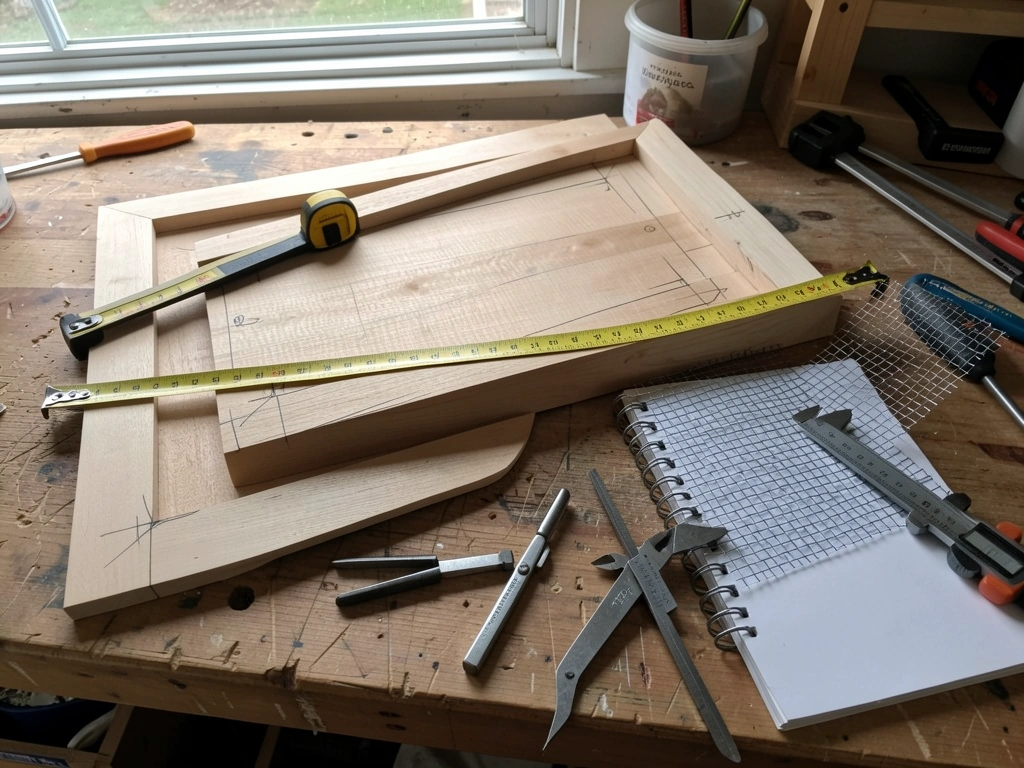
Before you buy a single piece of hardware, spend an hour with a tape measure and a notepad. The planning stage is where most DIY cage builds go wrong, and fixing a mistake after you've cut into a cabinet is frustrating and expensive.
Pick the right cabinet
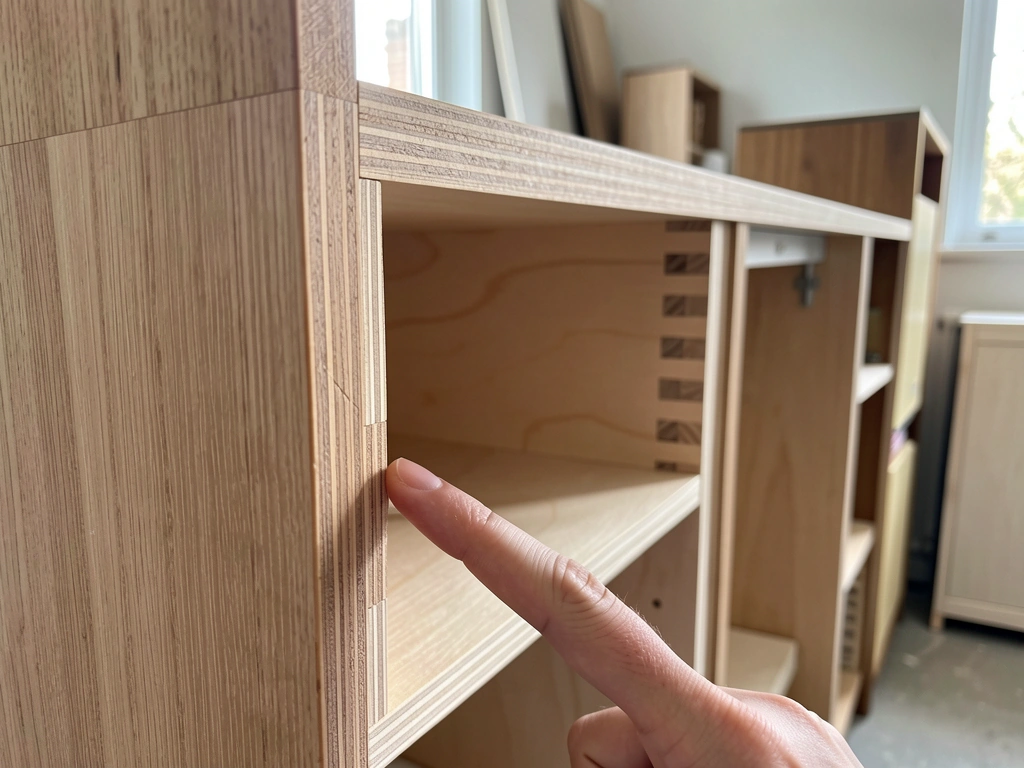
A solid-wood or plywood cabinet with no particleboard or MDF is your best starting point. Particleboard and MDF are bonded with formaldehyde-based glues that off-gas at levels that can seriously harm birds. Look for dovetail or mortise-and-tenon joinery, or visible plywood layers at cut edges. Armoires, pie safes, and old wooden display cases all work well. The cabinet needs to be structurally sound because you'll be opening up large sections of it, and a wobbly frame will only get wobblier.
Match the size to your bird species
The cabinet needs to be genuinely large enough for your bird to stretch, climb, and flap. A good rule of thumb: the cage should be at least twice the wingspan of your bird in width, and tall enough for several perches at different heights with clearance above the top perch. Bigger is always better here. If you're converting a piece for a large parrot, check out guidance on making a large bird cage before you finalize dimensions, because scale changes some of the structural decisions.
Plan your airflow before you pick up a drill
Birds need a constant supply of fresh air, and a converted cabinet is essentially a box that will trap stale air and feather dust if you don't wire it correctly. Plan to replace at least two opposing sides, or the sides plus the top, with wire mesh so air can move through. Never wire only one face and leave the other three solid. The CDC recommends ventilation systems that provide continuous fresh air and aren't blocked by dust, feathers, or waste, and that principle applies directly here. Also decide now where the cage will live: away from the kitchen (cooking fumes and PTFE non-stick cookware fumes are lethal to birds), away from drafts, and in a room with natural light if possible.
Sketch your door and panel layout
Draw the front of the cabinet and mark where you want the main access door, any feeding doors, and which panels become wire sections. The front door should be large enough for you to reach every corner of the cage for cleaning. A full-height front door that splits in the middle (top and bottom halves opening separately) is practical for large cabinets because it gives access without the bird having a full open doorway to escape through. Mark hinge positions on your sketch before cutting anything.
Choosing safe materials and bar spacing
Material safety is not optional. Birds chew, preen against bars, and breathe the air inside a small enclosed space all day. Getting this wrong causes slow poisoning or acute toxicity crises.
The wire mesh: what to use and what to avoid
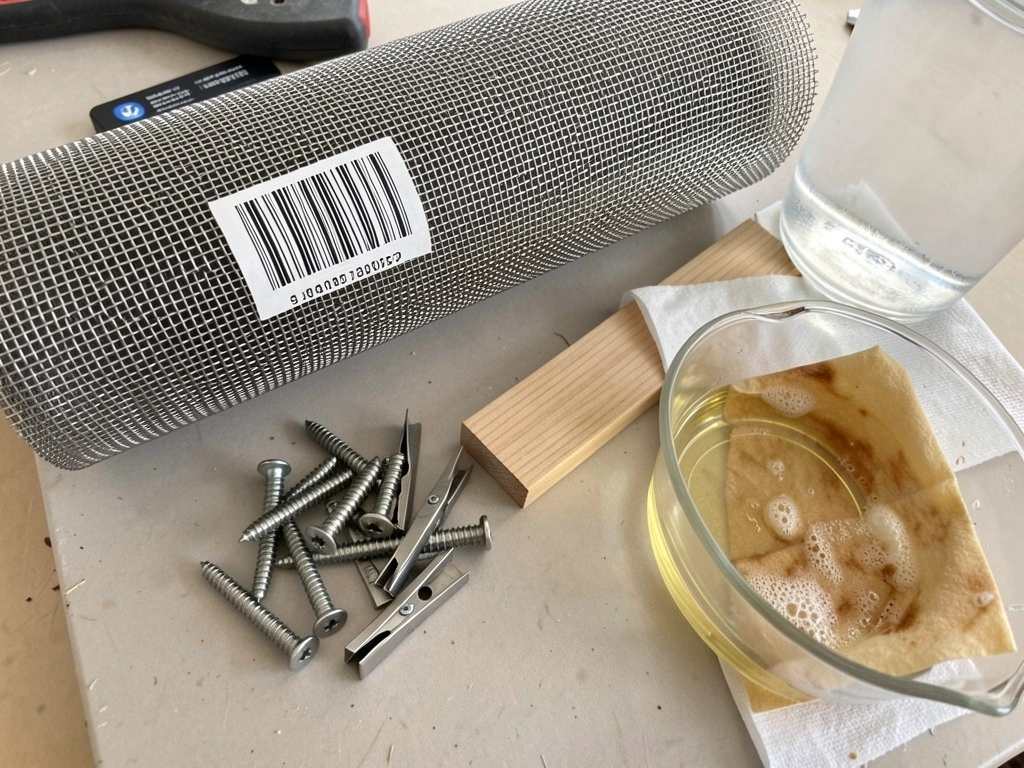
Stainless steel hardware cloth or welded wire is the gold standard. It is non-toxic, zinc-free, lead-free, and won't corrode. Grade 304 or 316 stainless steel are both appropriate. Avoid galvanized (zinc-coated) wire if at all possible. Galvanized mesh poses a zinc toxicity risk when birds chew it or ingest flakes of the coating, a condition sometimes called 'new wire disease.' If stainless steel is out of your budget and you decide to use galvanized mesh anyway, scrub it thoroughly with a white vinegar solution, rinse and dry it completely, and inspect it for loose flakes before installation. Understand that this reduces risk but does not eliminate it. Also avoid poly-coated or PVC-coated wire mesh: birds chew the thermoplastic coating and ingesting it is dangerous.
Bar spacing by species
Bar spacing is the single most critical measurement in this project. Too wide and your bird escapes or gets its head stuck. Too narrow and small birds can still get toes or beaks caught. Use the chart below as your guide.
| Bird Species | Safe Bar Spacing |
|---|---|
| Finches, Canaries | 1/4 inch to 3/8 inch |
| Budgerigars (Budgies), Parrotlets | 1/2 inch |
| Lovebirds | 1/2 inch maximum |
| Cockatiels, Small Conures | 1/2 inch to 5/8 inch |
| Medium Parrots (Caiques, Senegals) | 3/4 inch |
| Large Parrots (Amazons, African Greys) | 1 inch to 1.5 inch |
| Macaws | 1.5 inch to 2 inch |
When buying hardware cloth, the measurement on the label refers to the opening size, which is what you want. A 1/2-inch hardware cloth has 1/2-inch openings. Double-check a few spots on any roll with a ruler before you buy, because manufacturing tolerances vary.
Wood, fasteners, and finishes
The cabinet's wood must be untreated and free of chemical preservatives, stains, or unknown finishes. If the cabinet has a painted or lacquered finish on the interior, strip and sand it before the bird moves in. Any new wood you add (for framing, perch mounts, or a tray rail) should be an untreated, bird-safe species. Cherry, maple, apple, and birch are all safe. Avoid cedar, pine (aromatic varieties), and any pressure-treated lumber. For fasteners, use stainless steel screws and staples, not galvanized ones. Hardware (hinges, latches, hooks) should be stainless steel or nickel-plated and explicitly lead-free and zinc-free.
Coatings and sealants
If you want to paint or seal the exterior of the cabinet, use a water-based, non-toxic paint, let it cure fully (at least two weeks in a well-ventilated space), and never apply it to any surface the bird can reach. The interior should be left bare, sealed with food-safe beeswax, or finished with a water-based sealant that is fully cured and confirmed bird-safe. When in doubt, leave wood bare on the inside.
Step-by-step build process
Work in a well-ventilated area, wear safety glasses when cutting wire and wood, and gloves when handling cut hardware cloth (the edges are razor-sharp).
Step 1: Strip the interior
Remove all shelves, hardware, hinges, and any interior fittings. Sand the interior surfaces to remove old finish, splinters, and rough spots. Wipe down with a damp cloth and let it dry completely. If you find MDF or particleboard components in the frame itself, this is the moment to decide whether to replace them with plywood or solid wood, or to start with a different cabinet.
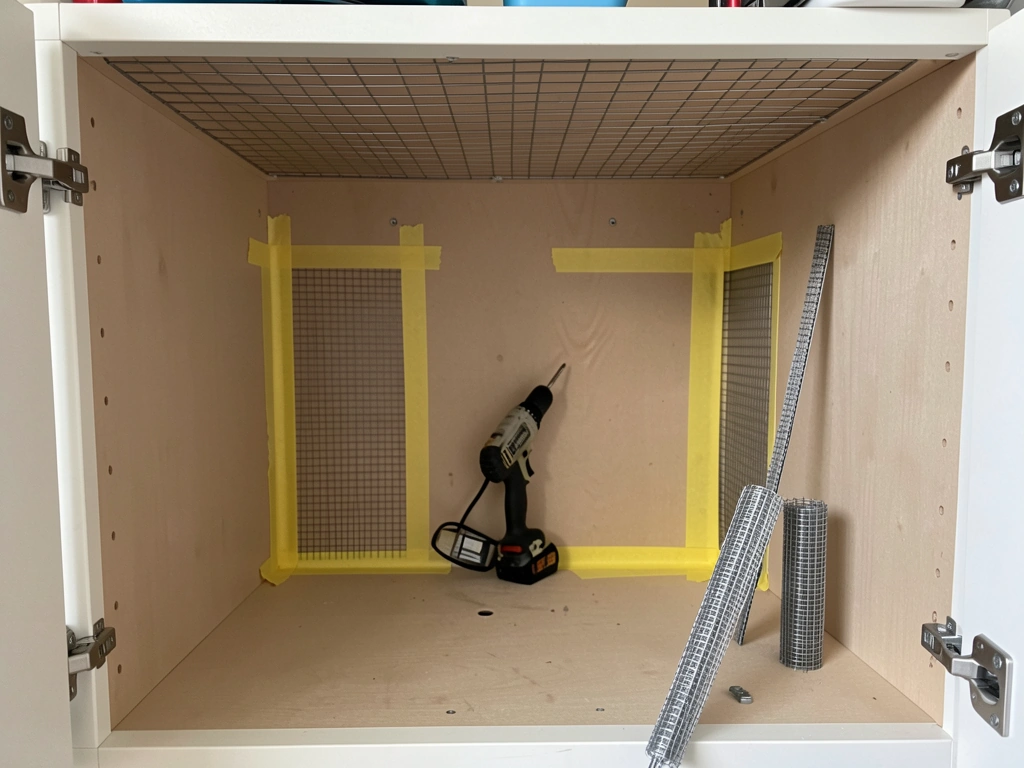
Step 2: Cut out the panel openings
Using your sketch as a guide, use a jigsaw to cut out the sections of solid panel that will become wire. Leave at least a 2-inch border of solid wood around every opening so you have a sturdy frame to staple and screw the wire mesh into. Cut slowly and follow your pencil lines. For side panels, cut the entire interior of the panel out, leaving only the border frame. For the top, cut a large central rectangle and leave the corners.
Step 3: Line the interior with wire mesh
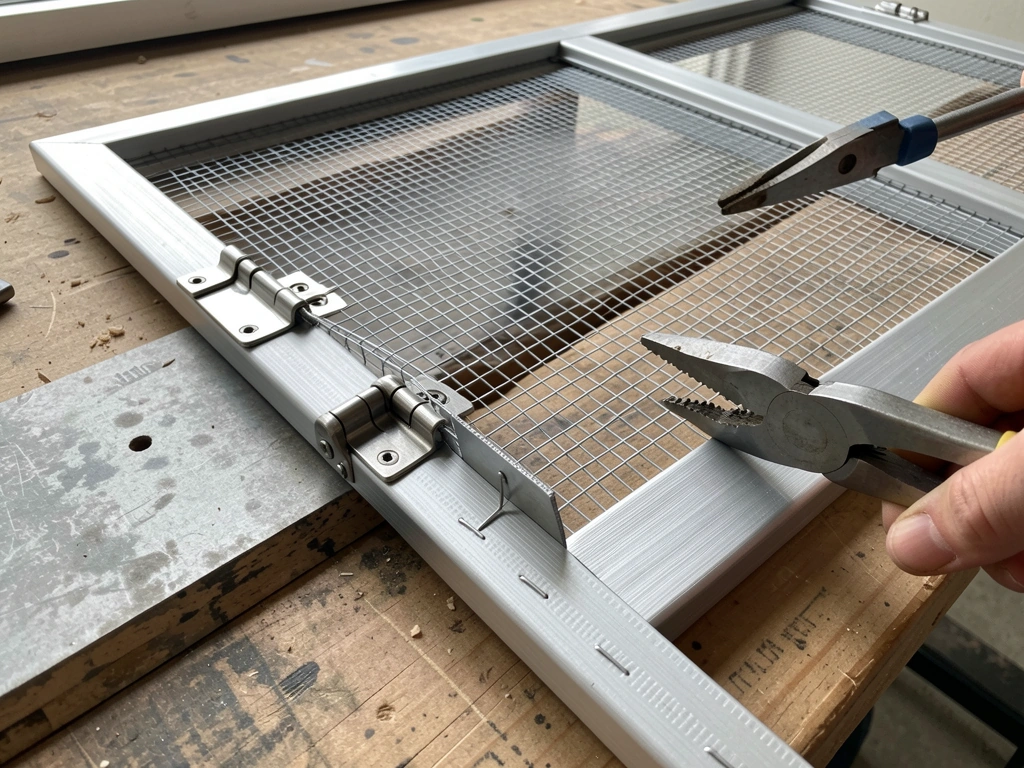
Cut your stainless steel hardware cloth slightly larger than each opening (about 1 inch overlap on all sides). Fold the cut edges over using pliers or a seaming tool so no raw wire edge is exposed inside the cage. Staple the mesh to the wood frame using stainless steel staples, spacing them every 1.5 to 2 inches. Then add a thin wooden trim strip over the stapled edge and screw it down. This sandwich approach, wire between wood frame and trim strip, locks the mesh firmly and covers any remaining sharp edges. Run your bare hand slowly over every inch of mesh inside the cage to feel for sharp points.
Step 4: Build the front access door
For a large cabinet, build the front door as a framed wire panel rather than a solid panel with a hole cut in it. Cut two pieces of 1x2 or 1x3 untreated hardwood for each door (top/bottom and two sides), join them with screws at the corners, stretch mesh across the frame, and fasten it the same way you did the side panels. Hang the door using heavy-duty stainless steel hinges, one at the top and one at the bottom for full-height doors. Make sure the door swings outward (toward you) so the bird can't push it open from inside. Test that the door sits flush and there are no gaps at the edges wider than your target bar spacing.
Step 5: Add ventilation at the top
Heat and stale air rise, so good ventilation at the top of the cage is essential. If the cabinet has a solid top, cut a large ventilation rectangle and cover it with mesh the same way you did the sides. If the cabinet has a thin top panel, replace the entire top with a wire-covered frame. The goal is cross-ventilation: air enters from one wired side, circulates, and exits from another wired section or the top.
Step 6: Install the droppings tray rail
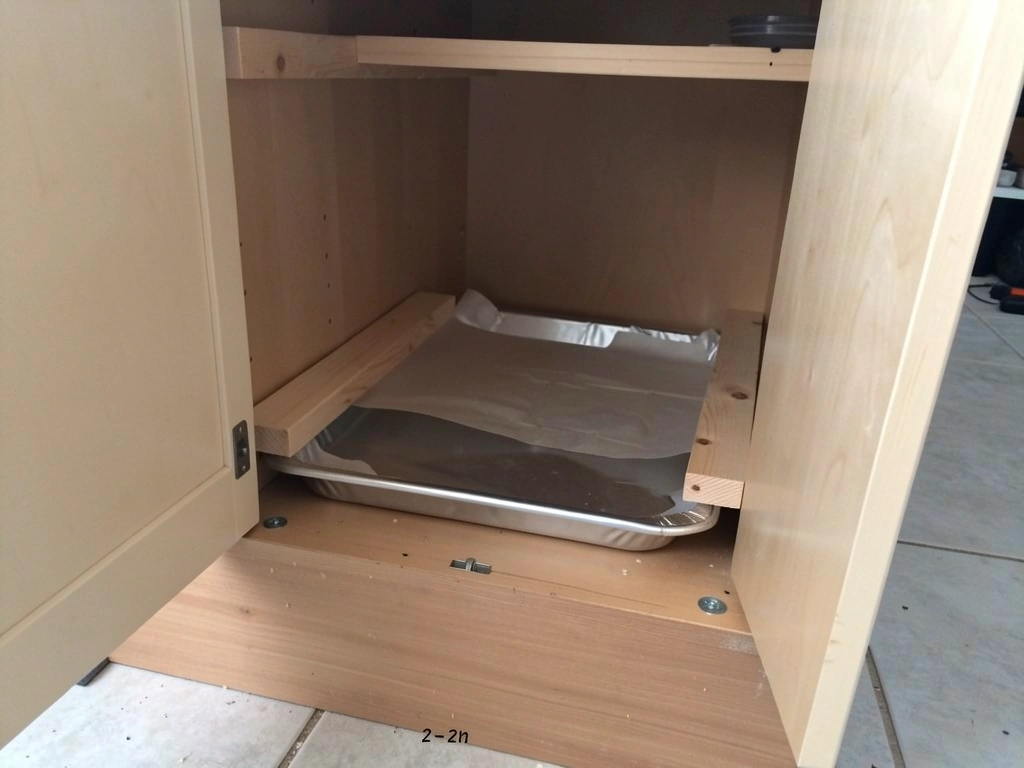
A removable tray at the bottom is non-negotiable for hygiene. Cut two thin wooden runners (like drawer slides) and screw them to the lower interior sides of the cabinet, parallel to each other, about 1 to 2 inches above the floor. These are the rails your pull-out tray slides along. The tray itself can be a sheet of aluminum flashing, a baking sheet, or a custom-cut piece of galvanized steel pan (keep the tray surface below the bird's reach if possible, and line it with paper rather than letting the bird sit on bare metal). Test that the tray slides in and out smoothly without leaving a gap the bird could escape through when it's removed.
Installing perches, trays, and essential cage accessories
A wired cabinet is just a box until you furnish it. How you set things up inside directly affects your bird's physical health, especially its feet and beak.
Perches
Use natural wood branches from bird-safe tree species as your primary perches. Vary the diameter: perches of different thicknesses exercise different parts of the foot and prevent pressure sores. A general guideline is that the bird's foot should wrap about two-thirds of the way around the perch. Mount perches at different heights using eye-bolts or stainless steel screws driven through the wire into a wood backing block. Do not place a perch directly above a food bowl (droppings contaminate food fast) and don't position the highest perch so close to the top wire that the bird's head or tail presses against it.
Food and water placement
Mount food and water cups on the wire at a mid-height level, accessible from a nearby perch. Use stainless steel cups with clip-on holders that attach to the mesh. Place them away from perches above (to avoid contamination) and near a feeding door if you added one, so you can swap cups without fully opening the main door. Daily liner replacement under food bowls helps you spot changes in droppings, which is one of the earliest signs of illness.
The droppings tray and liner
Line the pull-out tray daily with unbleached paper, paper bag material, or commercial pre-cut cage liners. Avoid cedar shavings, corn cob bedding, or cat litter, all of which can harbor bacteria and mold or cause respiratory issues if inhaled. The smooth, non-absorbent surface of a metal tray makes it easy to see droppings clearly, which lets you monitor your bird's health at a glance. Pull the tray out, slide in a fresh liner, and slide it back every morning.
Toys and enrichment
Hang toys from stainless steel quick-links or nickel-plated hooks clipped to the top wire. Avoid any toy with zinc die-cast parts, lead weights (found in some older bird toys), or fraying rope that the bird could get tangled in. Rotate toys regularly to keep the bird engaged. Leave enough clear space for the bird to move between toys without getting stuck or injured.
Safety checks: escape prevention, coatings, and toxicity
Before your bird spends a single night in the new cage, run through every item on this checklist. Don't rush this part.
- Check every inch of mesh for protruding wire ends, gaps, or loose staples. Press your hand firmly across the whole surface.
- Verify bar spacing with a ruler at multiple points across every wired panel. Spacing must be consistent and within range for your species.
- Test the door latch by pulling, pushing, and wiggling it hard. Birds are surprisingly strong and persistent. If you can open it easily with one hand, your bird might too. Add a carabiner or a secondary latch.
- Check all four corners of the door frame for gaps when the door is closed. Any gap wider than your target bar spacing is an escape risk.
- Inspect every interior wood surface for splinters, rough edges, or exposed fastener tips.
- Confirm that no painted, lacquered, or chemically treated surface is accessible to the bird.
- Smell the inside of the cage. It should have no chemical odor. If it does, give it more curing time with the doors open in a ventilated room.
- Make sure the cabinet is stable on the floor or its stand. Try pushing it from different directions. It should not rock.
- Remove the droppings tray and check the gap it leaves. The bird should not be able to squeeze into that gap or escape through the tray opening.
Heavy metal toxicity from zinc, lead, or copper is one of the most serious risks in a DIY cage build. If you used any galvanized components and treated them with vinegar, be aware that this reduces surface zinc but does not make galvanized wire fully safe for heavy chewers. Large parrots especially should never be housed against galvanized mesh long-term.
Cleaning, maintenance, and daily care routine
A cabinet-style cage has more nooks than a standard cage, so you need a deliberate cleaning routine to prevent mold, bacteria, and feather dust buildup.
Daily tasks
- Pull out the droppings tray, discard the liner, wipe the tray surface with a damp cloth, and replace with a fresh liner.
- Wash food and water cups with hot soapy water and rinse thoroughly.
- Wipe down any perches that have droppings on them with a damp cloth.
- Do a quick visual check of the wire panels and door latch.
Weekly tasks
- Scrub the pull-out tray with hot water and a bird-safe disinfectant (diluted white vinegar works well; rinse and dry fully before replacing).
- Wipe down the interior wood surfaces with a barely damp cloth. Don't soak wood.
- Check the wire for corrosion, bent sections, or loose fasteners.
- Rotate perches if any show heavy soiling or wear.
- Inspect toys for damage, fraying, or broken metal parts.
Monthly tasks
- Do a full interior scrub: remove everything, clean all surfaces, rinse, and let dry completely before putting anything back.
- Check the hinges and latch hardware for rust or loosening screws.
- Inspect the wood frame for any signs of the bird chewing through to an unsafe layer.
- Check ventilation openings for feather and dust buildup that could restrict airflow.
A cabinet cage is harder to clean than a standard bar cage, and that is honestly its biggest practical drawback. The front door and the pull-out tray need to make every corner accessible. If you find yourself unable to reach a corner during cleaning, add a second small access door before you go any further.
Common mistakes and troubleshooting
Poor airflow
If only one side of the cabinet is wired and the others are solid, air won't circulate. The fix is to add wire to at least one more panel, ideally the opposite side or the top. You'll know airflow is a problem if the interior feels humid or smells stale within a few hours of the bird being inside.
Wrong bar spacing
Using hardware cloth with openings that are too large is the most common and dangerous mistake. If you bought the wrong size, do not try to stretch it to work. Replace it. Mesh is not expensive compared to a vet bill for a bird with its head stuck in a bar gap.
Unstable doors
A door that sags, warps, or doesn't close flush is an escape route. Sagging usually means the hinges are too small or spaced too far apart. Add a third hinge in the middle of tall doors. Warping means the wood frame wasn't properly dried or wasn't thick enough. Replace with heavier stock (1x3 instead of 1x2) and allow any wood to fully acclimate before building.
Non-removable waste tray
If the tray doesn't slide out easily or the gap it leaves is large enough for the bird to escape into, you have two problems at once: dirty cage and escape risk. Rebuild the tray rail system so the tray slides smoothly and the gap when the tray is removed is either blocked by a solid panel the bird can't move, or too small for the bird to pass through.
Toxic materials discovered late
If you realize after building that some component might be unsafe (galvanized fasteners you didn't notice, a lacquered shelf you missed, a mystery glue in a joint), don't put the bird in until you've addressed it. Strip what you can, replace what you can't strip safely, and give the whole structure a solid week of off-gassing in fresh air before the bird goes in. It's frustrating to wait, but it's far better than dealing with heavy metal or chemical poisoning.
The bird chews through the wood frame
Large parrots, especially macaws and cockatoos, will chew any wood they can reach. If the bird is getting through the door or panel frame, add a metal J-channel or aluminum angle trim around the edges of the frame to protect the wood. This also gives you a cleaner look on the exterior.
Converting a cabinet into a bird cage is absolutely a doable weekend project, and the result is genuinely better than most commercial cages in terms of space and character. The work is in the details: getting the mesh right, building a door that actually latches, setting up real ventilation, and checking every surface for toxicity before the bird goes in. Get those things right and you'll have a cage your bird can live in safely for years. If you want to go even bigger with the project, looking into armoire conversions is a natural next step since the same principles scale up well with a larger structure. If you are starting from an armoire, apply the same approach for safe wire mesh, ventilation, and escape-proof doors how to turn an armoire into a bird cage.
FAQ
Can I convert any cabinet, even if it has drawers or shelves built in?
You can use cabinets with drawers or shelves, but you should remove all interior hardware and fittings first. Then re-evaluate the structure once the interior is sanded back to clean wood. If the shelving creates solid areas that you cannot wire around for airflow, remove or redesign those sections so at least two opposing sides, or sides plus the top, become mesh.
What bar spacing should I use when I do not have a chart?
Start by matching mesh opening size to your bird’s smallest vulnerable parts (head, beak, and toes). If you are unsure, oversize the mesh tightness rather than loosening it, because stuck-in gaps are a higher risk than reduced visibility. When in doubt, buy a smaller opening hardware cloth than you think you need and verify the fit by measuring openings directly off the label.
Is it safe to keep the cabinet’s existing paint or varnish on the inside?
No, you should not rely on unknown interior finishes. Any interior paint, lacquer, stain, or bonded coating should be stripped and sanded away before installation. Even “sealed” finishes can off-gas or be chewed off, so leaving the interior bare or finished only with products you know are fully cured and bird-safe is the safer approach.
How long should I air out the cabinet after building before putting my bird inside?
If you used any new wood, sealants, vinegar-scrubbed galvanized parts, or paint anywhere the bird can reach, wait at least a week in fresh air before housing the bird. After that week, do a quick smell and surface check (no chemical odor, no tackiness, no visible residue). If anything still smells strong or feels sticky, keep airing and re-check.
What should I do if I’m not able to make full-height access to clean every corner?
If you cannot reach deep corners during a normal cleaning session, add a second small access door before the bird moves in. A single front door plus a pull-out tray often still leaves hard-to-reach nooks in cabinet corners, and those areas can develop mold and odor even if the rest looks clean.
Do I need a removable tray if I already have a lined bottom?
A removable tray is still important because it lets you fully clear droppings and liners daily without disturbing perches or food cups. A simple liner trapped on the bottom often stays damp at the edges and is harder to monitor visually for changes in droppings.
Can I use a galvanized tray or galvanized pans inside the cage?
You should keep the metal tray surface out of the bird’s direct reach if possible, and lining is strongly preferred. If a bird can reach and chew or sit on bare metal, galvanized surfaces create a higher risk scenario than lined or non-chewable surfaces. Use a liner material and design the layout so the bird cannot climb onto the tray itself.
What if my cabinet frame flexes after cutting out openings, will it still be safe?
Flex is a warning sign. If the frame wobbles after removing panels, reinforce the border framing and hinge/door mounting points before installing wire mesh and hanging a door. A sagging or shifting door is also an escape risk, so address structural looseness immediately rather than finishing and hoping it holds.
How can I prevent rust on screws, hinges, and trim over time?
Use stainless steel hardware wherever it contacts the cage interior, especially around doors and mesh edges. If you live in a humid environment, choose stainless steel for any exterior trim exposed to mist from cleaning. Avoid mixing metals, because galvanic corrosion can accelerate rust around joints.
Can I place the cage near windows or in natural light if I avoid the kitchen?
Natural light is helpful, but avoid direct harsh sun that can overheat the cabinet enclosure. Also make sure the cage is not in a draft path from HVAC vents, exterior doors, or ceiling fans. Aim for stable room temperature, and use indirect light if your cabinet receives intense morning or afternoon sun.
My bird shows interest in chewing the wooden trim around the wire, what should I change?
Add a protective metal barrier around any wood that is within reach of heavy chewers, such as J-channel or aluminum angle trim at the wire frame edges. Then re-check that the wire is fully trapped in a tight sandwich construction so there are no loose edges the bird can pry up.
What cleaning routine should I use for the mesh and cabinet surfaces to avoid respiratory dust?
Dry sweeping tends to kick up feather dust and debris. Instead, wipe down interior surfaces with a damp cloth and replace liners daily, especially under food and water areas. For mesh, remove droppings promptly and keep cleaning agents bird-safe, fully rinsed, and used only after confirming the surfaces are dry and odor-free.
If I used vinegar on galvanized mesh, can I still keep it long-term for a macaw or cockatoo?
You should treat vinegar-cleaned galvanized wire as reduced risk, not as equivalent to stainless steel. For strong chewers like macaws and cockatoos, galvanized components should be avoided for long-term housing, because chewed fragments and coating wear can still create heavy metal exposure risk.
Next Article
How to Make a Bird Cage Tray: DIY Step-by-Step Guide
DIY guide to measure, cut, and finish a bird cage tray that fits tight, catches droppings, and stays spill-free.
