Yes, you can absolutely build a safe, functional bird cage at home today. The key is using the right wire gauge and spacing, cutting clean joints, and doing a proper safety check before any bird goes inside. Whether you want a simple wire cage for a budgie, a small enclosure for a canary, or a basic play cage for a toy or display, this guide walks you through every step, from picking the right size to the final wipe-down before your bird moves in.
How to Make a Bird Cage at Home With Wire DIY Steps

Maya Bennett
22 Mar 2026
Choosing the Right Cage Size and Style
Size is the most important decision you'll make before cutting a single wire. Bigger is always better, but you need to hit the minimum first. For small birds like budgerigars, cockatiels, lovebirds, and parrotlets, the Merck Veterinary Manual recommends a minimum of 20 x 20 x 30 inches. Merck Veterinary Manual lists minimum cage dimensions of 20 × 20 × 30 inches and specifies bar spacing of 0.5 inch for budgerigars, cockatiels, lovebirds, and parrotlets. If you're building for canaries or finches, a long horizontal cage works better than a tall one, since these birds fly side to side rather than climb. For a small home build meant as a travel or temporary cage, you can go smaller, but don't drop below 16 x 16 x 20 inches for a single small bird and treat it as a short-term space only.
Style comes down to shape and door placement. A rectangular box cage is the easiest to build from scratch and the most practical. Round cages look nice but stress birds out and waste interior space. Stick with a rectangle or square footprint. Decide early whether you want a front-opening door, a top-opening hatch, or both. For a beginner build, a single front door with a slide latch is the simplest to execute safely.
If you're thinking about going much larger, or converting a piece of furniture into a walk-in aviary style enclosure, that's a different project scope. A large DIY enclosure or a cabinet conversion each come with their own structural considerations, which are worth exploring separately once you've nailed the basics here.
Materials and Tools You'll Need (Especially the Wire)
The wire is the single most critical material choice in this whole project. Get it wrong and you risk zinc or lead poisoning, which is fatal to birds. Here's what to look for and what to avoid.
Safe Wire Options
- Stainless steel welded wire mesh: the gold standard. It's non-toxic, durable, and easy to clean. Look for 16 or 19 gauge.
- Powder-coated galvanized wire: acceptable if the coating is intact and bird-safe (no lead or zinc in the coating). Inspect it carefully before using.
- Avoid plain galvanized wire that hasn't been powder-coated. The zinc coating can cause zinc poisoning, especially with chewing birds like parrots.
Bar spacing matters as much as material. For budgies, canaries, parrotlets, and lovebirds, LafeberVet recommends spacing of 3/8 to 7/16 inch. The Merck Veterinary Manual caps bar spacing at 0.5 inch (half an inch) for this group of birds. Don't go wider than that. A bird that gets its head stuck in wire spacing is in serious danger. Use a ruler or caliper to verify your mesh before you buy it.
Full Materials List
- Stainless steel or safe powder-coated welded wire mesh, 16 or 19 gauge, with 3/8 to 1/2 inch grid spacing
- Solid wood or PVC pipe for the frame (wood is easier to work with for beginners)
- Wire cutters or aviation snips (for cutting mesh cleanly)
- Pliers, including needle-nose and standard
- J-clips or hog rings plus J-clip pliers (for joining wire panels)
- Small hinges (at least 2 per door) and a slide bolt or cage latch
- Staple gun with 1/2 inch staples (if attaching wire to a wood frame)
- Sandpaper (80 and 220 grit for smoothing wood edges)
- Bird-safe sealant or paint (water-based, non-toxic, fully cured before use)
- Measuring tape, marker, and safety gloves
A note on tools: if you don't have J-clip pliers, you can use small zip ties rated for outdoor use as a backup for joining mesh panels, but clip off the tails flush so there are no sharp points your bird can catch a toe on. J-clips are stronger and look cleaner, though, so they're worth picking up.
Step-by-Step: Making a Simple DIY Bird Cage
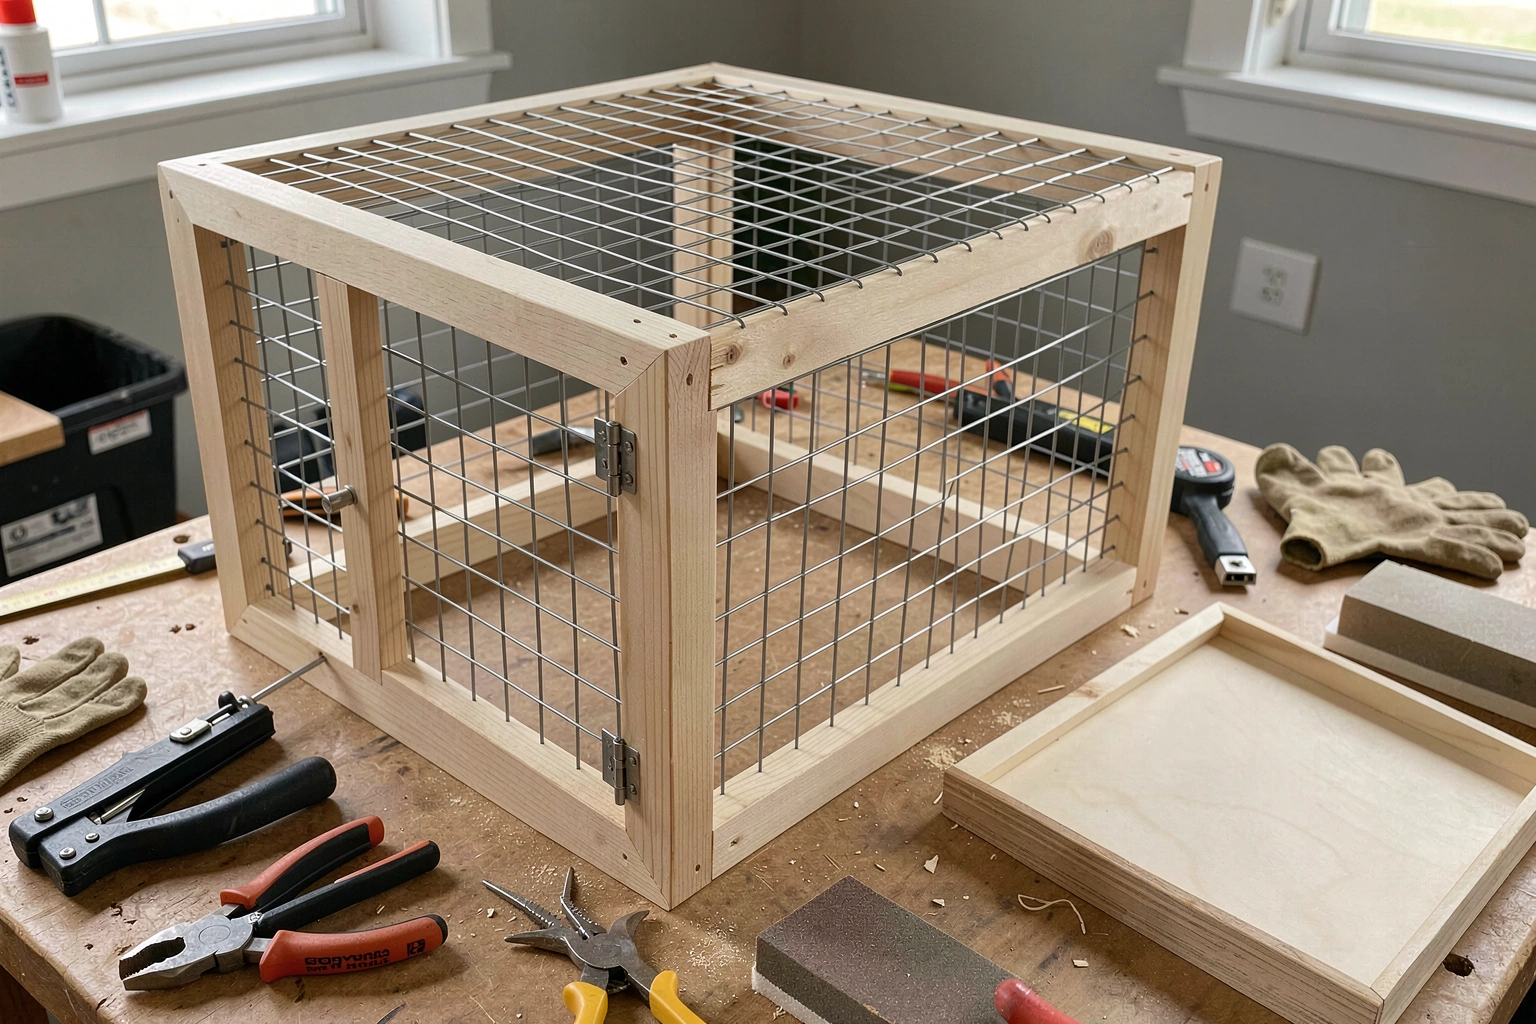
This version uses a wood frame with wire mesh panels. It's the most beginner-friendly approach and gives you a sturdy, good-looking result. Target size for this build: 24 x 20 x 30 inches (width x depth x height), which comfortably meets the minimums for a pair of budgies or one cockatiel.
- Cut your frame pieces. Cut eight lengths of 1x2 pine or poplar: four at 24 inches (top and bottom horizontals, front and back), four at 20 inches (side horizontals), and four at 30 inches (vertical corner posts). Sand all cut edges to 220 grit smoothness before assembly.
- Assemble the top and bottom rectangles. Screw the 24-inch and 20-inch pieces together at the corners using wood screws and wood glue. You'll end up with two rectangular frames, one for the top and one for the bottom.
- Attach the corner posts. Stand the four 30-inch verticals upright and screw them to the corners of your bottom rectangle. Then attach the top rectangle to the tops of the posts. Check for square with a measuring tape across the diagonals (they should be equal).
- Cut your wire mesh panels. Using your wire cutters or aviation snips, cut five panels of wire mesh to fit each face of the frame (front, back, two sides, and top). The bottom will be the tray area, covered separately. Cut carefully and wear gloves, because cut wire ends are sharp.
- Attach the wire panels. Staple the mesh to the outside face of the wood frame using your staple gun, every 2 to 3 inches around the perimeter. Pull the mesh taut as you go so it doesn't sag. For extra security, run a thin strip of wood (called a batten) over the stapled edge and screw it down.
- Cut out the door opening. On the front panel, use wire cutters to cut a door opening roughly 6 x 8 inches. Fold or file any sharp wire ends inward and flat.
- Build and hang the door. Cut a piece of mesh slightly larger than your opening and staple it to a small wood frame the same size as the opening. Attach this door to the cage front with two small hinges on one side, and install a slide bolt latch on the other side.
- Add a removable tray. Cut a piece of plywood or thick cardboard to fit inside the cage bottom. You can line it with newspaper or cage liner paper. This tray should slide in and out for easy cleaning.
- Smooth and inspect. Run your gloved hand over every interior surface. File or fold any sharp wire ends you find. Check that all staples are fully seated and no points protrude inward.
Step-by-Step: Making a Small Bird Cage at Home
This version skips the wood frame entirely and works purely with wire mesh and J-clips. It's faster, lighter, and great for a travel cage, a hospital cage, or a play cage. Target size: 16 x 14 x 18 inches. This is a tight space suitable for short stays only, not permanent housing.
- Plan your panels on paper first. Sketch out the six panels: front (with door cutout), back, two sides, top, and bottom. Label each with exact dimensions.
- Cut all panels from your wire mesh roll. Cut the front, back, and sides to the full height of the cage. Cut the top and bottom to the full footprint. Label each panel with masking tape so you don't mix them up.
- Shape the door. On the front panel, cut a 5 x 6 inch rectangle near the center-bottom area (leave at least 2 inches of wire border all around). Fold the cut wires back cleanly or snip them at the junction so you have a clean opening. Cut a separate piece of mesh 1 inch larger on each side for the door itself.
- Assemble the box. Stand the front and back panels upright and connect them to the side panels using J-clips, spaced every 2 to 3 inches along each seam. J-clip pliers make this fast. The box shape will hold itself once all four sides are clipped together.
- Attach the bottom panel. Lay the bottom mesh panel in place and J-clip it to the lower edge of all four sides. This creates the floor of the cage.
- Attach the top panel. J-clip the top panel to the upper edge of all four sides, but leave one edge partially unclipped as a secondary top-opening hatch if you want one, or clip it fully shut and rely on the front door.
- Hang the door. Use two small J-clips on one side of the door as pivot hinges (open the clip slightly so it swings). On the other side, use a bent wire hook-and-eye closure or a small carabiner clip as the latch.
- Add a perch support. Thread a 1/4-inch natural wood dowel horizontally through the mesh at mid-height on each side, resting it in the wire grid. No glue needed. The mesh holds it in place.
This wire-only cage is also the foundation for a toy or decorative bird cage build. If you're making a miniature version as a prop, craft display, or toy, just scale the measurements down and use lighter 22-gauge wire with smaller grid spacing. The same J-clip assembly method works at any scale.
Finishing, Safety Checks, and Bird-Proofing
Before any bird goes near this cage, you need to run through a full safety check. This step is non-negotiable. A cage that looks fine to you can still have hidden hazards that hurt or kill a bird.
Safety Check List
- Run your bare hand (carefully) over every interior surface and feel for sharp wire ends, protruding staples, or rough wood splinters. Fix anything you find with a file or needle-nose pliers before proceeding.
- Check every door latch by opening and closing it 10 times. A latch that sticks or pops open is a flight risk. Parrots especially figure out simple latches fast, so use a slide bolt that requires two motions to open.
- Verify bar spacing with a ruler in multiple spots across each panel. It should be consistent and no wider than 1/2 inch for small birds.
- If you used wood, confirm there are no treated or aromatic woods (cedar, pine sap pockets, pressure-treated lumber). Stick to poplar, birch, or untreated pine and seal it with a water-based, bird-safe sealant that has fully cured (usually 72 hours minimum with no smell remaining).
- Test the removable tray. It should slide in and out without gaps large enough for a bird to slip into the base structure.
- Check perch stability. Each perch should hold firm when you push it side to side. A bird that loses its footing on an unstable perch can injure its feet or toes.
Preparing the Cage Before Your Bird Moves In
Once the safety check passes, wash the entire cage with warm water and unscented dish soap. Rinse it twice and let it air dry completely, ideally outdoors in the sun for a few hours if possible. UV light helps neutralize surface bacteria. Then line the tray, place perches at two different heights (not directly above each other so droppings don't fall on the lower perch), and position food and water dishes near the front so you can access them without reaching deep into the cage and stressing your bird. Add one or two toys but don't overcrowd the space.
Cleaning and Maintenance Plan for a Homemade Cage
A homemade cage needs slightly more attention than a commercial one because the joints and connections can loosen over time. Build a simple routine from day one and it stays manageable.
| Task | Frequency | What to Use |
|---|---|---|
| Replace tray liner | Daily | Newspaper, paper towel, or cage liner paper |
| Wipe food and water dishes | Daily | Warm water and unscented dish soap |
| Wipe cage bars and perches | Weekly | Damp cloth with diluted white vinegar (1 part vinegar, 10 parts water), rinsed clean |
| Full cage wash | Monthly | Warm soapy water, soft brush, thorough rinse, air dry fully before bird returns |
| Inspect J-clips and staples | Monthly | Check by hand for loosening, re-clip or re-staple as needed |
| Inspect wire for rust or damage | Monthly | Look closely at joints and cut edges; replace any rusted section immediately |
| Check door latch function | Monthly | Open and close several times; tighten screws or replace latch if stiff |
Never use bleach, aerosol sprays, or scented cleaning products near the cage. Bird respiratory systems are extremely sensitive. Diluted white vinegar is your go-to safe cleaner for a homemade cage. For tougher buildup, a paste of baking soda and water works well on wood or wire and rinses off cleanly.
One thing specific to homemade cages: check your tray regularly. A DIY tray made from plywood can warp or swell if it gets consistently wet. If you notice warping after a month or two, cut a replacement from a slightly thinner piece of plywood and seal the edges with waterproof wood glue before cutting a new liner to fit.
Common Mistakes and Quick Fixes
Most problems with homemade bird cages come from a few predictable errors. Here's what I see most often and how to fix it without tearing the whole thing apart.
| Mistake | Why It's a Problem | Quick Fix |
|---|---|---|
| Using galvanized wire without powder coating | Zinc toxicity risk, especially for birds that chew | Replace with stainless steel or confirmed bird-safe powder-coated mesh |
| Bar spacing too wide | Bird can get head stuck and suffer injury or death | Add an extra layer of finer mesh over the existing panel and secure with J-clips |
| Sharp wire ends left on interior | Foot, toe, or feather injuries | Use needle-nose pliers to bend ends flat, or clip flush with wire cutters and file smooth |
| Door latch too simple | Bird escapes or learns to open it | Replace single-step latches with a slide bolt plus a secondary clip or carabiner |
| Wood sealed with non-bird-safe paint or varnish | Toxic fume exposure, especially when new | Strip and re-seal with a confirmed water-based, non-toxic sealant; cure fully before use |
| J-clips spaced too far apart | Panels flex and separate over time | Add extra J-clips every 1.5 inches along the seam, especially at corners |
| Cage not level | Doors swing open or closed on their own, stress for the bird | Place on a level surface or add small felt pads under the legs to adjust |
| Perches placed directly above food dishes | Droppings contaminate food and water constantly | Move perches to the sides and place dishes near the front below clear space |
One mistake that's easy to overlook: forgetting to account for the space your perches and dishes take up when calculating interior size. If your cage is exactly at the minimum 20 x 20 x 30 inches, make sure perches, toys, and dishes don't reduce usable flight space to nothing. Your bird needs room to spread and flap its wings. The Merck Veterinary Manual also advises that a cage should be at least one and a half times the bird’s wingspan in all directions so the bird has room to stretch needs room to spread and flap its wings. If the interior feels crowded when you mock it up with accessories in place, either go back and build slightly larger or reduce the number of accessories inside.
If you've finished your cage and your bird seems anxious or avoids certain spots, check for drafts coming through the wire panels, reflections causing distress (glass or mirrors nearby), or perch placement that puts the bird at eye level with human foot traffic. Small adjustments to placement and environment often matter more than any change to the cage itself.
Once you've got this basic wire cage built and your bird is settled in, you'll have the skills and confidence to tackle bigger projects, whether that's scaling up to a large walk-in enclosure, building a dedicated cage tray system, or even converting a piece of furniture into a custom aviary. You can use the same safety-first approach to turn an armoire into a bird cage by lining the interior, securing the wire, and double-checking spacing and finishes before your bird moves in converting a piece of furniture into a custom aviary. If you want to go beyond a simple wire cage, you can also learn how to turn a cabinet into a bird cage while keeping the same safety-first principles. If you’re aiming for a large build, use the same safety-first approach, just scale the frame and mesh correctly for a spacious walk-in feel large walk-in enclosure. If you want more guidance on a DIY bird cage plan, start by choosing the right size and safe wire spacing before you cut anything. The fundamentals are the same: safe materials, correct spacing, clean joints, and a solid maintenance habit from day one.
FAQ
How do I know if my cage size is big enough after adding perches, toys, and dishes?
For a DIY cage, start with the bird’s wingspan and behavior. Allow room for full wing extension without touching the sides, then confirm the door and tray do not force you to block access when you clean. If you cannot comfortably place two perch heights and still keep a clear flight lane, the cage is effectively too small even if the outer dimensions meet a minimum.
What should I do if I’m unsure about the bar spacing accuracy on my wire panels?
Use the mesh spacing for the bird’s head size and do a real-world test. After cutting, run a ruler or caliper measurement on multiple spots (not just one panel), then press a thin scrap of the same size as a typical perch or toy against the mesh to see if anything can slip through or catch. Also check that the wire ends are tight at corners so there are no gaps.
What hidden sharp points should I look for before putting a bird in a wire cage?
Avoid cutting corners on the final joint finishing. Even if J-clips or ties are used, verify there are no protruding ends, sharp wire burrs, or loose connectors near perches, tray edges, and door openings. Smooth any burrs by filing and then re-check the spot by lightly dragging a gloved finger over it.
Can I use any hardware-store wire and just assemble it carefully?
If you cannot find an appropriate wire mesh spec, do not guess. Birds are sensitive to metal hazards, and the article already flags zinc or lead risk. The practical step is to confirm the wire is properly identified as bird-safe and intended for cages before you assemble, then re-check bar spacing with measurements.
How can I reduce drafts or airflow problems in a DIY cage?
Plan for ventilation and airflow by keeping a clear perimeter around the cage (avoid placing it directly against walls or behind curtains) and keeping drafts in mind. If the bird shows stress, check for cold air currents coming through panel gaps, loose frames, or an ill-fitting door latch. Small gaps at corners are a common draft source.
Is it safe to build both a front door and a top hatch in the same homemade cage?
Yes, but only if it does not reduce your bird’s usable space or create openings. A front-opening door is simplest, and if you add a top hatch, ensure you can reach the bird safely without leaning in from above near its eye level. Always verify the latch fully secures, so the bird cannot lift it.
How often should I inspect my homemade bird cage for loosening joints or wear?
Your first signs should be operational and behavioral, not cosmetic. Check daily for loose J-clips, shifting mesh, and tray alignment, then do a weekly inspection of corners and the door latch. If you notice wobble when you gently touch the frame, tighten or re-do that section before continuing use.
What should I do if my DIY tray warps or swells from moisture?
If your tray liner warps or the plywood tray swells, treat it as a replacement issue, not a patch job. The article recommends cutting a new replacement from slightly thinner plywood and sealing the edges with waterproof glue, then fitting a liner. Also make sure the bottom stays fully dry between cleanings so recurring moisture does not loosen the frame over time.
How should I place perches and dishes to make cleaning easier and reduce stress?
Because homemade cages can shift, let the cleaning routine drive the placement. Place food and water near the front so you do not reach deep into the cage, then position perches so droppings fall into the tray without landing on the lower perch area. This reduces stress and makes daily cleaning faster.
What perch setup reduces droppings on the lower perch and near food?
When using perches, don’t stack them at the same vertical zone or right above each other. Even if wire spacing is perfect, poor perch layout can create a “mess line” where droppings land consistently. Use at least two heights and offset them so droppings fall into the tray area instead of onto the lower perch or the feed dishes.
My bird avoids part of the cage, what should I troubleshoot first?
If the bird seems anxious after the cage is clean and assembled, first check environment and comfort rather than tearing down the cage. Verify there are no drafts, look for reflections from glass or mirrors nearby, and confirm perch height does not put the bird at eye level with heavy foot traffic. Adjust placement, then observe for a day before changing the build.
Can I scale down the build for a toy or display cage without changing anything else?
If you are making a miniature prop or toy cage, follow the same assembly logic, especially J-clip integrity and mesh spacing relative to the “head risk” for anything that could be placed inside. Also keep in mind that lighter wire and smaller grid spacing are different from full-size housing, so don’t assume a prop cage is safe for real birds.