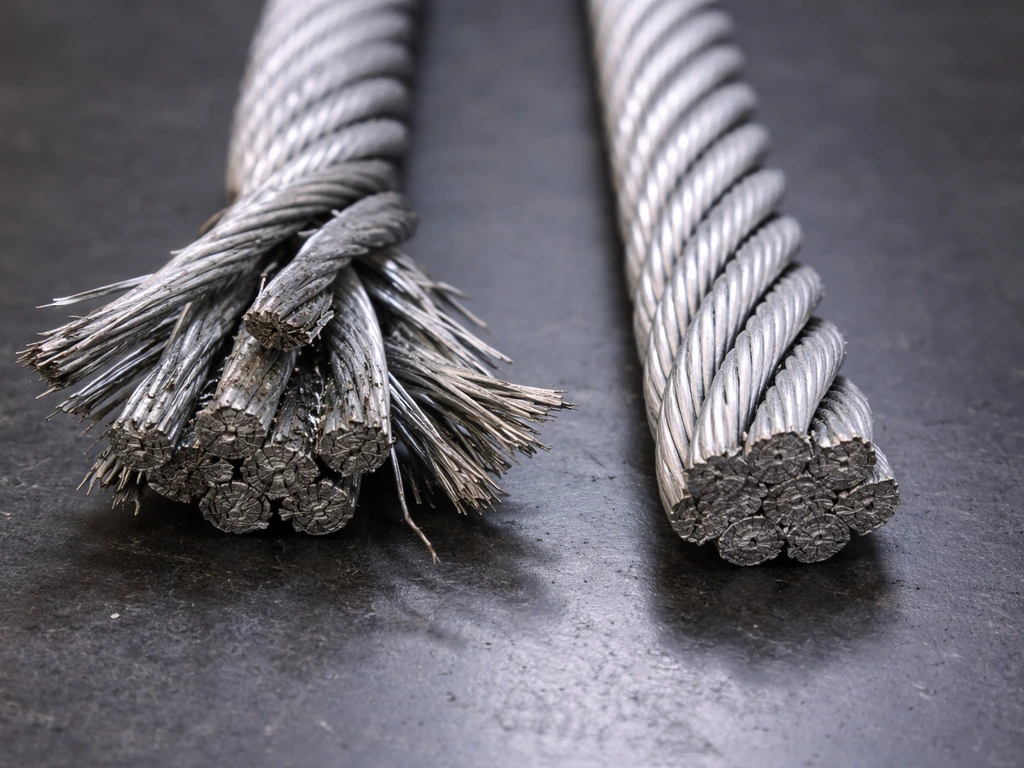
Bird caging in wire rope is a type of structural damage where the outer strands of the rope separate and bulge outward, forming a shape that looks exactly like a bird cage around the rope's core. The core itself often gets pushed outward between those strands, making the whole rope look swollen and distorted at the affected spot. Once you see it, you cannot miss it, and the rule is simple: a bird-caged rope is a rope you stop using immediately and replace. There is no fix that restores its original strength.
What Is Bird Caging in Wire Rope and How to Fix It

Maya Bennett
13 May 2026
What bird caging in wire rope actually looks like
A healthy wire rope has a tight, uniform, helical pattern of outer strands wrapped snugly around the core. When bird caging happens, those strands splay open and push away from each other, creating a distinct barrel or cage shape over a short section of the rope. The fiber or steel core that normally runs hidden through the center gets displaced and may protrude visibly between the open strands. OSHA specifically lists both birdcaging and steel core protrusion together as distortion indicators during inspection, because they almost always signal the same underlying structural failure.
You might encounter this kind of damage if you are building or repairing a DIY wire rope enclosure, using cable hardware for a climbing or containment setup, or working with any system where wire rope carries load. The visual is unmistakable: a section of rope that suddenly looks wider and cage-like, with visible gaps between strands that should be flush against each other.
What causes bird caging
The single most common cause is shock loading, which happens when a load is suddenly released and the rope rebounds sharply. That sudden snap sends a shockwave through the rope structure, and the strands essentially bounce apart and cannot spring back into position. The damage is instantaneous and permanent. This is why every reputable rigging and wire rope guide lists sudden load release as the primary cause.
Beyond shock loading, several other mechanisms can trigger bird caging, especially in DIY and enclosure-building contexts where ropes may be handled or installed without formal rigging training.
- Shock loading: A sudden drop or snap release of tension causes the strands to splay apart permanently. This is the number one cause listed in every wire rope damage guide.
- Improper handling during installation: Kinking, coiling too tightly, or forcing a bend tighter than the rope's minimum bend radius can pre-stress the strand geometry and trigger separation later.
- Incorrect termination: Installing wire rope clips backward (saddle on the dead end instead of the live end) or using too few clips can create localized stress concentrations at the end fitting. At least three clips are recommended for loop terminations, with the saddle always on the live load-bearing side.
- Over-tensioning: Applying more load than the rope's working load limit stretches and distorts the lay of the strands, weakening the geometry that holds them in place.
- Corrosion and wear: Rust or abrasion degrades individual wires, making strands thinner and less able to hold their position under load, eventually allowing separation.
- Improper spooling: Winding rope onto a drum too loosely or letting it pile up rather than spooling in even layers can create stress points that contribute to strand displacement under load.
- Impact damage: A sharp blow to a tensioned rope, such as a dropped tool or object striking the rope, can cause localized bird caging at that exact point.
How to spot early signs before it gets bad
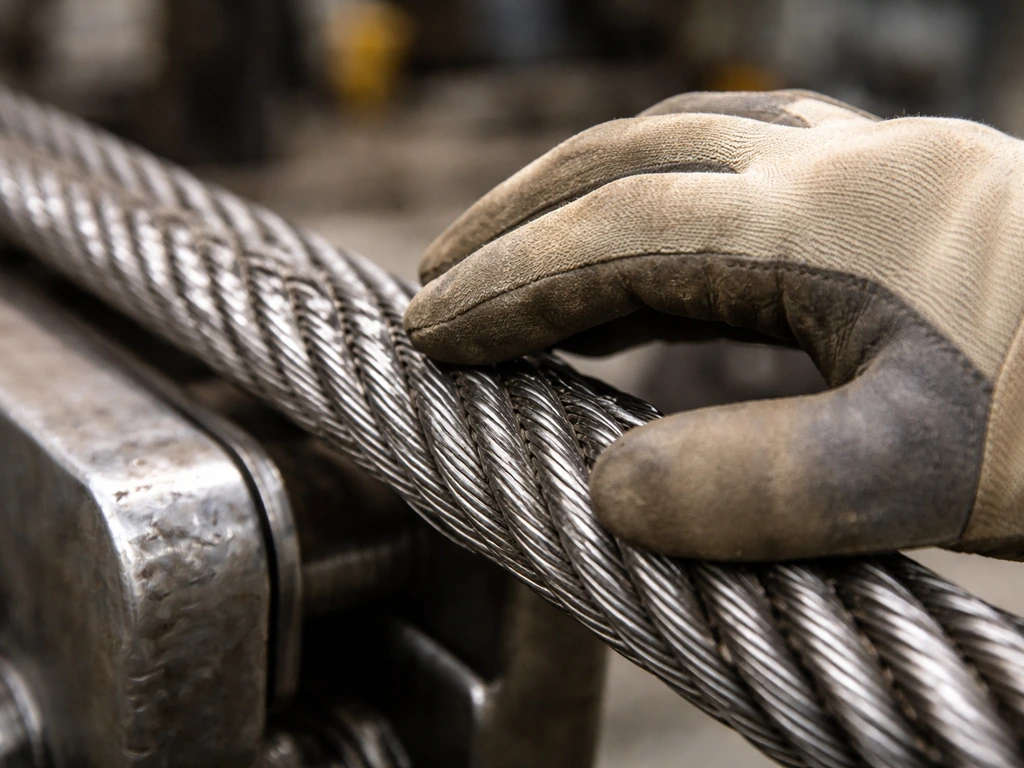
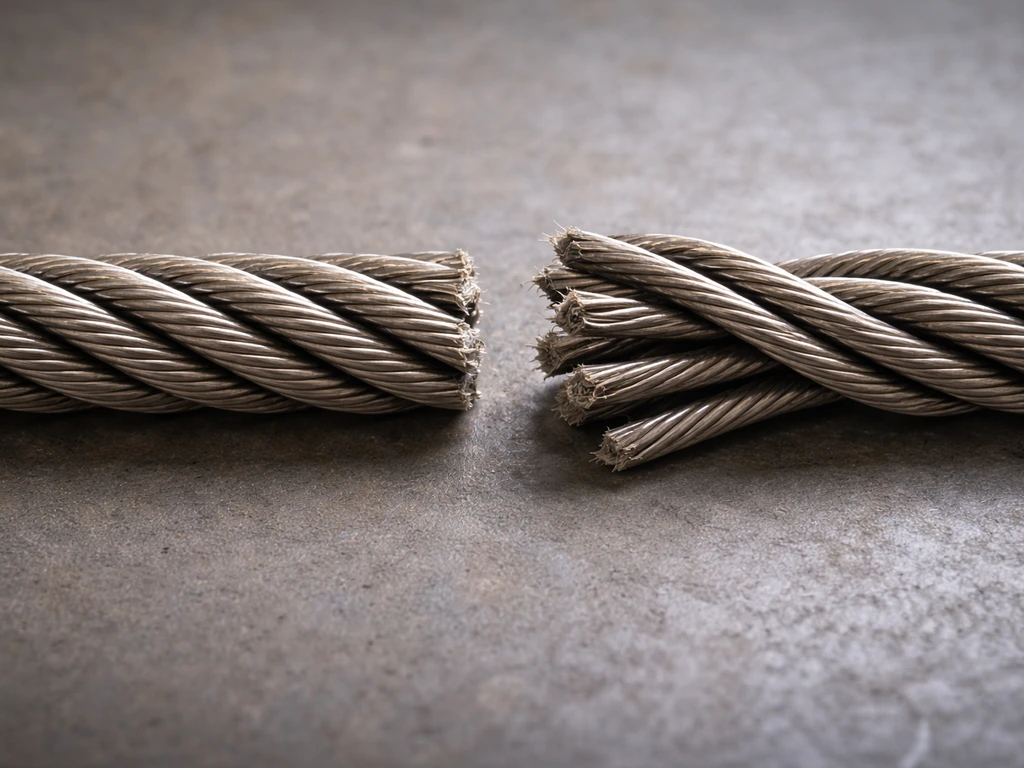
Early bird caging can be subtle. The strands may not yet be fully splayed, but you can feel slight irregularities in the rope's surface when you run your hand along it (with gloves on, always). The rope will feel bumpy or uneven in a localized section rather than smooth and uniform. At this stage the strands may look slightly looser than the rest of the rope without the dramatic barrel shape of advanced damage.
Advanced bird caging is obvious: a distinct bulge, clear gaps between strands, and possible core protrusion. OSHA inspection standards treat any visible birdcaging as a removal-from-service indicator, regardless of how severe it looks. Even a subtle early-stage case means the internal structure has already been compromised.
| Stage | What You See | What You Feel | Action |
|---|---|---|---|
| Early | Slight looseness or unevenness in strand lay, minor gaps starting to form | Bumpy or irregular texture in one section of otherwise smooth rope | Remove from service immediately, do not continue use |
| Advanced | Visible barrel-shaped bulge, strands clearly splayed apart, possible core protrusion | Rope feels soft and spongy at the damaged section, strands shift under finger pressure | Remove from service, replace entire rope or affected section |
| Severe | Full cage shape, core visibly pushed out between strands, obvious deformation | Rope feels loose and structurally compromised throughout the damaged area | Do not use under any load, replace immediately |
Repair or replace? Here is the honest answer
[There is no repair for a bird-caged rope.](/bird-cage-troubleshooting/is-to-cage-a-wild-bird-a-standalone) This is not a pessimistic take, it is what every authoritative source from OSHA to the U.S. Army Corps of Engineers agrees on. The structural geometry of the rope, the precise helical relationship between strands and core that gives it strength, cannot be restored once the strands have separated. Trying to push the strands back together and re-tension the rope is not a fix. The damage is internal as much as external, and the rope will fail at a load far below its rated capacity.
The USACE wire rope standard is explicit: shock loading damage cannot be corrected, and birdcaging is listed among the damage types calling for immediate replacement alongside kinks, protruding cores, and heat damage.
Northern Tool’s wire rope operator inspection guide is tied to specific rope product/manual entries, and it reflects how rope manuals commonly describe birdcaging and similar core distortion as linked to improper handling or shock-loading conditions birdcaging is listed among the damage types calling for immediate replacement alongside kinks, protruding cores, and heat damage. .
OSHA inspection rules treat birdcaging as significant distortion and a rejection criterion. So the practical guidance here is: stop using the rope, cut it out of service, and replace it with a new section of the correct diameter and construction. This guidance is often summarized as the bird cage problem: once the strands separate into that cage-like shape, you replace the rope immediately.
If the bird caging is near a termination point (near a clip or swaged fitting), you have a bit more flexibility in some cases. If the rest of the rope is in good condition, you may be able to cut back past the damaged section and re-terminate with fresh clips, as long as enough rope length remains for safe use. But inspect the full length carefully before doing this, because shock loading that caused bird caging at one point may have stressed the rope along its entire run.
How to prevent bird caging from happening again
Choose the right rope and hardware for the job
Match the rope's working load limit to your actual load, with a meaningful safety margin. Never operate at or near the rated capacity in DIY setups where loads can shift unexpectedly. Choose a rope construction appropriate for the application: a 7x19 construction (more strands, more flexible) is better for applications with frequent bending or movement, while a 7x7 works for static, straight runs.
Install terminations correctly every time
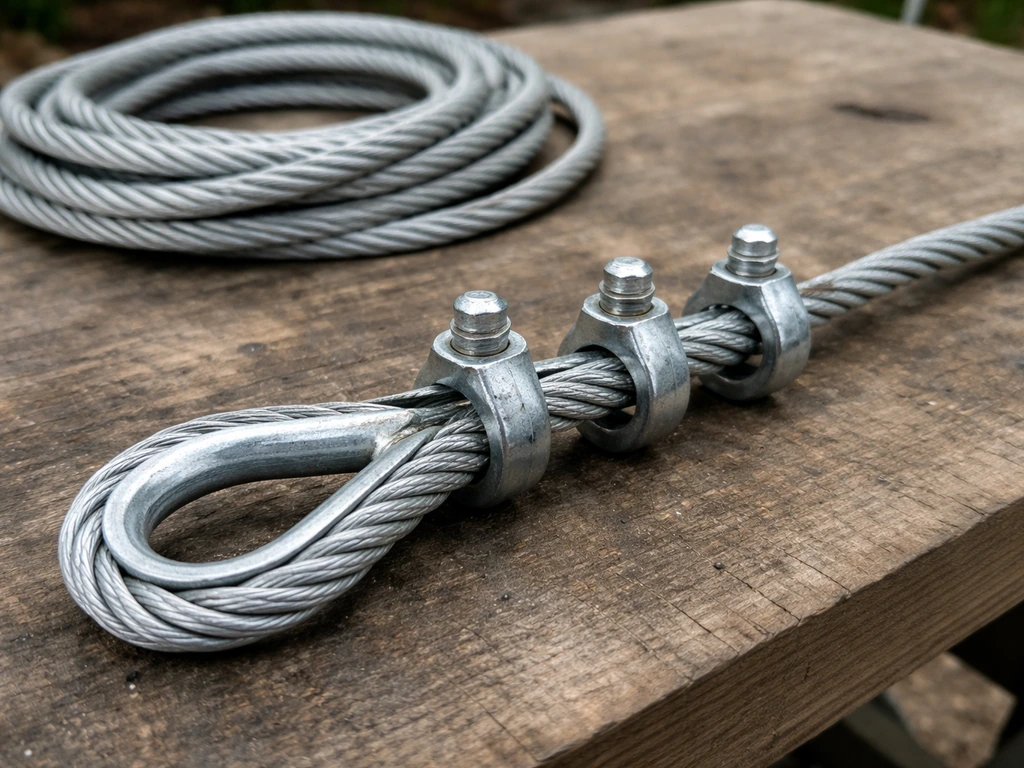
Most DIY bird-caging issues I have seen around enclosure hardware start at the termination, not in the rope body. Use at least three wire rope clips for any loop or eye connection. Place the first clip one saddle width from the dead end of the rope. The saddle of each clip sits on the live (load-bearing) end, and the U-bolt goes over the dead end.
This is the "never saddle a dead horse" rule: the saddle never goes on the dead end. Getting this backward concentrates crushing force on the load-bearing side, distorts the strand geometry, and creates a stress riser that can lead to strand separation under load. Even correctly installed clips reduce working load limit to roughly 70 to 75 percent of the rope's original rating, so factor that into your design.
Handle rope carefully during installation
Always uncoil wire rope from the end, rolling it out flat rather than pulling from the middle of a coil. Pulling from the middle introduces twists and kinks that pre-stress the strands before the rope ever sees a working load. Do not bend the rope tighter than its minimum bend radius, and never drop a coil of tensioned rope or allow it to snag and snap. Smooth, controlled handling prevents the strand geometry from being disturbed before installation.
Avoid shock loads in operation
In enclosure or containment setups, shock loading usually comes from animals or objects impacting the wire suddenly, or from abrupt mechanical failure in a tensioning system. Build your setup so loads are applied and released gradually. For a sprint car bird cage setup, make sure you’re using the right wire rope and termination method so you avoid shock loads and strand distortion. If an enclosure panel or tensioned run will experience dynamic loading (animals climbing, jumping, or pulling), size the rope and hardware well above static load requirements and inspect more frequently.
Inspect regularly and systematically
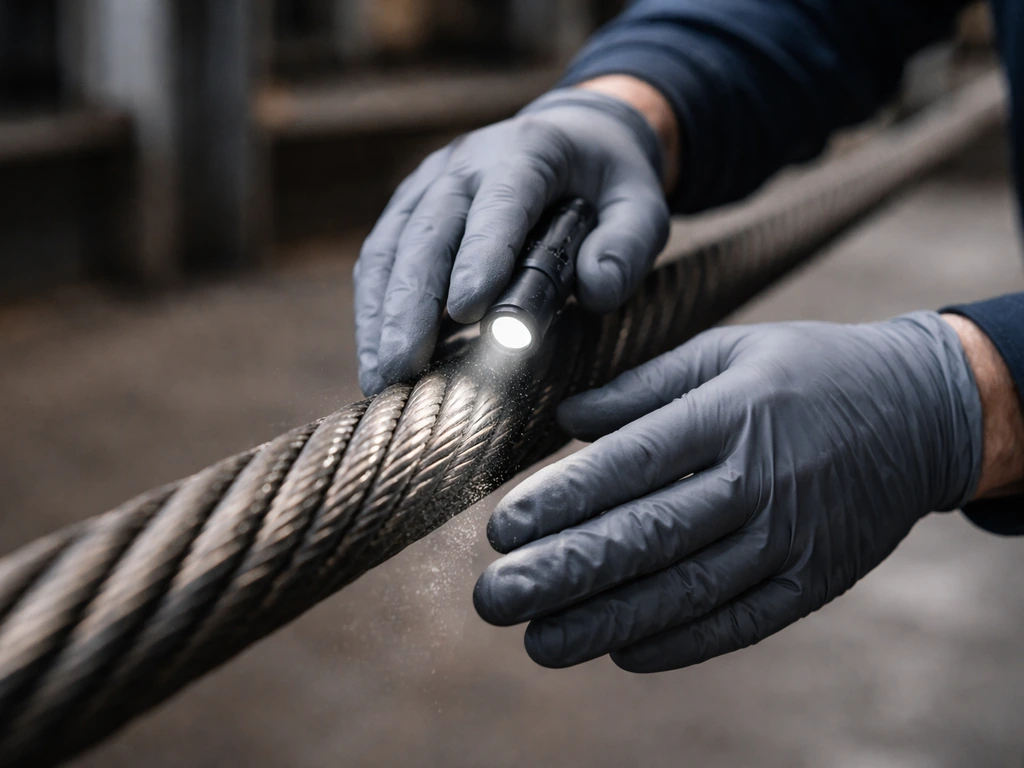
Run a gloved hand along the full length of the rope while visually scanning it. Do this before each use if the rope is part of a safety-critical connection. For permanent enclosure installations, inspect monthly or after any event that may have caused a sudden load, like a storm, an animal escape attempt, or a hardware failure. Check the terminations especially carefully, since clips and end fittings are where distortion most often starts.
Tools, supplies, and step-by-step troubleshooting checklist
What you need on hand
- Heavy leather work gloves (wire rope can cut bare hands even when inspecting)
- Flashlight or headlamp for checking inside fittings and terminations
- Wire rope cutters or bolt cutters sized for your rope diameter
- Replacement wire rope of the same diameter and construction type
- Wire rope clips (minimum three per termination, rated for the rope diameter)
- Thimbles for eye terminations (optional but recommended to protect the rope bend)
- Torque wrench or adjustable wrench for clip installation
- Tape measure for clip spacing
- Marker or tape for flagging suspect sections during inspection
Step-by-step troubleshooting checklist
- Put on leather gloves before touching any wire rope. Broken wires and frayed strands can cut through skin quickly.
- Start at one termination end. Visually inspect the clip or swaged fitting for any signs of distortion, strand separation, or corrosion around the hardware.
- Check clip installation: saddle on the live end, U-bolt on the dead end, and at least three clips properly spaced. If any clip is reversed or missing, remove the rope from service and re-terminate correctly.
- Run your gloved hand slowly along the full rope length while looking for any bumpy, swollen, or uneven sections. Any area that feels or looks different from the uniform smooth lay of the rest of the rope is a suspect section.
- At any suspect section, look closely for strand separation (gaps between strands that should be flush), a barrel or cage shape, or any core material visible between the outer strands.
- If you find even minor birdcaging, mark the location with tape and remove the rope from service. Do not attempt to use it again under load.
- Inspect the other termination end and hardware using the same process.
- If the bird caging is isolated to within a few inches of a termination and the rest of the rope is clean and undamaged, you can cut past the damaged section and re-terminate, provided enough rope length remains.
- If bird caging appears anywhere in the body of the rope, or if you suspect a shock load event affected the whole run, replace the entire rope.
- Install the replacement rope with correct clip orientation and spacing. Apply the working load gradually the first time, not all at once, to properly seat the clips and set the termination.
- Log the date of replacement and schedule the next inspection. For safety-critical setups, inspect before each use. For permanent enclosure hardware, inspect monthly at minimum.
Wire rope issues in enclosure and containment builds often overlap with other structural problems worth knowing about, including general cage hardware failures and the broader category of cage setup problems that can compromise animal safety. The same inspection mindset that catches bird caging early will catch most other hardware issues before they become emergencies. The core habit is simple: look and feel along every inch of rope on a regular schedule, replace anything that does not look right, and never improvise a fix on a structural rope that animals or loads depend on. If you want a quick bird and cage walkthrough, focus on how the rope looks and feels at inspection points, then remove it immediately when distortion appears.
FAQ
Is bird caging the same as a kink, and can I keep using the rope if it looks small?
No. Bird caging is strand separation with a cage-like barrel and often displaced core, it is a distortion that indicates internal geometry loss. Even early-stage roughness means the rope structure has already been compromised, so you still stop using it and replace it, not just smooth it out.
What should I do if bird caging appears right after installing new wire rope or clips?
Treat it as an installation or loading event problem. Stop use immediately, inspect the exact section and both ends, confirm clip orientation (saddle on the load-bearing side), check rope diameter and construction match the fittings, and look for signs of shock or snag during handling that could have pre-damaged the rope before it ever saw service.
Can I rotate the rope, flip it end-for-end, or take the damaged section out to keep the same rope length?
If the bird-caged section is removed or cut out, the remaining rope can only be used if the rest of the rope shows no distortion, and you can re-terminate using fresh, correctly sized fittings with adequate rope length. Do not assume the damage is localized, shock loading can stress the entire run, so inspect the full length before trusting a shortened assembly.
If the core is only slightly visible between strands, is that always bird caging and removal-from-service?
Visible core protrusion is a serious distortion and is treated the same way operationally. If you can see the core or the rope looks swollen with strand gaps, you cannot rely on “minor” severity, remove the rope from service and replace the affected section.
How can I tell the difference between normal lay (strand shape) and bird caging without overthinking it?
Normal wire rope has a consistent, uniform helical lay with tight gaps between strands. Bird caging creates a localized, sudden increase in rope diameter and a repeatable pattern of open gaps that you can see and feel along a short section. A simple test is to compare the suspect area to adjacent sections in the same lighting and from multiple angles.
Does rope diameter or strand count change how I should inspect for early bird caging?
Inspection approach is similar, but smaller diameter ropes and higher strand-count ropes can make subtle strand irregularities harder to see. In those cases rely more on tactile feel with gloves (bumpy or uneven localized area), and inspect terminations closely because distortion often starts where clamps or fittings introduce load concentration.
What measurement or tool can I use to confirm I should replace the rope?
Visual confirmation may be enough, but practical decision-making can include comparing the suspect section’s diameter to the rope’s nominal diameter and to nearby undamaged sections. If the diameter is noticeably swollen and the surface is uneven, that is a strong indicator of internal damage, so replacement is the safest route.
Can lubrication or cleaning hide bird caging and make it harder to detect?
Yes. Grease, dirt, or corrosion products can mask gaps and make strand movement look smoother. Clean the area enough to inspect the lay and core visibility, and if you find distortion after cleaning, replace the rope rather than assuming the buildup caused the appearance.
How often should I inspect a wire rope enclosure or containment system after dynamic events?
Inspect immediately after any event that could cause impact or abrupt release, such as an animal escape attempt, panel strike, or hardware failure. For routine use, follow a schedule, and at minimum re-check frequently during early bedding-in or after any change in tensioning, since shock loads can create bird caging quickly and permanently.
What are the most common DIY causes that lead to bird caging in loop or eye connections?
Most frequent mistakes are incorrect clip placement (saddle on the dead end, wrong spacing, or too few clips), mismatch between clip size and rope diameter, and sudden loading from tensioning errors or snagging during installation. Use correct clip count and placement, apply load gradually, and avoid dropping or snapping coils during setup.
If I already used a bird-caged rope for a short test load, is it still unsafe even if it held?
Yes. Bird caging indicates internal structural distortion that can fail under subsequent loads at levels below the rope’s rating. A successful test does not restore original strength, so replace the rope before putting it back into safety-critical service.
Next Article
Is to Cage a Wild Bird a Standalone? What to Do Today
Answer whether caging a wild bird is standalone, with safe, legal steps for short-term rescue and rehab contact today.