If you searched for "broken bird cage drawing," you almost certainly need a way to map out exactly what's damaged on your cage so you can fix it fast and safely. Think of a "drawing" as your quick visual diagnosis: sketch or mentally note which parts are broken, where the damage is, and what caused it. That's the approach this guide takes. We'll walk through fast triage, the right tools and materials, step-by-step repairs, safety checks, and when to stop patching and just replace the cage entirely.
Broken Bird Cage Drawing Guide to Repair and Replace Safely

Maya Bennett
15 Apr 2026

Quick Triage: Figure Out What's Actually Broken
Before you touch a tool, do a full once-over of the cage. Grab a notepad or your phone and physically mark or photograph every problem area. This is your "broken bird cage drawing" in practice. Identify damage by category:
- Bars: bent, spread apart, snapped, or pulled loose from the frame
- Panels: whole welded sections that are warped, cracked, or separated at seams
- Frame: the main structural skeleton, including top, bottom, and corner uprights
- Door: misaligned, bent frame around the opening, or hinge failure
- Latch/lock: spring gone, catch worn out, or clip missing
- Coating/finish: rust, white powder (white rust), chipped paint, or bare metal
Once you have the full picture, identify the cause. The most common culprits are falls or impacts (bent bars, cracked welds), prolonged moisture exposure (rust, coating breakdown), bird chewing (especially on soft or coated wire), and improper assembly where bars were never seated properly and eventually worked loose. Knowing the cause matters because it tells you whether the fix will hold. A latch that snapped because of bird pressure will snap again if you replace it with the same hardware. A bar that corroded through will corrode again if you don't address the source of moisture.
If you're not sure whether what you're seeing is surface discoloration or something more serious, look closely for pitting, loss of sheen, or white powdery deposits on the wire. That white powder is white rust, an oxidation product of galvanized coatings, and it is toxic to birds. Research on small psittacines specifically flags white rust as a serious health risk, so don't dismiss it as cosmetic. A cage with oxidation or pitting on the wire is in a different category from a cage with a loose door hinge.
Tools, Supplies, and Safe Materials for DIY Repairs
Using the wrong materials on a bird cage is one of the most common and dangerous mistakes. RSPCA Knowledgebase also gives guidance on choosing bird cage enclosures with safety in mind, including material and finish considerations Using the wrong materials on a bird cage. Birds chew, lick, and press against every surface, so anything you introduce into the repair needs to be non-toxic. Here's what to have on hand before you start.
Tools
- Needle-nose pliers (for bending bars back and tightening c-rings)
- Wire cutters / bolt cutters (for removing damaged sections cleanly)
- Flat-nose pliers
- Metal file or fine sandpaper (for smoothing sharp edges after cuts)
- Screwdrivers, both flathead and Phillips
- Zip tie tool or hog ring pliers
- Steel wool or a wire brush (for prep work on metal surfaces)
Safe Repair Materials
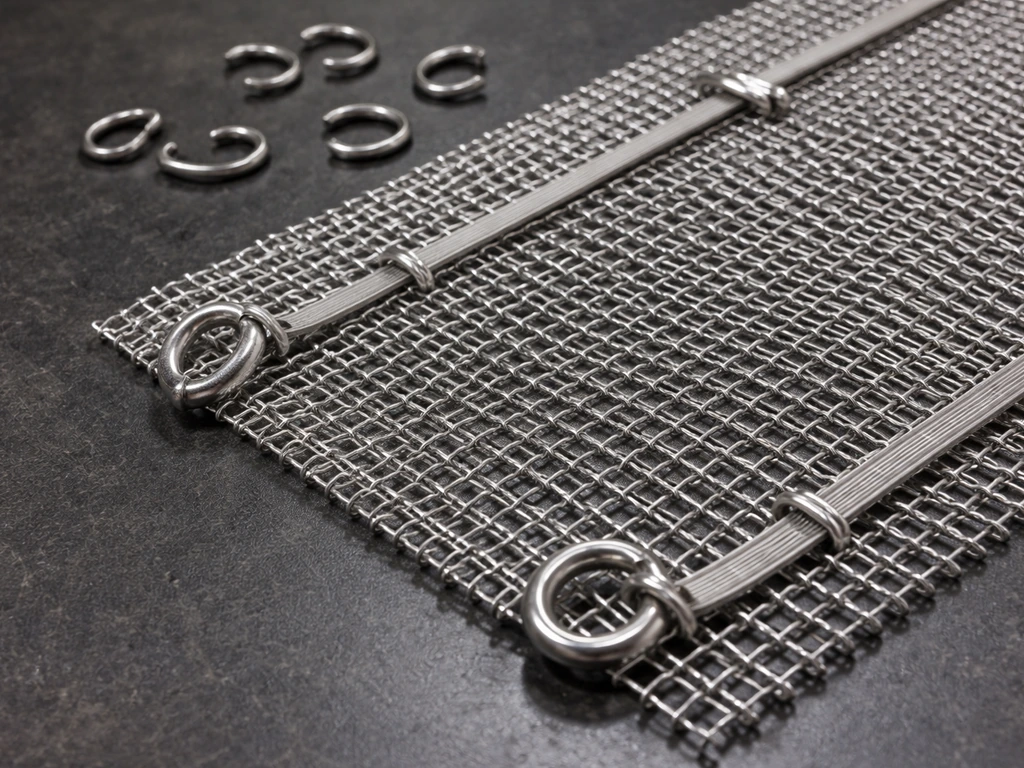
- Stainless steel wire or stainless welded wire mesh (19-gauge or heavier for most repairs)
- Stainless steel hog rings or c-rings to join wire sections
- Stainless steel zip ties (avoid plastic zip ties; birds can chew through them)
- Replacement latches and hinges in stainless steel or powder-coated steel
- Bird-safe sealant or touch-up paint only where labeled explicitly safe for birds (many are not)
- Replacement powder-coated panels, sourced from the cage manufacturer if possible
The one material to be very cautious about is galvanized wire. If you need to add a patch panel using galvanized welded wire mesh, you have to wire-brush it thoroughly first to remove loose zinc coating and then inspect it closely before your bird ever contacts it. Honestly, for any repair your bird will be near, stainless steel is the safer default. It costs more, but it doesn't corrode and it doesn't leach zinc. The Merck Veterinary Manual also describes zinc toxicosis as a risk when birds ingest zinc-containing materials such as galvanized wire or cages it doesn't leach zinc.
If you're replacing a latch or trying to source hardware, it's worth understanding common bird cage hardware problems before you buy, so you don't end up with a latch that fails in the same way.
Step-by-Step Repairs for the Most Common Break Types
Rejoining or Re-fitting Loose and Bent Bars
- Remove your bird from the cage and set up in a safe temporary space.
- Use needle-nose pliers to gently straighten a bent bar. Apply slow, even pressure. Do not force it quickly or the bar may snap.
- If the bar has pulled loose from a weld point, assess whether the surrounding area is still solid. Press the bar back into position.
- Use stainless steel hog rings to re-attach the bar to adjacent bars or to the frame ring. Close the hog ring fully with hog ring pliers so there are no open gaps.
- Tug the bar firmly in multiple directions to confirm it won't shift.
- Run your finger along the bar and the repair point. File or sand any sharp edge until it's smooth.
Replacing a Damaged Panel
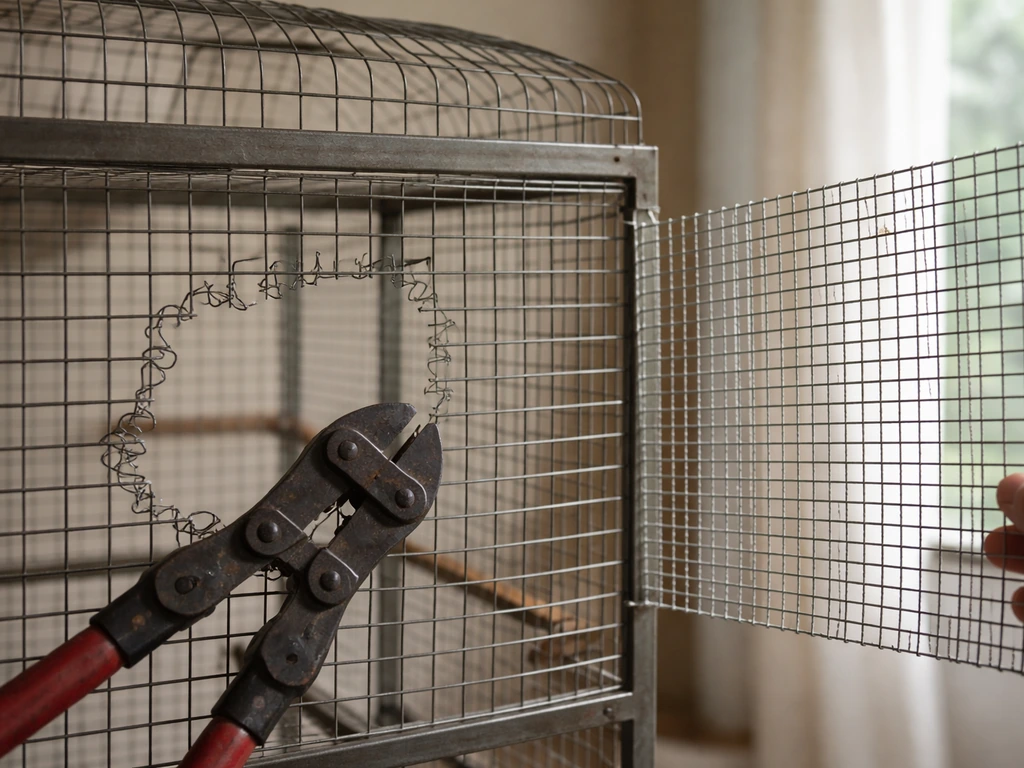
- Use bolt cutters or wire cutters to cut out the damaged panel section cleanly, cutting as close to the frame or intact wire as possible.
- File all cut wire ends flat and smooth before proceeding.
- Cut your replacement stainless steel mesh to size, leaving about half an inch of overlap on all sides.
- Align the new panel against the frame and hold it in position.
- Attach with stainless steel hog rings every 2 to 3 inches around the perimeter. Closer spacing means less flex and less risk of your bird opening a gap.
- Check bar spacing across the new panel against the original cage spec. For small birds like budgies, bar spacing should not exceed half an inch. For larger parrots, follow your cage model's original spacing.
- Tug the panel firmly, then check all edges again for sharp points.
Patching or Reinforcing Frame Sections
Frame damage is the most serious repair you'll attempt as a DIYer. If the main structural uprights or the base frame are bent, cracked at a weld, or visibly warped, read the replacement section below first. If the frame damage is minor, such as a small crack at a non-load-bearing joint, you can reinforce it with a metal sleeve or a length of stainless steel bar stock shaped to fit over the damaged section, then secured with heavy stainless zip ties or hog rings. This is a patch, not a permanent fix, but it can stabilize the cage while you source a replacement.
Fixing Doors and Latches
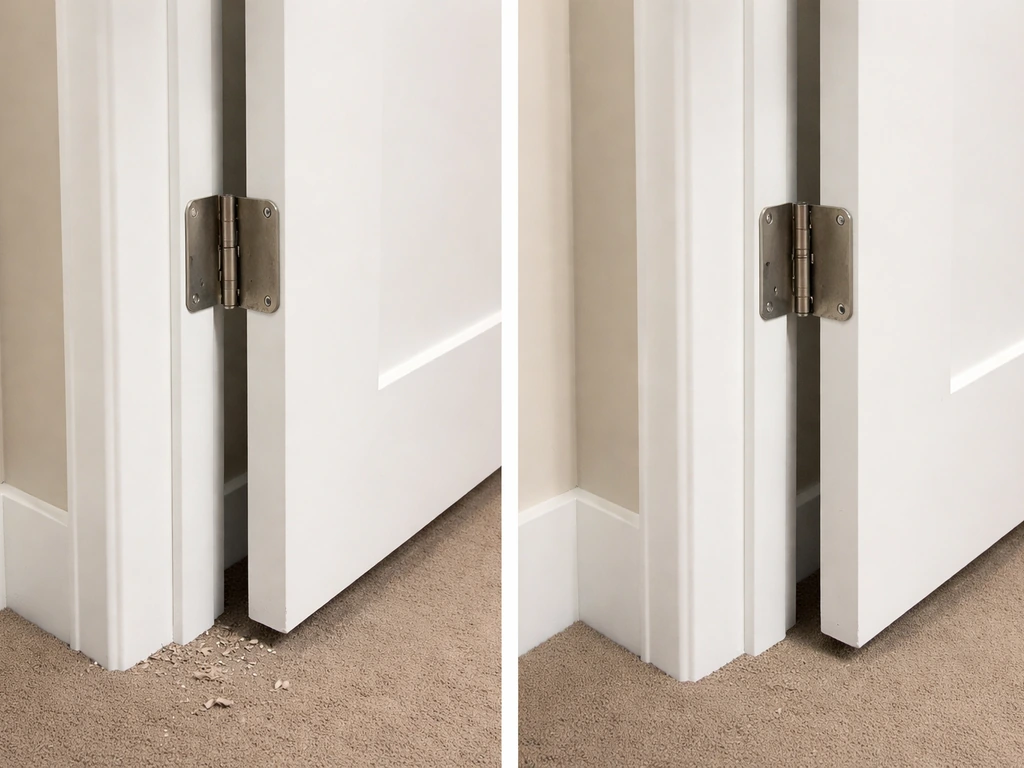
- If the door frame is bent, use flat-nose pliers to work it back into a rectangular shape. Test that it fits flush in the opening before reattaching hinges.
- Replace worn or broken hinges with stainless steel equivalents. Use the same screw size to avoid enlarging holes in the frame.
- For a failed spring latch, remove it fully and replace it rather than trying to repair the spring itself. A latch that has failed once is unlikely to be reliable after repair.
- For cages with parrots that are escape artists, upgrade to a two-step or carabiner-style latch. Many birds learn to work simple slide latches within days.
Structural Safety Checks Before Your Bird Goes Back In
Do not skip this step. Run through all four of these checks every single time you do a repair, even a small one.
| Check | What to Look For | Action if Problem Found |
|---|---|---|
| Stability | Rock the cage gently. No wobble, twist, or creaking at the frame joints. | Re-secure joints or assess for frame replacement. |
| Sharp edges | Run your finger along every cut, repaired, or bent wire end. | File or sand until smooth. No exceptions. |
| Rust and white rust | Any orange-brown rust or white powdery deposits on wire or frame. | Surface rust: assess depth. White rust or pitting: replace. |
| Gap sizing | Measure bar spacing at the repair site with a ruler. | Adjust if spacing is larger than the original cage spec for your bird's size. |
| Chew risk | Check if the repair material is harder and smoother than the original cage material. | Replace soft or plastic repair materials with metal alternatives. |
Zinc toxicity is a genuine danger, not a theoretical one. Avian veterinarians are clear that a cage showing oxidation, pitting, or loss of sheen on its coating poses an unacceptable risk of zinc ingestion. If your safety check turns up white rust at the repair site or elsewhere on the cage, stop and move to the replacement decision below.
Repair vs. Replace: How to Decide Fast
The repair-or-replace decision comes down to three things: structural integrity, coating condition, and whether the failure is recurring. Here's a practical way to think through it.
| Situation | Repair or Replace? |
|---|---|
| Single loose or bent bar, coating intact | Repair |
| Damaged panel, frame solid and coating intact | Repair (replace panel) |
| Latch or hinge failure, first time | Repair (replace hardware) |
| Bent main frame upright or base | Replace |
| White rust, pitting, or oxidation anywhere on wire or frame | Replace immediately |
| Multiple repairs needed, cage over 5 years old | Replace |
| Latch failure recurring despite replacement | Replace (cage geometry is off) |
| Bars chewed through (especially soft coated wire) | Replace affected panels; reassess cage material |
The fastest way to make this call: if you're uncertain whether the cage is safe after your inspection, err on the side of replacement. A few days in a temporary carrier while you source a new cage is far less risky than leaving a bird in a structurally compromised or chemically unsafe enclosure. If you're looking at a cage with seemingly minor wire damage and wondering whether the coating matters, understanding what bird caging means in wire rope and wire construction can help you see why coating integrity is so critical to overall wire strength and safety.
Preventing Repeat Damage
Placement and Mounting Stability
Most cage falls happen because the cage was on an undersized or unstable stand, or because it was placed where it could be knocked by foot traffic, pets, or doors. Place the cage on a stand rated for at least 20 percent more than the cage's total weight (cage plus food, water, and bird). Position it against a wall where two sides are protected, and use anti-tip straps if the stand is tall. On hard floors, put rubber feet or furniture pads under the stand legs.
Seasonal Protection and Covers
Moisture is the main long-term enemy of cage metal. If your cage is near a window, patio door, or in a room that gets humid, consider a cage cover that breathes rather than trapping moisture against the bars. In winter, condensation near cold windows is a common cause of localized rust. Move the cage away from drafts and direct cold exposure. If the cage goes outside seasonally, bring it in during rain and dry it fully before covering it.
Bird-Proofing Against Chewing
Birds chew for enrichment and instinct, so the goal is not to stop chewing but to give them better targets than the cage itself. Provide wood chews, destructible toys, and foraging materials inside the cage. For the cage structure, if your bird persistently chews on bars, switching to heavier gauge stainless steel wire (18-gauge or thicker) makes chewing through it physically much harder. Check repair points regularly since repaired spots can be slightly proud of the surface and become a focus for chewing.
It's also worth thinking about the broader question of what your bird should and shouldn't have access to. Whether it's ever appropriate to cage a wild bird is a separate topic, but the underlying principle applies to pet birds too: the cage should always support the bird's welfare, not compromise it. A damaged cage that can't be secured properly fails that test.
Optional Upgrades After You've Done the Repair
Once the cage is structurally solid again, it's a good moment to make a few targeted improvements. These aren't essential, but they make the cage safer, cleaner, and more functional long-term.
Layout and Accessory Guards
After any panel replacement, you may have slightly different bar spacing in one section. Take the opportunity to reorganize perch and toy placement so your bird isn't spending most of its time near the repaired area while it's still new. Once you've confirmed the repair holds after a week, you can rearrange freely. Add corner guards or bumpers at any point where the cage frame meets furniture or a wall, especially if the cage was damaged by an impact.
Mess Control
Cage skirts or seed catchers attach to the lower frame and catch debris before it hits the floor. These also protect the lower bars from the moisture that wet food and water droplets create, which is a common corrosion start point. Replacing a simple pull-out tray with a deeper tray lined with unbleached paper makes cleaning faster and reduces the time wet material sits against metal.
Better Latches and Enrichment Mounts
If you replaced a latch during repair, consider upgrading the remaining latches on other doors at the same time so everything is consistent. Adding a few external hook mounting points to the frame (using stainless steel S-hooks through existing bars) makes it easy to hang foraging toys outside the cage during out-of-cage time, which reduces the wear on interior bar welds.
One area that often gets missed in a standard repair walkthrough is understanding how cage mechanical systems interact, which is something that comes up when you look at the broader range of caging hardware. For example, how a sprint car bird cage setup works mechanically is a completely different context, but it illustrates how critical precise fit and secure locking points are in any cage structure where failure has consequences.
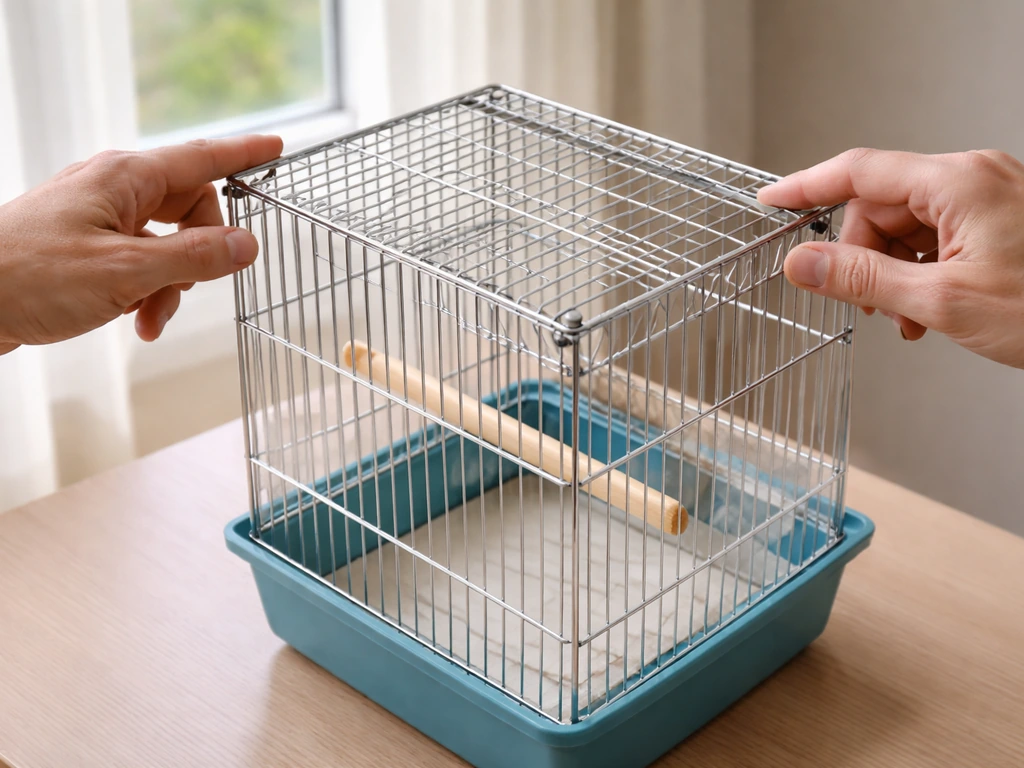
If this repair has you thinking about a more complete cage rebuild or upgrade, having a full step-by-step walkthrough of how a cage should be assembled and checked from scratch is worth having on hand. A detailed cage assembly and inspection walkthrough can save you from re-doing repairs that don't stick because the underlying setup wasn't right the first time.
Your Next Steps Today
Here's the short version: sketch or photograph the damage now, categorize each broken part, and rule out white rust or structural frame damage before you commit to a repair. If the cage passes that test, grab stainless steel hardware and wire, follow the steps above for the specific break type, run through all five safety checks before your bird goes back in, and then make a few targeted upgrades so the same problem doesn't come back in three months. If it doesn't pass, move your bird to a safe temporary space today and start shopping for a replacement. There's no patch that makes a structurally unsafe or zinc-corroded cage acceptable for your bird.
FAQ
My broken bird cage drawing shows a small bent bar. Can I just straighten it and move on?
If you find a loose bar or panel but the wire coating looks intact, you still need to check for pitting or white powder at the repair edges and along any weld or crimp line within a few inches. Even “small” wire defects can spread under stress, so tug-test the area after the repair and monitor daily for 72 hours for new discoloration or flaking.
When is a wire repair not enough even if only one section looks damaged?
Do not replace only the visual panel if the underlying structural frame is also stressed. A common failure pattern is a repaired panel that looks fine but a nearby weld or upright is carrying extra load, causing the next break to happen at a different point. If the upright is cracked, warped, or repeatedly loosens, replacement is usually the safer decision.
The cage looks “only slightly” oxidized. Is a quick wipe-down enough before the bird returns?
White rust (often powdery, chalk-like, or sleeve-like oxidation on galvanized coating) is a hard stop. Rinse-off can remove surface debris, but it does not make the underlying zinc-safe. The practical move is to isolate the cage immediately, avoid letting the bird contact any affected bars, and switch to a replacement or fully rework with bird-safe stainless components.
What should I avoid when sourcing replacement wire or mesh for a broken bird cage drawing repair?
If you have to use any mesh or replacement wire, confirm it is food-contact safe or explicitly listed as non-toxic for animal enclosures, and avoid coated products not made for animal use. For galvanized items you are not fully de-zinc-brushed and inspected, treat them as unsafe. When in doubt, choose stainless steel and plan to replace the entire affected section rather than patching small near-contact areas.
How can I tell if a temporary frame reinforcement (sleeve or bar stock) is holding securely?
For welded or zip-tied sleeve reinforcements, you should see full contact along the sleeve and no rocking when you press gently from multiple angles. If the cage flexes at the repaired joint, the bird will often find and chew the highest flex point. Re-check tightness after the first week, then again at two to four weeks.
What are good “first 24 to 48 hours” monitoring checks after I fix the cage?
After a repair, place the cage in a low-stress environment and keep the bird under observation near the repaired area without leaving it unsupervised for long periods the first day. Watch for increased chewing at the repaired seam, flaking debris, or new rust bloom. If you see any new powder, stop immediately and move to a temporary carrier.
If I replace a panel, how do I know the new bar spacing is still safe?
Any bar spacing change matters mainly if the bird can slip its head through or reach fingers in and out. After panel replacement, measure the new spacing where the repair sits and compare it to your bird species and the cage’s original spacing. If spacing increases near the door or perch area, treat it as a safety issue and adjust or replace the panel.
Can I use glue or sealant to patch a broken spot instead of replacing hardware?
Tread carefully with adhesives. Many glues, sealants, and coatings off-gas or become chewable points, and even “pet-safe” labels may not cover use on actively chewable structural surfaces. Prefer mechanical fasteners and stainless parts. If you must use a sealant for corrosion control, keep it out of any area the bird can lick or chew and allow full cure time per product instructions before reintroducing the bird.
I replaced a latch before, and it failed again. Should I replace the latch again or look deeper?
If the latch failure seems related to impact or a bent door frame, replacing the latch alone often repeats the failure. Inspect the door alignment points, strike plate contact, and any bars that the latch mounts to for bending or incomplete seating. Upgrade remaining latches only after the frame is confirmed straight and lock points align properly.
How do I decide repair versus full replacement when the damage keeps coming back?
A practical rule is to only repair when you can confirm both (1) no white rust, pitting, or coating loss at any near-contact wire surfaces, and (2) the frame is not cracked or visibly warped. If the cause was moisture-driven corrosion or recurrent falls, replacement is usually more cost-effective than repeated patching.