A 'sprint car bird cage' setup is a streamlined, mobility-friendly cage build that prioritizes quick access, good airflow, and a clean layout you can actually manage every day. Think low-profile tray systems, smooth-rolling stands, fast-release door latches, and an enrichment layout that keeps things tidy without slowing you down. It is not a racing term here; it is a practical philosophy: build lean, build safe, and make every part of the cage easy to reach, clean, and adjust on short notice. If you are setting one up today, here is exactly how to do it right from the start.
Sprint Car Bird Cage Setup: Step-by-Step Safe Guide

Maya Bennett
18 Jun 2026

What a sprint car bird cage setup actually means
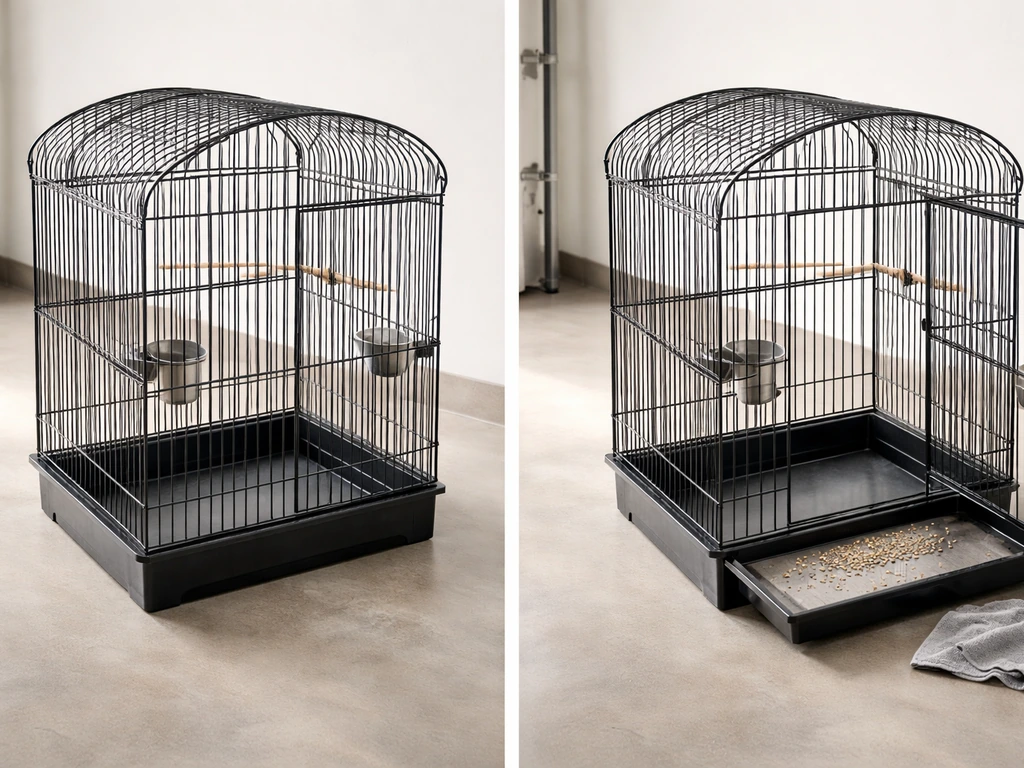
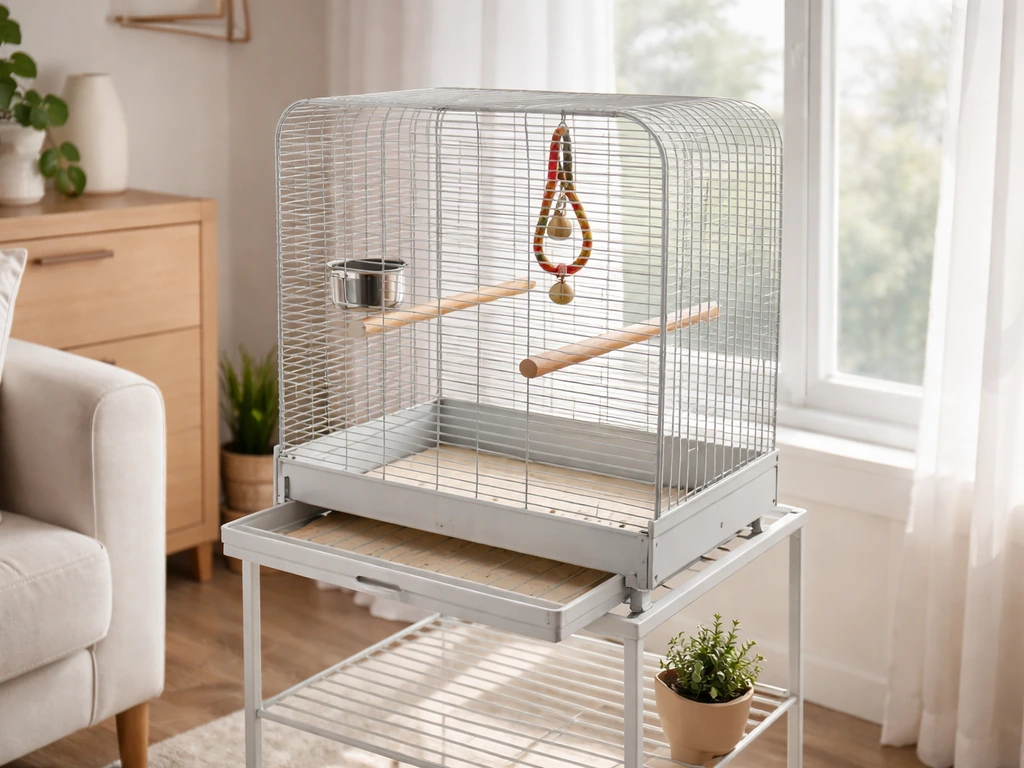
The sprint car concept applied to a bird cage is about efficiency and mobility. It describes a cage configured for fast daily maintenance, quick health checks, and easy repositioning without dismantling the whole thing. That means a cage on a wheeled stand with locking casters, front-facing doors with secure but fast-release latches, a pull-out or slide-out waste tray, and an interior layout where perches, feeders, and water stations are positioned logically so you can swap them out or clean them without disturbing the bird more than necessary.
The welfare requirements do not change just because the build is streamlined. You still need correct bar spacing, non-toxic materials, proper ventilation, and species-appropriate dimensions. The sprint car approach just means you are building those requirements into a setup that is genuinely easy to live with every single day, which is actually better for your bird because consistency in cleaning and monitoring improves welfare outcomes.
Choosing the right cage size, bar spacing, and materials
Size: give them room to move
For budgies, lovebirds, parrotlets, and cockatiels, the practical minimum is around 20 x 20 x 30 inches, which aligns with both Merck Veterinary Manual guidance and what most avian vets use as a floor, not a target. Bigger is always better if you can manage it. The wingspan rule is a useful gut-check: a bird should be able to fully extend both wings without touching the bars. For cockatiels and small conures, a 20 x 20-inch footprint is the minimum width and length; for budgies, some veterinary hospital guides cite 17 x 17 inches as an absolute floor, but 20 inches is a much more livable starting point.
Bar spacing: the number that matters most for safety
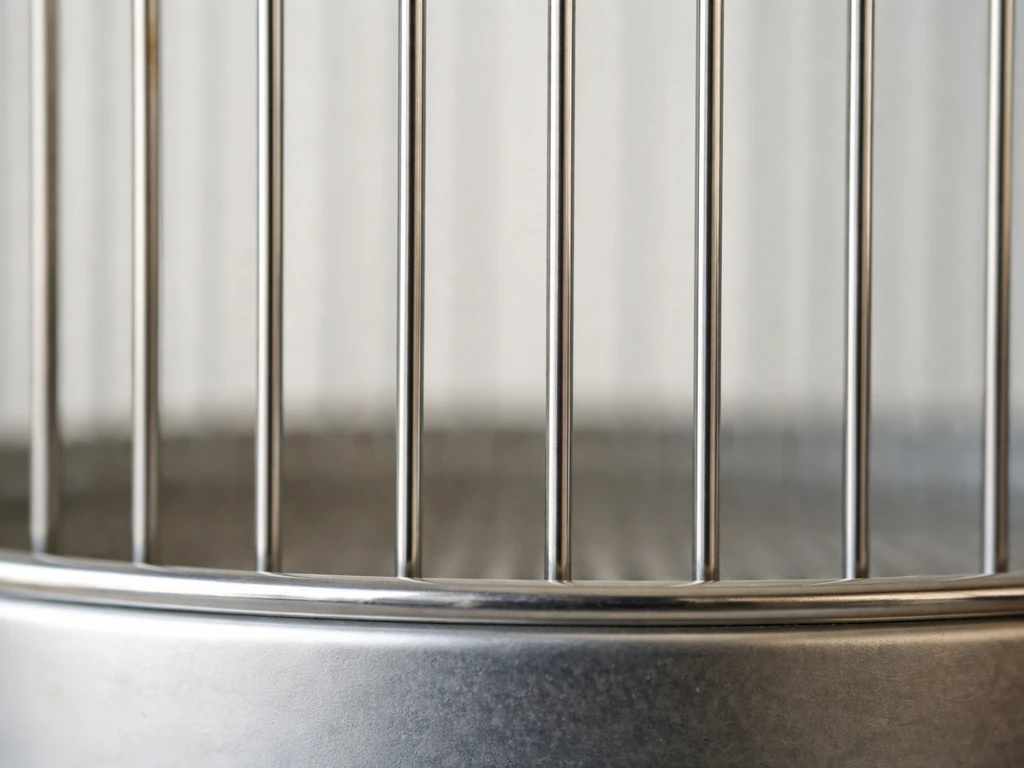
Bar spacing determines whether your bird can get its head or body stuck, which is a life-or-death detail. For small birds including budgies, parrotlets, finches, lovebirds, and canaries, bar spacing must not exceed 1/2 inch (0.5 inches). Cockatiels can tolerate up to 5/8 inch, but 1/2 inch is the safer and more commonly recommended standard for mixed small-bird setups. Head entrapment at incorrect bar spacing is a real and documented hazard, so do not buy a cage without confirming this measurement yourself with a ruler.
Safe materials: what to buy and what to avoid
Stainless steel is the gold standard for bar material. It is non-toxic, durable, easy to clean, and does not corrode. Powder-coated steel is a widely used and acceptable alternative, but only if the coating is confirmed lead-free and zinc-free and is fully intact with no chips or peeling. Avoid galvanized wire cages entirely. Galvanized steel contains zinc, and zinc ingestion from chewing on cage bars is one of the most common causes of heavy metal poisoning in pet birds. Similarly, avoid any cage with paint that cannot be confirmed non-toxic, and skip homemade enclosures made from wood or hardware store galvanized wire. PetMD's cockatiel care guidance explicitly flags wood and galvanized wire habitats as problematic for exactly these reasons.
| Material | Safety Rating | Notes |
|---|---|---|
| Stainless steel | Best | Non-toxic, corrosion-resistant, easiest to clean |
| Powder-coated steel (lead/zinc-free, intact) | Good | Inspect regularly for chips; replace if coating degrades |
| Galvanized wire | Avoid | Zinc exposure risk; documented cause of heavy metal poisoning |
| Bare mild steel | Avoid | Rusts quickly; corroded surfaces harbor bacteria and sharp edges |
| Wood frame panels | Avoid | Absorbs moisture, bacteria, and is impossible to fully sanitize |
Also check every accessory: food dishes, water tubes, perch connectors, and toy hooks. Anything that comes in contact with your bird or its food and water should be stainless steel, food-grade plastic, or untreated natural wood. If you cannot confirm what a piece is made from, do not use it.
Tools and materials checklist before you start
- Tape measure or ruler (to verify bar spacing and cage dimensions)
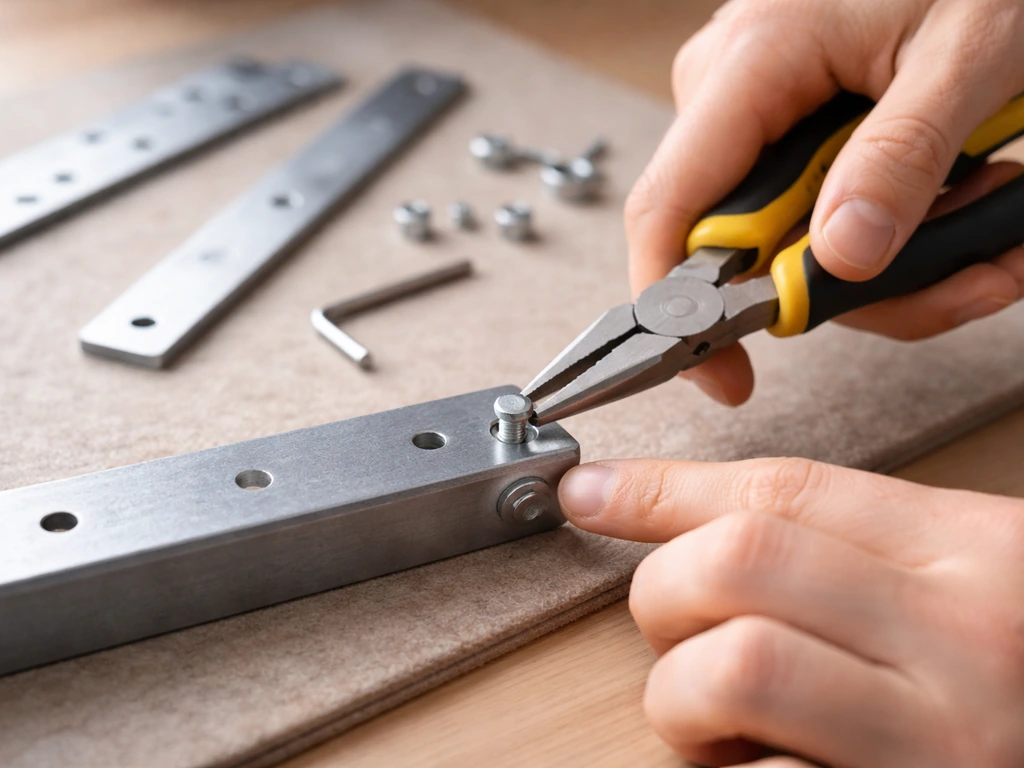
- Needle-nose pliers (for tightening hardware, bending wire ends flush)
- Wire cutters (for trimming any protruding wire ends)
- Screwdriver set (flat and Phillips for latch hardware and stand assembly)
- Fine-grit sandpaper or a metal file (to smooth any sharp cut edges)
- Locking casters rated for your cage weight (usually 4, two with locks)
- Non-toxic bird-safe disinfectant (such as Oxyfresh or a diluted bleach solution for pre-use cleaning)
- Cage liners or unscented paper (for the waste tray)
- Zip ties rated for indoor use (for securing accessories; trim all tails flush)
- Quick-release door latches or carabiner-style locks if the existing latches are weak
Step-by-step assembly and safety checks
- Unbox and lay out all panels, trays, hardware, and accessories before touching anything together. Check the parts list against what arrived.
- Inspect every bar for sharp ends, kinks, or coating chips. Run your fingertip along the bar joints and the cut edges of the wire mesh. File or sand anything that snags.
- Assemble the frame starting from the base. Attach the bottom tray housing first, then build the side panels up, then the top. Follow manufacturer sequence if provided; the base being stable before the walls go up matters for alignment.
- Check bar spacing with a ruler at multiple points across each panel. Manufacturers vary and the listed spec is not always what shipped. If spacing exceeds 1/2 inch anywhere on a small-bird cage, return or reject the cage.
- Install the stand and lock the casters if using a wheeled base. Test the locks on two different floor surfaces. A loaded cage on unlocked casters on a smooth floor is a tipping hazard.
- Hang and test every door. Doors should close with a solid click and require deliberate human hand movement to open. Birds, especially cockatiels, are escape artists; a door that pops open with pressure from inside is a problem. Add a quick-release carabiner to any latch you are not confident in.
- Before placing the bird inside, do a full pre-use clean: scrub all surfaces with hot water and a bird-safe soap, rinse thoroughly, then wipe with a diluted bird-safe disinfectant. Allow the cage to air dry completely in a ventilated area before use. Never expose the bird to a cage that still smells of cleaner.
- Do a final safety walk-around: no wire ends sticking inward, no gap larger than bar spacing spec, all latches locked, tray seated fully, no zip-tie tails left uncut.
Setting up perches, feeders, water, and enrichment
Perches: variety is not optional
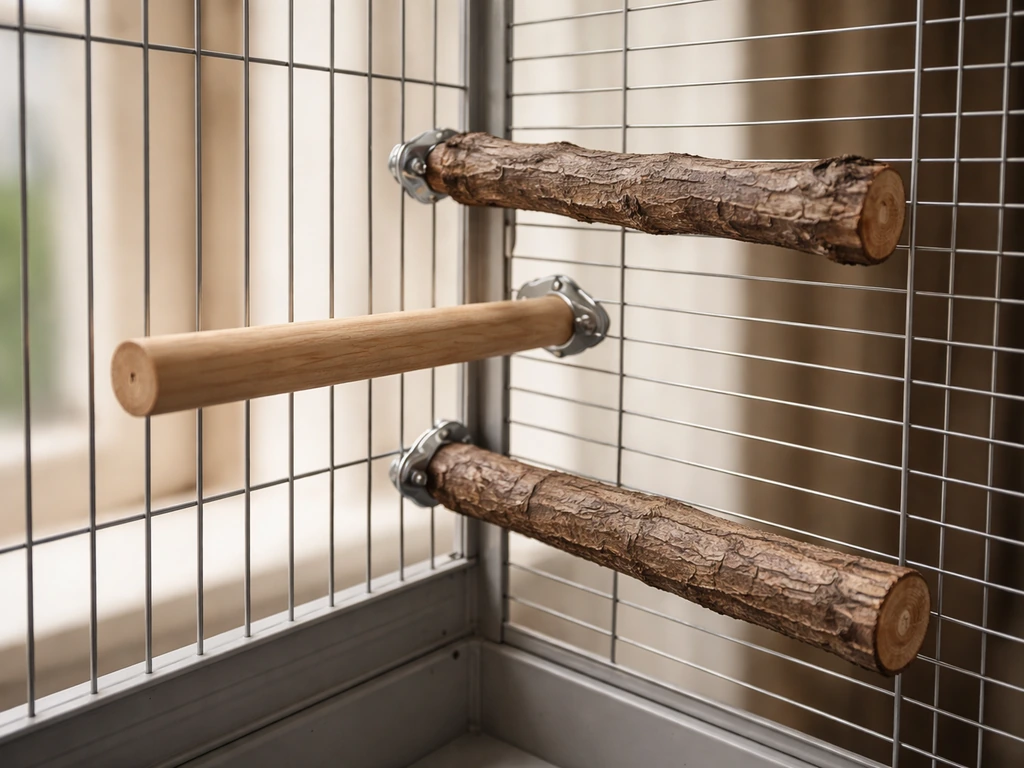
Use at least three perches of different diameters and textures. The diameter should roughly match your bird's foot size so that the front toes and rear toe do not fully overlap when gripping. For budgies and cockatiels, natural wood dowels between 1/2 inch and 1 inch work well as a base, but you want variation.
A thinner branch-style perch (natural wood like manzanita, dragonwood, or java wood) at one height, a slightly thicker perch lower down, and a textured mineral or cement perch for beak and nail conditioning at a mid-level are a solid starting trio. Using perches of a single uniform diameter is a documented contributor to pressure sores on the underside of the feet, so varied sizing is a welfare requirement, not just a preference.
VCA warns that using perches of a single uniform diameter can contribute to pressure sores on the underside of feet and that avian veterinarians do not recommend rope perches.
Avoid rope perches and synthetic fiber perches. Fraying is a serious problem with these: birds get toes and nails caught in loose fibers, sometimes with severe injury. Avian vets consistently advise against rope perches for exactly this reason. Stick with natural wood, mineral, or food-safe acrylic options. Position at least one perch near the top of the cage (birds feel safer at height), one at a mid-level near the food and water, and one lower for variety. Never position a perch directly above a food or water dish.
Feeders and water stations
Mount two food dishes at a comfortable mid-level perch height on opposite sides of the cage to encourage movement. One for seed or pellets, one for fresh food. Stainless steel dishes with bolt-on or clip-on mounts are the most hygienic and easiest to swap for cleaning. For water, either a stainless steel clip-on dish or a bird-safe water tube works; tubes reduce contamination from droppings but need checking daily for blockages. Position water away from perches directly above to keep it from filling up with droppings and feather dust. In a sprint car layout, swing-out dish holders that open from the outside of the cage are worth the upgrade: you can swap dishes without opening the main door.
Enrichment layout without cluttering the space
Keep the enrichment layout sparse at first. One foraging toy, one bell or sound toy, and a few safe chew items like natural wood blocks or cardboard is enough to start. Hang toys from the upper cage area so they do not obstruct flight paths or landing perches. Rotate toys weekly to maintain novelty; a bird that ignores everything in the cage is a bird that is bored. Leave the center of the cage open for movement. A cluttered cage is harder to clean and harder for the bird to navigate, both of which are problems in a sprint car setup.
Placement, airflow, and seasonal protection
Place the cage against a wall, not in the center of a room, so at least one side feels secure to the bird. Position it at or slightly below eye level for humans so you can observe the bird easily and the bird does not feel threatened from above. Keep the cage away from exterior doors, drafty hallways, windows that get direct midday sun, and anywhere within range of cooking fumes. The kitchen is especially dangerous: overheated PTFE (Teflon) nonstick coatings release fumes that are fatal to birds, and even moderate cooking smoke can cause serious respiratory distress. The University of Illinois veterinary program explicitly warns about PTFE sources and recommends limiting any bird's exposure.
Ventilation matters more than most people realize. Birds that produce powder down (cockatiels, cockatoos, African grey parrots) generate fine particulate that can be a respiratory irritant to other birds and even to the birds themselves in poorly ventilated spaces. Merck's guidance notes that pulmonary hypersensitivity in macaws has been associated with housing near high powder-down species in stagnant air. American Humane standards for bird rooms recommend air handling that creates negative pressure with exhaust vented directly outside. At home, this means keeping the bird room well ventilated with fresh air exchange, using an air purifier with a HEPA filter, and avoiding placing the cage in corners where air stagnates.
Seasonal and weather protection
Indoors, keep cage temperature between 65 and 80 degrees Fahrenheit. Avoid placing the cage near heating vents or radiators; forced-air heat dries out respiratory membranes and can carry fumes. In winter, check for cold drafts from windows at night even if the room feels warm during the day. A breathable cage cover (cotton or linen, not plastic) used at night can help buffer temperature drops and reduce drafts while still allowing airflow. Never use an airtight cover or plastic sheeting; those trap moisture and reduce oxygen exchange, which creates bacterial and mold conditions and can cause carbon dioxide buildup in an enclosed space.
If you move the cage outdoors at any point, direct sun exposure above 85 to 90 degrees Fahrenheit is dangerous, especially with no shade option available. Position outdoor cages in partial shade, ensure the bird can always move into a cooler section, and bring them inside when temperatures drop below 60 degrees Fahrenheit or if wind picks up significantly. A wheeled sprint car setup makes this much easier because you are not carrying the whole thing.
Mess control and your daily cleaning workflow
A sprint car setup makes cleaning faster if you build it right from the start. If you want to see how all of these details come together, look for the of bird and cage walkthrough that shows the setup step by step. Line the waste tray with unscented paper (newspaper, butcher paper, or commercial cage liners) cut to fit. Change it daily. This sounds like a lot but it takes about 90 seconds once you have the tray system working smoothly, and it keeps ammonia from building up in the cage. Ammonia from droppings is a direct respiratory irritant for birds and becomes a serious problem if you let trays go more than two days.
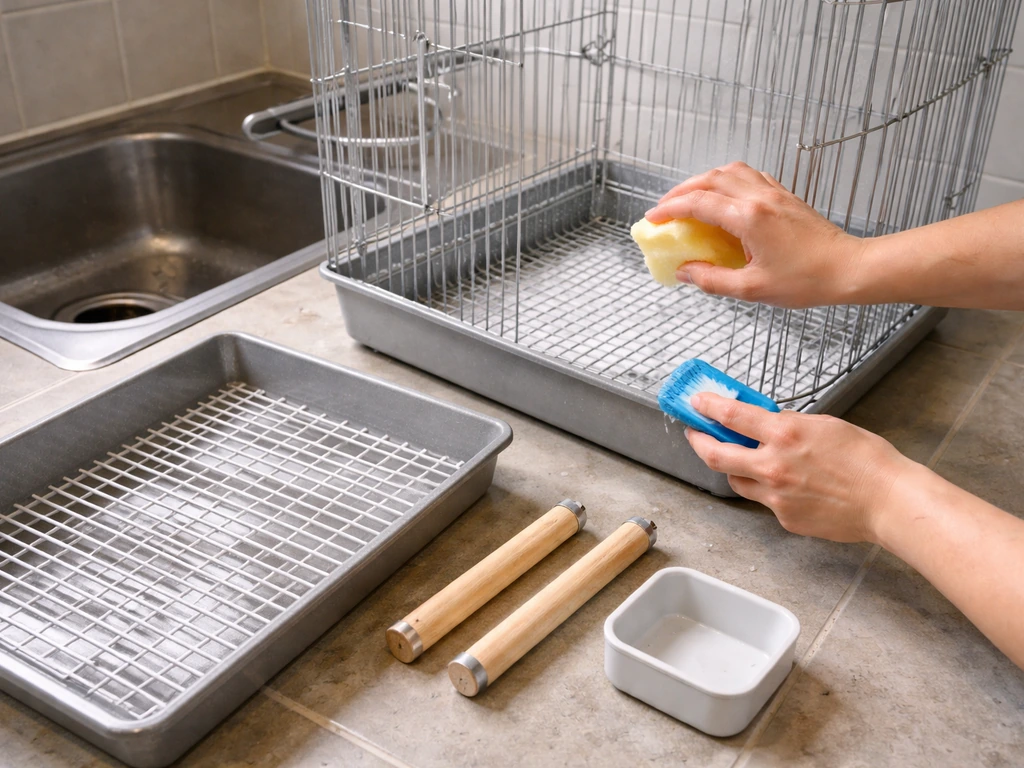
Scrub and wash the entire cage, tray, perches, and dishes at least once to twice per month with non-toxic disinfectant soap and hot water. In a USDA APHIS docket attachment related to avian welfare, sterilizing cages, perches, and bowls between occupants is discussed, including “bird-safe” cleaning examples such as Oxyfresh and disinfecting products like Avitech/Dent-A-Gene in a shelter short-term holding context [USDA APHIS docket attachment that references “bird-safe” cleaning and disinfecting products like Oxyfresh and Avitech/Dent-A-Gene](https://downloads. regulations. gov/APHIS-2020-0068-22463/attachment_2.
pdf). This is the VCA-recommended frequency and it aligns with what actually keeps bacterial and fungal loads under control. The critical step is rinsing everything completely before the bird goes back in. Disinfectants including diluted bleach and vinegar can release toxic fumes if residue remains or if the bird is exposed before drying.
Purdue veterinary guidance recommends scrubbing off all organic material first (droppings, food debris) before applying any disinfectant, since disinfectants work poorly on dirty surfaces. A 1:10 dilution of bleach in water is an effective sanitizer once the surface is already clean, followed by a thorough rinse and complete air drying.
- Daily: remove and replace tray liner, check water and food freshness, spot-clean any obvious droppings on perches or bars with a damp cloth
- Weekly: remove and wash all dishes, scrub perches with hot water and a stiff brush, wipe down cage bars with a damp cloth, rotate toys
- Bi-weekly to monthly: full cage disassembly clean with hot water and bird-safe disinfectant, rinse completely, air dry fully, replace any worn or stained cage liner material
DIY customization, troubleshooting, and hazard fixes
Sprint car upgrades worth making
- Wheeled stand with locking casters: the single biggest sprint car upgrade; makes placement and seasonal repositioning effortless
- Swing-out external dish mounts: swap food and water without opening the main door or disturbing the bird
- Quick-release door latches with a secondary carabiner backup: prevents escapes, keeps curious birds from learning the latch
- Pull-out seed catcher skirt: a mesh or acrylic skirt around the lower cage perimeter catches scattered seed and feather debris before it hits the floor
- Clip-on LED task light above the cage: gives you clear visibility for health checks without needing overhead lighting at eye level
Troubleshooting common problems
Bird not using perches: check diameter and texture. If all perches are the same smooth dowel, add a natural branch-style perch with grip texture. Position perches at different heights and observe which height the bird gravitates toward naturally, then add more options at that level.
Food and water spilling constantly: reposition dishes so they are not directly below a perch, and switch to deeper stainless steel dishes with a lip. If you are troubleshooting a broken bird cage drawing or a layout sketch, focus on how the door, latch, and dish positions line up so nothing blocks access during daily cleaning. Seed catchers and anti-scatter dish covers (available at most bird supply retailers) solve most chronic spill problems.
Doors not sealing or latches failing: replace manufacturer latches with stainless steel bolt-style latches or add a carabiner rated for at least 5 lbs. Check that the door frame is not bent or warped; a warped frame will never seal properly no matter the latch quality. If the frame is warped, you may need to replace the panel.
Rust developing on bars or hardware: surface rust on mild steel is both a hygiene issue and a sign the coating has failed. Sand the rusted area, check for bare metal exposure, and if the rust is on the bars themselves or the internal structure, the cage needs to be replaced. A stainless steel upgrade eliminates this problem permanently.
Pest prevention
Feather mites, red mites, and flies are the three most common cage pests in a bird setup. Mites typically arrive on new birds or from contaminated accessories; prevention means quarantining new birds for at least 30 days before cage introduction and never reusing accessories from unknown sources without full disinfection. Red mites hide in cage joints and crevices during the day and feed on birds at night; a thorough monthly disinfection that reaches every seam and joint is your best defense. For flies, daily tray changes and covered food dishes are the primary control. Never use commercial insecticide sprays, powders, or pest strips near or in the bird's environment; these are acutely toxic to birds even at low concentrations.
Ventilation problems and how to catch them
Signs of poor ventilation include the bird sitting fluffed up more than usual, persistent respiratory clicking or tail-bobbing while breathing, or an unusual odor coming from the cage area. These are veterinary concerns first: get the bird checked.
But also move the cage to a better-ventilated location immediately, increase fresh air exchange in the room, and if you have multiple species including heavy powder-down producers like cockatiels or cockatoos in the same room, add a HEPA air purifier and consider separating them. Poor air quality is one of the most underestimated welfare risks in a home bird setup, and the sprint car approach of keeping the cage mobile means you can actually fix it quickly.
That mobility is a big part of the bird cage problem in day-to-day care, since it helps you respond quickly to air quality and other risks sprint car approach of keeping the cage mobile.
A note on sharp wire ends and chew hazards
Any time you modify a cage by cutting wire, drilling holes, or adding hardware, go back over every cut edge and attachment point. File sharp wire ends flush, check that screw heads face outward and not inward toward the bird, and confirm that any zip ties used to mount accessories have been cut at the knot with no tail protruding. Birds investigate everything with their beaks, and a sharp wire end or accessible screw tip is an injury waiting to happen. This is a five-minute check that makes the difference between a safe build and a problem you find too late.
FAQ
How do I confirm bar spacing is safe if the cage has different sections or rounded corners?
For a sprint car bird cage setup, measure the bar spacing at multiple heights and near corners, because some cages have tighter spacing around welded frames. Use a rigid ruler or calipers, verify the maximum gap is below your bird’s limit (about 1/2 inch for small birds), and don’t rely on the product label if the cage is used or secondhand.
Can I use scented liners or deodorizing products in the waste tray to reduce smell?
Avoid any “self-cleaning” liners, deodorizer pellets, or scented products inside the sprint car bird cage setup. Even if the scent is mild, many are toxic to birds through inhalation. Stick to unscented paper liners for the tray and clean metal or food-safe materials only.
Where should I place an air purifier relative to a mobile sprint car bird cage so ventilation improves without creating drafts?
If you use a HEPA purifier, keep the cage in the purifier’s normal airflow zone but do not blast air directly at the bird (drafts can worsen respiratory irritation). A practical test is to place a loose tissue near the cage and ensure there is gentle circulation, not strong, steady wind across the perches.
What perch setup mistakes cause injuries even when the perch diameter looks correct?
Choose perches that are secure and do not move when you lightly push them. For safety, avoid any perch holders that allow gaps where a nail can catch, and make sure perch ends are capped or positioned so the bird cannot wedge its foot between metal parts. Rotate perch locations during cleaning so droppings do not build up in hidden pinch points.
How do I troubleshoot a water tube that sometimes leaks or sometimes clogs?
For water tubes, check not just flow rate but also the seal at the connection point and any vent holes. A slow leak can wet the area under perches and create ammonia risk from damp droppings, while a partial blockage can leave the bird without enough water. Inspect daily and wipe tube connections during tray changes.
My latch closes quickly but sometimes feels loose, what should I do in a sprint car bird cage setup?
If you need a fast-release latch, add a backup safety habit: keep a secondary check that the latch is fully engaged after closing, especially after cleaning when hands may dislodge alignment. If the cage has any play in the door frame, prioritize door replacement or professional adjustment instead of relying on stronger force with the latch.
Can I sand and repaint rust spots on the cage, or should I replace the cage entirely?
If you see rust starting at bar welds or around accessory holes, treat it as a full replacement decision for that cage section, not a spot-fix. Sanding and repainting can trap contaminants and the coating may not meet bird-safe standards. The most reliable path is upgrading to stainless steel bars and hardware to stop recurrence.
What is the correct order and timing for disinfecting so my sprint car bird cage stays safe for the bird?
If you must disinfect, never put the bird back until everything is fully dry and rinsed, including tray edges, perch undersides, and dish mounts. Residual bleach or vinegar can irritate airways, and “wet” disinfected surfaces can increase odor and fumes. Use hot water rinse as the final step, then air dry with the room ventilated.
How should I rotate toys weekly without increasing the risk of toe or nail injuries?
For weekly toy rotation, keep at least one chew item the bird already accepts so you do not reset behavior every week. If you notice toe or nail catching, remove the toy immediately and inspect the attachment point for sharp wire ends, frayed rope, or loose staples before reintroducing any similar item.
Do I need to treat the whole room and accessories for mites, or only the cage?
If feather mites or red mites are suspected, disinfecting the cage alone is often not enough. Launder or replace any washable covers, disinfect nearby stands, and quarantine and treat the bird under a vet plan, since mites live on both birds and their environment. Avoid adding new accessories during the treatment window.
What are the key safety rules for moving a sprint car bird cage outdoors, especially with partial shade?
For outdoor days, decide your “cool-down” rule before you go out. If the bird cannot reach shade and a cooler side within the enclosure, bring the cage inside. Also avoid windblown dust and direct exhaust exposure, and if the cage has wheeled casters, lock them so the bird cannot shift position into hotter sun.
Next Article
Bird Cage Problem: Diagnose Issues and Fix the Cause Fast
Quick checklist and step-by-step fixes for bird cage problem issues like mess, smell, safety, airflow, pests, and wear