For metal bird cages, your safest DIY option is a water-based, zero-VOC acrylic paint from a brand that explicitly labels its product bird-safe or non-toxic, such as ECOS Paints or AFM Safecoat. For the most durable and long-lasting finish, a professionally applied lead-free, zinc-free powder coat is the gold standard. Whatever you choose, the paint must be completely cured, not just dry to the touch, before your bird goes anywhere near the cage. That distinction matters more than almost anything else in this process. If you're wondering whether a bird cage is safe for rats, the key is making sure the materials are non-toxic and the finish is fully cured before the rats come into contact with it can i use a bird cage for my rats.
What Paint to Use for Bird Cage: Safe Step-by-Step

Maya Bennett
23 May 2026
How to tell if a paint is actually bird-safe
Birds have incredibly sensitive respiratory systems. Fumes that barely register for you can cause serious respiratory distress or worse in a parrot or finch. That means you can't just grab whatever's in the garage and call it good. Here's what to look for when evaluating any paint or coating.
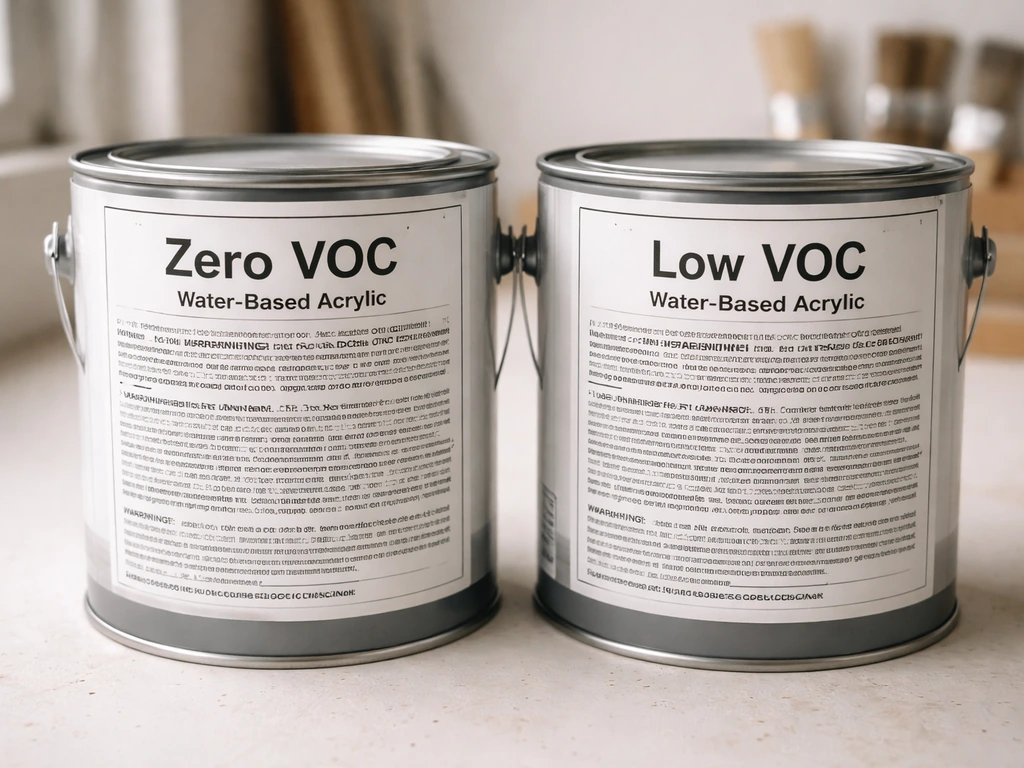
- Zero or ultra-low VOC (volatile organic compounds): VOCs are the airborne chemicals that off-gas from wet and curing paint. Even after a surface feels dry, VOCs can continue releasing for days. Look for products explicitly labeled zero VOC, not just low VOC.
- No lead, zinc, or chromate: These heavy metals are toxic to birds even in small amounts. ECOS Paints specifically flags these as things to avoid. Never assume a paint is lead-free just because it's modern, especially if you're repainting over an older cage finish.
- No formaldehyde or ammonia: Some interior paints include these as preservatives or binders. AFM Safecoat's zero-VOC line explicitly excludes both.
- Water-based formula: Solvent-based (oil-based) paints release harsher fumes and take far longer to fully off-gas. Stick with water-based acrylics.
- No lingering smell after curing: Once a paint has fully cured, it should be completely odorless. If you can still smell it after 72 hours in a ventilated space, that's a red flag.
A quick smell test is a useful final check, but don't rely on it alone. Some toxic compounds are odorless. Always read the Safety Data Sheet (SDS) for any product you're considering. If the brand won't publish an SDS or doesn't list ingredients, skip it. The paint must pass all the criteria above, not just a couple.
Best paint types for bird cages
Not all bird-safe paints are created equal, and the method of application matters as much as the formula. Here's how the main options stack up.
Powder coating (the best long-term option)
Powder coating is a dry finishing process where electrostatically charged powder is applied to metal and then cured in an oven at high heat. The result is a hard, durable finish that doesn't chip or peel the way liquid paint can. For bird cages, this is the most protective option because once it's properly cured, it's essentially inert. There are no ongoing off-gassing concerns. The catch: you need a professional shop to do it, and the cage has to be completely stripped first. When selecting a shop, explicitly ask for a lead-free and zinc-free powder coat and verify it. A good powder coat that's undercured, meaning it wasn't held at the right temperature long enough, can crack or scratch off easily. If you can scratch a new powder coat off with a fingernail, it wasn't cured correctly.
Water-based acrylic paint (the best DIY option)
For most bird owners doing this at home, a zero-VOC water-based acrylic is the way to go. Brands like ECOS Paints make products specifically for this use case. AFM Safecoat's zero-VOC flat is another solid choice that contains no formaldehyde or ammonia. These paints dry relatively quickly (thin coats can be touch-dry in 10 to 30 minutes) but require full curing before bird contact, which typically takes 24 to 72 hours for standard acrylics in good conditions. Apply in thin, even coats rather than one thick coat. Thick applications trap moisture and solvents underneath, which prolongs curing and can cause bubbling.
Spray paint vs brush-on: which is better?
Both can work, but each has trade-offs. Spray paint reaches all those tight angles around cage bars more easily and produces a more even coat. The downside is overspray, stronger aerosol fumes during application, and more demanding ventilation requirements. If you go the spray route, do it outdoors or in a proper spray area, wear a respirator rated for paint fumes, and never spray near the bird's room. Brush-on acrylic gives you more control, produces less airborne mist, and is generally more beginner-friendly for a cage project. For most home setups, brush-on zero-VOC acrylic with a good synthetic brush is the practical choice.
| Option | Durability | DIY-friendly | Off-gas risk | Cost |
|---|---|---|---|---|
| Zero-VOC acrylic (brush) | Good | Yes | Very low | Low |
| Zero-VOC acrylic (spray) | Good | Yes (outdoors) | Low with ventilation | Low |
| Standard spray paint | Good | Risky | High | Low |
| Powder coat (professional) | Excellent | No | None once cured | Higher |
What to use on different parts of the cage
Cages aren't one material. The bars, the hardware, and any wood or plastic components each need a slightly different approach.
Metal bars and wire
This is where your bird-safe zero-VOC acrylic or powder coat does its main job. Metal is non-porous, so adhesion depends on prep more than anything else. Bare metal or rust-free metal takes paint best. If your bars are galvanized, be aware that galvanization involves zinc, which is toxic to birds if ingested. Don't paint over deteriorating galvanized coating without fully stripping it first. Use a metal-compatible primer that's also low-VOC before your topcoat if the manufacturer recommends it.
Hinges and hardware
Hinges and latches are friction points, which means paint there is more likely to chip or wear. For these areas, a thin coat of the same bird-safe acrylic can work, but be careful not to gum up the moving parts. Some bird owners prefer to leave stainless steel hardware unpainted rather than risk paint flaking into the cage from a moving hinge. If the hardware is already powder-coated and in good condition, leave it alone.
Plastic parts
Most bird cages have plastic trays, feeders, or grate inserts. Standard acrylic paint doesn't bond well to smooth plastic without a plastic-specific primer. In most cases, it's better not to paint plastic cage parts at all. If the plastic is cracked or degraded, replace it rather than paint over it. If you absolutely need to touch up plastic, use a plastic-bonding primer first, then a zero-VOC topcoat, and make sure the surface isn't one your bird will chew on.
Wood stands and perches
Wood is porous and absorbs paint differently than metal. For cage stands that aren't inside the enclosure, a zero-VOC acrylic or even a water-based polyurethane (zero-VOC formulation) works fine. For anything inside the cage like wood perches, leave them unpainted. Birds chew on perches constantly, and even a non-toxic paint will be ingested in quantity over time. Natural, untreated wood is always the safer choice for interior perch surfaces.
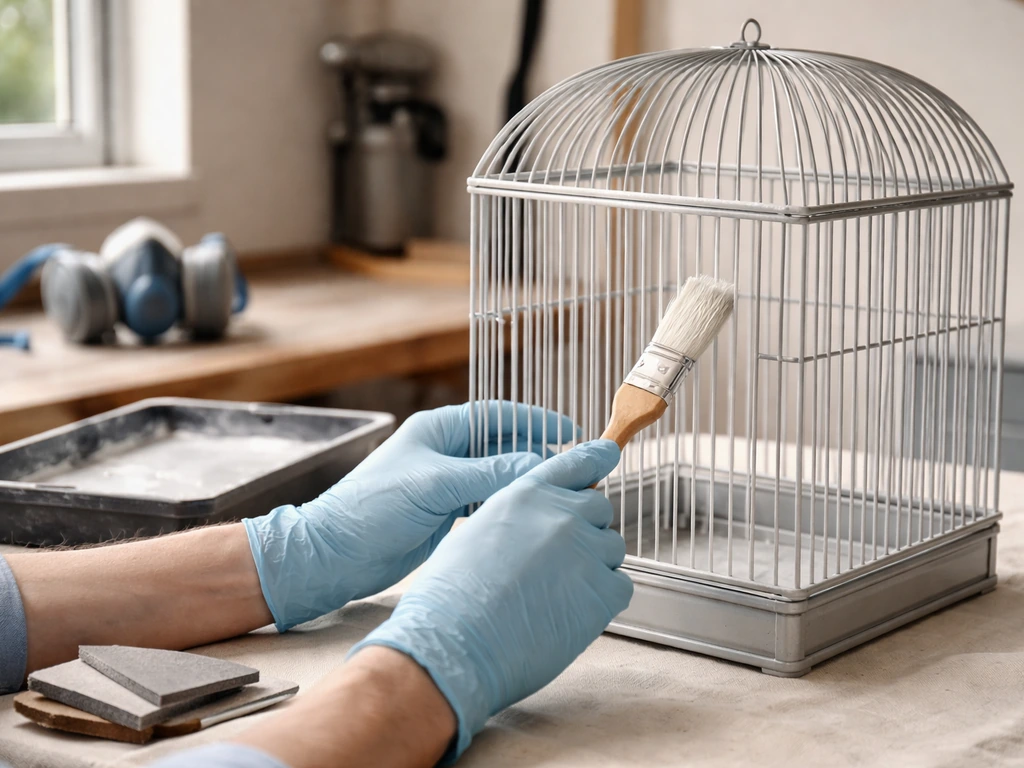
Step-by-step: how to paint a bird cage safely
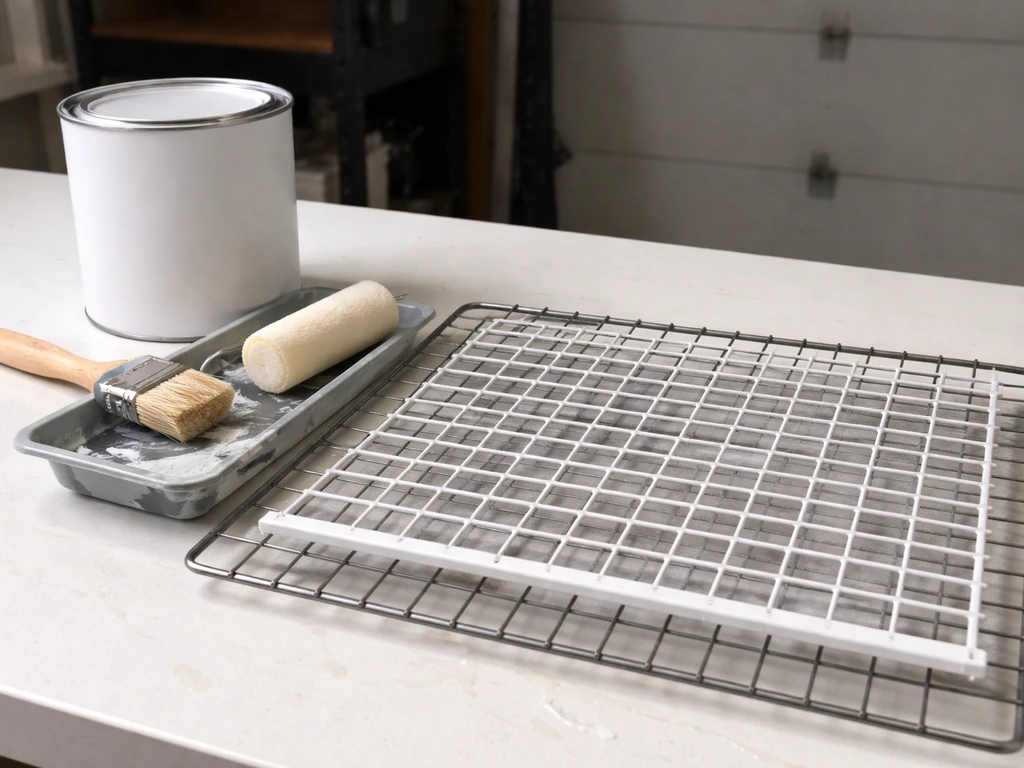
Before you start, gather what you need. Having everything prepped means you're not rushing and skipping steps.
- Wire brush or fine-grit sandpaper (120 to 220 grit)
- Rust remover or naval jelly (for rusty spots)
- Dish soap, bucket, and scrub brush
- Zero-VOC bird-safe paint (ECOS or AFM Safecoat recommended)
- Low-VOC metal primer if painting bare or rusted metal
- Synthetic bristle brush or spray equipment
- Respirator mask rated for paint fumes (N95 minimum; OV respirator for spray)
- Drop cloth or outdoor workspace
- Clean lint-free rags
- Remove your bird from the area entirely. Don't just move them to another room. Move them to a different floor or, better, outside or to a neighbor's home during application and the first 24 hours of curing.
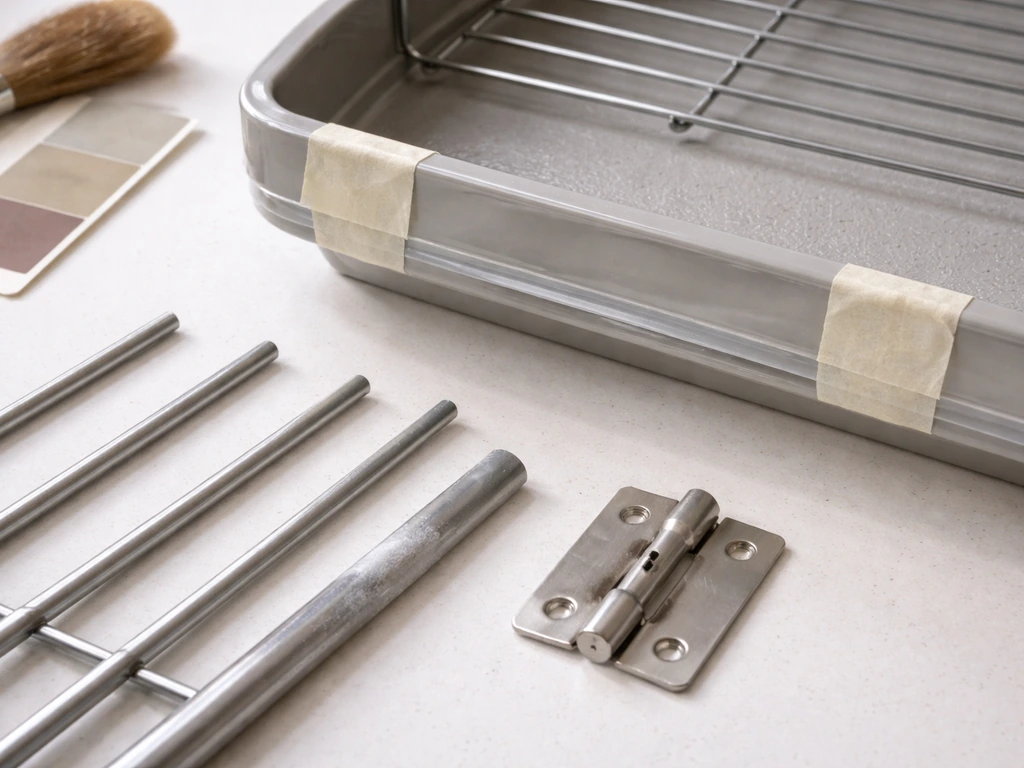
- Disassemble the cage as much as possible. Remove trays, grates, feeders, and any detachable hardware. This lets you paint all surfaces evenly and avoid puddling in corners.
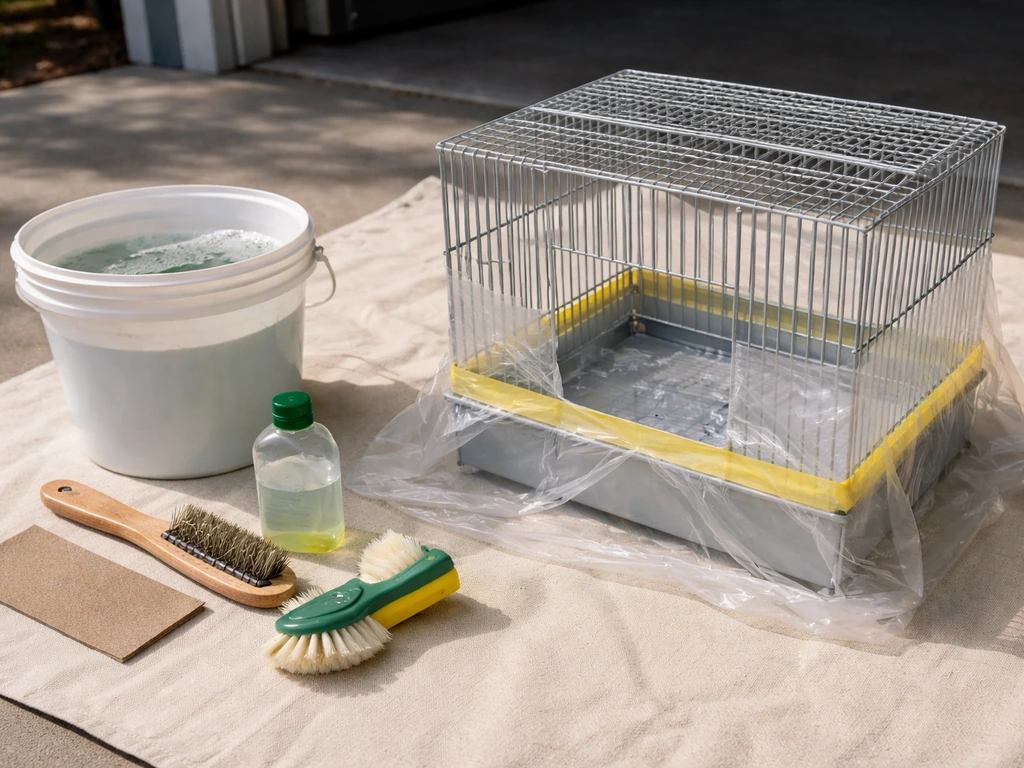
- Clean everything thoroughly. Wash all metal surfaces with dish soap and water to remove oils, droppings, and grime. Rinse completely and let it dry fully before sanding or priming.
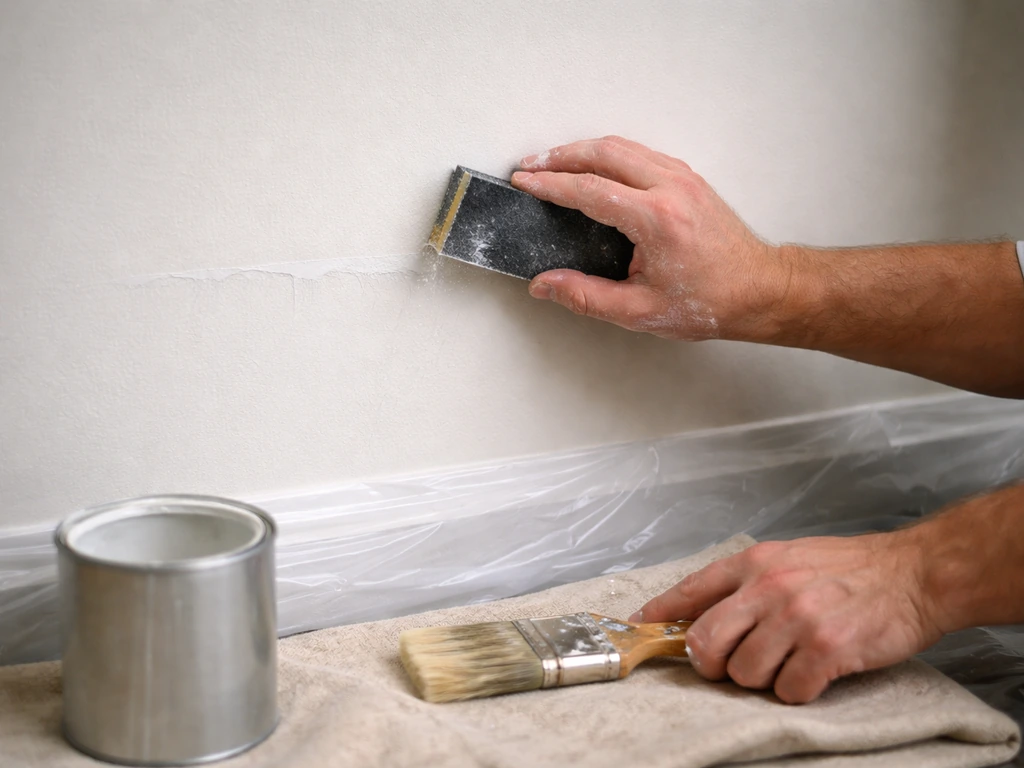
- Sand or strip the old finish. Use 120-grit sandpaper to scuff existing paint so the new coat bonds properly. If there's rust, use a wire brush to remove it, then treat the area with a rust converter before proceeding. If you're working on a cage from before 1978, treat the existing paint as potentially lead-bearing and take appropriate precautions (mask, containment, proper disposal).
- Apply primer if needed. If you're painting bare metal or covering rust repairs, apply a compatible low-VOC metal primer and let it dry fully according to the label before adding your topcoat.
- Paint in a well-ventilated space. Outdoors is ideal. If you're indoors, open every window and run fans to create cross-ventilation. Never paint in the same room where the bird lives, even with windows open.
- Apply thin, even coats. Two or three thin coats are far better than one thick coat. Thick coats trap solvents inside and extend curing dramatically. Let each coat dry to the touch before applying the next.
- Allow full curing before reassembly. This is not the same as dry-to-touch. Allow at least 72 hours in a warm, ventilated area. Some zero-VOC acrylics may need longer in humid or cool conditions. If you can smell any paint odor after 72 hours, wait longer.
- Do a final smell check. Put your face close to the cage bars and inhale. There should be zero paint smell. If there's any smell, give it another 24 hours and check again.
- Reassemble and reintroduce your bird. Only after the smell check passes should you put the cage back together, return food and water dishes, and bring your bird home.
Paints and additives to avoid completely
Knowing what not to use is just as important as knowing what to buy. Some common paint types are genuinely dangerous for birds.
- Lead-based paint: Lead was common in paint before 1978 and is still found in some industrial coatings. The CPSC limits lead in surface coatings to 90 parts per million, but even trace amounts are dangerous if a bird is chewing on bars. Never use any coating without a confirmed lead-free designation.
- Zinc-containing coatings: Zinc is used in some rust-inhibiting primers and galvanized finishes. It's toxic to birds if ingested. Avoid zinc-rich primers and don't paint over deteriorating galvanized metal without fully stripping it.
- Chromate and heavy-metal pigments: Some industrial paints use chromate for corrosion resistance. ECOS specifically calls these out as harmful. If the SDS lists chromate or heavy metal pigments, don't use it.
- Solvent-based (oil-based) enamels: These off-gas heavily and for a long time. Even after they feel dry, solvent vapors continue releasing. They're not appropriate for a bird cage under any circumstances.
- Unknown or generic craft paints: Dollar-store or unbranded craft acrylics may not list their full ingredient profile and may include preservatives, heavy metals, or fungicides that aren't disclosed. Stick with brands that publish a full SDS.
- Spray paints not explicitly labeled non-toxic: Most hardware-store spray paints contain solvents and propellants that off-gas significantly. The convenience isn't worth the risk unless the product is specifically formulated as zero-VOC and bird-safe.
- Anything with a strong odor after curing: If it still smells after 72+ hours of curing in open air, something is still off-gassing. That's a non-starter.
Drying vs curing: when can your bird actually come back?
This is the part most people get wrong. Dry to the touch means the surface film has hardened enough that it won't transfer to your finger. Fully cured means the chemical crosslinking process inside the paint film is complete and off-gassing has stopped. PowderCoatPro explains that blank" rel="noopener noreferrer">undercuring can leave a coating that never fully crosslinks, and poor prep can contribute to failures such as delamination and outgassing bubbles trapped in thicker films. If you’re pregnant, use extra caution with fumes and cleaning chemicals, and consider asking your healthcare provider what’s safest for your situation before you start off-gassing has stopped. Also, the safest approach depends on the cage material, ventilation during application, and whether the coating is fully cured before your bird has access. These are not the same thing, and for bird safety, only full cure matters.
For most water-based zero-VOC acrylics, thin coats can feel dry in 10 to 30 minutes. But full cure typically takes 24 to 72 hours under good conditions (warm, dry, ventilated). Some acrylics, like Golden Open, can take up to 30 days for true full cure. That's unusual, but it illustrates why you should always check the specific product's technical datasheet rather than guessing. A safe minimum for bird reintroduction with standard zero-VOC acrylics is 72 hours after the final coat, with a passed smell test. If conditions were cool or humid during drying, add another 24 hours minimum.
For powder coating, the curing happens in the oven at the shop. Once it's cooled and passed a scratch test (you should not be able to scratch it off with a fingernail), it's safe to reassemble. Still give it a ventilation period of 24 hours before reintroducing your bird, just to be cautious about any residual heat-related off-gassing from the curing process itself.
Troubleshooting common paint problems
Paint is peeling or flaking
This almost always comes down to prep. If the surface wasn't cleaned, degreased, or lightly sanded before painting, the new coat has nothing to bond to. Strip the flaking area back to bare or sound paint, clean thoroughly, let it dry completely, and reapply. If you used a thick single coat instead of multiple thin coats, the outer layer can skin over while the inner layer stays soft, which leads to peeling once the cage is in use. Thin coats, properly dried between applications, are the fix.
Uneven coverage or drips
Drips happen when you apply too much paint at once, especially on vertical bar surfaces. If the paint is still wet, you can brush drips smooth immediately. If it's dried, sand the drip smooth with fine-grit sandpaper (220 grit) and apply a thin touch-up coat. For spray paint, hold the can or gun further from the surface and keep it moving. Stopping in one spot while spraying creates runs.
Odor that won't go away
If your cage still has a noticeable paint smell after 72 hours outdoors or in a well-ventilated space, a few things could be going on. You may have applied coats that were too thick, trapping solvents inside. The ambient temperature may be too low, which slows curing significantly. Or the paint you chose has a higher VOC content than advertised. Move the cage outside if you haven't already, let it air for another 48 to 72 hours, and recheck. If the smell persists beyond a week, the product may not be appropriate for this use and should be stripped and replaced.
Bird is chewing the painted bars
This is a real concern, especially with parrots. Even a non-toxic, fully cured paint can be peeled off by a determined chewer. For heavy chewers, powder coating is far more resistant than any liquid paint. If your bird is actively peeling paint off the bars, that's a safety issue regardless of what paint you used, because ingesting any coating in quantity isn't ideal. Consider replacing the cage with a stainless steel option, which requires no coating at all, or having it powder-coated by a professional shop using a verified lead-free and zinc-free powder. CDC states that there are approximately 29 million housing units in the United States with lead-based paint hazards, including deteriorated paint and lead-contaminated dust blank" rel="noopener noreferrer">verified lead-free and zinc-free powder. If you're still deciding where to put the bird cage in the house, powder-coated bird cages are generally easier to keep safe because the finish is more resistant to wear and chipping. Also check that your bird has adequate chew toys and enrichment, since chewing behavior often increases when birds are bored or under-stimulated.
Hotspots where the finish wears quickly
Door hinges, food dish mounting points, and areas where the bird grips most often will wear faster than the rest of the cage. These spots need touch-ups periodically. Use the same zero-VOC paint, apply a thin coat only to the worn area, and follow the same curing protocol before reintroducing your bird. Don't let worn spots reach bare metal, especially if the underlying metal has galvanized coating, because exposed zinc is a direct ingestion hazard.
One last thing worth mentioning: if you're also thinking about putting the cage outside seasonally, outdoor exposure adds UV and moisture stress that accelerates paint wear. That's worth factoring into your coating choice, and it may make the case for powder coating even stronger if outdoor placement is part of your plan.
FAQ
Can I paint a bird cage that still has rust spots or flaking coating?
Don’t spot-paint over flaking or actively rusting areas. Strip back to sound material, remove all rust, then clean and dry thoroughly before priming (if the manufacturer requires a primer for the substrate), and apply thin coats. Leaving loose edges creates weak adhesion that can peel into the cage.
Is “zero-VOC” enough, or do I still need an SDS?
Zero-VOC reduces solvent fumes, but it does not guarantee bird-safe ingredients or a fully cured finish. You should still check the Safety Data Sheet for restricted components and confirm the product explicitly states non-toxic or bird-safe use, especially if the SDS is unclear or unavailable.
How can I tell if the paint is fully cured, not just dry to the touch?
Use the product’s technical data for full cure time, and follow the reintroduction window (many acrylics require days, not hours). A practical check is to verify the coating is hard and does not mark or transfer when gently rubbed with a white cloth, then complete the full cure period before bird access.
What ventilation setup is safest during painting?
Plan for cross-ventilation and separation from the bird room. Keep the bird completely out of the house area being painted, run fans to exhaust outdoors when possible, and avoid recirculating air back into living spaces. If you smell paint strongly indoors or have visible mist/overspray, stop and improve ventilation before continuing.
Can I use a clear coat over bird cage paint?
Only if the clear coat is also specifically labeled non-toxic/bird-safe and is compatible with your base coating. Many “concrete” or “marine” clears can contain additives that change cure behavior and may introduce residues. If you use a clear coat, follow the strict full cure requirement for the final top layer, not the base layer.
Should I paint the bars if my bird is a heavy chewer?
For heavy chewing, coating failure risk goes up even with safe products. Powder coating tends to resist chewing and chipping better than most liquid paints, but any chewed or lifted coating still needs to be addressed immediately. If your bird can peel coating in quantity, consider a cage material that needs no coating, like stainless, or have the cage powder-coated professionally.
Can I paint over galvanized bars without stripping?
Avoid painting over deteriorating galvanized coating. Galvanized layers can contain zinc, which is hazardous if birds ingest it. If the galvanization is intact, still follow manufacturer guidance and use appropriate primers and prep, but if it’s flaking or corroded, strip first and repaint with a compatible system.
What about the plastic tray, grate insert, or feeder compartment, can I just paint those?
Usually it’s better not to. Standard acrylic topcoats may not bond well to smooth plastics, and painted plastic is more likely to flake or become chew targets. If touch-up is unavoidable, use a plastic-bonding primer plus a bird-safe zero-VOC topcoat, then ensure the bird cannot chew it (and replace degraded plastic parts instead).
Do I need to remove powder coat if it’s already on the cage?
If the existing powder coat is well-adhered and in good condition, you may be able to scuff-sand and topcoat only if the new product is compatible and the manufacturer allows it. If there is peeling, cracking, or rust beneath, strip the loose coating completely, then clean and refinish. Always cure the final coat fully before bird contact.
How soon can I reassemble the cage after painting or powder coating?
You can reassemble after painting only when the coating is fully cured, not just dry, and ideally after a ventilation period so any residual odors dissipate. For powder coating, reassembly is typically after cooling and a scratch test passes, then allow an additional ventilation period (many owners use around a day) before introducing the bird.
What should I do if the cage still smells like paint after 72 hours?
First verify you’re using outdoors or a truly well-ventilated area. Thick coats, cold or humid conditions, or a coating with higher actual VOC than claimed can slow curing. Air it out longer, check cure hardness, and if the smell persists beyond a week or the coating is soft, strip and refinish with a product that matches bird-safe requirements.
Can I repaint touch-ups on worn spots without fully repainting the whole cage?
Usually yes for small worn areas, as long as you prep correctly. Sand lightly, remove debris, degrease if needed, and apply thin touch-up coats to the worn area only, then allow the same full cure time. Avoid leaving bare metal exposed, especially on regions that can contact the bird’s mouth.
Is it safe to paint around the hinges, latches, and rails?
You can paint these areas lightly, but prevent paint from gumming moving parts. Apply minimal coating only where it’s needed, avoid pooling, and keep hardware movement accessible during curing if possible. If hardware is powder-coated and intact, leaving it unpainted reduces flaking risk.
What is the safest practice if I’m painting while pregnant or in a household with a high-sensitivity person?
Treat fumes and cleaning chemicals as the main concern during application and cleanup. Use strict ventilation, keep the sensitive person away from the work area, and consider pausing the project if fumes are unavoidable. Ask a healthcare professional about precautions specific to your situation, especially around solvent exposure and after-spray residues.
Can I paint a cage and keep it in the garage before bringing it indoors?
It can help, but don’t rely on storage as a substitute for full cure. Even in a garage, you must complete the full curing time for the product system, and then confirm odor and coating hardness. If the smell persists, keep exhausting ventilation outdoors and do not bring the cage near the bird until fully resolved.