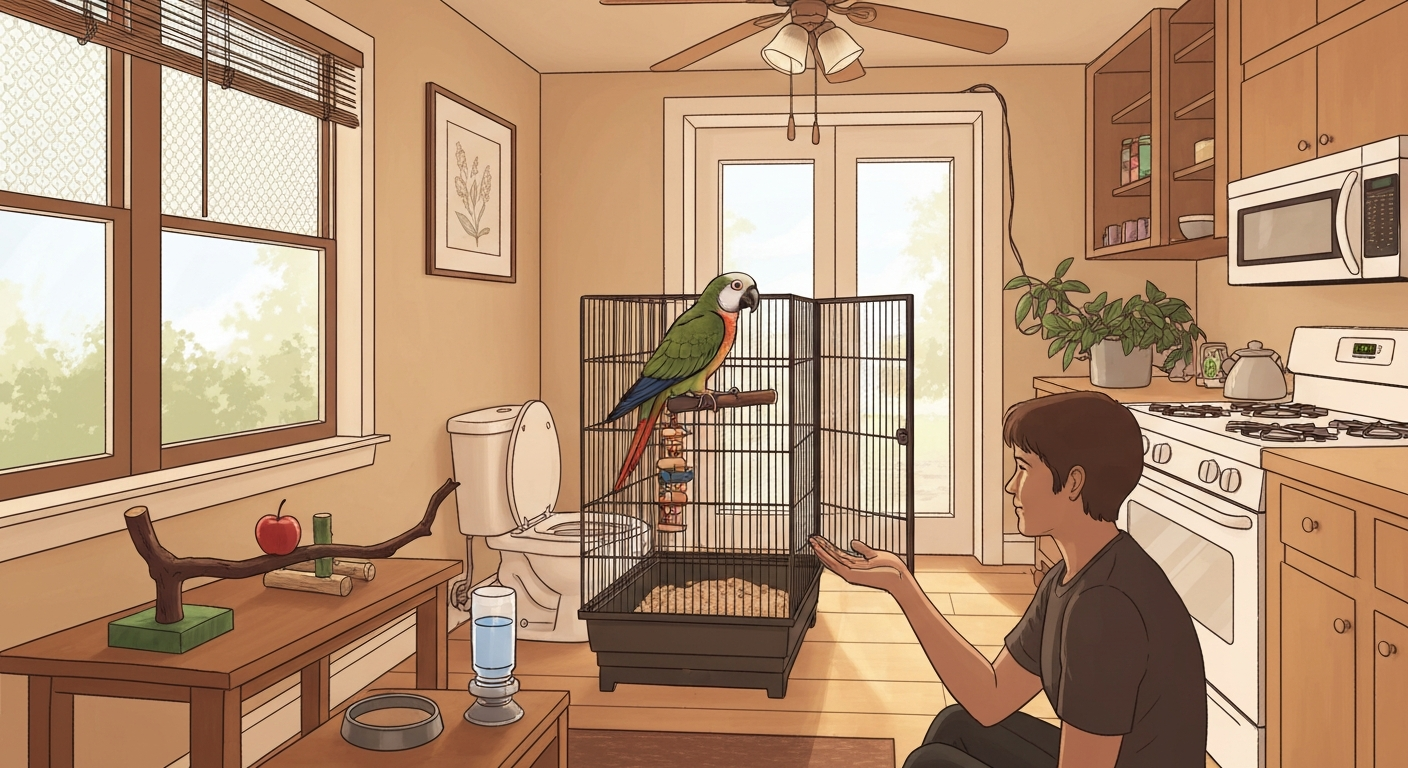
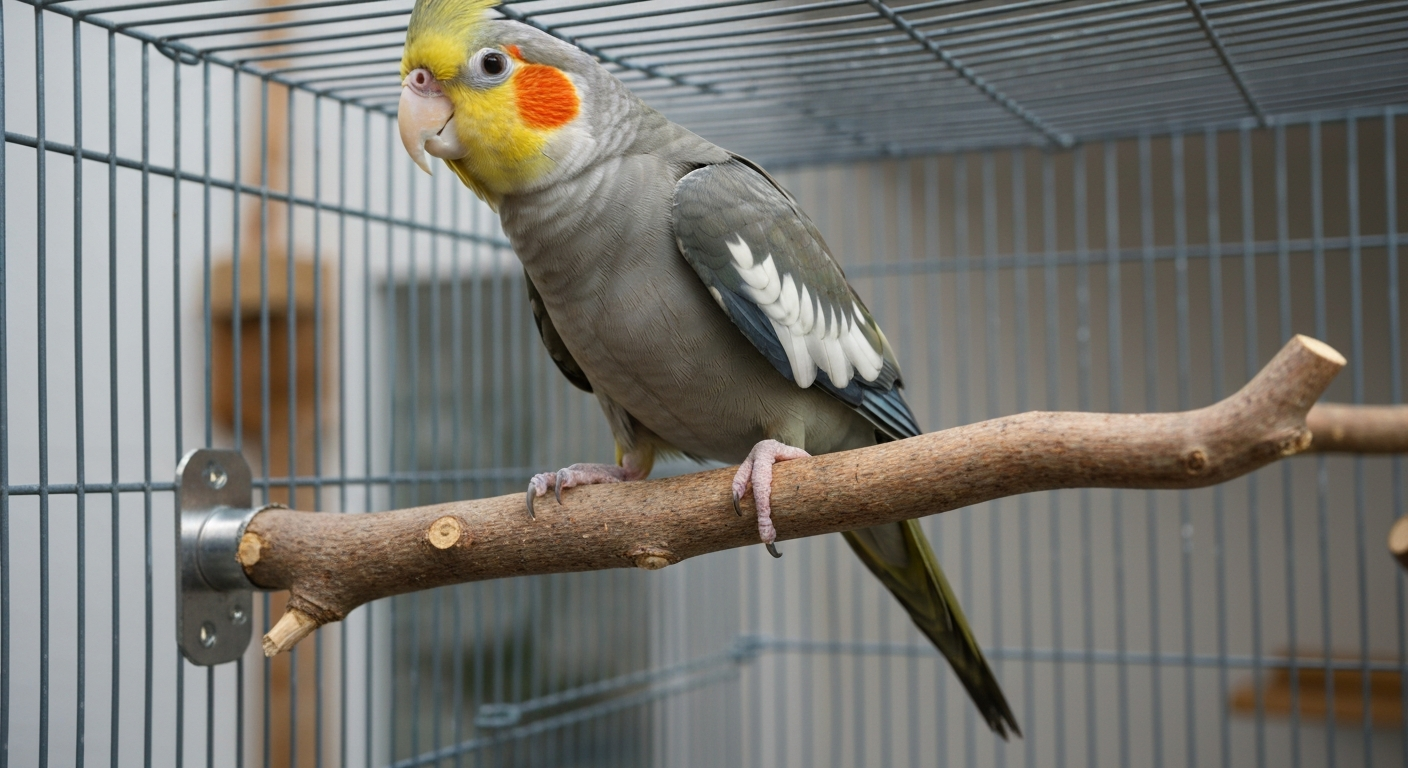
Yes, you can put tree branches in your bird cage, and honestly it is one of the best things you can do for your bird's feet and mental health. Natural branches with variable diameters and rough textures give birds a proper workout for their feet, which helps prevent bumblefoot and the kind of joint stiffness that comes from gripping the same uniform dowel rod all day. The catch is that not every branch is safe, and one you grab from the backyard without checking could be toxic, pesticide-coated, or harboring wood-boring insects. Do the prep work first and natural perches are fantastic. Skip it and you are taking a real risk.
Can I Put Tree Branches in My Bird Cage? Safe, Step‑by‑Step Guide

Maya Bennett
13 Aug 2026
Safety checklist before adding any natural branch
Run through every item on this list before a branch goes anywhere near your bird. I keep a printed copy on the wall of my bird room and check it every single time, because it is easy to skip a step when you are excited to add something new. If you’re unsure about keeping birds in a bedroom or shared living space, see guidance on whether can i put my bird cage in my room for practical placement and safety tips.
- Positively identify the tree species first. Do not guess. Use a plant-identification app, a field guide, or ask your local extension office. Then cross-check the species against the ASPCA toxic plant database and AAV (Association of Avian Veterinarians) safety lists.
- Confirm the tree has not been sprayed with pesticides, herbicides, or fertilizers recently. If you are collecting from your own yard and you spray anything nearby, observe the pesticide label's re-entry and harvest intervals before collecting branches.
- Inspect the bark and cut end for borer holes, webs, insect galleries, visible larvae, or sticky egg deposits.
- Check for mold, lichen, and fungal growth. Visible fuzz, black or white spots, or a musty smell are automatic disqualifiers. Mold can establish on damp cut wood within 24 to 48 hours.
- Remove any loose bark that could trap moisture, pests, or feces later.
- Clean and sterilize using one of the methods in the step-by-step section below (baking is the most reliable).
- Fully dry the branch before installing. Damp wood encourages rapid mold growth inside the cage.
- Quarantine the prepared branch in a separate space for a few days before placing it in your bird's main cage, especially if you have multiple birds.
Species-specific guidance: branch types and perch sizing
Perch diameter matters more than most people realize. A perch that is too thin forces a bird's toes to wrap all the way around and touch, which strains tendons. One that is too thick prevents a proper grip. The goal is a branch where your bird's front toes wrap roughly two-thirds of the way around, leaving a slight gap. Here is a practical breakdown by bird size.
Small birds (finches, canaries, budgies, parrotlets)
For small birds, look for branches in the 0.5 to 1.25 cm (roughly 3/16 to 1/2 inch) diameter range. Willow, apple, and pear branches work really well here because they tend to produce fine, multi-branching growth that gives small birds a naturally varied perch surface. Avoid anything too smooth or uniform. Manzanita is great for budgies specifically because the wood is extremely hard and resists chewing while offering a slightly irregular surface.
Medium birds (cockatiels, conures, lovebirds, caiques)
Medium birds generally need branches in the 1.25 to 2.5 cm (1/2 to 1 inch) range. Cockatiels and conures chew constantly, so harder woods like manzanita or java wood hold up much longer. Softer fruitwoods like apple are fine too, but expect them to become chew toys. That is actually a good thing for enrichment, just be ready to swap them out every few months. For caiques and similar active birds, use two or three branches at different heights to encourage climbing rather than just perching.
Large birds (African greys, Amazons, macaws, cockatoos)
Large parrots need 2.5 to 5 cm (1 to 2 inches) or wider, depending on the species. Java wood and manzanita are the gold standard at this size because of their density. A macaw will destroy apple or willow branches in a day, which is fine for enrichment but not practical as a primary perch. For large birds, I recommend mounting a thick manzanita or hardwood branch as the main perch and adding softer chewable fruitwood branches as secondary enrichment. Make sure any branch for a large bird can support at least 1 to 2 kg of active, shifting weight without flexing dangerously.
Safe vs. unsafe tree species at a glance
This is the table I wish I had when I started. Use it as a quick reference, but always double-check specific species against the ASPCA database because common names can refer to more than one plant. For a reliable species list and care guidance, see the Bird care packet, Bird & Exotic clinic (clinic/avian care guidance) blank" rel="noopener noreferrer">Bird care packet — Bird & Exotic clinic (clinic/avian care guidance). If a tree is not on any safe list you can find, treat it as unsafe until you get confirmation from an avian vet or a reliable avian toxicology source.
| Tree / Wood | Safe for birds? | Notes |
|---|---|---|
| Apple (Malus spp.) | Safe | Popular, widely recommended. Pesticide-free only. Softer wood, good for chewing enrichment. |
| Pear (Pyrus spp.) | Safe | Similar to apple. Confirm no recent spraying. |
| Willow (Salix spp.) | Safe | Flexible branches; great for small to medium birds. Soft and chewable. |
| Manzanita (Arctostaphylos spp.) | Safe | Hard, dense, long-lasting. Ideal main perch for small to large birds. |
| Java wood / Coffee wood (Coffea spp.) | Safe | Very hard and durable. Excellent for large parrots. |
| Grapevine (Vitis spp.) | Safe | Interesting texture. Good for climbing and enrichment. |
| Elm (Ulmus spp.) | Safe | Generally listed as safe. Confirm pesticide-free. |
| Magnolia (Magnolia spp.) | Safe | Generally considered safe. Bark is rough and good for grip. |
| Yew (Taxus spp.) | UNSAFE | Highly toxic. All parts including bark can be lethal. Never use. |
| Oleander (Nerium oleander) | UNSAFE | Extremely toxic. Cardiac glycosides can be fatal from minimal exposure. |
| Black locust (Robinia pseudoacacia) | UNSAFE | Toxic bark and seeds. Do not use. |
| Prunus spp. (cherry, plum, apricot, peach, nectarine) | UNSAFE | Bark and leaves contain cyanogenic glycosides. Avoid all members of this group. |
| Oak (Quercus spp.) | Caution / Avoid | High tannin content; acorns are toxic. Most avian sources advise skipping it. |
| Cedar / Pine / Fir (Cedrus, Pinus, Abies) | Caution / Avoid | Aromatic oils and resins can irritate respiratory systems. Avoid especially for small birds. |
| Eucalyptus (Eucalyptus spp.) | Caution / Avoid | Oils are respiratory irritants. Not recommended for cage use. |
| Avocado (Persea americana) | UNSAFE | Persin toxin is well-documented as fatal to birds. Avoid tree and fruit entirely. |
Tools and materials you will need
You do not need anything exotic here. Most of this is already in your kitchen or garage. I have listed affordable alternatives where the standard tool might not be handy.
- Pruning shears or a small hand saw for clean cuts
- Stiff scrub brush or old toothbrush for bark cleaning
- Large bucket or utility sink for washing
- Dish soap (unscented, no antibacterial additives)
- Unscented household bleach for disinfecting rinse (diluted 1: 30 to 1:32 bleach to water)
- White vinegar and water (1: 1 ratio) as a milder alternative rinse
- Oven or toaster oven with accurate temperature setting for baking
- Meat thermometer or oven thermometer to confirm internal branch temperature
- Baking tray lined with aluminum foil
- Clean towels or a drying rack
- Wire, stainless steel cage bolts, or wing nuts for mounting (see mounting section)
- Electric drill with appropriate bit size for the cage bar diameter
- Sandpaper (medium grit, around 80 to 120) for smoothing any sharp cut ends
- Zip ties (bird-safe, non-toxic) as a temporary mounting option for lightweight branches
Step-by-step preparation and sterilization
This process takes a few hours but almost all of it is hands-off waiting time. Do not skip the cleaning step before sterilizing. Dirt and organic debris on the surface will insulate pests and reduce the effectiveness of heat treatment.
Step 1: Initial clean
Rinse the branch under running water first to knock off loose dirt and debris. Then scrub the entire surface with a stiff brush and a small amount of unscented dish soap, paying attention to bark crevices and the cut ends. Rinse thoroughly. If you notice any sticky sap, scrape off the bulk with a plastic scraper or an old spoon, then clean the area with warm soapy water. For deep tannin staining or heavy sap residue, a diluted hydrogen peroxide wipe followed by thorough rinsing can help, but is optional. Rinse everything completely and move on.
Step 2: Baking (most reliable sterilization method)
Baking is my go-to method because it is consistent and evidence-based. International phytosanitary standards (ISPM-15) require wood to reach a core temperature of 56 degrees Celsius (about 133 degrees Fahrenheit) for a minimum of 30 minutes to reliably kill wood-boring insects and many other arthropod pests. The ISPM 15 / IPPC (heat‑treatment requirements for wood packaging), International Plant Protection Convention (FAO/IPPC documents) specifies reaching a wood core temperature of 56 °C and holding it for 30 minutes to reliably kill wood‑boring insects and many other arthropod pests blank" rel="noopener noreferrer">ISPM 15 / IPPC (heat‑treatment requirements for wood packaging) — International Plant Protection Convention (FAO/IPPC documents). For home use, I set the oven to 120 to 135 degrees Celsius (250 to 275 degrees Fahrenheit), place the branch on a foil-lined tray, and let it bake for 60 to 90 minutes depending on thickness. Use a meat thermometer to probe the thickest part of the branch and confirm it has genuinely reached at least 56 degrees Celsius at the core. Let the branch cool completely on a clean surface before handling further.
Step 3: Boiling (good alternative for thinner branches)
For thinner branches under about 2 cm in diameter, boiling for 20 to 30 minutes in plain water is a practical alternative to baking. The sustained high temperature kills surface pests and many pathogens. Let the branch dry fully afterward, ideally for 24 to 48 hours in a warm, well-ventilated spot, before it goes in the cage. Damp wood going into a cage is an invitation for mold.
Step 4: Disinfecting rinse (after baking or boiling)
Once the branch is dry, you can do a final disinfecting rinse if you want extra peace of mind. Mix unscented household bleach at roughly 1 part bleach to 30 to 32 parts water. Wipe or spray the branch surface, let it sit for 10 minutes, then rinse extremely thoroughly with clean water. I rinse mine at least three times. Then let it dry completely, at least overnight, before it goes near the cage. Bleach fumes are dangerous to birds' highly sensitive respiratory systems, so this step must happen well away from your bird and the branch must be fully odor-free and dry before installation.
Step 5: Vinegar and water rinse (mild option for already-clean branches)
A 1:1 white vinegar and water solution is a milder disinfecting rinse that works fine for branches that are already clean and freshly baked. It is not a substitute for baking but it is a good maintenance wipe between deeper cleanings. Rinse off the vinegar with plain water and dry fully.
A note on freezing
A lot of people suggest putting branches in the freezer overnight to kill pests. I would not rely on this method. Official phytosanitary cold treatments for quarantine purposes use multi-day schedules near 0 to 3 degrees Celsius, and household freezing does not reliably kill eggs or all life stages of mites and other arthropods. Use heat treatment instead. Freezing is fine as a temporary storage method for clean, dry branches, but it is not a substitute for sterilization.
Checking for pests, mold, and rot, and protecting branches seasonally
Even after prep, branches inside a cage need regular inspection. Droppings accumulate in bark crevices, water from drinkers splashes onto perches, and any residual moisture is an invitation for mold. Mold can establish on cut wood within 24 to 48 hours under the right conditions, which in a warm cage is most of the time.
What to look for during weekly inspections
- Visible mold: any fuzzy growth, white or black spots, or discoloration that was not there before. A musty smell when you get close to the branch is also a sign. Remove and discard moldy branches; porous organic material with established mold cannot be reliably disinfected.
- Borer activity: fresh sawdust or fine powder around the base of the branch or on the cage floor below it. New exit holes in the bark. Remove the branch immediately and inspect your cage and other perches.
- Soft or spongy spots: press along the length with your thumb. Rot makes wood noticeably soft or crumbly. That branch needs to go.
- Cracking: small surface cracks from drying are normal and fine. Deep longitudinal splits can trap droppings and moisture and should be sanded smooth or the branch replaced.
- Excessive droppings buildup: scrub perches with a stiff brush and warm water at least once a week. For heavily soiled spots, use your diluted bleach solution, then rinse and dry completely before returning the branch to the cage.
Seasonal considerations for collecting branches
Late winter to early spring, before bud break, is the best time to collect branches. The wood is dormant, sap flow is minimal, and insect activity is at its lowest point in the year. Avoid collecting in summer when pesticide spraying is most common and insects are most active in the wood. If you collect in autumn, inspect carefully for bark beetle and borer damage because those pests are often active earlier in the season. Always let freshly cut wood season (dry out) for at least one to two weeks in a warm, ventilated area before proceeding with any sterilization step.
Mounting and anchoring branches inside the cage
How you mount a branch matters as much as what the branch is made of. A perch that rocks, rolls, or shifts every time your bird lands on it is stressful and can cause falls. The right mounting method depends on your cage style and the size and weight of your bird.
Bar-clamp mounting (most common cage type)
Most standard parrot cages have horizontal or vertical bars spaced between 1.2 and 2.5 cm apart depending on species design. The simplest mounting method is a branch thick enough to wedge between two bars on opposite sides of the cage. Cut the branch about 1 to 2 cm longer than the interior cage width so it sits with pressure on both sides. This works well for branches up to about 500 g in total weight. For heavier or longer branches, add a stainless steel bolt and wing nut through a pre-drilled hole in the branch end. Drill the hole slightly smaller than the bolt diameter so the bolt bites in firmly. Do not use galvanized or zinc-coated hardware because birds chew and zinc is toxic to them.
Wire or cable tie attachment
For lighter branches (under about 200 g, suitable for small birds), threading stainless steel wire through two points on the branch and around cage bars works well. Use 1.2 to 1.6 mm stainless steel wire and twist the ends tightly with needle-nose pliers so there are no sharp protruding ends. Plastic cable ties are a quick temporary option but check them weekly because birds chew through them and frayed plastic is a swallowing hazard.
Freestanding branch stands for large birds
For large parrots in spacious cages or open play stands, a branch can be mounted vertically using a drilled base plate. Use a thick wooden or PVC base with a hole or bracket, insert the branch, and secure it with a stainless steel bolt from beneath. The base needs to be heavy or fixed enough to support a bird that may weigh 500 g to 1.5 kg and land with significant force. I use a small 15 by 15 cm hardwood base plate with pre-drilled holes that I can bolt to the cage floor grate. Test stability by applying downward pressure equivalent to your bird's weight before you let them use it.
Height and placement inside the cage
Avoid mounting perches directly over food and water dishes because droppings will contaminate them. Position your main perch at roughly two-thirds of the cage height, which is where most parrots prefer to sleep and rest. Secondary branches at different heights encourage climbing and movement. If you wonder "should I put my bird cage near a window," check the full guidance on window placement, natural light is good but avoid direct sun, drafts, and temperature swings that stress birds. Leave enough clear space between branches so your bird can turn around and fully spread its wings without hitting another perch. For a standard cockatiel cage that is 60 cm wide, two to three branches at different angles and heights is usually ideal without overcrowding the space.
Decorative branch ideas that are actually good for your bird
Natural branches do not have to just be horizontal perches. A branching piece of manzanita that forks two or three ways gives your bird multiple landing spots, varied grip angles, and something to navigate. Grapevine sections with interesting curves add visual complexity and are fun for smaller birds to walk along. For small finches and canaries, a collection of thin willow branches woven loosely between the bars mimics the kind of multi-twig environment they naturally inhabit. The key rule with any decorative addition is that it should not reduce the usable flight or movement space inside the cage by more than about 20 to 25 percent. If your bird looks cramped, remove one piece and see whether behavior improves.
Troubleshooting common problems
My bird is chewing the branch down to nothing
This is normal behavior for parrots, especially conures, cockatoos, and macaws. It is enrichment, not destruction. Switch to harder woods (manzanita, java) as the main perch and offer softer fruitwood branches as dedicated chew perches that you plan to replace. Check the chewed pieces periodically to make sure your bird is not ingesting large splinters. Small wood fiber shavings from chewing are harmless; large sharp fragments are not. If you see significant splintering, swap the branch out.
The branch is getting loose over time
Wood shrinks slightly as it dries out fully in the cage environment. A branch that was wedged tight initially may loosen after a week or two. Check the fit every week for the first month. You can re-tighten the bolt, add a small wooden shim to take up the gap, or replace the branch with a slightly thicker one. This is one reason I prefer bolt-and-wingnut mounting over relying purely on friction for anything heavier than about 200 g.
I see fine dust or powder under the branch
This is the most important troubleshooting scenario. Fine powder or sawdust under a branch almost always means wood-boring insect activity. Remove the branch immediately, bag it, and dispose of it outside the house. Inspect every other wooden item in the cage. Depending on your bird's health and how long the branch was in place, it is worth a call to your avian vet. Thorough baking before installation is the best prevention.
My bird will not use the new branch
Some birds are cautious about new objects in their space. Leave the branch in the cage and give it three to five days. Many birds come around on their own once the branch becomes a familiar part of the environment. You can also try placing a small treat on or near the branch to create a positive association. If your bird actively avoids it or shows signs of stress (feather fluffing, reduced appetite), remove the branch and reintroduce it more gradually by placing it outside the cage first where the bird can observe it. For related guidance on supervised out-of-cage time and safety considerations, see should i leave my bird cage open.
Ongoing cleaning and maintenance schedule
Natural branches are not a set-and-forget addition. Here is a realistic maintenance rhythm that keeps things safe without becoming a second job.
| Frequency | Task |
|---|---|
| Daily | Wipe down heavily soiled perch areas with a damp cloth or paper towel. |
| Weekly | Scrub all perches with a stiff brush and warm water. Inspect for mold, soft spots, borer dust, and cracks. Check mounting hardware for looseness. |
| Monthly | Remove branches and do a full scrub with diluted unscented dish soap. Rinse thoroughly and dry completely before replacing. Consider a vinegar-water rinse. |
| Every 3 to 6 months | Replace softer wood branches that show heavy wear, deep cracking, or dark staining. Re-evaluate fit as branches may have shrunk. |
| Annually or as needed | Do a full cage audit. Bake or re-sterilize any branches you are keeping long-term if there is any question about contamination. |
One practical mess-control tip: placing a sheet of parchment paper or a removable cage liner directly below your main perch makes the weekly scrub much faster. Droppings that land on the liner get rolled up and discarded rather than scrubbed off the cage floor.
When to call your avian vet
If you are genuinely unsure whether a specific tree species is safe, do not rely on online forums or general lists. Contact an avian veterinarian or your local extension service. Similarly, if your bird has been chewing on a branch before you identified the species, or if you suspect pesticide exposure, call the ASPCA Animal Poison Control Center or your vet immediately rather than waiting to see if symptoms appear. Birds mask illness well, and respiratory or toxic reactions can escalate quickly given how sensitive their respiratory systems are. The same caution applies if you ever clean with products containing phenolic compounds, pine or cedar oils, or run any essential oil diffuser near the cage: even well-intentioned natural cleaning products can cause acute respiratory injury in birds, so stick to unscented bleach solutions (properly diluted and fully rinsed) or purpose-made avian disinfectants. If you’re wondering whether Rust-Oleum products are safe for bird cages, see our guide titled 'is Rust-Oleum safe for bird cages' for details on coating types, proper curing, and bird-safe alternatives.
FAQ
Quick answer: Can I put tree branches in my bird cage?
Yes — you can use natural tree branches as perches and cage décor if they are a bird‑safe species, pesticide‑free, fully cleaned/treated, properly mounted, and matched to your bird’s size and behavior. Natural branches provide variable diameters and textures that benefit foot health, but improperly prepared or toxic wood, mold, pests, or insecure mounting can harm birds.
Safety checklist before placing a branch in a cage
1) Identify the tree species and confirm it is non‑toxic (check ASPCA / avian tox lists). 2) Ensure the branch is not recently sprayed with pesticides or fertilizers. 3) Inspect for mold, fungus, boreholes, or active insect activity. 4) Remove loose bark, sap blobs, or sharp splinters. 5) Heat‑treat or otherwise disinfect to reduce pests (see preparation methods). 6) Match perch diameter, length and strength to your bird’s species and weight. 7) Securely anchor the branch so it cannot shift or fall. 8) Observe the bird closely for 24–72 hours for chewing, irritation or respiratory issues.
Which tree species are generally safe vs. which to avoid? (concise table)
Safe / commonly recommended (if pesticide‑free): apple, pear, manzanita, grapevine, willow, pear, elm (small quantities), beech, oak (seasoned), birch. Avoid / toxic or high‑risk: yew (Taxus spp.), oleander, black locust (Robinia), many Prunus species (cherry, apricot, plum with cyanogenic compounds in leaves/green wood), cedar/pine (aromatic oils), eucalyptus (species‑dependent, strong oils), walnut (Juglans spp. — juglone), redwood/pressure‑treated lumber, and any wood with unknown pesticide residues. Note: local species vary — always verify the exact species with ASPCA, AAV, or an avian vet before use.
Species‑specific suitability (small to large pet birds)
- Small birds (finches, canaries, budgies, lovebirds): use thinner perches (6–12 mm / 1/4–1/2 in) and many varied diameters; lightweight branches and vine perches work well. - Medium birds (cockatiels, conures): thicker perches (12–20 mm / 1/2–3/4 in) and sturdy branches; avoid very thin or very wide single perches. - Large birds (cockatoos, amazons, macaws, African greys): use heavy, load‑bearing hardwood branches (20–40+ mm / 3/4–1.5 in or more depending on species); ensure branches support the bird’s full weight with a safety factor (see mounting/weight limits). Always provide multiple perches at different heights and materials for nail wear and foot exercise.
Tools and materials list
Essential tools: pruning saw or bow saw, loppers, hand pruner, wire brush, outdoor broom, bucket, thermometer (for heat treatments), oven thermometer (if baking), kitchen or utility gloves, safety glasses, drill and appropriate drill bits, quick‑release hose clamps or stainless steel pipe clamps, heavy‑duty zip ties, stainless steel U‑bolts or cage‑safe eye bolts, sandpaper (coarse then fine), scraper, scrub brush. Materials/consumables: chosen branches, unscented household bleach, vinegar (white), dish soap, food‑grade hydrogen peroxide (optional), baking soda (optional), F10 or avian‑safe disinfectant (optional), newspaper, towels, plastic sheeting, scale (for branch weight), masking tape/labels.
Step‑by‑step preparation and sterilization methods (overview)
1) Identify and harvest: cut branches from a non‑treated tree; choose dead/stable limbs 1–2 inches longer than final usable length. 2) Trim: remove twigs, loose bark, and damaged wood. 3) Clean: scrub with warm soapy water to remove debris, sap and surface contaminants; rinse. 4) Inspect: check for boreholes, frass, mold, or hidden insects. 5) Pest elimination options (choose depending on resources): - Heat (recommended): oven or kiln method — reach core temperature ≥56 °C (132.8 °F) and hold 30 minutes (ISPM‑15 standard); for household ovens, use an oven thermometer and treat small branches at lower moisture and heat carefully—monitor for fire risk. - Baking (home): slowly dry at 200–250 °F (93–121 °C) for several hours until fully dry; verify internal temp if possible; watch for sap/volatile fumes and never leave unattended. - Boiling: immerse small branches fully and simmer 30–60 minutes; effective for many pests but may warp wood and remove sap/tannins. - Freezing: household freezers are inconsistent; extended multi‑day deep‑freeze may reduce pests but is not reliably lethal for all eggs/mites. - Vinegar/water rinse: 1:1 rinse can help surface cleaning but is not a stand‑alone pest kill. 6) Dry and season: air‑dry in a ventilated, covered area until fully dry (days to weeks). 7) Sanding and final inspection: sand any rough spots and retest for smell/mold. 8) Disinfect (optional): wipe with avian‑safe disinfectant or dilute bleach (roughly 1:30) — rinse thoroughly and air dry. 9) Label and quarantine: keep prepared branch separate and observe for any signs of insects or mold for 3–7 days before introducing to cage.
Next Article
Should I Leave My Bird Cage Open? Safety, Training & Tips
Can I leave my bird’s cage open? Safety checklist, species tips, training, room setup & materials for safe free time.