For most bird owners, the liner needs to come out daily. If you want to keep the bird cage from making a mess, focus on daily liner changes to stop droppings and food from building up keep bird cage from making a mess. That's the honest answer. You pull the old sheet, drop in a fresh one, and the whole job takes under two minutes. But how often you actually need to do it depends on your bird's size, diet, and how aggressively they fling food and droppings around. A single budgie on pellets is very different from two conures eating fresh fruit and shredding everything in sight.
How Often to Change Bird Cage Liner: Clear Schedule

Maya Bennett
1 Jul 2026

General rule of thumb based on bird type and mess level
Daily liner changes are the baseline recommendation from most avian vets and major pet care sources, and for good reason: droppings left sitting on a liner start releasing ammonia within hours, especially in a warm room. That said, your specific situation may push you toward changing more or less often than once a day.
| Bird type / situation | Recommended liner change frequency |
|---|---|
| Single small bird (budgie, canary, finch) on pellets/seed | Every 1–2 days |
| Single small bird eating fresh foods or fruit | Daily |
| Medium bird (cockatiel, lovebird, parrotlet) | Daily |
| Large or messy bird (conure, caique, Amazon, African grey) | Daily, sometimes twice daily |
| Multiple birds in one cage | Daily minimum, twice daily if heavily soiled |
| Bird on a soft/wet diet (fresh fruits, sprouted seeds) | Daily, no exceptions |
| Breeding pair or birds with chicks in the nest | Twice daily or more |
Diet makes a huge difference. Birds eating pellets and dry seed produce firmer, less pungent droppings that sit neatly on the liner. Birds eating lots of fresh fruit, vegetables, or wet foods produce watery droppings that soak through paper faster and smell worse sooner. If you've recently switched your bird's diet to include more fresh food, bump up your liner changes accordingly.
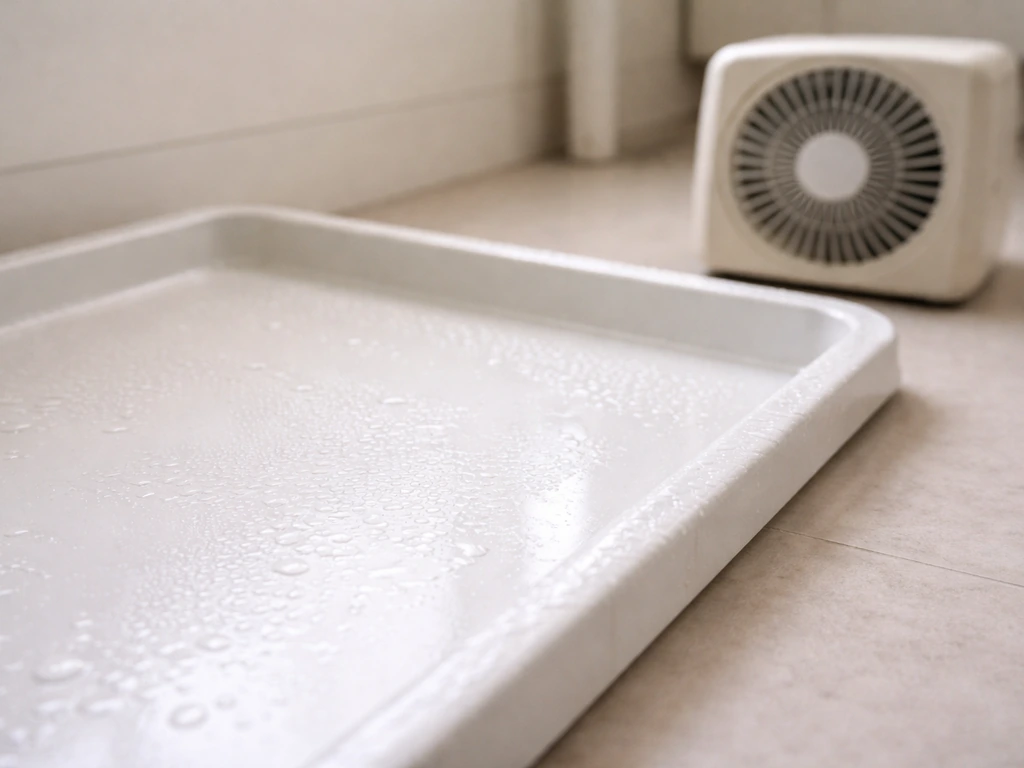
Cage size and the number of birds also matter. A large cage with one small bird may still only need daily changes, but a smaller cage with two or three birds can get overwhelmed quickly. Trust what you see over any schedule. If you want to cut how often seed ends up under the liner, use a seed guard designed for your cage tray and keep it clean. If you pull the liner at the end of day one and it's already saturated and piled with waste, you need to be changing it more often.
How to tell when it's time to change (visual, smell, and health cues)
Even if you're following a schedule, you need to do a quick visual and smell check every single day. Following these tips on liner changes and daily spot-checks can help you keep your bird cage from smelling smell check. Conditions change: a bird that was eating dry seed all week might discover the mango slice you offered and suddenly make a huge mess. Here's what to look for during your daily spot-check.
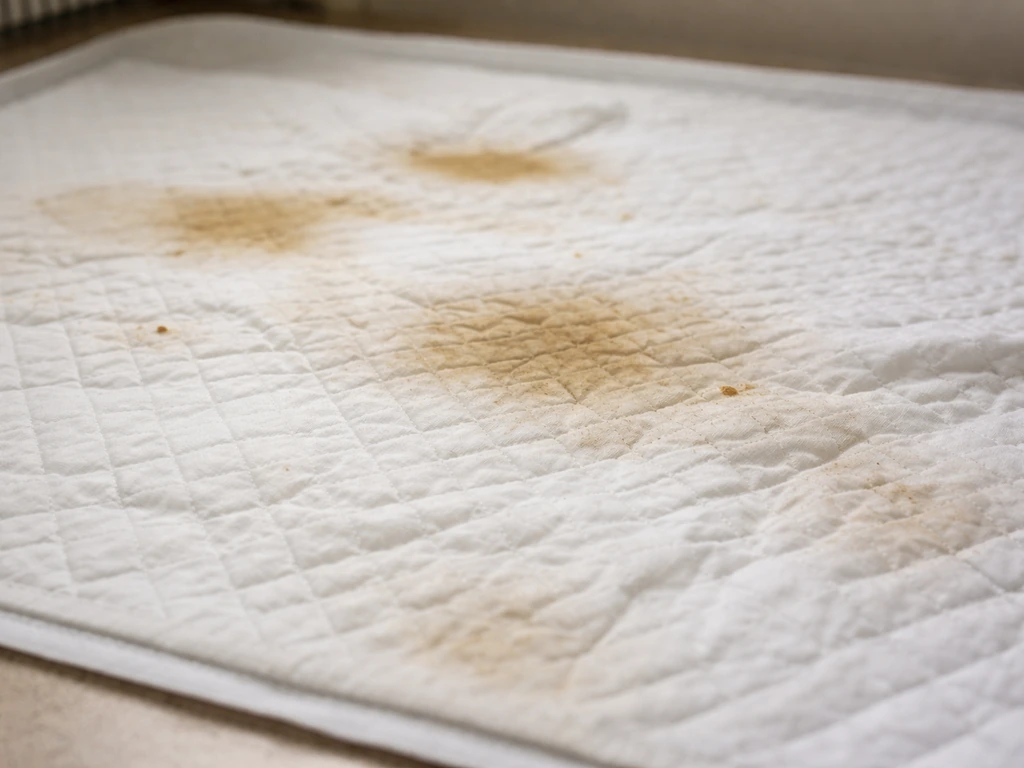
- Visible soaking or wet spots: If the liner is damp or saturated, change it immediately. Wet liner accelerates bacterial growth and mold.
- Odor: A healthy cage should smell faintly of bird but not sour, ammonia-like, or pungent. If you get a sharp smell when you open the cage door, the liner is overdue.
- Stuck or layered droppings: If droppings are starting to pile up or stick to the liner in layers, you've waited too long.
- Visible mold: Any fuzzy growth on the liner, perches, or wood accessories means the cage has too much moisture. Change the liner and check your perches and food dishes.
- Feather dust film: A thick gray or white film on the bars or liner, common with cockatoos and African greys, traps bacteria and dander and needs to be addressed.
- Abnormal droppings: If you notice droppings that look unusual (very watery, discolored, bloody, or with no solid component), change the liner and save a sample to show your vet. This isn't just a cleaning issue.
- Your bird showing respiratory signs: Tail-bobbing, labored breathing, or wheezing can be triggered by ammonia buildup from sitting waste. If you see this alongside a smelly cage, act immediately and ventilate the room.
Ammonia from droppings is genuinely harmful to birds. Their respiratory systems are far more sensitive than ours, so by the time you can smell it clearly, your bird has already been breathing it for a while. Never assume the liner is fine just because it isn't visually overflowing. Smell the cage every day.
Step-by-step liner change process for cleaner, safer results
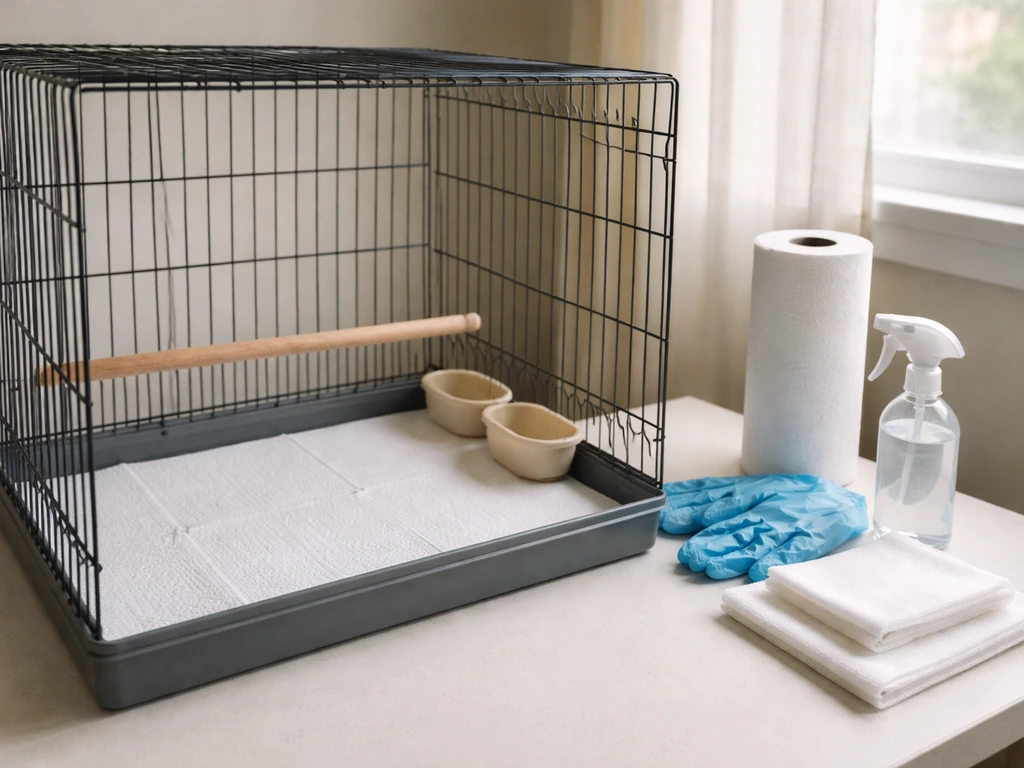
A liner swap done carelessly can actually spread bacteria rather than eliminate it. The goal is to remove waste without aerosolizing it, dispose of it hygienically, and leave the tray clean before the new liner goes in. The CDC also advises wetting surfaces or cages with water or disinfectant before cleaning to reduce dust being released into the air, which can happen if you dry sweep or vacuum blank" rel="noopener noreferrer">avoid aerosolizing waste when swapping the liner. Before you start the liner swap, decide where to put the bird when cleaning the cage so it stays safe and calm while you work where to put the bird when cleaning cage. Here's the process I use.
- Move your bird to a safe, temporary location before you start. A play stand, a second cage, or a trusted perch works fine. Don't skip this. You don't want droppings disturbed near your bird, and you don't want cleaning products anywhere close to them. If you need ideas for where to put your bird during cleaning, that's worth a quick look at a separate guide.
- Lightly mist the soiled liner with water before removing it. The CDC specifically recommends wetting cage surfaces before cleaning rather than dry sweeping, because dry debris releases contaminated dust into the air. A quick spritz from a spray bottle is enough.
- Fold the liner inward as you lift it, so the soiled side folds toward the center. This keeps droppings contained and prevents them from falling onto the tray or cage floor as you pull it out.
- Drop it directly into a trash bag or lidded bin. Don't leave it sitting open on a surface.
- Wipe down the cage tray with a damp cloth or paper towel to pick up any debris that got through or around the liner. If there's stuck residue, use a plastic scraper rather than anything abrasive that could scratch the tray coating.
- If the tray itself has soiling, spray it with a pet-safe disinfectant. Let it sit for the contact time listed on the product (usually 10 to 15 minutes for proper disinfection), then rinse thoroughly with clean water and dry completely before adding the new liner. Residue from cleaning products is dangerous to birds, so rinsing is not optional.
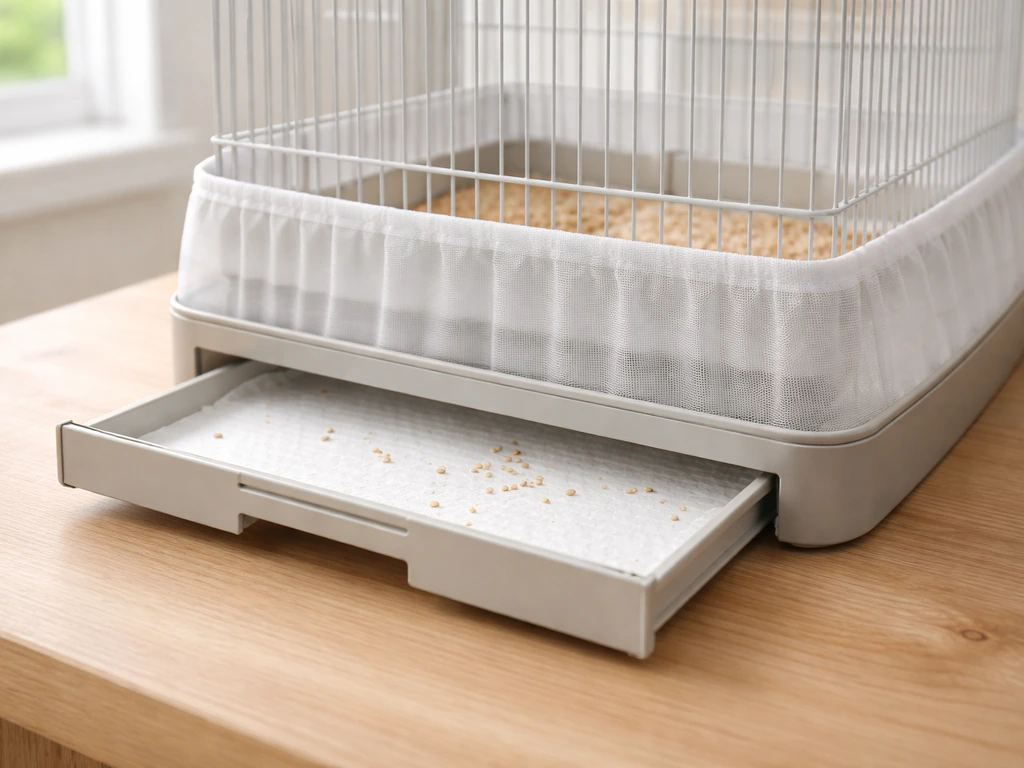
- Lay the new liner flat and make sure it fits the tray completely without gaps at the edges. Gaps let droppings fall between the liner and tray, which creates hidden buildup.
- Wash your hands thoroughly after the whole process, even if you used gloves.
For liner material, plain unprinted newsprint or paper bags work well and are affordable. Printed newspaper is generally considered safe in small amounts, but plain paper removes the question entirely. Avoid cedar shavings, scented liners, or anything with added fragrances: the fumes are toxic to birds. Pre-cut cage liner paper sized to fit specific cage trays is worth the cost if it saves you fiddling with fit every day, because a poorly fitting liner is one of the most common reasons droppings end up under rather than on the liner.
Deep cleaning schedule vs. routine liner swaps

Liner changes are maintenance, not cleaning. They keep the daily mess under control, but they don't replace regular scrubbing of the bars, perches, dishes, and tray. Think of it in three tiers.
| Task | Frequency | What it covers |
|---|---|---|
| Liner change + bowl wash | Daily | Remove soiled liner, wipe tray if needed, wash food and water dishes |
| Spot scrub | Weekly | Scrub cage bars, perches, and any droppings stuck to surfaces with a non-toxic cleaner; wipe down inside walls and the cage bottom tray thoroughly |
| Full deep clean | Monthly (or every 1–2 months for very tidy single-bird setups) | Full spray-down of the entire cage with a bird-safe disinfectant, soak perches and accessories, inspect all hardware and seams for hidden buildup, replace any perches or toys showing mold or damage |
VCA Animal Hospitals recommends full cage disinfection at least once or twice a month, using a non-toxic disinfectant soap with hot water. The key detail is contact time: most disinfectants need 10 to 15 minutes of wet contact to actually kill pathogens, not just a quick spray and wipe.
VCA Animal Hospitals recommends cleaning cages at least 1, 2 times per month with a full spray-down and scrubbing using a non-toxic disinfectant soap with hot water, and allowing most disinfectants about 10, 15 minutes of contact time before rinsing thoroughly 10 to 15 minutes of wet contact time. After that, rinse everything completely and allow it to dry fully before your bird goes back in.
A damp cage environment encourages mold and bacterial growth faster than a dry one.
Keeping up with daily liners makes the weekly and monthly cleans much less unpleasant. When droppings never get a chance to build up into layers, the scrubbing involved in a deep clean is minimal. Let daily changes slip for a week, though, and the monthly deep clean turns into a genuine project.
Common mistakes that lead to odor, bacteria, and pest problems
Most of the problems people run into with cage liners come from a handful of recurring mistakes. Here are the ones I see most often, and what to do instead.
- Stacking multiple liners and only removing the top one: This is a popular time-saving trick, but it backfires. Droppings and moisture seep between layers and the bottom sheets become a hidden source of bacteria and odor. Replace the full stack with a single fresh liner each time.
- Using scented or cedar-based liner materials: Cedar shavings and scented papers or liners release aromatic compounds that are toxic to birds. Stick to plain, unscented paper.
- Dry sweeping or vacuuming the tray before removing the liner: This stirs up dried droppings and feather dust into the air, which you and your bird then breathe. Always mist first.
- Skipping the tray wipe after pulling the liner: Droppings almost always get between the liner and the tray edges. If you skip wiping the tray before the new liner goes in, you're just covering up old waste.
- Not rinsing disinfectants off completely: Cleaning product residue is dangerous. Always rinse with clean water after disinfecting and let the tray dry fully.
- Poor liner fit: A liner that's too small for the tray leaves gaps. Waste falls through, accumulates underneath, and you won't notice until things smell bad. Measure your tray and cut or buy liners to fit properly.
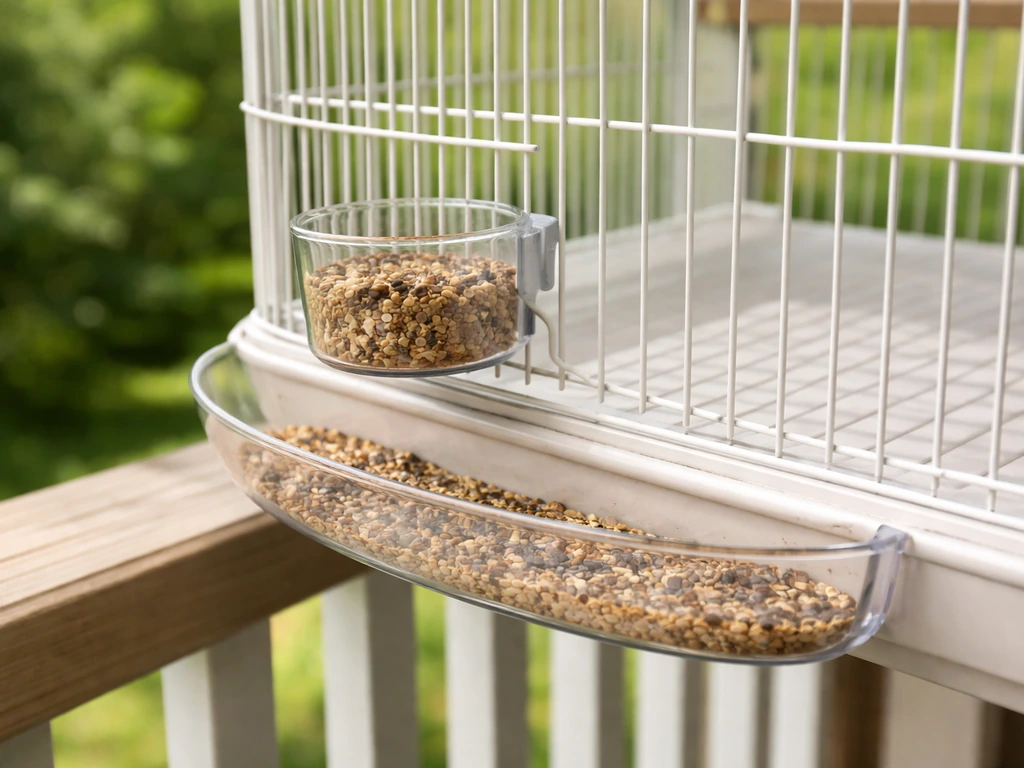
- Changing the liner but ignoring the food dishes: Bacteria from dirty water or old food travels. Wash food and water dishes daily at the same time you change the liner.
- Letting liner changes slide during busy weeks: Ammonia builds up fast, especially in warm weather. Even a single missed day with a large or messy bird can create conditions that stress their respiratory system. If life gets busy, liner changes are the one thing that shouldn't slip.
If you're already dealing with persistent odor despite regular liner changes, look at the tray itself. Plastic trays can develop micro-scratches over time that harbor bacteria. A deep soak in a diluted bird-safe disinfectant solution, followed by a thorough rinse and dry, usually fixes it. If your cage has a strong smell problem even after cleaning, check out guides on keeping bird cages from smelling for a full troubleshooting approach, since the source is sometimes the perches or cage bars rather than the liner. You can also pair this with good seed storage practices to help reduce odor and keep your cage environment healthier day to day keeping bird cages from smelling.
For pest issues, particularly fruit flies or small insects, check whether wet food scraps or fruit juice have soaked into the liner and tray. Switching to daily liner changes and removing fresh food after a few hours is usually enough to break the cycle. Make sure there's no debris collecting in the tray grooves or underneath the cage itself.
Seasonal adjustments and special situations
Hot and humid months
Heat accelerates everything: bacteria multiply faster, droppings dry out and release dust more quickly, and ammonia builds up faster in a warm room. During summer, especially if your home isn't air-conditioned or if the cage is near a window with afternoon sun, you may need to change the liner twice a day regardless of bird size. Check the liner mid-afternoon on hot days rather than waiting for your normal evening routine.
Breeding season
Breeding pairs and birds with active nests generate significantly more waste. The hen spends more time in the nesting area, food consumption increases, and droppings become larger and wetter. During active breeding, change the cage liner twice daily at minimum and check the nest box area separately. Any soiling that reaches the eggs or chicks needs to be addressed immediately.
Illness or recovery
A sick bird needs an especially clean environment. Droppings from an ill bird may contain higher bacterial loads, and any immune compromise makes your bird more vulnerable to the pathogens that build up in a dirty cage. Change the liner at least twice daily during illness, disinfect the tray each time, and keep a close eye on the consistency and color of the droppings as part of monitoring your bird's condition. Save abnormal samples to show your vet. This is also a situation where you should be more careful about washing hands before and after handling anything in the cage.
Heavy molt
Molt means dramatically more feather debris, dust, and dander landing on the liner and every surface of the cage. If you are trying to keep bird feathers from getting ruined in a cage, pay close attention to feather debris and moisture by adjusting your cleaning routine during heavy mess periods Moltr means dramatically more feather debris. For heavy-molting species like cockatoos and African greys, the liner can look like it's coated in powder within hours.
During a heavy molt, expect to change the liner daily and to wipe down the cage bars more frequently than usual to prevent feather dust from building up into a film. Keeping up with mess during molt also ties into managing overall cage mess, which is worth addressing as a broader routine during those weeks.
The core principle across all of these situations is the same: more mess, more moisture, or more stress on your bird all mean tighter liner change intervals. Your schedule is a starting point, not a rule. Use your eyes and nose every day, and adjust based on what you actually see in the tray.
FAQ
What if the liner looks dry, but there’s still a smell?
Go by odor, not just visibility. If you can smell the cage, ammonia and bacteria are already building up, so switch to at least two liner changes per day until the smell stops, then reassess with your normal baseline.
Can I reuse a liner after washing it?
Typically no. Paper liners (newsprint, paper bags, pre-cut paper) are meant to be single-use. If waste is present, washing and reusing can spread bacteria and leave residues that still release odor, so discard and replace.
How do I change the liner without stressing my bird or kicking waste around?
Move the bird to a secure perch in a different area first, then remove the liner, fold it inward, and toss it. Wipe down the tray with a clean, damp cloth only if it’s needed, then put in the fresh liner before returning the bird.
Is it safe to line the tray with something besides paper, like pellets liners or mats?
Sometimes, but only if it’s bird-safe and absorbs without holding odors. Avoid anything scented or treated, and make sure the mat does not trap moisture against the tray. If it stays damp after cleaning, you will usually need more frequent changes.
How often should I disinfect the tray itself if I’m changing liners daily?
Liner changes help, but they don’t replace tray cleaning. Plan a thorough tray scrub on the same cadence as your overall cage cleaning (often weekly to biweekly), and disinfect on top of that immediately after illness, breeding mess, or persistent odor.
Do I need to change the liner more often if my bird is on fresh foods?
Yes, especially with watery fruits and vegetables or any wet mash. If you notice faster soaking or puddling, switch from one daily change to morning and mid-afternoon, then adjust based on how quickly the liner saturates.
What if the liner keeps shifting or wrinkling under the bird?
That usually means poor fit or too much tray debris. Use pre-cut liner paper sized for your tray if you can, and check for obstacles that prevent the liner from laying flat, such as leftover paper scraps, seeds, or grease film.
How should I handle the liner if my bird is sick?
Use a stricter routine: change at least twice daily, handle liners with gloves if you have them, discard immediately, and clean the tray more thoroughly each time. Also wash hands and avoid touching your face before you return the bird to the cage.
Can I leave a liner in place all day on weekends or when I’m busy?
Try not to. Even if it doesn’t look full, waste can start releasing ammonia within hours, particularly in warm rooms. If you truly miss a scheduled change, do an immediate liner replacement and then return to the tighter interval for at least a day.
What should I do if fruit flies show up even though I change liners daily?
Check for food and liquid that are soaking into tray grooves, stuck under the grate, or spilled beneath the cage. Remove wet food after a few hours, clear tray debris during liner swaps, and consider tightening to two changes per day until the flies stop.
Does room temperature or sunlight change how often I should change liners?
Yes. Heat and afternoon sun speed up drying, dust, and ammonia buildup. On hot days, check mid-afternoon and be prepared to change the liner twice daily even if your bird’s diet is mostly pellets or dry seed.
Should I keep liner change frequency the same during molt, breeding, or multiple birds?
No. Those conditions increase waste, moisture, and debris. During heavy molt or active nesting, move to twice daily at minimum, and for multiple birds in a smaller cage expect to increase beyond the baseline if the liner saturates quickly.