Setting up a budgie cage correctly from scratch takes about an hour and makes a huge difference in how happy and healthy your bird stays long-term. The short answer: you need a cage that is at least 20 x 20 x 30 inches with bar spacing no wider than 0.5 inch, fitted with varied natural perches, separate food and water dishes mounted above perch level, a paper liner on the bottom, and placed in a draft-free, well-lit room away from the kitchen. Everything below walks you through each step in the order you should actually do it.
Budgie Bird Cage Setup: Step-by-Step Guide for Beginners

Maya Bennett
22 Mar 2026
Choosing the Right Cage Size and Layout
The Merck Veterinary Manual recommends a minimum cage size of 20 x 20 x 30 inches for a single budgie, and that is genuinely the floor, not a target. If you can go bigger, do it. Budgies are active, social birds that fly horizontally, so a cage that is wider than it is tall serves them better than a tall, narrow one. Think width first.
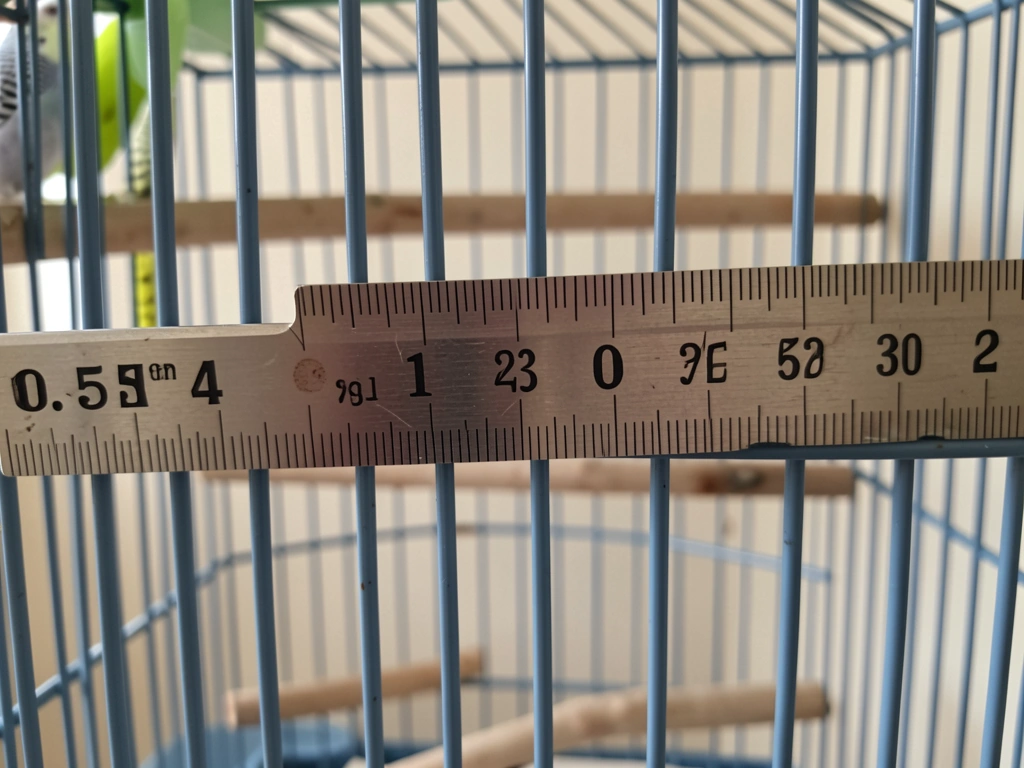
Bar spacing is non-negotiable. Maximum spacing for budgies is 0.5 inch (about 13 mm). Wider bars are an escape and entrapment risk. A budgie can squeeze its head through gaps it cannot pull back out of, which can be fatal. Always check this before buying any cage, even if it is marketed for small birds.
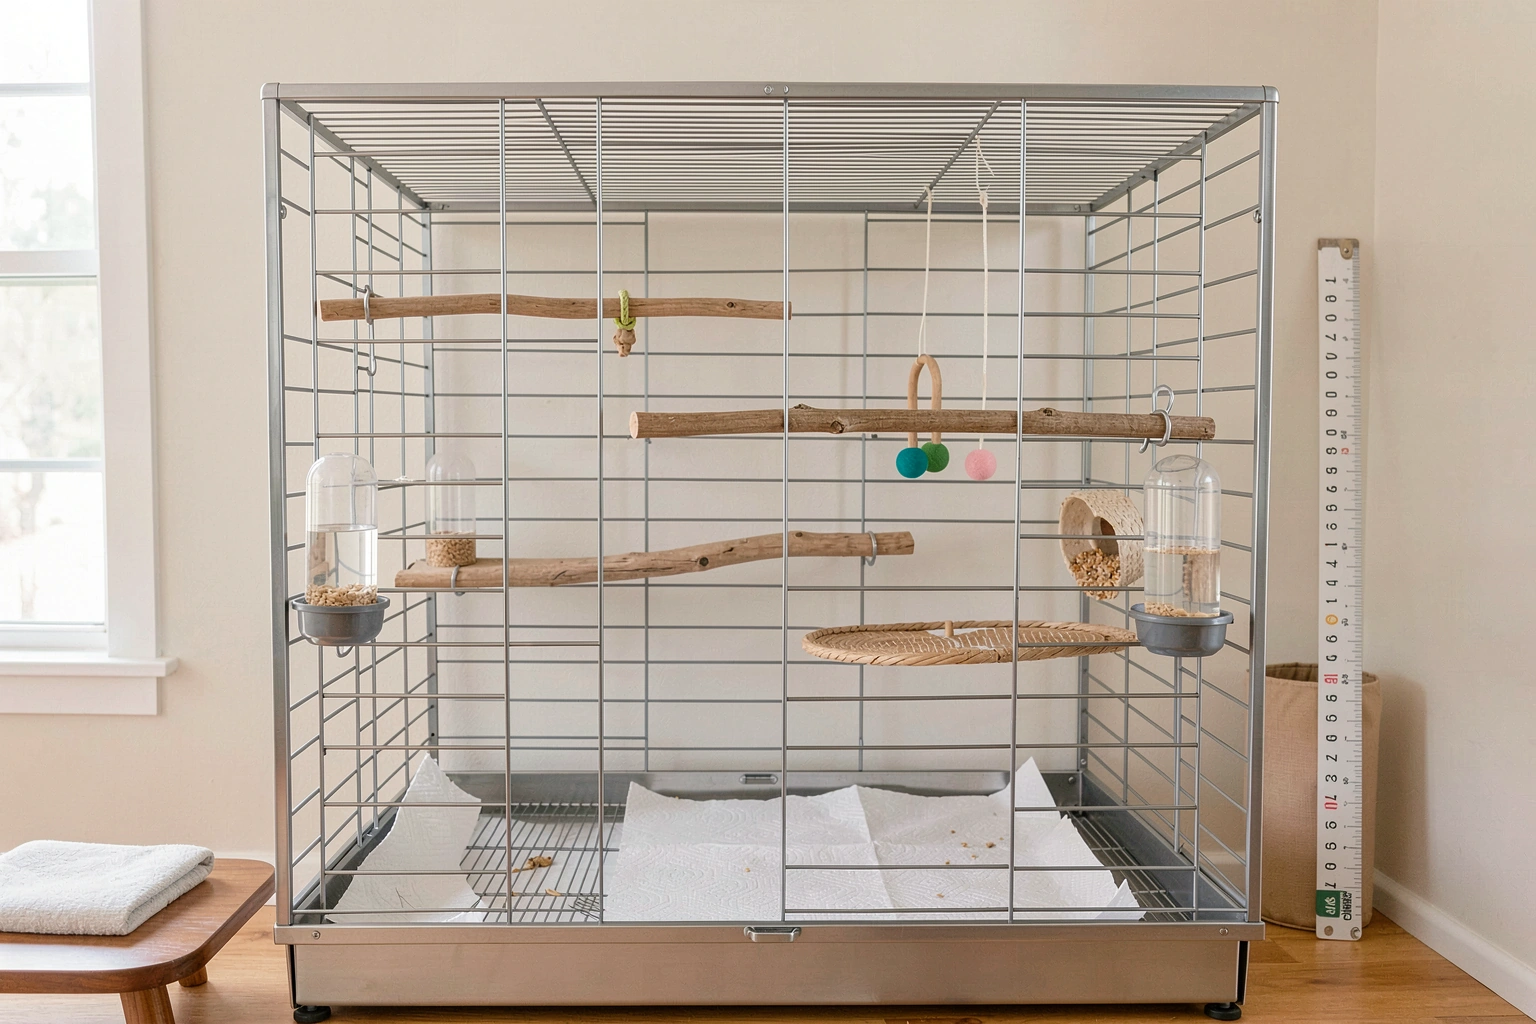
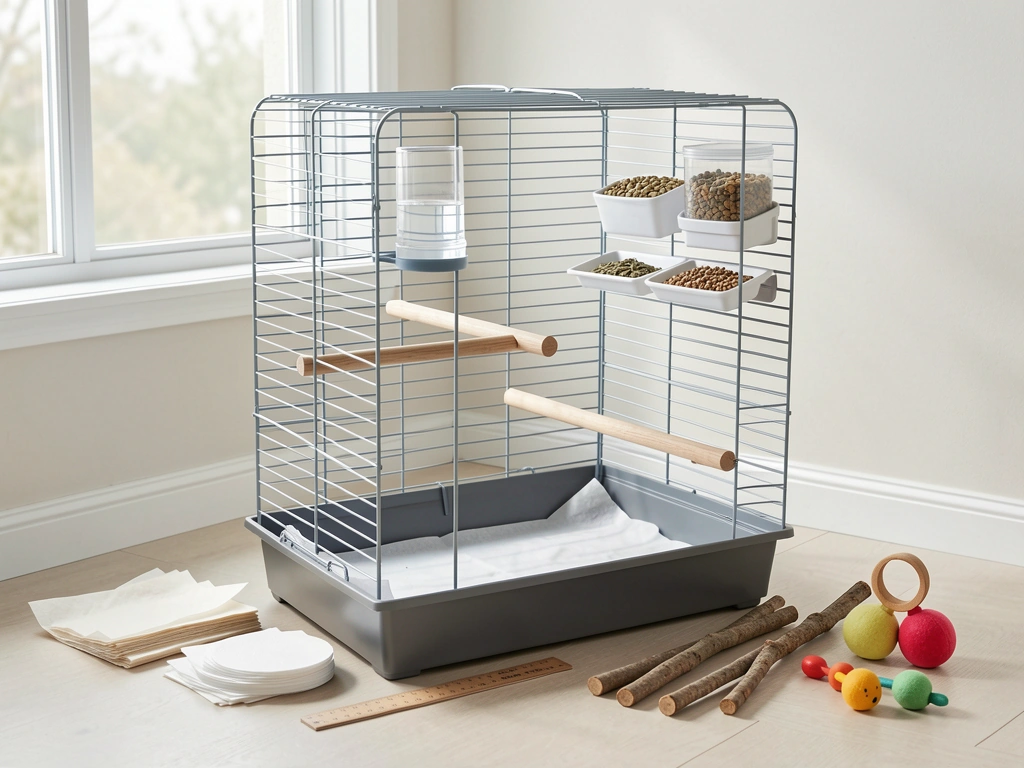
For layout, think in zones: a flying zone in the middle third of the cage where there are no obstacles, perch zones at the upper and lower thirds, and a feeding station mounted at one end. Do not fill every inch with toys and perches. Budgies need open airspace to move, and a cluttered cage causes stress and collisions. Leave the center open, position perches at two different heights, and keep toys to the sides rather than the middle.
If you are housing two budgies, bump up to the next size cage. The 20 x 20 x 30 inch minimum is per bird in practice, even if it is listed as a single-bird minimum. Two birds need room to get away from each other, and that matters especially when they are still getting used to each other.
Essential Accessories: Perches, Toys, Feeders, and Water
Perches
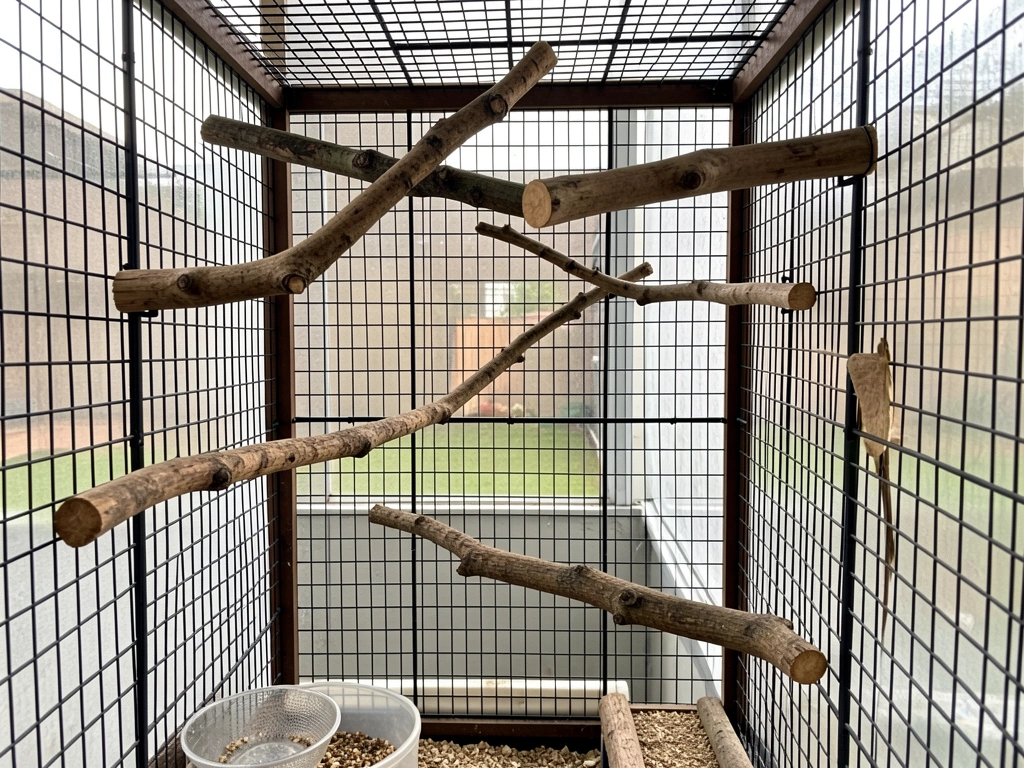
Perch variety is one of the most important things you can do for your budgie's foot health, and it is one of the most commonly overlooked parts of a cage setup. Use at least three perches of different diameters and textures. A budgie that grips the same diameter all day develops pressure sores, arthritis, and bumblefoot. Varying the diameter means different parts of the foot bear the load at different times.
Good perch options include natural wood branches (apple, willow, and eucalyptus are popular), rope perches, and cork perches. Avoid sandpaper-covered perches entirely. The Budgerigar Breeders Association is very clear on this: sandpaper perches are bad for budgie feet, full stop. The rough surface causes abrasions rather than trimming nails the way some packaging implies.
Place one perch high up near the back of the cage (budgies sleep high and feel safer there), one at mid-height, and one lower near the feeding station. Make sure no perch is directly above a food or water dish, since droppings falling into dishes is one of the fastest ways to contaminate food and water.
Toys and Enrichment
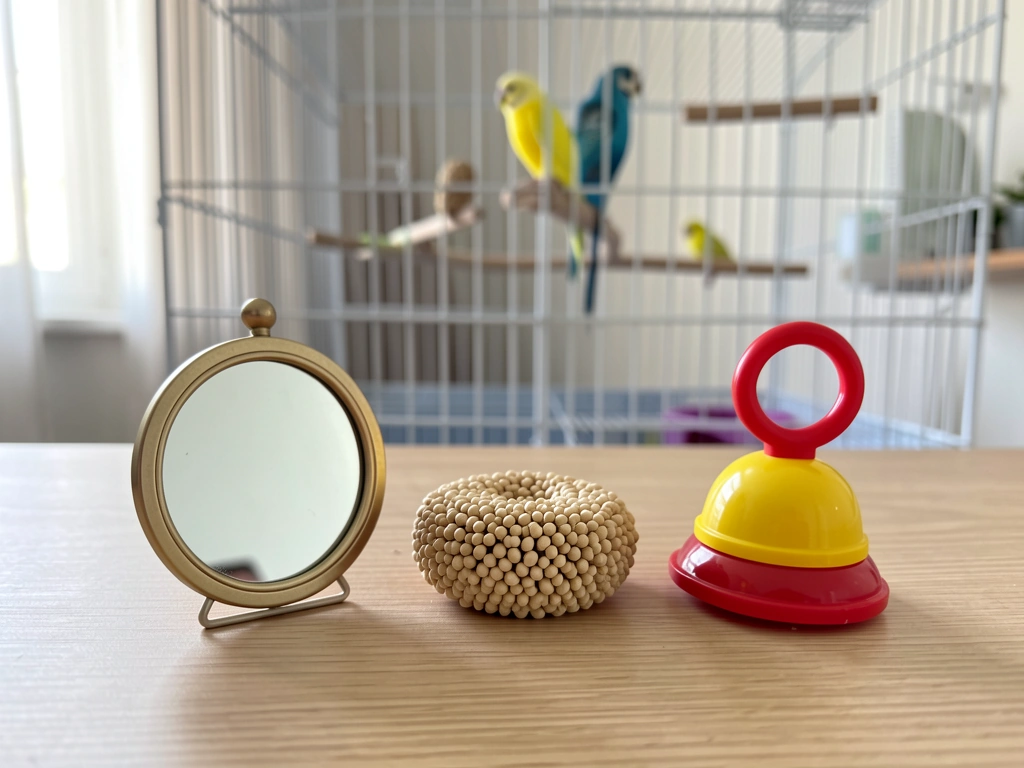
Budgies are curious and need mental stimulation. Start with two or three toys and rotate them weekly rather than cramming in everything at once. Good starter toys include a small mirror, foraging toys stuffed with millet, and a bell or rattle toy. Avoid toys with fine chains or loops that a toe can get caught in, and skip toys made with zinc-coated hardware, which is toxic to birds.
Feeders and Water Setup
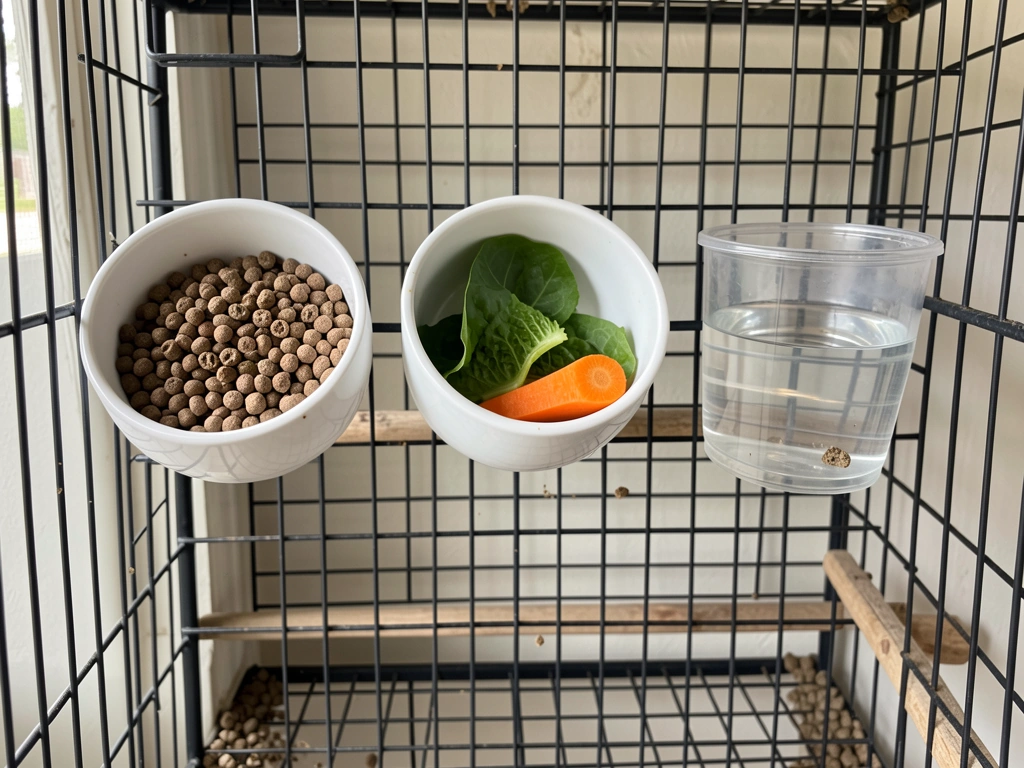
Use separate dishes for dry food (seed mix or pellets), fresh food (vegetables and fruit), and water. Combining them in one or two dishes leads to contamination fast. A wet piece of broccoli sitting in a seed dish will make the seeds moldy within hours.
Mount all feeders above perch level so droppings do not fall directly into food. Hooded dishes or dishes mounted on the cage wall (rather than placed on the cage floor) work well for this. Water should be changed daily without exception. Budgies will drink stale, contaminated water if that is all they have, and it makes them sick. Fresh, clean water every single day is one of the most important things you can do.
Bedding, Liners, and Keeping the Bottom Clean
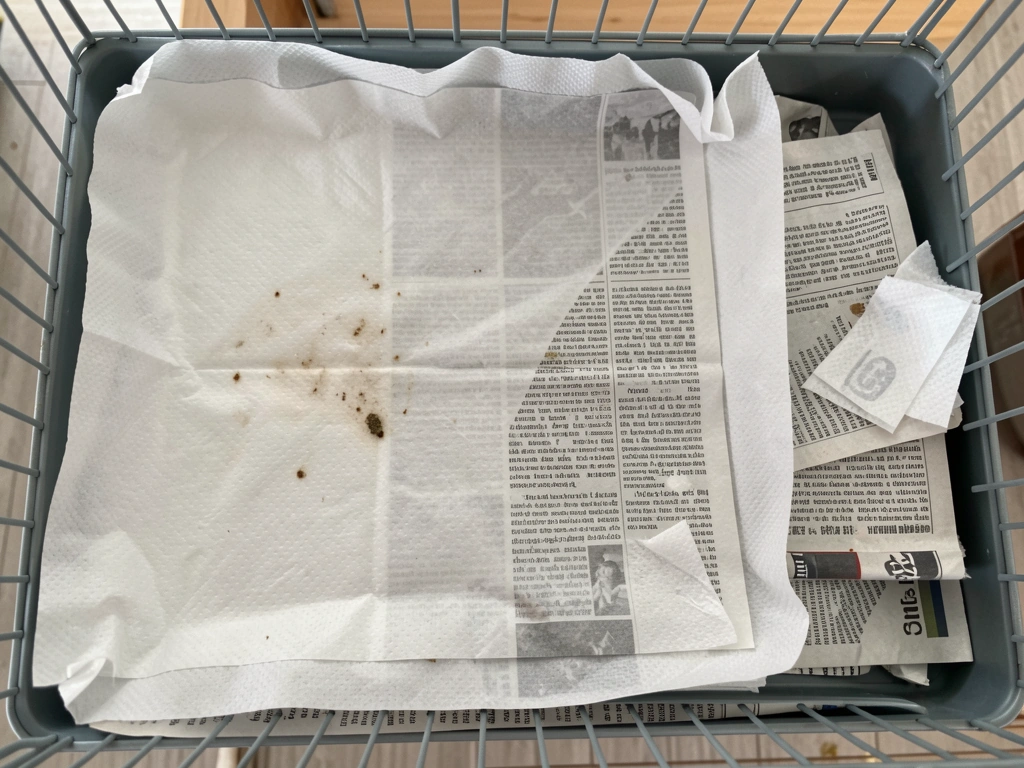
Line the cage bottom with paper. Newspaper, plain brown paper, or paper towels all work well and are easy to swap out daily. Paper lets you see droppings clearly, which matters because changes in dropping color, consistency, or frequency are often the first sign that something is wrong with your bird's health.
If you prefer a loose substrate rather than flat paper, use aspen shavings. They are safe for birds and do not produce the aromatic oils or fine dust that harm respiratory systems. Do not use pine or cedar shavings. Both contain aromatic oils and dust that are not safe for birds, a point Lafeber's avian experts specifically flag as a bird safety issue. Stay away from corn cob bedding and walnut shell bedding too, as both can harbor mold.
Whether you use paper or aspen, the goal is the same: you should be able to see and remove droppings easily and replace the liner without a big production. Skip grates if your cage came with one until you know your bird. Some budgies do fine with a grate over the bottom tray; others pace on it or get toes caught. Watch how yours behaves and remove it if there is any sign of stress or injury.
Where to Put the Cage in Your Home
Cage placement affects your budgie's health more than most people realize. The right spot is in a main living area where the bird has company and natural light, but away from drafts, direct heat sources, and the kitchen.
Keep the cage away from the kitchen. This is a firm rule. Cooking fumes, especially those from overheated nonstick (PTFE/Teflon) cookware, can kill a bird within minutes. Even ordinary cooking smoke and aerosolized oils are harmful to budgie respiratory systems. Both Winter Park Veterinary Hospital's avian husbandry guidance and PetAdvocacy's care materials call this out explicitly. The kitchen is not a safe room for a bird cage under any circumstances.
Temperature range should stay between roughly 65 and 80 degrees Fahrenheit (18 to 27 degrees Celsius). Budgies can tolerate mild variation but they are sensitive to cold drafts, which means avoid placing the cage near exterior doors, windows that open frequently, or air conditioning vents. A cage against an outer wall can get cold at night even if the room feels warm.
Natural light is important, but direct sunlight on the cage for hours at a time will overheat your bird with no escape. Place the cage near a window but not in direct sun, or cover part of the cage so the bird can choose shade. Aim for around 10 to 12 hours of light per day, then cover the cage with a breathable cloth at night to signal sleep time and block ambient light.
Noise and activity are fine in moderation. A living room environment with normal household sounds is actually good for budgies. Avoid placing the cage near a television or speaker that runs at high volume constantly, and do not put it in a frequently slammed door corridor or a room where sudden loud noises are common. Predictable, moderate background activity is ideal.
Setting Up a Feeding Routine That Actually Works
Budgies do best with a consistent feeding schedule. Set up your dishes so the daily routine takes under five minutes, and you will actually stick to it. Here is what a practical daily feeding workflow looks like.
- Every morning, remove the water dish, rinse it with hot water (no soap residue), refill with fresh clean water, and return it to the cage.
- Check the seed dish. If it looks full, blow gently across the surface. Empty seed hulls float to the top and can make it look like there is food when the dish is mostly empty. Remove hulls, top up with fresh seed or pellets.
- Add a small amount of fresh food (a piece of leafy green, a slice of carrot, or a bit of apple) in the fresh food dish. Remove any uneaten fresh food after two to four hours to prevent spoilage and bacterial growth.
- Swap the paper liner or spot-clean the aspen, removing visible droppings and soiled areas. Note anything unusual about the droppings.
- Do a quick visual check on the bird: active, vocalizing, posture normal, eyes clear.
That is the full daily feeding workflow. Seed or pellets stay in the dish all day. Fresh food goes in for a few hours, then comes out. Water is refreshed every morning. Nothing complicated, but skipping steps (especially water changes) is where health problems start.
Safety Checks and Common Setup Mistakes
Before your budgie ever goes into the cage, do a full safety check. Most problems are easy to catch at setup and much harder to fix after the bird is settled in.
- Bar spacing: run a ruler across bars. If any gap exceeds 0.5 inch (13 mm), the cage is not safe for a budgie.
- Perch hardware: check that perch bolts or screws do not protrude into the cage interior where toes can get snagged.
- Toy hardware: remove any fine chains, split rings, or loose loops. Replace with quick-link connectors if needed.
- Cage coating: powdercoated cages are generally safe. Avoid any cage with flaking paint or an unknown finish, as many old or cheap cages use zinc-based coatings that are toxic.
- Door latches: budgies are smart. Test every door and make sure the latch cannot be nudged open from the inside.
- Perch placement: confirm no perch sits directly over a food or water dish.
- Feeder mounting height: all feeders should be mounted above the main perch level to reduce contamination from droppings.
The most common setup mistakes I see are: using a cage that is too small (the minimum really is a minimum, not a target), overcrowding the cage with perches and toys, placing the cage in or near the kitchen, using sandpaper perches, putting only one type of perch in the cage, and not changing the water daily. Any one of these can cause real health problems. All are easy to fix.
One more mistake worth calling out: placing feeders and water dishes on the cage floor. Dishes on the floor collect droppings, kicked-up bedding, and debris constantly. Mount them on the cage wall at a height the bird can reach comfortably, above the perch line where possible.
Choosing the Right Liner and Perch Materials: A Quick Comparison
| Material | Safety | Visibility of Droppings | Ease of Cleaning | Recommended? |
|---|---|---|---|---|
| Newspaper / plain paper | Safe | Excellent | Very easy (daily swap) | Yes |
| Paper towels | Safe | Excellent | Very easy (daily swap) | Yes |
| Aspen shavings | Safe | Good | Moderate (spot clean daily) | Yes |
| Pine shavings | Unsafe (aromatic oils) | Poor | Moderate | No |
| Cedar shavings | Unsafe (aromatic oils/dust) | Poor | Moderate | No |
| Corn cob bedding | Risk of mold | Poor | Difficult | No |
| Sandpaper cage liner | Unsafe (abrasive to feet) | Good | Easy | No |
| Natural wood perch (apple, willow) | Safe | N/A | Wipe or replace | Yes |
| Rope perch | Safe (check for fraying) | N/A | Replace when frayed | Yes |
| Sandpaper perch cover | Unsafe (abrasive) | N/A | N/A | No |
| Plastic perch (single diameter) | Safe material | N/A | Easy | Use sparingly |
Daily Maintenance and Long-Term Care Checklist
Use this checklist to build a habit. Daily tasks take under 10 minutes once you have the right setup. Weekly and monthly tasks keep the cage genuinely clean rather than just surface-clean.
Every Day
- Change water dish: empty, rinse with hot water, refill fresh.
- Check seed or pellet dish: remove hulls, top up as needed.
- Add fresh food in the morning, remove uneaten portions after 2 to 4 hours.
- Replace or spot-clean the cage liner. Note any unusual droppings.
- Quick visual health check on the bird (posture, activity, eyes, feathers).
- Wipe any visible droppings off perches with a damp cloth.
Every Week
- Remove and wash all dishes with hot soapy water, rinse thoroughly.
- Scrub perches with a stiff brush and warm water, let dry completely before returning to cage.
- Rotate toys: remove one or two, add a different one to keep the bird engaged.
- Wipe down cage bars and interior surfaces with a bird-safe disinfectant or a diluted white vinegar solution.
- Check all perch fittings, toy attachments, and door latches for wear or loosening.
- Inspect rope perches for fraying. Replace immediately if strands are loose enough to tangle a toe.
Every Month
- Full cage deep clean: move the bird to a safe temporary space, remove all accessories, scrub the cage thoroughly with a bird-safe cleaner, rinse well, and allow to dry completely before reassembling.
- Inspect natural wood perches for cracks, mold, or excessive wear. Replace any that are compromised.
- Check the cage coating for chips or flaking. If paint is coming off, the cage needs to be replaced.
- Review cage placement: has anything changed (new heating vent, furniture blocking light, increased kitchen proximity)? Adjust as needed.
- Weigh your bird if you have a gram scale. Steady weight loss is often the first measurable sign of illness in budgies.
Every Year (or When Needed)
- Schedule a wellness visit with an avian vet, even if the bird seems healthy.
- Replace heavily worn perches, dishes, or accessories.
- Reassess cage size if you have added a second bird or if behavior suggests the bird feels cramped.
A well-set-up budgie cage is not complicated, but it does require consistency. The birds that thrive are almost always the ones whose owners built a simple, repeatable daily routine and stuck with it. Get the cage right on day one, keep the routine tight, and your budgie will give you a very clear sign it is happy: it will be loud, active, and constantly getting into everything it can reach.
FAQ
Can I use a larger cage with wider bar spacing if it feels roomy enough?
If a cage is slightly larger than the 20 x 20 x 30 inch minimum but the bar spacing is wider than 0.5 inch, prioritize bar spacing anyway. Bigger bars gaps are the bigger safety risk (head entrapment) and can make the cage unsuitable even when the interior space looks roomy.
How quickly should I add toys and extra perches after setting up the budgie bird cage setup?
Start by placing only the essentials (sleep perch, mid perch, lower perch near the feeding zone, and 2 to 3 toys). After 3 to 7 days of normal behavior, add one enrichment item at a time, if needed. This helps you spot stress signs caused by overcrowding or blocked flight paths.
If I have one budgie, do I still need a “multi-zone” setup?
For a lone budgie, you still want more than one perch, but you can keep the arrangement simple. Use two heights plus a lower feeding-area perch, and rely on horizontal flying space in the center rather than stacking many perches in the same zone.
How high should mounted food and water dishes be in a budgie bird cage setup?
Mount feeders above perch level, but do a height test with your hand. Your budgie should be able to reach comfortably without stretching upward from a tense stance or having to climb over droppings-prone areas. If the bird frequently perches far from the dish or drops food, lower or reposition the dish.
What should I do if I already bought sandpaper perches for my budgie bird cage setup?
Remove sandpaper-covered or abrasive-perch styles even if they look “bird-safe” on packaging. If you already bought one, replace it with natural wood branches of different diameters, and keep at least one perch in the lower third to reduce pressure from constant gripping.
Should I use a grate under the cage bottom right away?
Yes, but avoid using any grate as a default unless you observe your bird. If your budgie paces, shows foot redness, holds toes differently than usual, or seems reluctant to step near the bottom, take the grate out and switch to paper liner or another safe bottom plan.
Can I switch from paper liners to aspen shavings in my budgie bird cage setup?
New liners can be confusing if you switch materials too fast. If you change from paper to aspen, do it gradually over a few days, and watch for increased coughing, sneezing, or respiratory irritation. Also confirm the bedding is not dusty, and keep the cage out of direct airflow from vents.
Is it safe to place my budgie cage near a window if I cover part of it?
Don’t rely on “sunny window but covered” alone. Use a breathable cover for nighttime, and keep daytime light indirect so the bird has shade options without getting trapped in a heat spot. If the cage surface becomes warm to the touch, move it away from that sun source.
What droppings changes should make me worry right away?
If your bird is shedding, expect color and consistency changes sometimes, but not prolonged watery droppings or frequent sudden changes. Do a quick baseline review, then contact an avian vet if droppings stay very watery, have strong odor, include blood, or are paired with fluffed posture, lethargy, or reduced appetite.
What’s the best way to make the daily routine realistic for a budgie bird cage setup?
A good rule is to keep daily feeding and water tasks under five minutes by pre-planning where each dish sits and how you access it. If the schedule drags longer than that, your dish placement or reach is off, and you should adjust mounting position before adding more routines.
How do I rotate toys weekly without stressing a new budgie?
If your budgie is new to the cage, add a single “starter comfort” item for the first week, then rotate toys weekly. Avoid placing new toys right above or directly over perches where droppings fall, since accidental soiling can quickly make toys unusable.
Do I need to adjust feeding setup if my budgie eats pellets instead of seed?
If you use pellets plus seed, keep dry food in the dish all day as described, but remove wet fresh foods after a few hours. For seed mixes, avoid adding extra treats that create heavy waste in the bottom zone, since contamination risks jump when droppings and wet foods mix.
Next Article
Bird Cage Setup: Easy Steps and Setup Ideas for Beginners
Step-by-step bird cage setup with placement, perches, food and water stations, accessories, spacing, and quick checklist