A good bird cage setup comes down to four things: the right size cage, a safe location, the correct items inside, and a layout that keeps your bird comfortable and healthy. Get those four things right and everything else is fine-tuning. This guide walks you through each step in order, from choosing the cage to the final check before your bird moves in, so you can get it done today.
Bird Cage Setup: Easy Steps and Setup Ideas for Beginners

Maya Bennett
22 Mar 2026
Start With the Cage: Size and Bar Spacing First
The single most important purchase decision is cage size, and the rule is simple: bigger is always better. The minimums below are exactly that, minimums. Merck Veterinary Manual provides a table of minimum cage size and bar spacing recommendations by bird type, which you can use when planning your cage. If you can afford or fit a larger cage, go for it. Your bird will use the space.
| Bird Type | Minimum Cage Size (inches) | Bar Spacing (inches) |
|---|---|---|
| Budgerigar (budgie/parakeet) | 18 × 18 | ~0.5 |
| Canary / Finch | Largest possible for flight | ≤0.5 |
| Cockatiel | 24 × 18 × 24 | ~0.5–0.75 |
| African Grey / Amazon / Small Cockatoo | 40 × 30 × 60 | ~0.75 |
Bar spacing is a safety dimension, not just a comfort detail. The Association of Avian Veterinarians puts it plainly: the bird should not be able to fit its head between the bars. If it can, the bar spacing is too wide. A bird that gets its head or leg stuck between bars can injure itself badly within minutes. Always confirm bar spacing before you buy, especially if you are purchasing secondhand.
On cage shape, go rectangular over round whenever possible. Round cages limit climbing routes and can disorient some birds. A rectangular cage gives your bird clear corners to retreat to, more usable perch positions, and better airflow. For specific species setups, budgie-specific and canary-specific guides go deeper on the nuances for each bird.
Material matters too. Stainless steel is the gold standard: durable, non-toxic, and easy to clean. Powder-coated cages are fine if the coating is intact and labeled bird-safe. Avoid any cage with peeling paint, rust, or zinc plating, as these are toxic if ingested.
Where to Put the Cage at Home
Placement affects your bird's health more than most people realize. Birds are sensitive to drafts, temperature swings, fumes, and stress from noise or sudden movement. Here is what to prioritize.
Keep It Away From the Kitchen
Never place a bird cage in or adjacent to the kitchen. Cooking fumes, non-stick cookware (PTFE/Teflon) vapors, smoke, and aerosol sprays can be fatal to birds even in small concentrations. In discussions among r/parrots users, people also emphasize keeping birds well away from Teflon/non-stick cookware and using proper separation and ventilation to reduce exposure non-stick cookware (PTFE/Teflon) vapors. Their respiratory systems are far more sensitive than ours. A living room or dedicated bird room with good ventilation is the right spot.
Drafts and Windows
Keep the cage at least 12 inches away from exterior windows. Drafts from windows, fans, and air conditioners are a leading cause of respiratory illness in pet birds. Direct, unfiltered sunlight through glass can also overheat a bird quickly, since they cannot easily move away if the cage is placed directly in a sunny window. Indirect natural light is ideal: bright enough to support a healthy day/night cycle, but without direct sun exposure for hours at a time.
Height and Social Positioning
Birds feel safest when the cage is roughly at eye level or slightly above. Too low and they feel vulnerable; too high and they can become overly territorial. Place the cage against a wall on at least one side so your bird has a sense of security at its back. Avoid high-traffic areas where people constantly brush past the cage, but do keep it in a room where the family spends time, since birds are social and thrive on activity around them.
Noise and Stress
Moderate household noise is fine and actually good for socialization. Avoid placing the cage next to a television that runs at high volume all day, near a stereo, or in a hallway where doors slam regularly. Consistent, unpredictable loud noise elevates stress hormones and suppresses immune function over time.
What Goes Inside: The Essentials
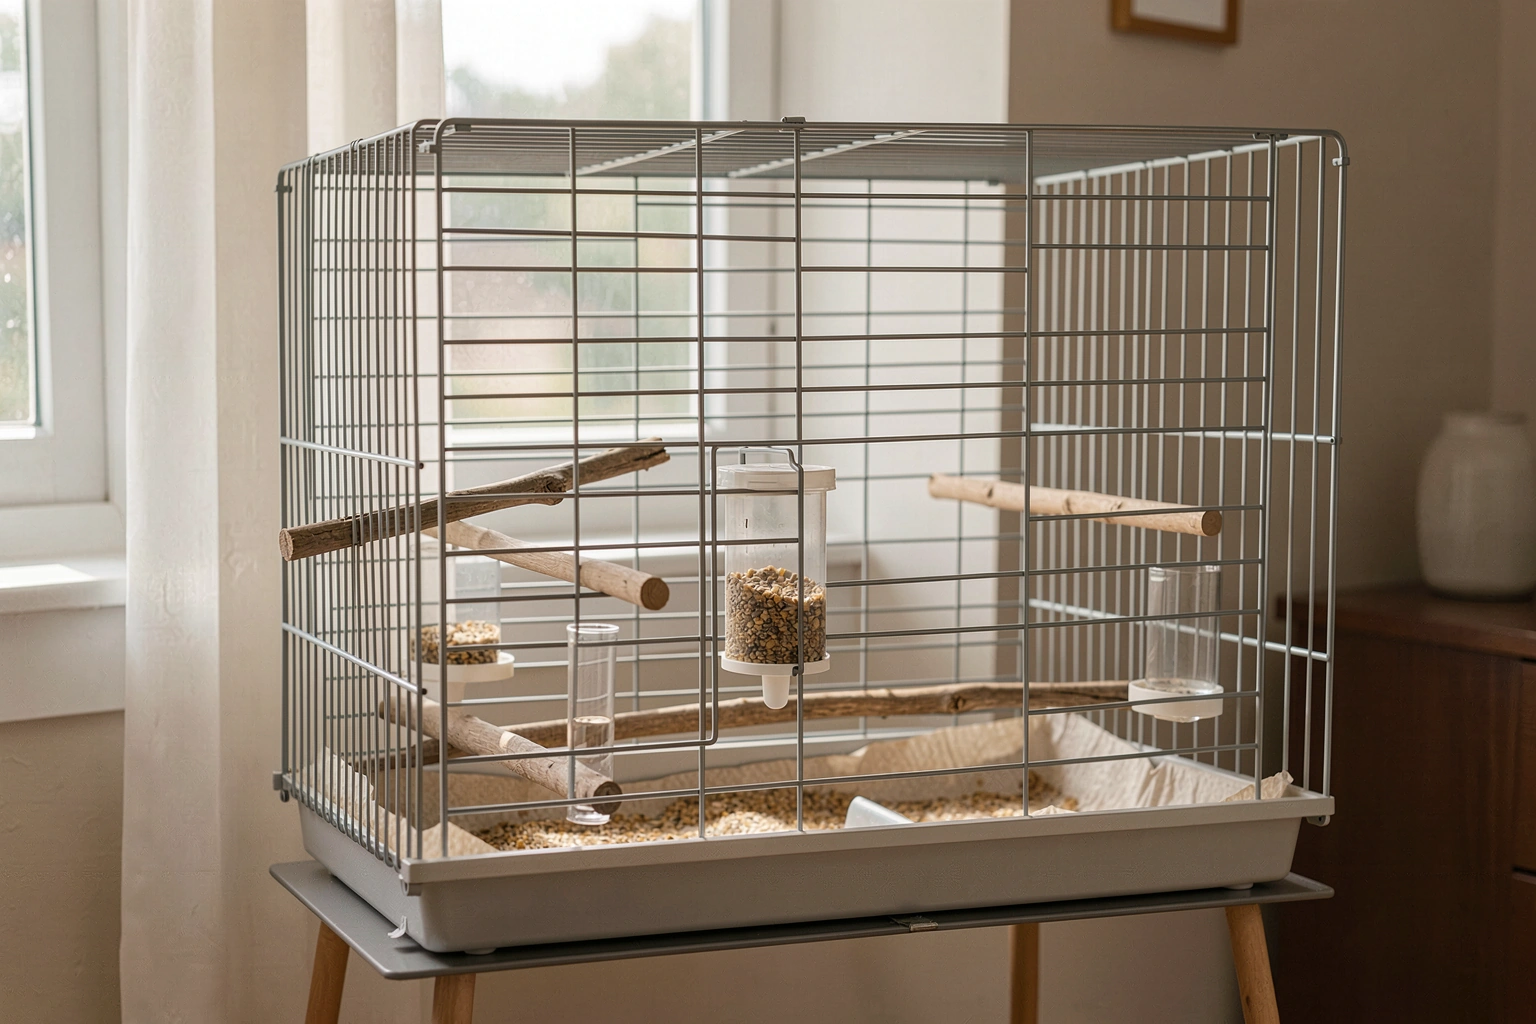
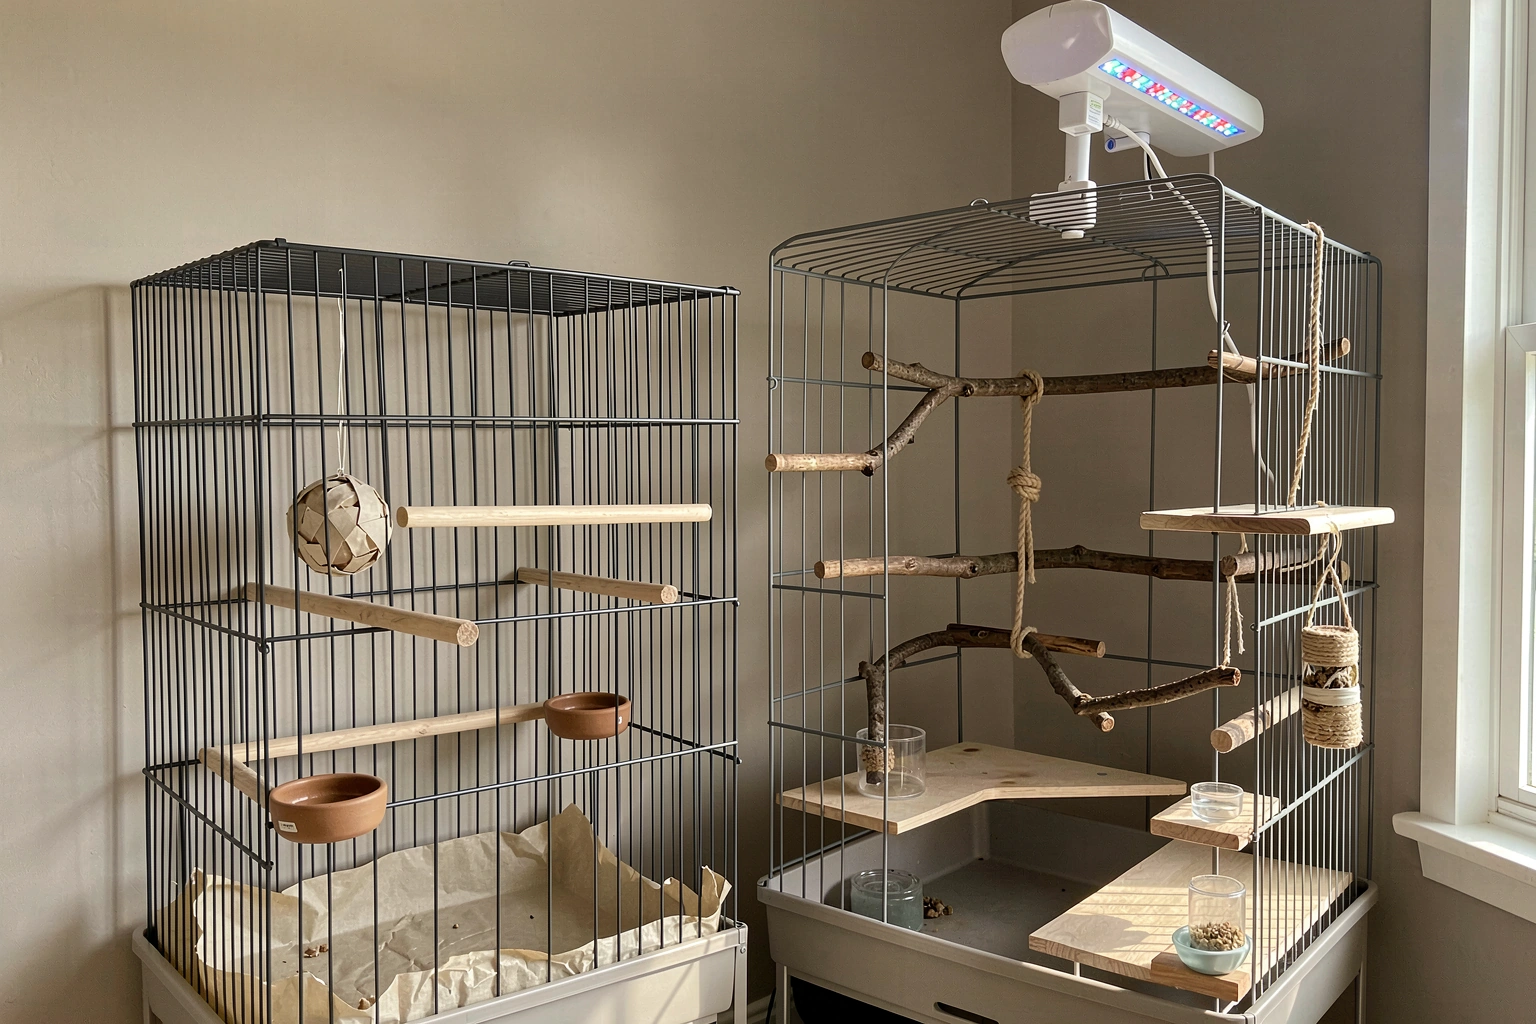
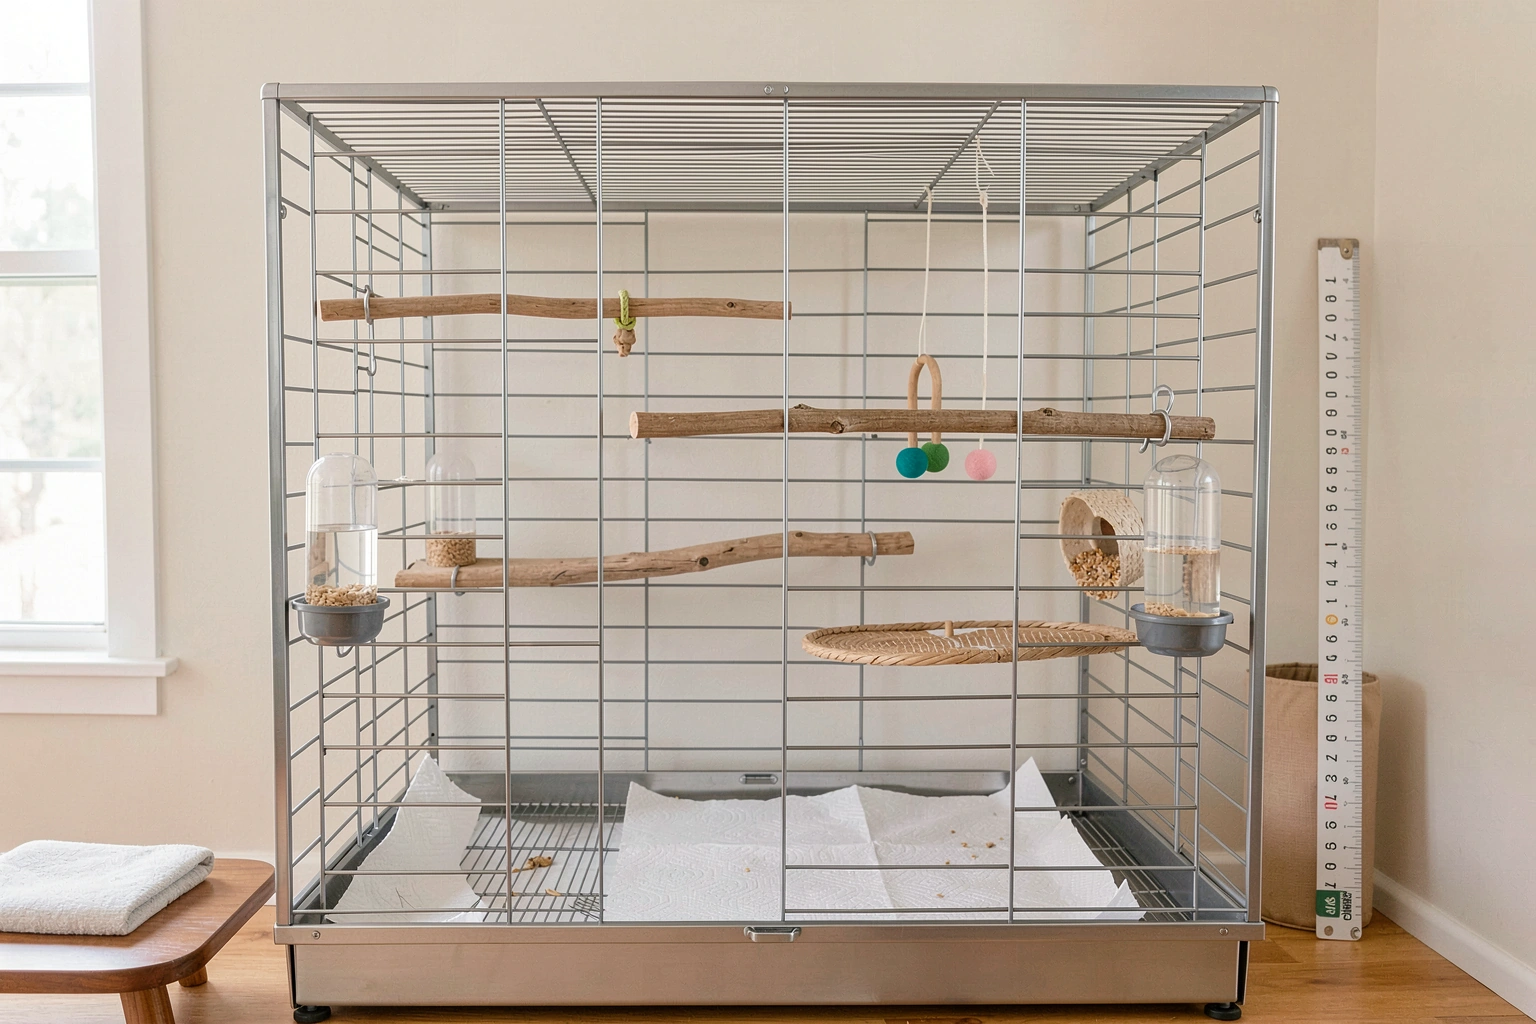
Perches
Perches are the most important interior element. Birds spend almost all of their time standing, so poor perch choice leads to foot problems fast. Use at least two perches of different diameters and textures so your bird's feet flex differently throughout the day. Natural wood perches (untreated manzanita, dragonwood, or java wood) are excellent. Rope perches add texture variety. Concrete or cement perches can help keep nails trimmed but should not be the only option. Avoid smooth dowel-only setups: identical diameter dowels are one of the most common causes of pressure sores on bird feet.
Place perches at different heights. The highest perch is where your bird will sleep and feel most secure, so make sure it is well away from food and water dishes to prevent contamination from droppings. Leave enough space at the top of the cage for your bird to fully extend upward without touching the cage ceiling.
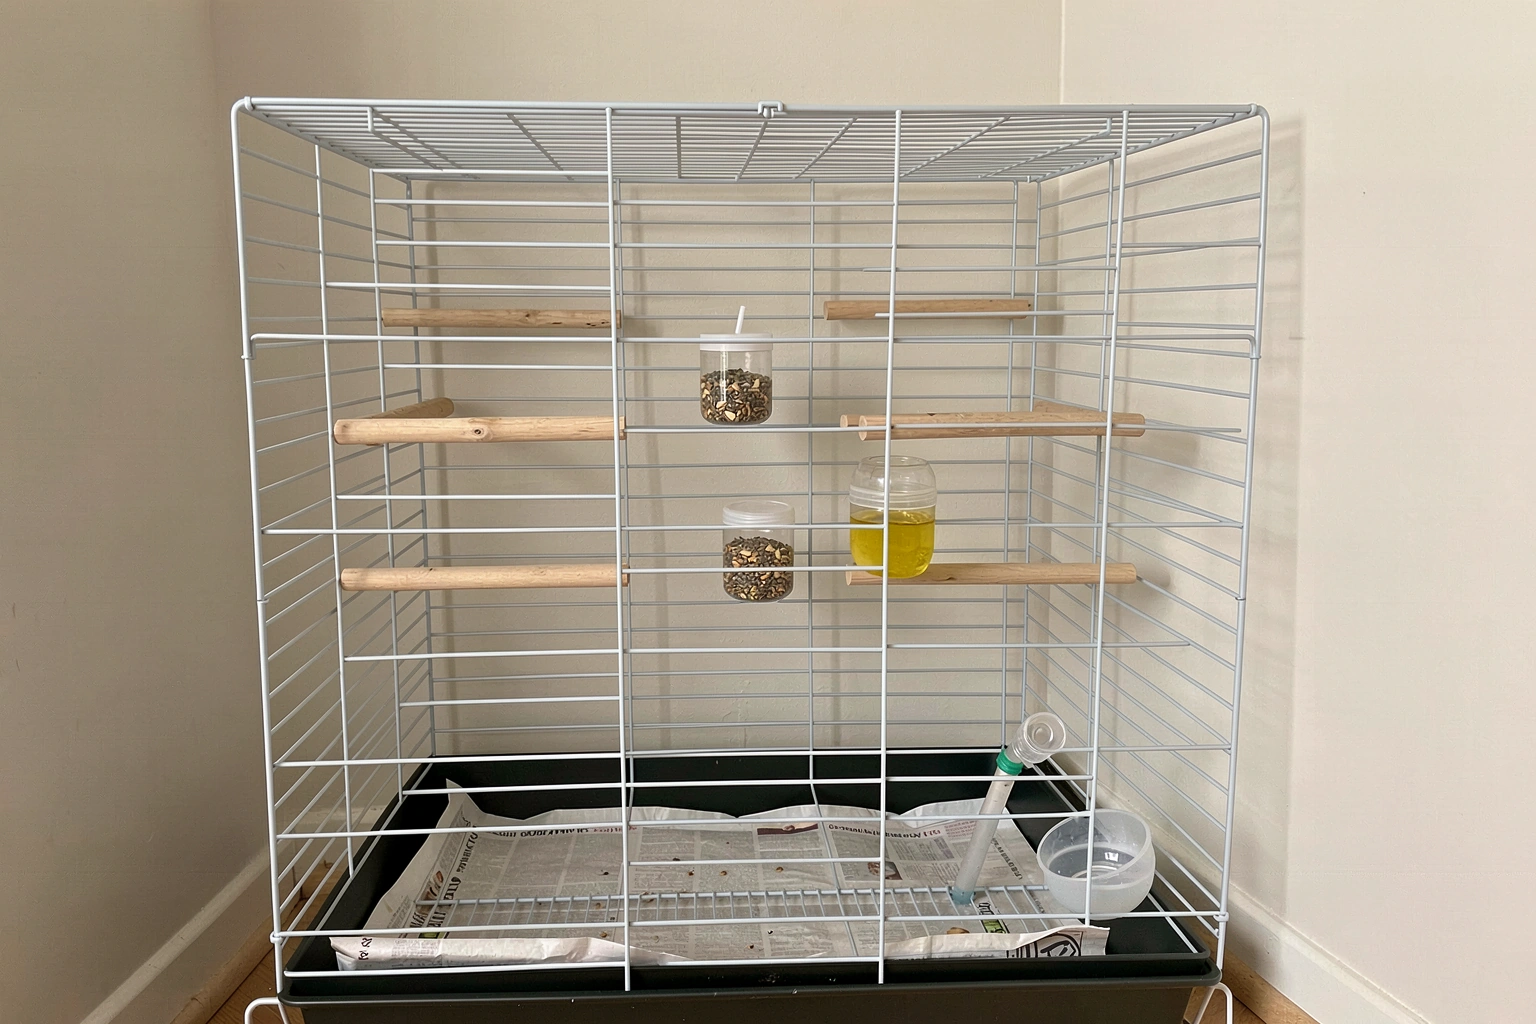
Food and Water Dishes
Attach food and water dishes to the sides of the cage, not the floor. When dishes sit on the floor, droppings fall directly into them as the bird perches above. Side-mounted dishes keep food and water clean far longer. Make sure the dishes are sized appropriately for your bird: not so deep that a small bird could fall in and get stuck, and not so shallow that they tip easily. For most small birds, a dish about 2 to 3 inches in diameter and 1.5 inches deep is right.
Place food and water on opposite sides of the cage if space allows. This encourages light movement and prevents one dish from contaminating the other. Use at least two food stations if your bird eats both pellets and fresh food, keeping wet foods separate from dry.
Cage Liner and Bedding
For the cage floor, newspaper, plain brown paper, or paper towels are the best liners. They are cheap, easy to change daily, and let you monitor droppings for health changes (changes in color, consistency, or volume are often the first sign something is off). If you want a bedding-style liner, aspen shavings are bird-safe. Do not use cedar or pine shavings: the aromatic oils and fine dust they release are respiratory irritants and can be toxic over time. Most cages have a grate above the floor tray, which keeps the bird from walking in its own waste. Keep that grate in place.
Accessory Layout: What Goes Where and Why
A cluttered cage is a hazardous cage. The goal is a layout where your bird can move freely between perches, access food and water without stretching awkwardly, and play with toys without getting tangled. Think of the cage in three zones: upper, middle, and floor.
- Upper zone: sleeping perch, one hanging toy (keep it away from the perch so it does not disturb sleep), and any foraging element like a treat skewer.
- Middle zone: second perch, food and water dishes mounted at a comfortable reach height, and any swings or rope perches.
- Floor zone: liner only. Do not place toys, dishes, or perches on the floor. The floor should be easy to clean and free of items that trap droppings.
Limit toys to two or three at a time for small birds, three to five for larger parrots. Rotate toys every one to two weeks to keep your bird mentally stimulated without overwhelming the space. When you hang a toy, make sure it cannot swing into a perch and trap a foot or wing. Tug gently on any hanging toy before installing it to confirm the attachment point is secure.
Check that every accessory is made from bird-safe materials. Avoid anything with zinc hardware, lead paint, or synthetic dyes that could be chewed off and ingested. If a toy has small chain links, confirm the links are large enough that a toe cannot get caught in them. Natural materials, stainless steel hardware, and food-safe dyes are the safe defaults.
For a natural-themed setup, you can add branches from bird-safe trees (apple, willow, and birch are commonly used) as supplemental perches. Just make sure any branch you bring in has been washed thoroughly and dried. If you want to explore a full natural cage approach, there is a lot more to dig into on that topic specifically.
Step-by-Step Setup Checklist for Today
- Confirm cage size meets the minimum for your bird species and that bar spacing is correct. Measure it yourself if buying secondhand.
- Wash the cage thoroughly with warm water and a bird-safe disinfectant (diluted white vinegar works well). Rinse completely and let it air dry before adding anything.
- Choose your cage location: away from the kitchen, at least 12 inches from exterior windows, against at least one wall, and in a socially active room.
- Install the floor grate and add your liner (newspaper or paper towels). Cut to fit the tray.
- Mount the highest perch first, positioning it so the bird has at least 2 to 3 inches of clearance above its head when standing on it.
- Add a second perch at a lower position, using a different diameter and texture from the first.
- Mount food and water dishes on the sides at mid-cage height, on opposite sides if possible, and away from perches directly above.
- Add two to three toys in the middle and upper zones, checking that each is securely attached and cannot swing into a perch.
- Do a final safety check: open and close every door to confirm latches are secure. Check for any sharp wire ends or gaps. Tug on every perch and dish holder.
- Introduce your bird calmly and observe for at least 30 minutes to make sure it can navigate the space, reach food and water, and access its sleeping perch without obstruction.
Common Mistakes and How to Fix Them
Even experienced bird owners make these errors. Most are easy to correct once you know what to look for.
| Mistake | Why It's a Problem | Quick Fix |
|---|---|---|
| Dishes placed on the cage floor | Droppings contaminate food and water from birds perching above | Replace with side-mounted dish holders at mid-cage height |
| Only one dowel perch, same diameter | Constant uniform pressure causes foot sores | Add a second perch with a different diameter and texture |
| Cage too close to a window or vent | Drafts cause respiratory illness; direct sun causes overheating | Move the cage at least 12 inches from windows, away from vents |
| Cedar or pine shavings used as bedding | Aromatic oils and fine dust are respiratory toxins for birds | Switch to newspaper, paper towels, or aspen shavings |
| Too many toys in the cage at once | Birds get tangled, stressed, or the space becomes hard to clean | Remove all but two to three toys and rotate every one to two weeks |
| Bar spacing too wide for the bird | Bird can get its head or legs trapped, causing injury | Replace the cage or use a bird-safe cage insert to reduce spacing |
| Cage placed in or near the kitchen | Cooking fumes and non-stick cookware vapors can be fatal | Move the cage to a well-ventilated living area away from the stove |
Keeping It Clean: Your Ongoing Maintenance Plan
A clean cage is not just about aesthetics. It directly affects your bird's respiratory health, prevents bacterial and fungal infections, and gives you early warning of health problems through daily observation of droppings.
Daily Tasks
- Replace the cage liner. This takes 60 seconds and lets you check droppings for any changes in color or consistency.
- Wash and refill food and water dishes. Do not just top them up: dump, rinse, and refill.
- Remove any uneaten fresh food within two hours to prevent bacterial growth.
- Wipe down perches if visibly soiled.
Weekly Tasks
- Scrub the floor tray, grate, and all dishes with hot water and bird-safe disinfectant.
- Wipe down cage bars and horizontal surfaces.
- Inspect all perches for cracks or deep soiling. Replace if necessary.
- Rotate toys and check for wear, fraying rope, or broken parts.
Monthly Tasks
- Do a full cage disassembly clean: scrub bars, tray, grate, and accessories thoroughly.
- Inspect the cage structure for rust, peeling coating, or bent bars.
- Replace any perches that are worn down or cracked.
- Check all latches and door locks for security.
What to Watch in the First Two Weeks
The first two weeks in a new cage are an adjustment period. Watch for signs that the layout is not working: if your bird is not eating or drinking, the dishes may be in an uncomfortable position. If it is sleeping on the floor instead of a perch, the perch placement or diameter may be wrong. If it seems stressed or is feather-plucking, the environment may be too loud, too bright at night, or too cluttered. These are all fixable problems. Observe daily, make small adjustments, and trust what you see. A bird that is eating well, exploring its toys, and sleeping in its top perch is a bird that is comfortable in its natural cage setup. Explore a natural bird cage setup too, since the safety-first choices like correct bar spacing and clean, secure placement still apply. If you are comparing options, a canary bird cage setup often prioritizes similar safety checks like correct bar spacing and secure, easy-to-clean placement. If you are planning a finches bird cage setup, aim for the same safety-first choices like correct bar spacing and stable, easy-to-clean placement. If you are specifically working on a budgie bird cage setup, also tailor the perch spacing and toy rotation to match budgie behavior natural cage setup.
FAQ
What if I already bought a cage that is large, but I am unsure about bar spacing?
If you have a cage that is “bigger is better” sized but the bar spacing is wide, size alone is not enough. Recheck the bar spacing using your bird’s head fit test (it should not be able to fit its head between bars), especially for secondhand cages and cages bought online where bar spacing specs are sometimes wrong.
How high should the perches be when doing a bird cage setup?
Use the cage height so your bird can sleep on the top perch without bumping the ceiling, but also avoid making the cage fully “ceiling level.” A practical approach is to place the highest perch at least a few inches below the ceiling and keep the bottom tray area easily accessible for daily cleaning, since dirty liners quickly become a respiratory risk.
How do I arrange the cage so it is easy to clean without stressing my bird?
Plan for daily access. Side-mounted dishes reduce contamination, but you still need enough clearance to remove liners, clean bowls, and rotate toys without reaching across perches (which can scare the bird). If you cannot reach the back corners comfortably, the setup is likely to become “hard to maintain,” which is when health and odor issues start.
How many perches is ideal, and what is a common mistake for beginners?
For most birds, stick to a limited number of perches with different diameters and add foot-safe climbing opportunities rather than more random stands. A common mistake is placing many perches at the same height or too close together, which prevents natural foot flexing and increases the chance of droppings landing on the wrong areas.
My bird’s water keeps getting dirty quickly. What should I adjust first?
Turn the water station into a “check and refresh” habit. If your bird splashes or soaks wet foods, keep water on a different side and consider using a heavier, steadier dish so it does not tip. If water is consistently contaminated, the layout is usually the cause, not the liner.
What should I troubleshoot if my bird seems stressed after the bird cage setup?
If you see feather plucking or reduced eating after moving to a new cage, treat it as an environmental fit issue first: noise level, night lighting, and how safe the bird feels at the back of the cage. Also check whether food and water are reachable without awkward stretching, because discomfort can look like “behavior problems.”
Do I still need to clean liners daily if my cage has a grate above the tray?
A grate over the tray helps keep birds out of their droppings, but it does not eliminate hygiene needs. You still need daily liner changes and odor control. If droppings are accumulating on perches or grates, reposition perches and dishes so the bird is not defecating directly into bowls or onto high-touch areas.
Can I use branches from outside for a natural bird cage setup?
If you want to add branches or “natural” elements, the two key steps are washing and full drying, then ensuring the branch is stable and cannot wobble. Also avoid unknown woods, and check that the branch does not sit where a toy or swing could snag a foot or wing.
How do I handle lighting and drafts if my bird cage setup is near a window?
Yes, especially if the cage is in a room that gets evening lights. Start by keeping the cage away from direct, prolonged sun through glass and avoid bright nighttime lighting that prevents a normal rest period. If your bird is restless at night, reduce light sources near the cage and keep daily noise patterns consistent.
What liner is best, and what should I avoid for health monitoring?
The liner type is mainly about droppings visibility and safety. Plain paper products are great for monitoring, but if you use aspen shavings, avoid them when they are dusty and do not cover droppings so you lose the ability to detect early changes. The best liner is the one that you will change daily.
How can I prevent hanging toys from becoming a safety hazard during bird cage setup?
If toys are swinging too freely, they can trap feet or interfere with perch access. Use a tug test before hanging, then confirm the toy swing path does not reach a perch. A beginner mistake is adding toys close to the sleeping perch, which can disturb rest and increase stress.
What accessories are most likely to be unsafe, and how do I screen them quickly?
If you are buying accessories or using “unknown” items, look for safe defaults: stainless steel hardware, bird-safe natural materials, and no peeling or questionable coatings. Avoid zinc hardware and anything with chewing-access small parts, since ingesting metal or paint chips is a serious risk for birds.