If you searched 'how to make bird cage don't starve together,' you're most likely dealing with one of two real-world problems: getting your bird safely inside its cage and keeping it there, or setting up feeders and waterers so your bird never goes without food or water. This guide covers both. You'll get a step-by-step cage prep and move process, a safe cage build checklist, a daily feeding routine, and fixes for the most common things that go wrong.
How to Make Bird Cage Setup So Your Bird Doesn’t Starve

Maya Bennett
15 Jun 2026

What 'bird cage don't starve together' actually means
The phrase pulls in a few directions. Some people are asking how to get a reluctant bird into a cage for the first time or after a move. If you're trying to get the bird cage in Dress to Impress specifically, look for the quest or event steps that unlock it, then follow the in-game requirements for your avatar how to get a reluctant bird into a cage for the first time or after a move.
Others are worried about a bird that has access to a cage but isn't eating, often because feeders are placed badly, the bird is stressed, or the water has gone bad. A smaller group has seen the phrase connected to video game crafting guides (there's a 'how to craft bird cage dst' topic for Don't Starve Together players), but if you're here from a pet bird search, this article is the one for you.
The fix for both real-world problems, getting the bird in and keeping it fed, is the same setup done right the first time.
Before you put the bird in: prep the cage and the bird
Rushing this step is the number one reason birds won't enter a new cage or refuse to settle. Give yourself at least a few days, ideally a week, before the actual move. Birds are deeply suspicious of new objects appearing suddenly, and a cage that smells wrong or looks threatening will cause the bird to reject it outright.
Prep the cage first
- Wash every surface with hot water and a bird-safe soap, then rinse thoroughly. Avoid bleach sprays that leave residue on perches or food surfaces.
- Check every bar, weld, and seam for sharp edges or flaking coating. Run your finger along the bars. If anything catches, file it down or replace the panel.
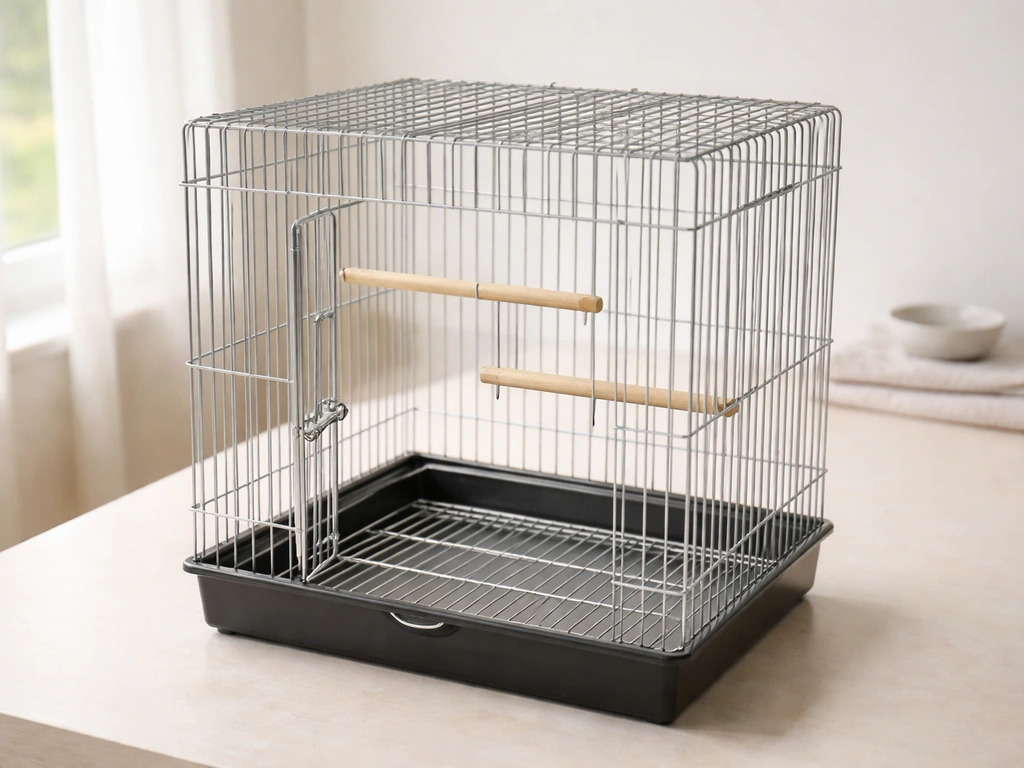
- Install perches at two different heights: one near food bowls and one higher up as a sleeping spot. Avoid placing perches directly over food or water cups.
- Add food and water cups before introducing the bird so they're already part of the environment.
- Place the cage in the room where the bird will live for 48 hours before the move. Let the bird observe it from a distance.
Prep the bird

If your bird has never been in a carrier or a new cage, run two or three short positive sessions per day for several days before the move. Use a target stick (a chopstick or pencil works) and reward the bird with a treat every time it touches the tip. Once the bird is following the target confidently, use it to guide the bird toward the carrier or cage opening. The Association of Avian Veterinarians describes this as target training: the bird touches the target, you click or say a verbal marker immediately, and the treat follows. It works fast, even with birds that seem stubborn.
On the day of the move, cover both the carrier and the new cage with a large towel or sheet. This blocks the bird's view of escape routes and reduces the panic that causes birds to bolt. When you open the carrier door at the cage entrance, keep the towel in place around the sides so the only open path is into the cage. Once the bird is inside, let it sit quietly for 10 to 15 minutes before removing the cover.
How to build or customize a safe cage
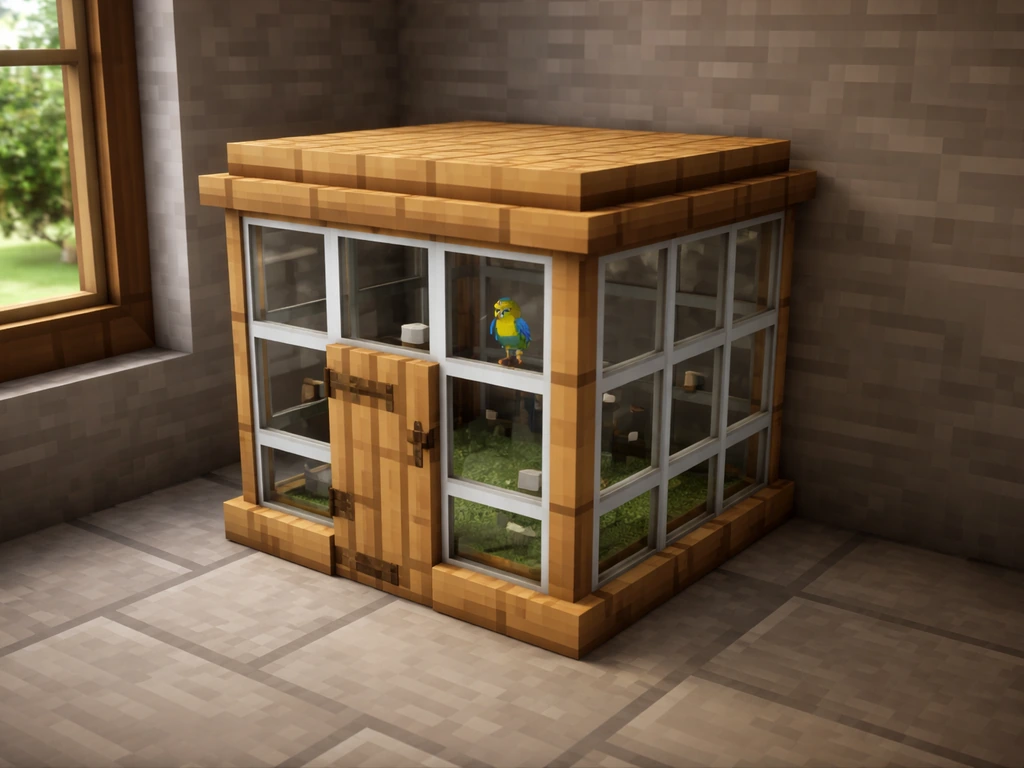
Whether you're buying a ready-made cage or building one yourself, the materials and dimensions are non-negotiable from a safety standpoint. If you want a totally different build, see how to make a bird cage in minecraft for a game version of the same idea. Get either of these wrong and the cage becomes a health hazard regardless of how well you set up the feeding.
Size: bigger than you think
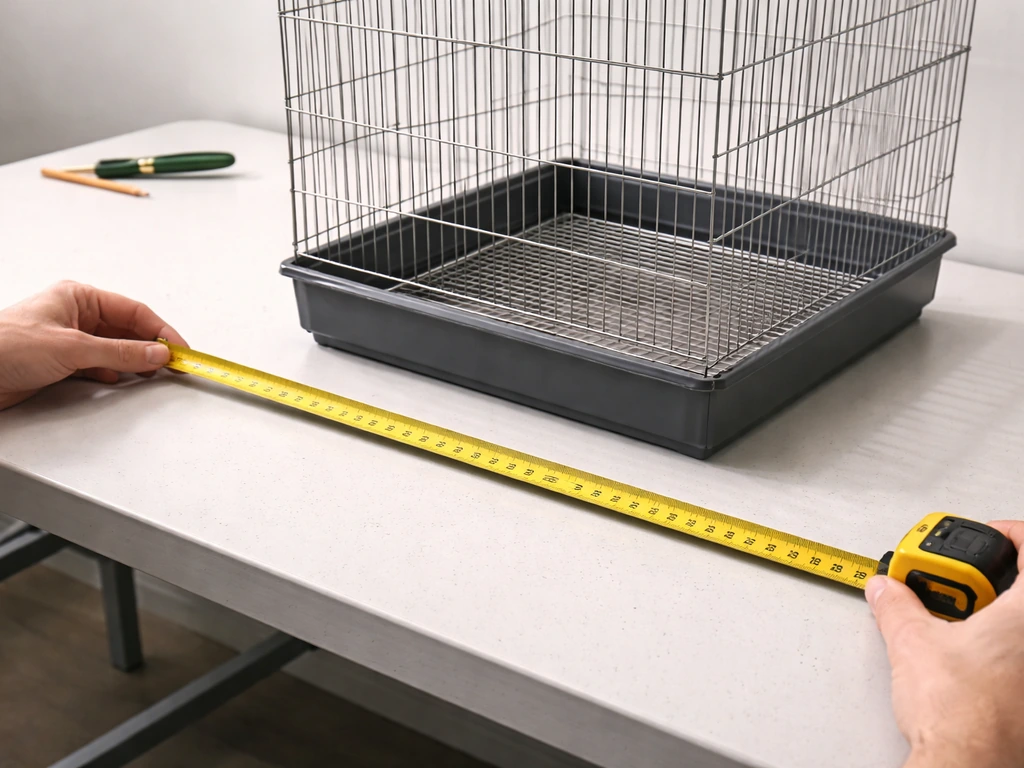
The Merck Veterinary Manual's rule is simple: the cage should be at least one and a half times the bird's wingspan in every direction. That's the floor. Below are the minimum dimensions and bar spacing by species group, based on veterinary guidance. These are minimums, not targets. Go larger whenever you can.
| Species Group | Minimum Cage Size (in) | Max Bar Spacing (in) |
|---|---|---|
| Budgerigar, cockatiel, lovebird, parrotlet | 20 × 20 × 30 | 0.5 |
| Conure, Poicephalus, caique, miniature macaw | 36 × 24 × 48 | 0.75 |
| Large macaw, large cockatoo | 36 × 48 × 60 or larger | 1.0 to 1.5 |
Bar spacing matters because bars that are too wide let a bird push its head through and get stuck. Bars that are too narrow for a large bird's beak can trap the lower mandible. When in doubt, go tighter rather than wider for small birds.
Safe materials: what to use and what to avoid
Stainless steel is the gold standard for cage bars and hardware. It doesn't corrode, doesn't chip, and doesn't leach anything toxic. Welded wire made from safe alloys is the next best option for DIY builds. What you must avoid is galvanized metal.
Galvanizing is a zinc coating process, and zinc toxicosis is one of the most common heavy metal poisonings in pet birds. The University of Illinois veterinary college and multiple avian toxicology references confirm that galvanized wire cages and hardware are a leading source of zinc exposure. Lead is equally dangerous and shows up in some paints, solders, and older cage hardware. If you're buying second-hand or building with wire from a hardware store, check the label.
If it says galvanized, don't use it.
Doors, locks, and stands
- The main door should open wide enough for you to reach your whole arm inside without the bird panicking at your presence in the opening.
- Use a secondary lock (a carabiner or dedicated cage lock) on any door a parrot has access to. Most parrots learn to open simple slide latches within days.
- If building a stand, make sure it's heavy enough not to tip if the bird rocks or the cage is bumped. A cage that tips is a cage the bird won't trust.
- Avoid wood stands unless they're sealed with a bird-safe finish. Bare wood absorbs droppings and becomes a bacterial reservoir.
Setting up feeders and water so the bird doesn't starve
A bird can go without food for a surprisingly short time given its high metabolism, and dirty or inaccessible water is a fast route to illness. The setup here is as important as the cage itself.
Feeder and waterer placement
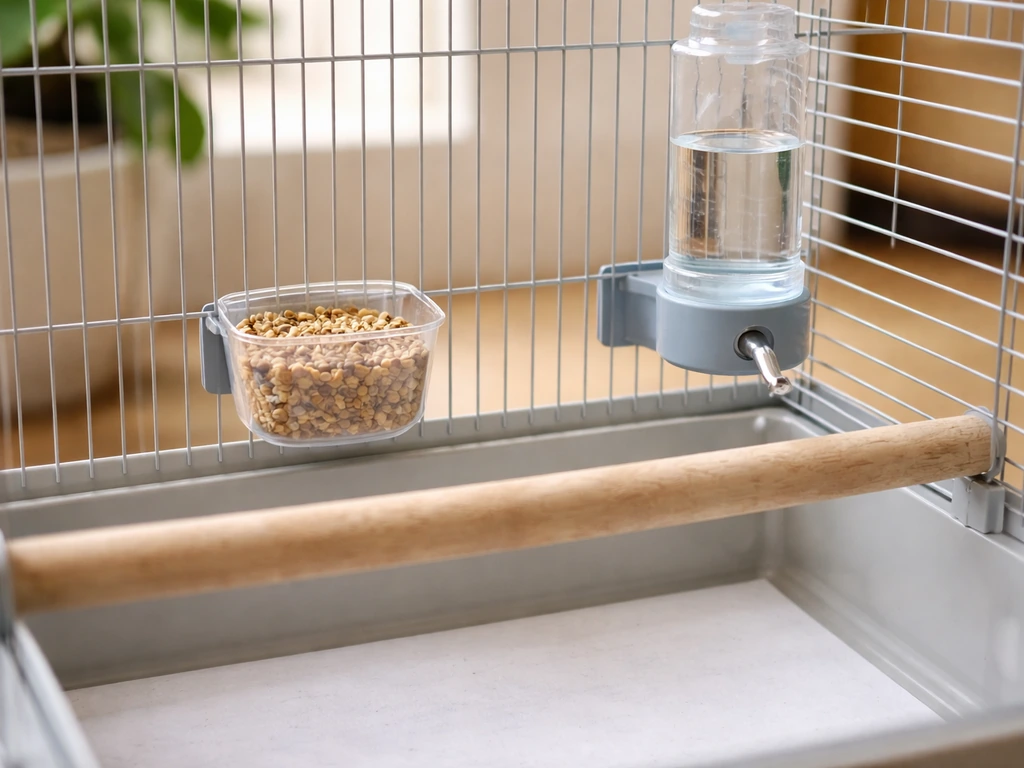
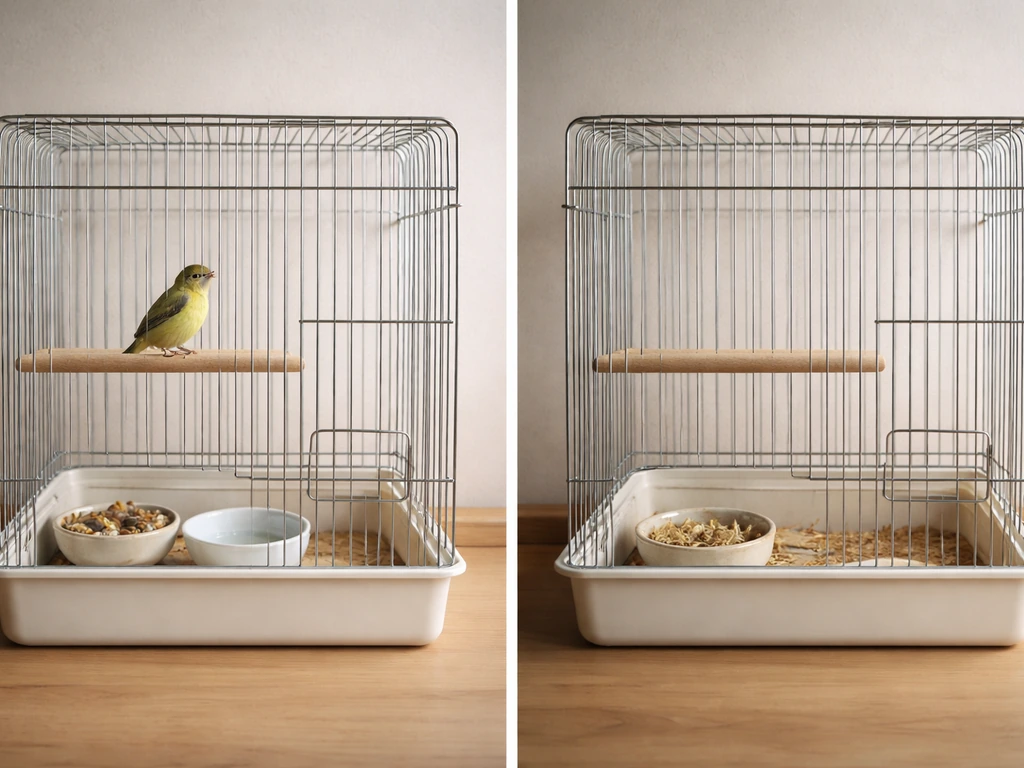
Mount food cups at a height the bird can reach comfortably from a perch, never on the cage floor. Cups placed on the floor collect droppings at a much higher rate, and as Purdue University's veterinary college notes, fecal contamination of food and water promotes rapid bacterial growth and mold. Keep the perch closest to the food cup at the same height as the cup rim, not above it, to reduce the chance of the bird standing over the cup and fouling it.
For water, you have two options: an open cup or a sipper bottle. Open cups are easier for the bird to use but need to be changed more frequently, especially if your bird is a dunker (birds that dip food into water contaminate the cup almost immediately). A water bottle keeps the water clean longer but must be checked every single day to confirm the ball valve is flowing and the water is actually coming out.
Change water bottle contents daily regardless. The University of Florida's small animal hospital specifically calls out daily water changes for sipper bottles, and the CDC recommends cleaning food and water bowls daily as a baseline for disease prevention. [CDC recommends cleaning bird cages, perches, and equipment properly](https://www. cdc.
gov/healthy-pets/about/birds. html), and keeping enclosures clean to help prevent droppings build-up before reuse.
What to put in the feeder
Seeds are what most birds will eat first, but Merck Veterinary Manual is clear that seeds should not make up the majority of a bird's diet because they're high in fat and nutritionally incomplete. A good baseline is 50 to 70 percent pellets or a formulated diet, with fresh vegetables, some fruit, and a small portion of seeds or nuts as enrichment. A bird that is eating only seeds may appear to be eating fine while slowly declining in condition, which is its own kind of starvation.
Daily feeding routine
- Morning: Remove and wash food cups. Refill with fresh food. Check water cup or bottle and replace the water completely.
- Midday (if possible): Check for wet or contaminated food, especially in warm weather. Remove anything that looks moldy or has been fouled by droppings.
- Evening: Remove any uneaten fresh food (vegetables, fruit) that has been sitting more than four hours. Leave dry pellets or seeds overnight as a backup.
- Daily: Change cage paper and inspect droppings for any changes in color, consistency, or volume that might indicate the bird isn't eating.
Backup feeding options
If you're going to be away for more than a few hours, install a second food cup on the opposite side of the cage. This isn't just about quantity, it's about giving the bird a choice if one cup gets contaminated. A seed hopper that holds a day's worth of dry food is a good backup for dry food, but don't rely on it as the primary feeder since you can't see contamination inside a hopper as easily. For water, run both a cup and a sipper bottle simultaneously until you're confident the bird reliably uses the bottle.
Troubleshooting when things go wrong
Bird won't enter the cage
This almost always comes down to trust and association. If the bird has been chased or grabbed near the cage, it now associates the cage with a negative experience. Go back to target training. Put a few favorite treats just inside the door and walk away. Don't hover. It may take 20 minutes or 20 sessions, but eventually curiosity wins. Never force the bird inside physically unless it's a veterinary emergency. Forced entry creates lasting cage aversion.
Bird is in the cage but stressed
Signs of stress include feather fluffing, repeated pacing or bouncing, loss of appetite, and screaming. Merck Veterinary Manual notes that stress leukograms are common after transport and handling, meaning even a healthy bird can show physical stress markers for 24 to 48 hours after a move. Give the bird quiet, covered time for the first day. Keep foot traffic low and resist the urge to interact constantly. If stress behaviors continue past 48 to 72 hours, check that the cage isn't too small, that there are no loud appliances or predatory pets nearby, and that the bird can see out but also has a covered corner to retreat to.
Wrong bar spacing
If you realize after the fact that your bar spacing is too wide for your bird's size, don't wait to see if a problem develops. A bird that gets its head stuck in bars can break its neck or choke in minutes. Either replace the cage panel or add a secondary layer of appropriately spaced wire mesh to the interior of the problematic wall.
Wet or contaminated feed
Wet seed or wet pellets mold within hours in warm conditions. If you're finding your dry food getting damp, the water cup is probably too close to the food cup, or the bird is carrying water in its beak back to the food. Move the cups to opposite sides of the cage. Switch to a water bottle to reduce splashing. Any food that smells off or looks discolored should be discarded immediately. A bird will often refuse to eat moldy food and go hungry rather than eat it, so contaminated food is a direct starvation risk.
Broken or blocked feeder
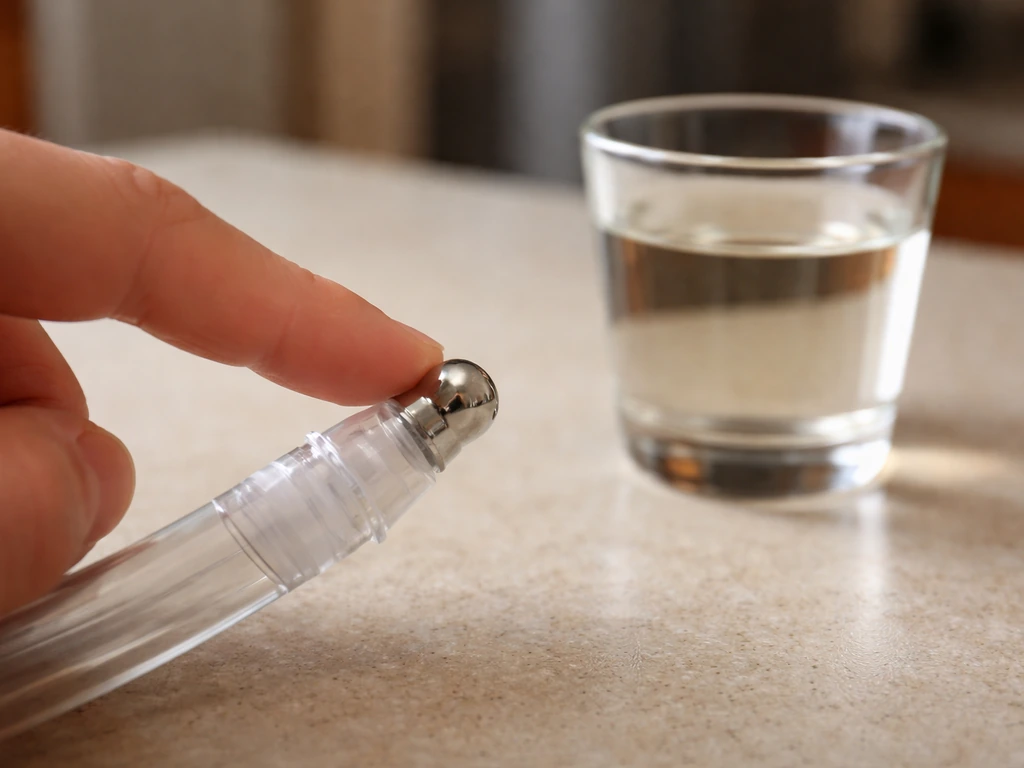
Check your sipper bottle ball valve every morning by pushing a finger against the tip. Water should flow immediately. If it doesn't, soak the bottle tip in warm water for a few minutes to dislodge any mineral buildup. Keep a spare bottle cleaned and ready so you can swap it instantly if one fails. Cup feeders with cracked edges should be replaced, not taped. Cracks harbor bacteria and can cut the bird's tongue or feet.
Placement, covers, and keeping the cage comfortable year-round
Where you put the cage and how you manage temperature and light directly affect whether the bird eats well and stays calm. A stressed or cold bird will often reduce its food intake significantly, which circles right back to the starvation risk.
Placement rules that matter
- Place the cage at or slightly below eye level. Birds feel safer at height but become territorial if the cage is above human head level.
- Keep the cage against a solid wall on at least one side. This gives the bird a sense of security and reduces 360-degree exposure anxiety.
- Never place the cage in the direct airflow of an air conditioner, heating vent, or ceiling fan. The University of Florida's guidance specifically calls out drafts as a placement hazard.
- Keep the cage out of the kitchen. Cooking fumes, including non-stick cookware vapors, are acutely lethal to birds.
- Avoid direct, unfiltered sunlight on the cage for more than a couple of hours. Birds can overheat quickly when they can't move out of the sun's path.
Using cage covers
A cage cover at night serves a real purpose: it blocks light, reduces drafts, and signals to the bird that it's sleep time. Use a breathable fabric like cotton muslin or a commercially made vented cage cover. Never use plastic sheeting, which traps heat and blocks airflow. Cover the cage at the same time each night to establish a routine. Birds that sleep on a consistent schedule tend to eat better and show fewer stress behaviors. Leave the front of the cover loose enough to lift quickly if you need to check on the bird during the night.
Seasonal protection
In summer, make sure the room temperature stays below 85 degrees Fahrenheit and that the bird always has access to fresh water, checking it more frequently in heat. In winter, watch for cold air coming through windows near the cage. A temperature drop of more than 10 degrees within a few hours can be enough to stress a bird into reduced feeding. If your home gets very cold at night, a partial cover plus a low-wattage ceramic heat emitter nearby (not inside the cage) can maintain a safe ambient temperature without lighting disruption.
Your setup checklist: do this today
- Confirm cage dimensions meet or exceed the species minimums in the table above.
- Check all bars and hardware for zinc or lead-containing materials. Replace anything galvanized.
- Wash and rinse the entire cage. Let it air dry before adding accessories.
- Install perches at two heights, neither one directly above a food or water cup.
- Mount food and water cups at perch height, on opposite sides of the cage.
- Run both a water cup and a sipper bottle for the first week to confirm the bird uses the bottle.
- Start target training sessions if the bird is reluctant to enter. Two or three short sessions per day.
- Cover the cage at a consistent time each night with a breathable cotton cover.
- Change cage paper daily and inspect droppings every morning.
- Set a daily alarm for morning cup washing and water changes.
FAQ
What should I do if I’m away for a full day and I can’t check the cage? Can I rely on a hopper and a water bottle alone?
Use a backup plan, not a guess. If your bird is on pellets, calculate normal daily intake, then provide enough for the whole time window plus an extra meal, and keep feeders positioned so food stays dry. For longer absences, ask a person you trust to do at least a daily water check, since sipper bottles can fail even when food is still available.
How can I tell early if my bird is actually starving or just eating some food after a move?
Don’t wait for hunger to “prove” the bird is safe. Weigh the bird at the same time each day for the first week after the move, and watch droppings consistency and urine output. A small drop in weight plus reduced interest in food is an early warning that starvation risk is already rising even if some eating is still happening.
Is it okay to hand-feed my bird if it won’t eat from the cups right away?
Hand-feeding can work during an emergency, but avoid turning it into a replacement routine that trains the bird to refuse cage feeders. If you must assist, keep the behavior time-limited, place the offered food in the same cup setup you use in the cage, and transition back to normal access over a couple of days once the bird is calm.
If my bird keeps refusing food, could the cage be the problem, and how do I know when to change it?
Cage size issues should be addressed immediately, because stress and feeding refusal can escalate quickly. If you suspect the cage is too small, compare the bird’s wingspan to the cage’s usable dimensions (not just the outside measurements) and ensure the bird can turn, climb, and rest comfortably. If you cannot enlarge soon, add perches at different heights so the bird can access food and water without crowding.
I’m doing a DIY cage repair, how can I check whether my replacement wire is safe if there’s no packaging label?
Skip “natural” zinc sources, like some bird-safe-looking hardware, and verify the metal type. If you can’t find a label for the wire, avoid using it. For DIY mesh covers or repairs, only use known stainless steel or verified non-galvanized wire, because even a small amount of zinc exposure can become an ongoing risk.
How often should I clean food and water, especially if my bird is a messy drinker or a dunker?
Clean cups daily, but also inspect them multiple times a day if your bird dips, spills, or flings water. If you notice crusting, slime, or a sour smell, discard the contents immediately and wash the specific feeder. Mold risk can be fast with warm rooms, so “rinse only” is usually not enough.
My bird is only touching seeds or refuses pellets. What’s a safe way to transition to a balanced diet without risking starvation?
If the bird refuses pellets, don’t try to “force” with large seed-only portions. Offer a small variety of fresh vegetables and keep pellets available in the same cup location. If your bird is newly stressed, keep pellet presentation consistent and start with softer transitions, like pelleted diet pieces moistened slightly, then reduce moisture after a few days.
My bird seems stressed and stops eating. How do I troubleshoot whether it’s the environment versus the feeder setup?
Bad timing is a common cause: changing light or temperature suddenly can reduce intake even when food and water are present. Keep the room steady, avoid drafts near windows, and match the daily cover schedule. Also check that cup placement hasn’t shifted, because a small change in reach height can stop eating until the bird relearns the setup.
Can I cover the cage all the way overnight, and what if my bird gets too warm?
Yes, but only if it improves safety and calm. Use a breathable cover, leave a front opening you can lift quickly, and avoid covering the cage so tightly that airflow stops. If your bird shows heat stress signs, like panting or extreme lethargy in warm weather, remove the cover and manage temperature instead of relying on darkness.
What are the most reliable warning signs that I should call an avian vet, even if my bird still pecks at food?
Even if the bird is eating, watch for “silent” starvation cues like weight loss, watery droppings, or a sudden reduction in activity. Compare today’s droppings and eating behavior to the pre-move baseline, and if you see a steady decline for more than 48 hours, contact an avian vet urgently.