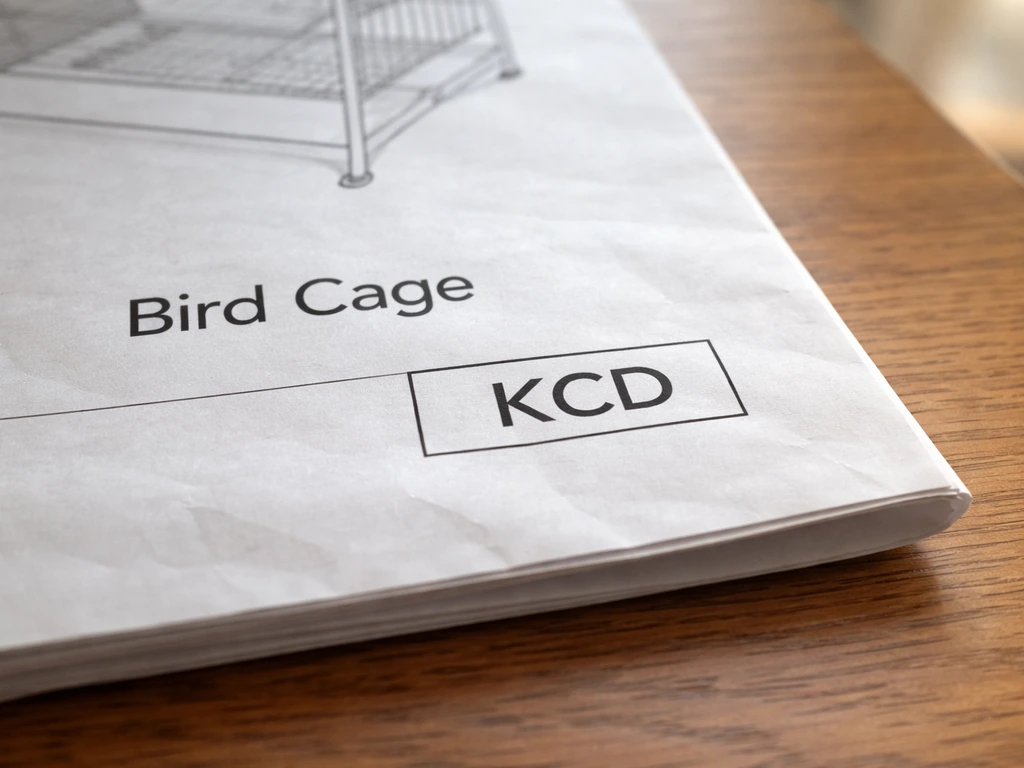
If you searched 'how to use empty bird cage kcd,' the most likely answer is this: 'kcd' in a real bird-care context usually refers to a cage kit, brand code, or product identifier printed on your cage's box or assembly manual, not a standardized industry term. Once you've confirmed what your specific 'kcd' label means, the process for safely setting up an empty bird cage is the same: inspect it thoroughly, clean and decontaminate it, assemble the essentials, and place it correctly before any bird goes inside. That's exactly what this guide walks you through, step by step.
How to Use Empty Bird Cage KCD: Setup Guide

Maya Bennett
12 May 2026
What Does 'KCD' Actually Mean for Your Cage?
This is the first thing to sort out, because 'kcd' is genuinely ambiguous. In the gaming world, KCD stands for Kingdom Come: Deliverance, where an 'empty bird cage' is a quest item worth 30 groschen with a weight of 6. That's a completely different context from real bird ownership, and if you landed here from a gaming search, that's the wrong guide. If you were searching for how to get the bird cage in DTI, this KCD code discussion is still the wrong guide, so use the DTI-specific steps instead. For everyone else, here's how to figure out what 'kcd' means on your actual cage.
- Check your cage's box or packaging for a model code, SKU, or series label. 'KCD' may be part of a product line identifier (for example, some cage brands use letter-number codes like KCD-24 or KCD-48 to denote size or series).
- Look at any included assembly sheet or use-and-care manual. Manufacturers like those sold through major pet retailers include setup PDFs that list part codes at the top. If 'kcd' appears there, it refers to a specific component or assembly series.
- Search the exact code from your packaging on the manufacturer's website. If you can't find it, contact the brand directly with the code and your cage's purchase date.
- If 'kcd' appeared in an online forum, community thread, or video, it may be informal shorthand for a particular cage setup method or quarantine protocol used in that community. Ask the source directly or look for a pinned explanation in that community.
The bottom line: don't try to follow assembly steps until you've matched 'kcd' to your specific cage. If your cage came with a manual that uses this code, lay all the parts out and cross-reference them against the parts diagram before you do anything else. Misidentifying components is the most common setup mistake, and it's easy to avoid.
Safety First: Inspect Before You Do Anything Else
Whether your cage is brand new or secondhand, a physical inspection before setup is non-negotiable. You're looking for three specific things: bar spacing, hardware condition, and latch integrity.
Bar Spacing by Species
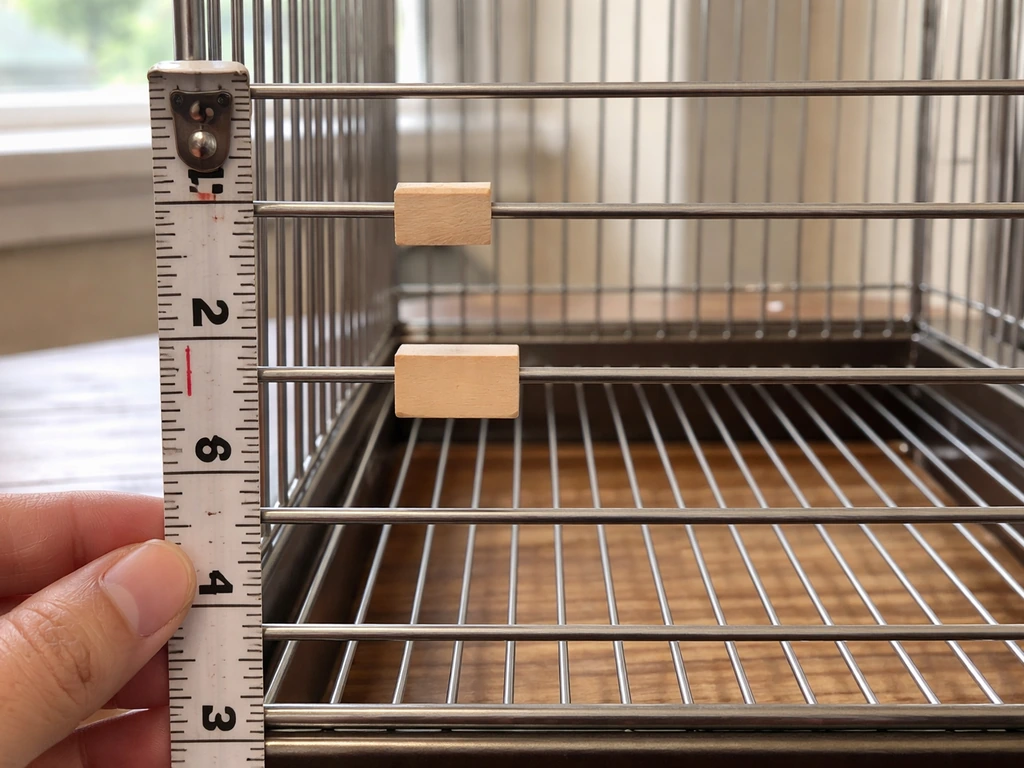
Bar spacing is the single most important structural safety check. Bars that are too wide let a bird push its head through and get stuck. The Merck Veterinary Manual publishes minimum bar spacing recommendations by species. Use this as your baseline:
| Bird Type | Recommended Bar Spacing |
|---|---|
| Finches, canaries | 1/4 inch to 3/8 inch |
| Budgies, parrotlets | 3/8 inch to 1/2 inch |
| Cockatiels, lovebirds | 1/2 inch to 5/8 inch |
| Conures, caiques | 5/8 inch to 3/4 inch |
| African greys, Amazons | 3/4 inch to 1 inch |
| Macaws, large cockatoos | 1 inch to 1.5 inch |
Measure bar spacing with a ruler at multiple points around the cage, not just one spot. Bars can be unevenly spaced from manufacturing defects or damage.
Hardware and Coating Checks
Run your fingers along every bar and weld point. You're feeling for sharp edges, rough welds, or loose connections. Then look closely at the coating. Flaking paint or white powdery rust on galvanized steel are serious red flags because [zinc exposure from degraded coatings is toxic to birds](https://www.
petmd. com/bird/emergency/poisoning-toxicity/cbdHeavyMetalPoisoning). According to the Pet Poison Helpline, birds can develop chronic zinc poisoning from picking at galvanized or coated surfaces that are flaking. The Merck Veterinary Manual also notes that zinc-containing sources, including galvanized or coated birdcages, can be relevant to birds and that flaking or degraded coatings can lead to harmful zinc exposure [galvanized or coated surfaces that are flaking](https://www.
merckvetmanual. com/toxicology/zinc-toxicosis/zinc-toxicosis-in-animals). If you see flaking paint or white rust anywhere on the cage, don't use it. Either strip and re-coat with a bird-safe finish or replace the cage entirely.
Latch and Door Security
Open and close every door multiple times. Latches should click positively shut with no play. Parrots especially are notorious for figuring out simple slide latches within hours, so if the latch doesn't have a secondary lock or requires two simultaneous movements to open, add a carabiner or cage-specific lock as a backup. Check that door hinges are firmly attached and that the door doesn't sag or bind when opened.
Cleaning and Decontaminating an Empty Cage
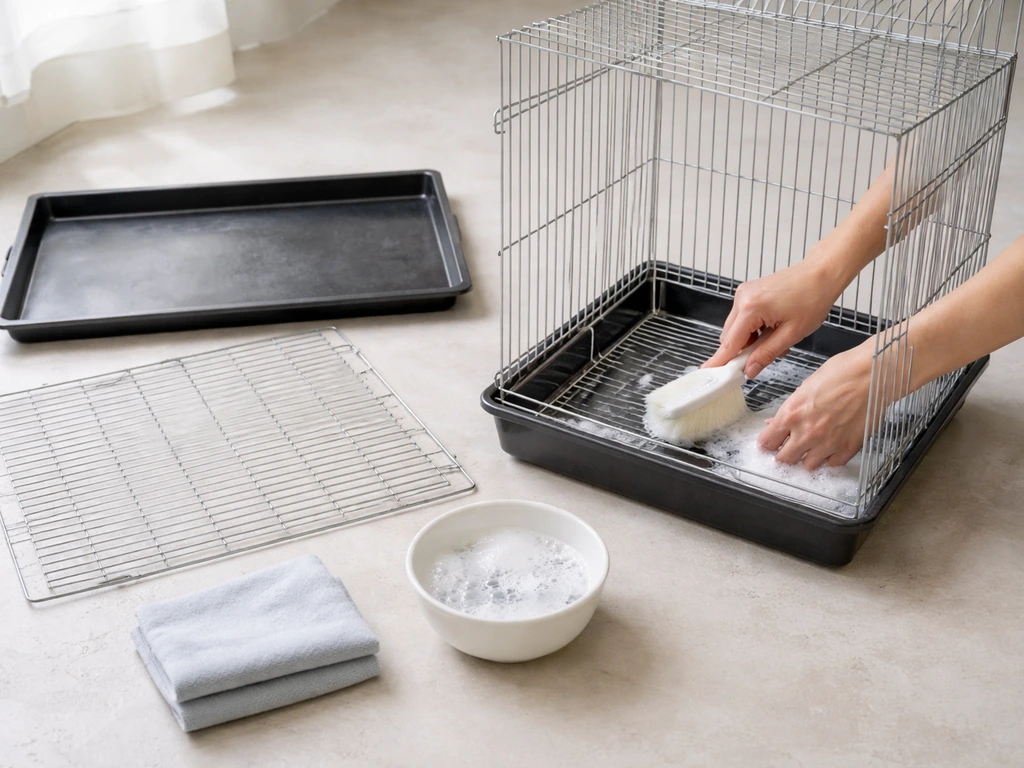
Even a brand-new cage needs cleaning before first use. Factory residues, packaging chemicals, and dust can all be harmful. For a secondhand or previously used cage, decontamination is critical. Here's the full protocol.
- Remove everything from the cage: grate, tray, perches, dishes, and any accessories. Set them aside in a separate pile.
- Use a scraper or stiff brush to remove any dried debris from the cage tray and bars before you get anything wet. The USDA APHIS recommends physical removal of debris before applying any cleaning solution because wet debris is harder to remove and reduces disinfectant effectiveness.
- Wash the entire cage with non-toxic dish soap and hot water. Scrub every bar, weld, corner, and the tray interior. VCA Animal Hospitals recommends this full scrub at least once or twice a month for in-use cages, so do it thoroughly now as a baseline.
- Rinse completely with clean water. Soap residue left on bars or the tray can irritate or harm your bird.
- Apply a bird-safe disinfectant according to the product's instructions. Critical: follow the contact time on the label. Some products require only 1 minute of contact time; others need 15 to 30 minutes. Don't rush this step.
- Rinse the cage again thoroughly with clean water to remove all disinfectant residue. Merck Veterinary Manual lists many common cleaners, including bleach and ammonia, as household hazards for birds, so complete rinsing is essential.
- Wash all removable components (dishes, perches, tray) with hot soapy water. Dishwasher-safe dishes can go in the dishwasher since very hot water temperatures aid disinfection. Hand-wash perches and dry fully before reinstalling.
- Let the entire cage air dry completely before adding any bedding or accessories. Don't use heat guns or propane torches near coated cages.
For quarantine situations (a bird that may be ill, or a new bird being introduced), use a dedicated cage that hasn't been near your other birds, and run this full decontamination protocol every time the quarantine period ends before reusing the cage for another bird.
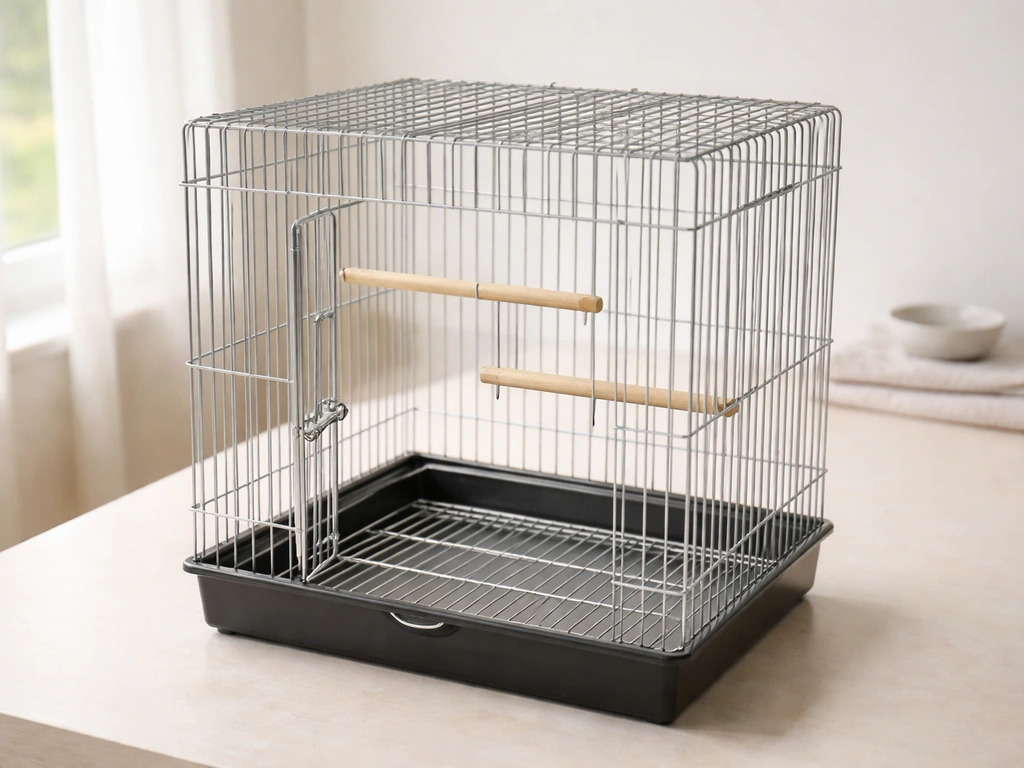
Assembling and Setting Up the Essentials
Once the cage is clean and dry, you're ready to set it up. If you're playing Minecraft, you can apply the same idea of planning a safe layout when learning how to make a bird cage in Minecraft. Work through this in order so you don't have to redo anything. If you are specifically following the “how to craft bird cage dst” approach, double-check that your materials and construction steps still match these setup and safety rules set it up.
Liners and Tray Setup
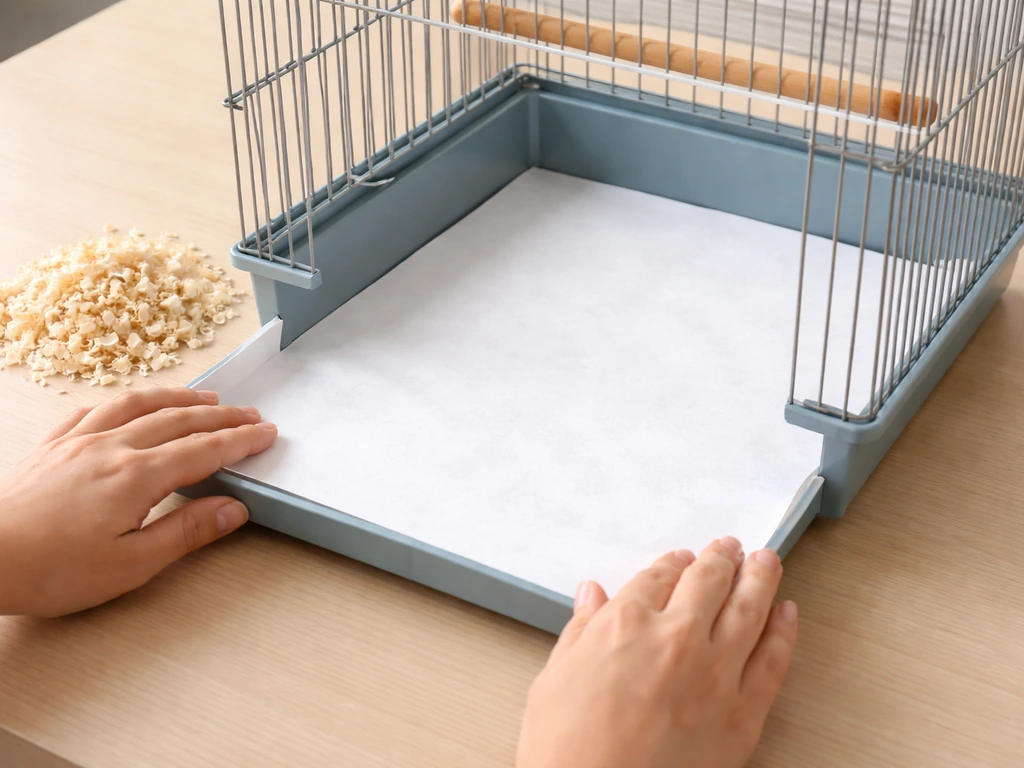
Line the cage tray with unscented paper, newspaper, or purpose-made cage liners. Avoid cedar shavings (cedar contains aromatic oils that are harmful to birds' respiratory systems) and avoid scented or printed paper with heavy ink coverage. Cut the liner to fit so it lies flat without bunching at the corners. For daily spot-cleaning, having two or three liners stacked lets you peel off the top layer without having to cut a fresh piece each time.
Perch Placement
Install at least two perches at different heights. Perch diameter matters: for parakeets and similar-sized birds, a diameter of around half an inch is appropriate for grip. Larger birds need thicker perches that allow their foot to wrap about two-thirds of the way around the diameter. Always position perches so the bird's tail doesn't touch the cage wall or bars when perched, and keep perches away from food and water dishes to reduce contamination from droppings. Don't place one perch directly above another for the same reason.
Feeders and Water
Attach food and water dishes at a comfortable height, typically at a mid-to-lower perch level so the bird doesn't have to strain. Don't place dishes directly under a perch. Rinse and refill water daily at minimum. According to use-and-care manual guidance for most commercial cages, food and water dishes should be cleaned daily. Use dishes that lock or clip securely into the cage opening so they can't be tipped or pushed out.
Grate Installation
If your cage includes a wire grate above the tray, install it so the bird can't access the tray or its liner. This keeps birds out of their droppings and reduces contamination risk. Make sure the grate sits level and clips securely into place at all attachment points.
Where to Put the Cage: Placement, Airflow, and Seasonal Covers
Getting placement right protects your bird from hazards you might not even think about until something goes wrong. Here's what to do and what to avoid.
Where to Place It
- Put the cage on a flat, stable surface or a dedicated cage stand with locking wheels if you need to move it.
- Choose a wall position where the cage has at least one solid wall behind it. This gives the bird a sense of security.
- Keep the cage at eye level or slightly below, not on the floor (where the bird feels exposed to predators) and not so high that it towers above everyone in the room.
- Place the cage in a room where the family spends time so the bird gets social interaction, but avoid kitchens due to cooking fume hazards.
Airflow Do's and Don'ts
Drafts are a genuine health risk for birds. Position the cage away from direct air conditioning vents, as the Environmental Literacy Council specifically flags this as a hazard. Never place a cage directly under a ceiling fan. The CAFAB Bird Club safety guidance is clear on this: even birds that don't regularly fly can suddenly take flight if startled, and a running ceiling fan can be fatal. If you have a ceiling fan in the room, keep it off when the bird is out of the cage and position the cage away from the direct airflow path even when the fan is running.
Cage Covers for Seasonal Protection
Covers are useful for three things: blocking drafts in winter, reducing light for sleep, and providing a sense of security. Use a breathable cover made from natural, unscented fabric. The critical rule is that a cover must never trap heat or block all ventilation. In warmer months especially, a fully enclosed cover can raise the temperature inside the cage dangerously quickly. Cover three sides at most, leaving one or two sides open for airflow. In winter, a cover on the side facing a window or exterior wall helps block cold drafts without suffocating the bird. Remove covers completely during the day and any time room temperatures are high.
Safe Accessories and Decor Ideas
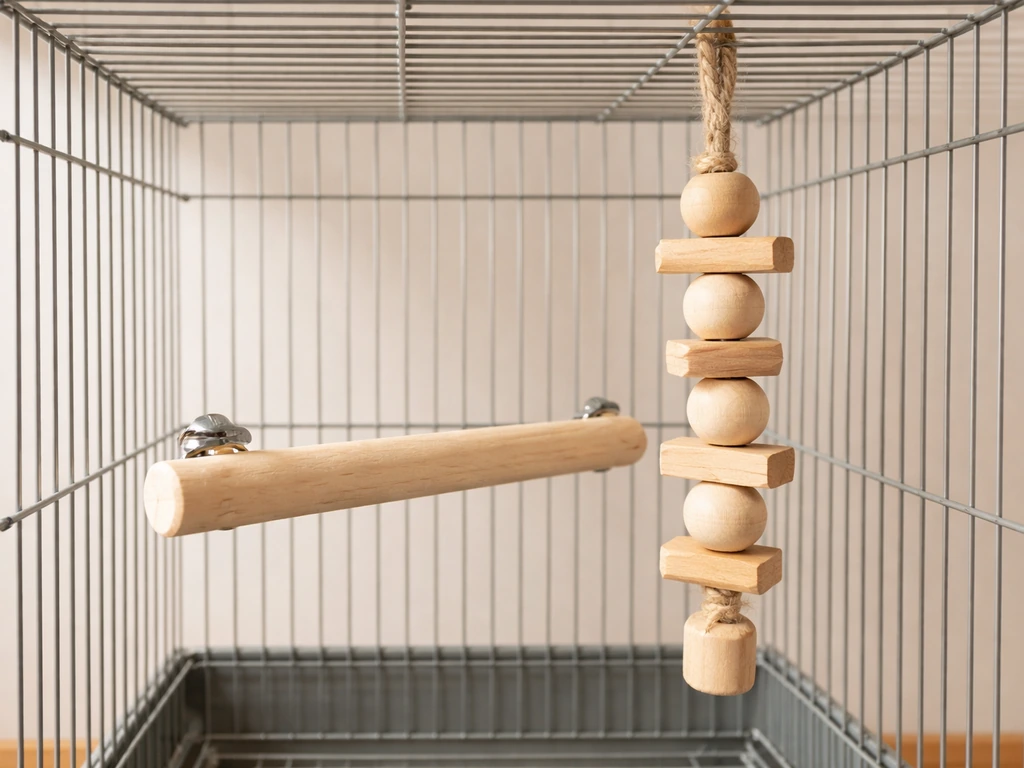
Once the basics are in place, you can add toys and enrichment, but material safety comes first. The GCCBC bird toy safety guidance specifically warns that some woods are treated with chemicals (including tanning agents) that are toxic to birds, and lists certain woods like cedar as unsafe. Stick to materials you can verify.
Safe Materials to Use
- Wood: untreated softwoods like pine, balsa, and birch are generally safe. Avoid cedar, redwood, and any wood you can't verify as untreated.
- Rope and fiber toys: look for natural cotton or sisal without dyes. Avoid synthetic fibers that can fray into threads long enough to tangle around toes.
- Stainless steel hardware: use stainless steel for any metal components in toys. Avoid anything zinc-plated or with unknown metal coatings.
- Food-safe dyes only: if a toy or perch is colored, confirm the dye is food-safe or certified bird-safe by the manufacturer.
Accessory Placement Tips
- Rotate toys every week or two to keep the bird mentally stimulated without overcrowding the cage.
- Leave enough open space in the cage for the bird to fully extend its wings without touching any toy or accessory.
- Don't hang toys directly above food or water dishes where they could fall in or shed debris into the dishes.
- Avoid mirrors for some species (especially cockatiels) that may become obsessively attached to their reflection instead of bonding with you.
Troubleshooting Common Problems and Your Quick-Start Checklist
Common Issues and Fixes
- Mess outside the cage: Add a seed catcher skirt around the lower perimeter of the cage. These attach with clips and catch seeds and debris before they hit the floor.
- Pests (mites, insects): If you notice small insects or your bird is scratching constantly, clean the cage with the full decontamination protocol and treat with a bird-safe mite spray. Remove and wash or replace all wooden perches, as mites often hide in cracks in wood.
- Bird ignoring food or water: Check that dishes are clean, at a comfortable height, and not contaminated by droppings from above. Sometimes moving a dish to a different location in the cage is enough.
- Cage wobbles or feels unstable: Check all base connections and stand joints. Tighten any loose bolts. Do not use the cage until it is completely stable. A wobbling cage stresses birds and is a fall hazard.
- Missing parts or components that don't match your KCD manual: Contact the manufacturer with your cage's model number. Most brands will ship replacement parts. If the cage is secondhand and you can't match the manual to the cage, source a compatible replacement part from the manufacturer or a bird supply retailer rather than improvising.
- Cage doesn't match the KCD instructions at all: Stop and verify. If what's in front of you doesn't match the parts diagram or the setup steps in your manual, you may have the wrong cage model or an incomplete kit. Don't force assembly. Contact the seller or manufacturer before proceeding.
Your Quick-Start Checklist for Today
- Confirm what 'kcd' refers to on your cage's packaging or manual before following any specific assembly steps.
- Inspect bar spacing against species-appropriate measurements and check for flaking paint or white rust.
- Test all door latches and hinges. Add a backup lock if needed.
- Run the full clean and decontamination protocol: scrape, wash with soap and hot water, rinse, disinfect with appropriate contact time, rinse again, and air dry.
- Install the tray liner, grate, perches at different heights, and secure food and water dishes.
- Position the cage on a stable surface away from drafts, direct AC vents, and ceiling fans.
- Add a breathable cage cover for one to two sides only (not fully enclosed).
- Add species-appropriate toys and accessories using only verified bird-safe materials.
- Do a final visual sweep: nothing sharp, nothing loose, no chemical smell remaining, fresh water in the dish.
If after all this your cage is missing parts, has coating damage you can't repair, or the 'kcd' instructions simply don't match what you have in front of you, don't guess. If you also need help with starving-proof feeding routines while housing birds, use the guide on how to make bird cage don't starve together.
If you're here for fashion styling help, you can also look up the specific steps for how to get the bird cage in Dress to Impress and use it as an accessory in your outfit. If you're trying to get the bird cage in DTI, double-check the item name and follow the correct in-game quest or inventory steps so you end up with the right cage.
A cage that doesn't meet basic safety standards isn't safe to use regardless of how convenient it would be to push forward. Reach out to the manufacturer, return the cage if it's new, or look for a certified bird-safe replacement. Your bird will thank you for taking the extra day to get it right.
FAQ
What if “kcd” on my cage box or manual does not clearly match any parts diagram?
Do not assemble based on guesswork. Photograph the label and the exact parts you received, then compare features (door type, latch style, grate design, perch mounts) to the manual’s labeled drawings. If the manual uses multiple variants for the same cage model, confirm the model number, not only the “kcd” code, before starting assembly.
Can I use an empty bird cage as temporary housing while my bird is in quarantine or travel?
Only if it is dedicated and fully decontaminated after the previous use. Plan for separate liners, separate perches and dishes if possible, and clean and disinfect before the bird goes in. When transporting, avoid covers that trap heat, and keep the cage away from direct vehicle vents or sun hotspots.
How do I check bar spacing if the cage bars are not perfectly uniform around the frame?
Measure at multiple heights and around the entire perimeter, including near doors and corners where bends or damage often occur. Use the smallest observed spacing as your decision point. If you cannot measure reliably, or the cage shows any deformation, treat it as unsafe and replace or consult the manufacturer.
What should I do if I find flaking coating, white rust, or sticky residue on a used cage?
Stop use immediately. Scrubbing alone usually does not fix degraded galvanized coatings. Replace the cage or have the coating professionally stripped and re-applied with a bird-safe, fully cured finish. If you cannot confirm the new coating is bird-safe and non-flaking, err on the side of replacement.
Is it safe to use cedar or other aromatic woods if I seal or cover them?
No, do not rely on sealing to make cedar safe. Aromatic oils can still off-gas, and some treated woods contain chemicals that are not removed by sealing. Use only materials you can verify as bird-safe for chew and perch use, and replace any suspect wood toys or accessories.
How often should I clean and disinfect the cage beyond daily liner changes?
Daily: spot-clean and refresh liners, and rinse and refill water. Weekly or as needed: deep clean the tray, perches, and dishes using a bird-safe cleaner, then fully rinse and dry before reuse. If the cage is used for a sick bird or the bird has frequent diarrhea, increase the frequency and do a full decontamination cycle between occupants.
What liner should I avoid besides scented paper and cedar shavings?
Avoid anything dusty, heavily inked, or made of treated fibers. Also avoid liners that can snag feet or get pulled into the grate. If you use newspaper, keep ink exposure minimal by avoiding glossy sections and ensure the liner lies flat without bunching.
Should perches be disinfected too, or is cleaning enough?
Treat perches as contact surfaces that need the same hygiene level as dishes. Clean regularly and disinfect periodically, especially in multi-bird or quarantine situations. Let perches fully dry before returning them, because moisture can promote bacterial growth.
How can I tell if a latch is strong enough for an escape-prone bird?
Test with repeated open and close cycles, then gently apply sideways pressure to see if there is any looseness. For birds known to manipulate simple closures, use an additional backup method such as a cage-specific secondary lock, a secure clip, or a properly sized hardware safeguard that cannot be defeated through normal pecking or foot leverage.
Where should I place the cage relative to the room if I do not have a separate bird room?
Aim for stable, draft-free airflow. Keep the cage out of direct paths of HVAC vents and away from ceiling fans or oscillating fans. If that is impossible, at minimum keep the cage on a wall-side position that blocks direct airflow, reduce fan use when the bird is out, and avoid placing it near doors where drafts occur.
If I use a cage cover for sleep, how do I prevent overheating?
Use a breathable, natural, unscented cover and avoid anything fully enclosed on all sides. Cover only part of the cage (for example, three sides) and leave ventilation openings. Remove the cover during daytime and when room temperatures are high, and never use a cover that makes the cage feel warm to the touch.
What if my cage does not include a wire grate or the grate does not clip securely?
Do not operate the cage without a configuration that prevents access to droppings. If the grate is missing or loose, you will need a safe replacement part or a different cage design. Never improvise with unstable pieces that can fall into the tray or create sharp edges.
Next Article
How to Get the Bird Cage in DTI Roblox Step by Step
Step-by-step to get and place the Bird Cage in DTI Roblox, including where to find it and fixes if it won’t appear.