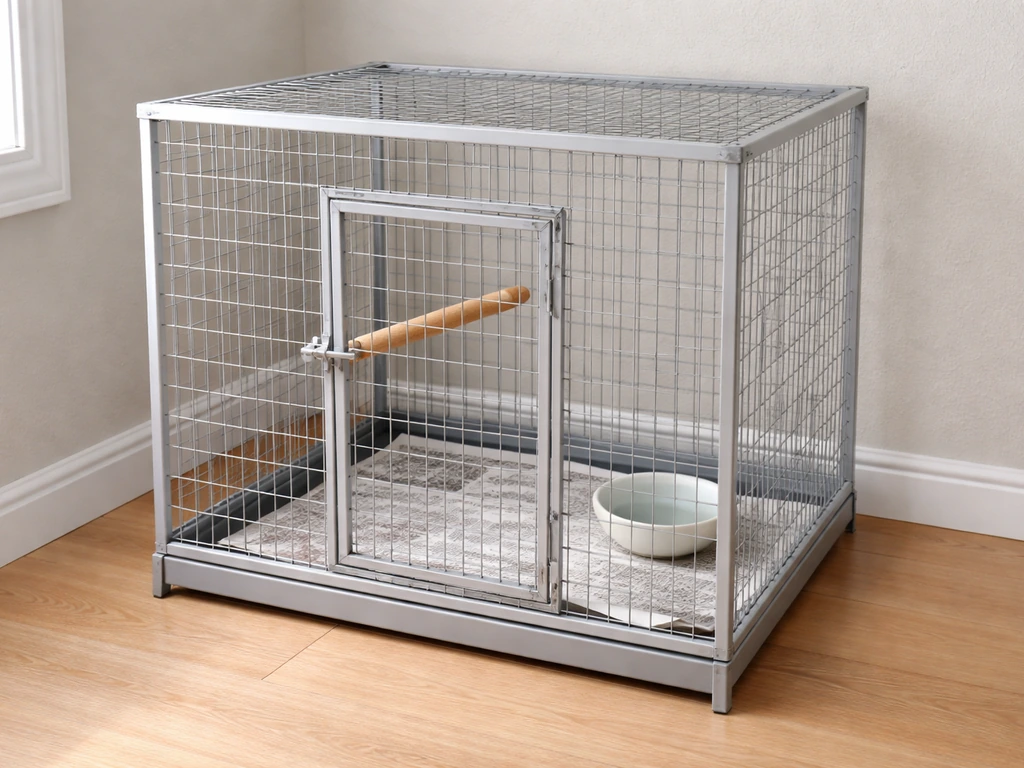
You can repair most bent, loose, or mildly rusted bird cage bars yourself with basic tools and the right replacement hardware, but only if the cage frame is structurally sound and the bar material is still safe. If you're dealing with widespread coating failure, deep pitting, or missing bars that leave unsafe spacing, replacement is the honest answer. For everything in between, this guide walks you through every repair scenario step by step.
How to Repair Bird Cage Bars: Safe Step by Step Fixes

Maya Bennett
22 May 2026
Diagnose the damage and decide: repair or replace?
Before you touch a tool, do a slow visual inspection of the entire cage. Good lighting and a clean cage make this much easier. You're looking for four categories of damage: mechanical (bent, broken, or missing bars), structural (loose welds, cracked frame joints, warped panels), surface (rust, chipping, or peeling coating), and spacing issues (gaps that are too wide or uneven).
Repair is the right call when damage is isolated to one or two bars, the frame is rigid and welds are intact, and any coating damage is a small chip rather than a spreading problem. Custom Cages' guide to Majestic cage materials recommends choosing powder-coated bars or stainless steel because they resist corrosion and are easier to keep clean Overview of Majestic Cage Materials. Replace the cage when you see oxidation spreading across multiple bars, white rust or pitting under a powder coat, flaking or bubbling finish that your bird has been chewing, or a warped frame that will never sit square again. Powder-coated finishes that show oxidation, loss of sheen, or pitting are a hard stop: partial touch-ups won't fix an underlying zinc corrosion problem, and the risk to your bird is real. When in doubt, an avian vet's opinion on cage safety is worth the call.
Know your bars: material, gauge, and spacing
Getting this right matters more than any other step because the replacement material has to match what's already there, both for strength and for your bird's safety.
Common cage bar materials
| Material | Common Use | Repair Notes |
|---|---|---|
| Powder-coated steel | Mid-size to large cages | Safe when intact; replace if coating is failing or chipped along welds |
| Stainless steel (304 grade) | Premium cages | Most repair-friendly; no coating to damage, naturally corrosion-resistant |
| Plastic-coated wire | Small cages (budgies, finches) | Keep coating fully intact; replace any bar with exposed wire underneath |
| Galvanized steel (zinc-coated) | Budget cages, outdoor aviaries | Never use galvanized wire inside a finished cage; zinc is toxic if ingested |
| Aluminum | Lightweight or travel cages | Softer and easier to bend/rebend, but weaker; match gauge exactly |
Gauge and spacing: measure before you buy anything
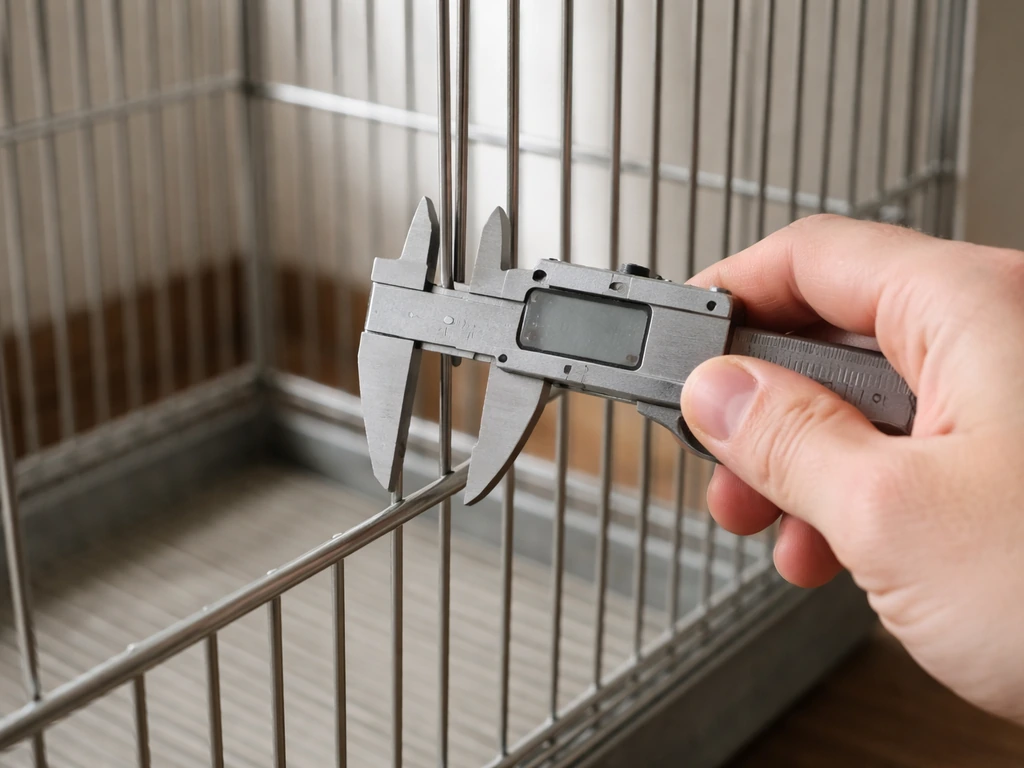
Bar gauge (thickness) and bar spacing (the gap between bars) are not interchangeable across species. Use a digital caliper to measure your existing bars. A typical parrot cage uses 14 to 16 gauge steel rod, while finch or canary cages often use 19 to 22 gauge wire. For spacing, measure the widest gap you can find on the undamaged sections. Correct spacing keeps birds from getting their head, foot, or wing stuck, and prevents escapes. General species guidelines: under 1/2 inch for small birds (finches, budgies, canaries), 1/2 to 3/4 inch for cockatiels and small conures, 3/4 to 1 inch for medium parrots, and up to 1.5 inches for large macaws. If your replacement bar creates a gap wider than the species maximum anywhere along its run, you need to adjust or add an additional bar.
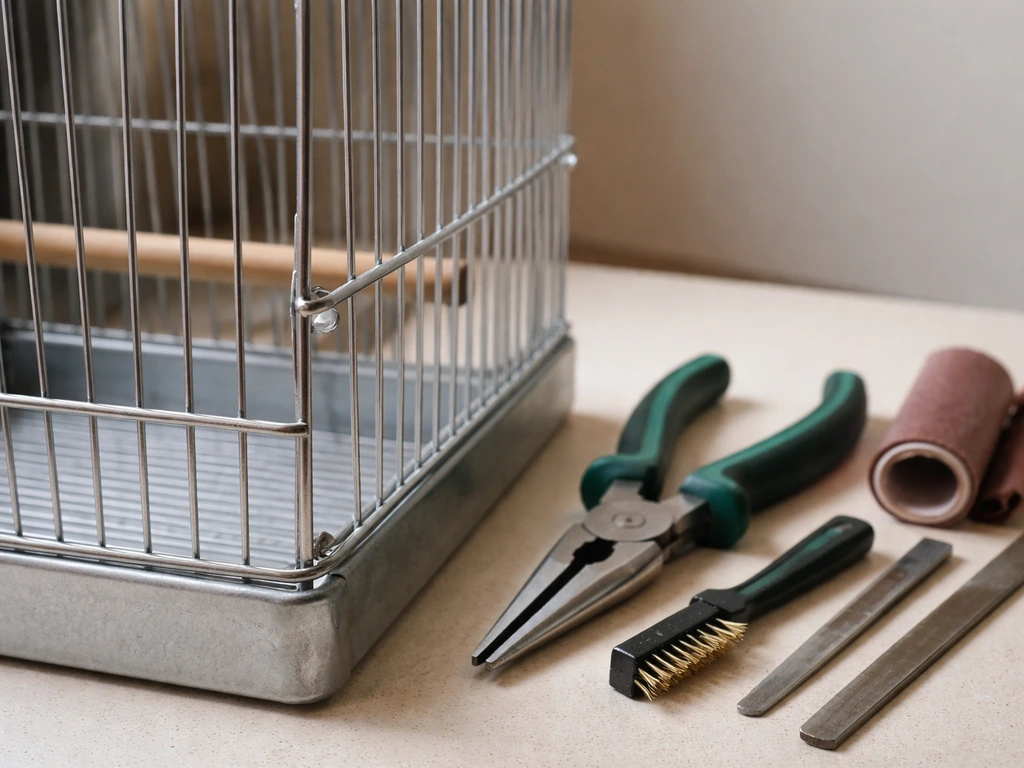
Tools and bird-safe parts you'll need
Gather everything before you start. Stopping mid-repair to find a tool usually means setting an unsecured cage aside, which is a safety risk if your bird is nearby.
- Digital caliper (for measuring bar gauge and spacing accurately)
- Needle-nose pliers and standard pliers (for straightening and reattaching)
- Channel-lock or locking pliers (for stubborn or thick bars)
- Wire cutter or bolt cutters (for removing a broken bar cleanly)
- Round and flat metal files (for smoothing cut ends and sharp edges)
- 220-grit wet/dry sandpaper (for rust removal and surface prep)
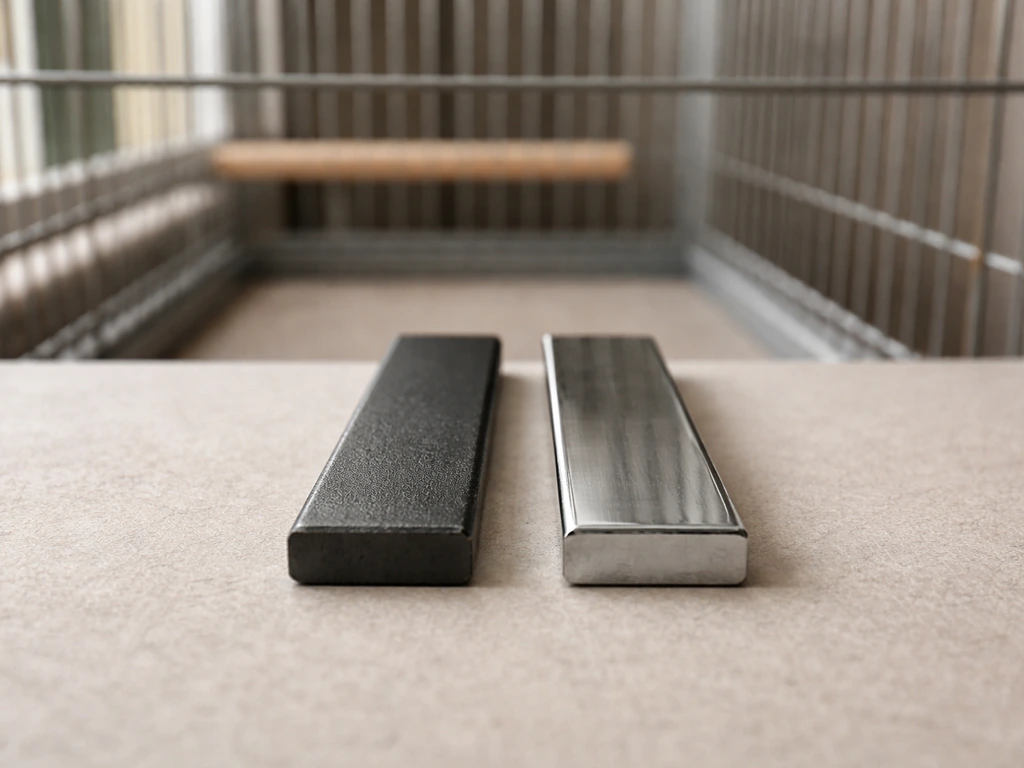
- Replacement bar stock or wire rod in matching gauge and material
- Stainless steel binding wire or small stainless hog-ring clips (for reattaching)
- Hog-ring pliers (if using hog rings)
- White vinegar or a commercial rust remover rated bird-safe (no phosphoric acid products near birds)
- Stainless steel bristle brush or fine steel wool (for rust scrubbing)
- Bird-safe paint or sealant: only use if absolutely necessary; stainless or bare powder-coated steel is preferred over any topcoat
- Protective gloves and safety glasses
A note on coatings: if you do need to touch up a small area, use only water-based, non-toxic paint that is fully cured and odor-free before the bird returns to the cage. Many experienced bird owners and avian vets recommend leaving bare metal uncoated rather than applying any paint that hasn't been verified safe. When in doubt, skip the coating.
Repairing bent bars: how to straighten and realign
Bent bars are the most common repair, especially in cages owned by strong chewers like macaws or cockatoos. The goal is to restore the bar to straight, reposition it at the correct spacing, and make sure no metal fatigue cracking occurred during the bend.
- Remove the bird and any food or toys from the affected area.
- If the bar is still attached at both ends, check whether it's bent in the middle or pulled loose at one end. Bars bent at the midpoint can often be straightened in place.
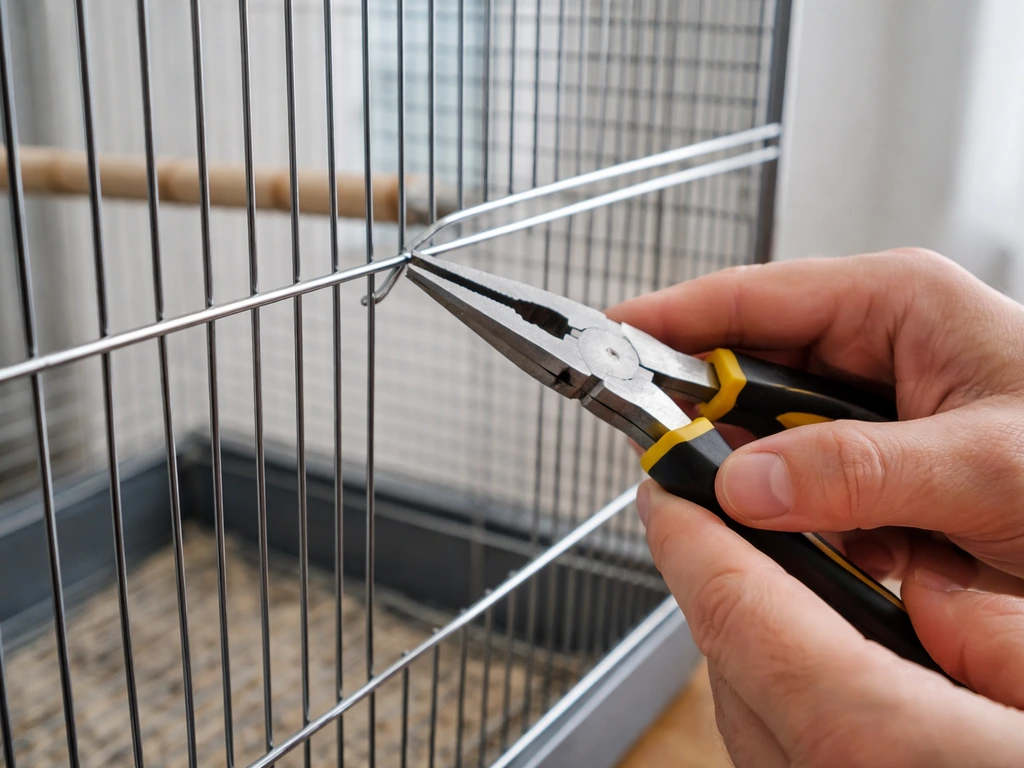
- Use two sets of pliers to work the bar back toward straight: one pair to hold the bar steady near the attachment point and one pair to apply controlled pressure at the bend. Work gradually, alternating sides of the bend to avoid over-correcting.
- Check for stress cracks by bending slightly past straight and back. If you hear a crack or see a whitened line in the metal, the bar has fatigued and must be replaced, not straightened.
- Once straight, verify the spacing on both sides with your caliper or a simple spacing gauge cut from cardboard. Both gaps should be within 1/16 inch of the rest of the panel.
- If the bar won't return to true alignment because the bend is too severe, stop here and move to the replacement steps below.
Common mistake: using a hammer to smack a bent bar straight. This transfers force unpredictably and can loosen nearby welds. Slow, controlled plier pressure is always better.
Replacing broken, missing, or badly damaged bars
Replacing a single bar
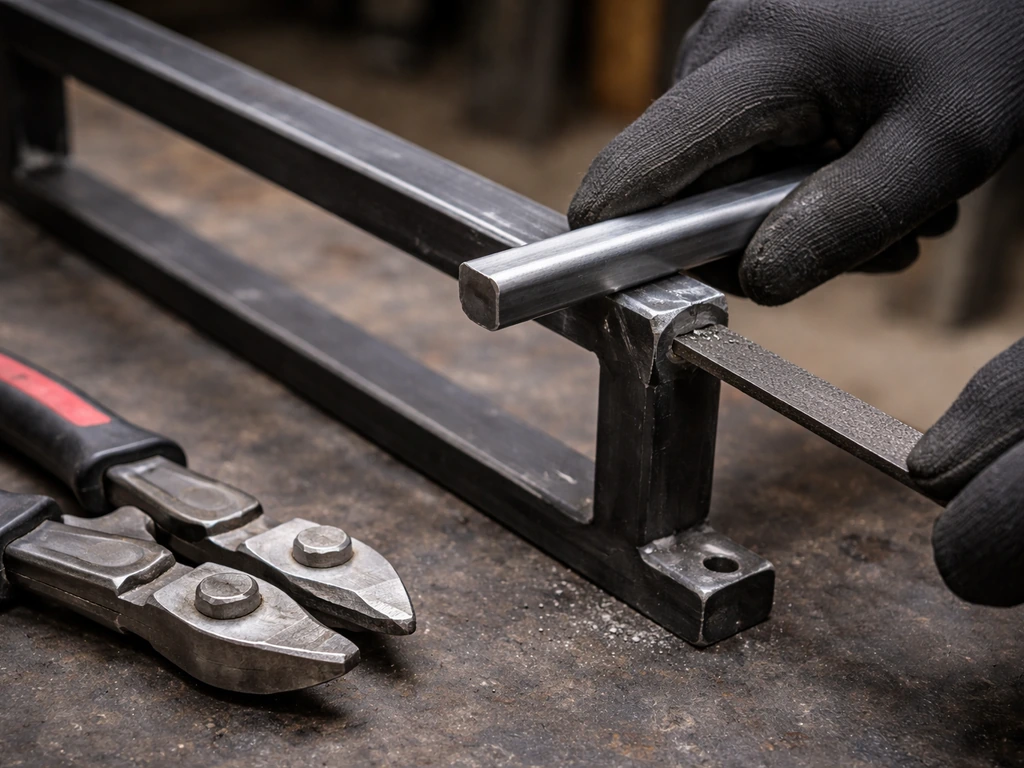
- Cut and remove the damaged bar flush at both attachment points using wire cutters or bolt cutters. File the stub ends smooth immediately.
- Cut your replacement bar stock to exactly the same length. Measure twice: the bar needs to sit in the frame properly without bowing.
- If the cage uses welded attachment points (as most steel cages do), you'll be threading the new bar through existing holes in the top and bottom frame rails or through the grid weave, then securing with stainless hog rings or binding wire.
- Thread the bar through the frame, align it to match the spacing on either side, then crimp one hog ring per end firmly with hog-ring pliers. The ring should sit flush against the frame rail with no sharp protrusion toward the cage interior.
- Alternatively, wrap two to three tight turns of stainless binding wire around the bar-to-frame junction, twist the tail end away from the interior, and trim short. Bend the wire tail flat against the frame.
Replacing an entire panel or section
If multiple bars in a section are broken or if the spacing has become inconsistent across an entire panel (which can happen with a cage that's been dropped or sat on), replacing the whole panel is cleaner and safer than patching bar by bar. Most commercial cages use modular wire panels that slot into a frame. Measure the existing panel dimensions precisely (width, height, bar gauge, and spacing), then source a matching replacement panel from the cage manufacturer if it's still in business, or from a wire mesh supplier using the same spec. Attach the new panel to the frame using the original fastener type, whether that's hog rings, clips, or bolt-and-nut hardware. Inspect all four edges after installation to make sure no bar ends protrude inward.
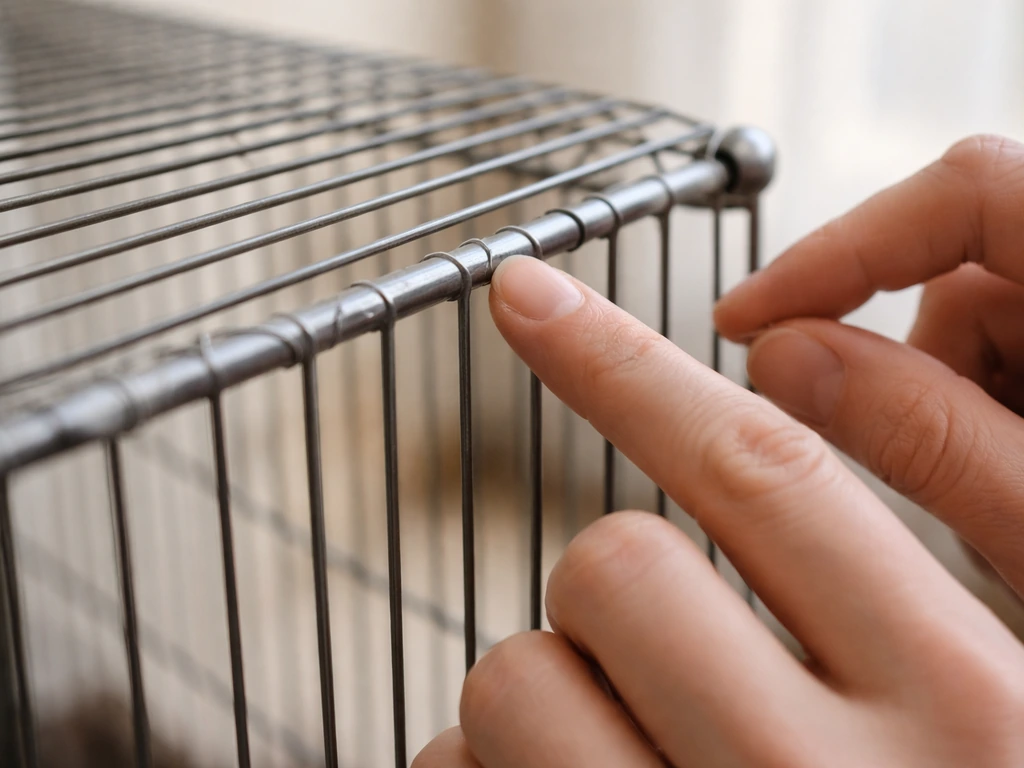
Reattaching loose bars and cleaning up sharp edges
A bar that rattles or slides when your bird grabs it is a real escape risk, and sharp cut ends are an injury risk. Both get fixed in the same workflow.
- Identify every loose bar by gripping each one and testing for movement. A properly attached bar should have zero play.
- For bars that have come loose from a welded joint, clean the joint area with fine sandpaper to remove any rust or residue before re-securing. You won't be re-welding at home safely, so use two stainless hog rings or binding wire wraps to clamp the bar back to the frame rail.
- For bars loose at only one end (common in cages with horizontal bars that thread through the vertical rails), push the bar back to the correct depth and secure with a hog ring or a small stainless cotter pin if the frame hole allows it.
- After all bars are secured, run your gloved finger along every cut or repaired end inside the cage. Anything that catches your glove catches your bird's foot or tongue.
- File every sharp end with a flat file until it's completely smooth, then follow with 220-grit sandpaper. Check again bare-handed at the end. If it snags skin, it's not done.
Rust removal, corrosion prevention, and safe finishing
Removing rust from steel bars
Surface rust (orange-brown discoloration without pitting) is repairable. Deep pitting or rust that has eaten through the bar cross-section means the bar needs replacement. For surface rust, soak a cloth in undiluted white vinegar and wrap it around the affected bars for 30 to 60 minutes. The acetic acid dissolves iron oxide without introducing toxic chemicals. After soaking, scrub with a stainless bristle brush or fine steel wool, then rinse thoroughly with clean water. Dry completely with a cloth and allow to air dry for another hour before any finishing step. Leaving moisture on bare steel will restart the rust cycle within days.
To coat or not to coat
If the existing powder coat is intact everywhere except the repair area, you can leave the bare metal uncoated as long as it's clean and dry. If the powder coat or coating is damaged, RSPCA advises keeping any coating intact and non-toxic, and it notes that plastic-coated wire is commonly used for small cages while powder-coated bars are often used on larger cages existing powder coat is intact. Bare stainless steel and clean bare mild steel are both safe. If you want a protective topcoat, use only a water-based, zero-VOC paint that is listed as non-toxic after curing. Apply thin coats, let each cure fully (at least 48 to 72 hours in a ventilated area away from birds), and do a smell test before your bird goes anywhere near it. Any detectable smell means it hasn't cured. Never use spray paint aerosols near a bird room; the propellants and solvents are acutely toxic to birds even in trace amounts.
Long-term corrosion prevention
The single biggest cause of recurring rust on cage bars is moisture sitting on the metal after cleaning. After every cage wash, towel-dry the bars and let the cage air dry fully before covering it or returning the bird. Position cages away from windows where condensation forms seasonally, and away from kitchen humidity. If your cage lives on a patio or in a sunroom, a weather-appropriate cage cover at night dramatically reduces moisture exposure and extends bar life.
Final safety check before your bird goes back in
Don't rush this step. A five-minute safety check prevents an emergency vet visit.
- Sharp-edge test: run your bare fingertips along every repaired bar, end cap, hog ring, and wire wrap. No snags, no points.
- Spacing test: at every repaired bar, measure the gap on both sides and compare to the rest of the panel. Gaps must be consistent and within the safe range for your bird species.
- Stability test: grip the repaired panel or bar and apply the amount of force your bird would use when climbing. Nothing should flex, rattle, or shift.
- Coating check: look at every area where paint or powder coat was disturbed during the repair. No loose flakes, no sharp coating edges that could be chewed off.
- Full perimeter check: walk around the entire cage looking for any other bars that may have been disturbed when you worked on the repair area. Loose welds can spread.
- Wait out any coatings: if you applied any paint or sealant, the cage must be fully cured, fully aired out, and odor-free before the bird returns.
Prevention: keeping bars from failing again
Most repeat bar damage comes from a handful of predictable causes. Strong chewers (macaws, cockatoos, Amazon parrots) need a cage rated for their beak strength, and no repair patch will hold up if the original gauge was too light. If your bird bent a 16-gauge bar, the next replacement bar should be 14-gauge or the cage should be upgraded. Weekly inspection, a few seconds of running your hand over the bars and checking for loose spots, catches problems before they become repair jobs. Clean your cage with plain water or a mild bird-safe disinfectant, rinse well, and dry thoroughly every time. Never let a wet cage sit covered overnight.
If you're also dealing with a wobbly cage base or broken wheels, those are separate structural issues worth addressing at the same time so the cage is fully stable before your bird moves back in. Fixing bird cage wheels starts with inspecting them for cracks, worn axles, and loose mounts before choosing the right replacement part or hardware. Similarly, if this repair has made you realize the bar spacing is wrong for your bird's size, addressing that proactively (by adding bars to narrow the gaps) is a safer long-term fix than repeated patching. If the gaps are too wide, you can make cage bars effectively smaller by adjusting spacing with additional bars or the correct replacement parts for your bird bar spacing. If you need help dialing in the gaps and choosing matching replacement bars, follow this guide on how to fix bird cage bar spacing safely bar spacing is wrong for your bird's size. A cage that fits your bird correctly from the start requires far less maintenance and keeps everyone safer.
Troubleshooting post-repair problems
| Problem | Likely Cause | Fix |
|---|---|---|
| Bar is loose again within days | Hog rings or binding wire not crimped tight enough | Re-secure with an additional ring or double-wrap the binding wire |
| Rust returns to the same spot quickly | Moisture not being dried after cleaning | Improve drying routine; consider a bare stainless replacement bar |
| New bar is slightly misaligned | Bar cut too long or short, causing bowing | Recut to exact length and re-thread; even 2mm makes a difference |
| Bird won't go near the repaired area | Smell from coating or cleaner residue | Rinse again, air fully, and wait; birds detect fumes humans cannot |
| Gap too wide next to replacement bar | Replacement bar slightly narrower gauge than original | Add a secondary bar or source correct gauge stock |
FAQ
How can I tell if a bent bar is still safe, even if it looks straight again?
Check for “stress whitening” or fine cracks right along the bend line, and gently run a finger over the area for sharp metal edges. If the bar flexes when you apply light pressure, or if the bend changed the bar’s thickness or created a visible crease, replace the bar rather than trusting a cosmetic straightening.
What’s the safest way to remove old sharp bar ends after a break?
After replacing the bar or panel, file only the very ends and corners so there are no burrs facing inward. Follow up by wiping with a damp cloth to remove metal dust, then do a hand test (glove on) to confirm nothing catches your skin or the inside of a paper towel.
Can I use zip ties, wire, or glue to hold a loose bar in place temporarily?
Temporary fasteners that can loosen are an escape and injury risk, and most adhesives can off-gas near birds. If you need “temporary” stability, use only the same style of hardware the cage originally used (clips, hog rings, or bolt hardware) and complete the proper replacement as soon as possible.
If I’m missing one bar, is it better to patch or to replace the whole panel?
If the cage uses modular wire panels, replacing the whole panel is usually safer when the loss happened from a panel-level impact, because it keeps bar gauge and spacing consistent across the full area. If only one bar is missing and the surrounding section is undamaged, a properly matched replacement bar can work, but you must re-measure spacing at the widest point after installation.
Is vinegar safe on powder-coated bars if rust is around the edge only?
Vinegar is meant for dissolving iron oxide, but it can sit under lifted or bubbling coating and keep corrosion active under the finish. If the coating is intact and the rust is only surface-level, vinegar wraps are usually fine, but if you see any coating failure around the rust spot, replace the bar or use only a cleaning approach that does not spread moisture under the coating.
What should I do if the bar spacing is correct in one spot but not in another?
Re-measure spacing along the entire repaired run, especially near where the cage was dropped or impact deformed the frame. If any section exceeds your species maximum gap anywhere, adjust with additional bars or replace the panel/frame as needed, because a single oversized gap can still allow head or foot trapping or escapes.
Can I sand rust away and keep using the same coating?
You can remove surface rust, then clean and dry thoroughly, but you should not assume the original coating is still sound under the sanded area. If the coating is bubbling, peeling, or showing pitting, treat it as an underlying corrosion sign and replace the affected bars instead of relying on patch sanding and touch-up.
How long should I wait after touching up or painting before letting my bird back in?
Beyond curing time, rely on a practical smell test. Even if the paint “dries,” wait until it is fully odor-free, then let it sit in a well-ventilated area until no detectable smell remains. If you can smell anything, do not reintroduce the bird yet.
What’s the best way to prevent recurring rust after repairs?
Dry the cage completely after every wash, towel-dry bars, then air dry with airflow before covering or returning the bird. Also avoid locations with seasonal condensation (near windows) and high kitchen humidity, since moisture films can restart corrosion even when the bar surface looks clean.
How often should I inspect bar repairs to catch problems early?
Do a quick weekly check with light contact (run your hand along bars) and watch for new looseness or rubbing points. If your bird is a heavy chewer, increase to twice weekly until you confirm the repair holds under normal grabbing and climbing behavior.
Do I need to check the cage base or wheels before putting my bird back?
Yes. If the repair coincided with a drop or the cage was unstable, check for wobble, cracks, loose mounts, and worn axles. A moving cage can stress repaired bars and fasteners repeatedly, turning a one-time fix into repeat damage.
Next Articles

How to Open a Bird Cage Safely Step by Step
Step-by-step guide to open a pet bird cage safely, identify locks, troubleshoot jams, and maintain latch alignment.
How to Make a Temporary Bird Cage Step by Step
Step-by-step DIY guide to build a safe temporary bird cage now, with sizing, bar spacing, materials, and safety checks.
How to Make a Glass Bird Cage: Step-by-Step DIY Guide
Step-by-step DIY for a safe glass bird enclosure: materials, escape-proof design, ventilation, assembly, and maintenance