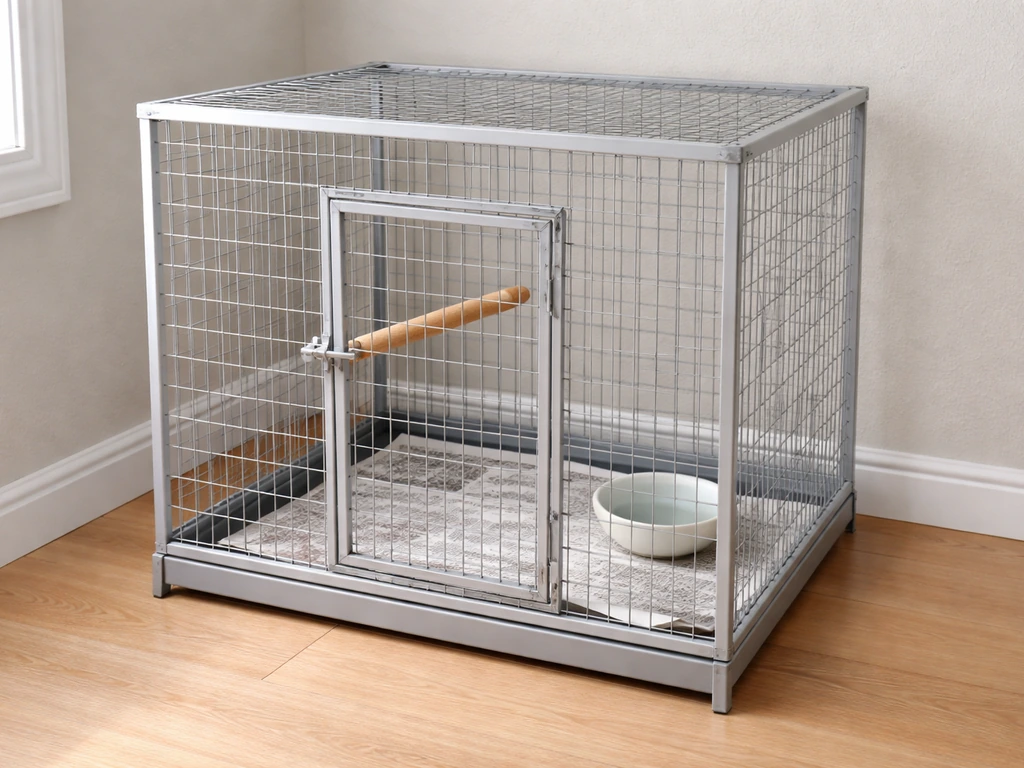
You can connect two bird cages together by aligning them side by side on a flat, stable surface and securing them with cage-safe zip ties, quick links, or metal connector plates through matching bar sections, then checking the joint for gaps, sharp edges, and stability before your birds go anywhere near it. Done right, a linked cage setup gives your birds more space and enrichment without the cost of buying a larger cage. Done wrong, it creates escape routes, pinch points, and cleaning headaches. This guide walks you through the whole process, from picking your connection method to the final safety sweep.
How to Connect Two Bird Cages Together Safely

Maya Bennett
25 Apr 2026
Decide the connection type before you start
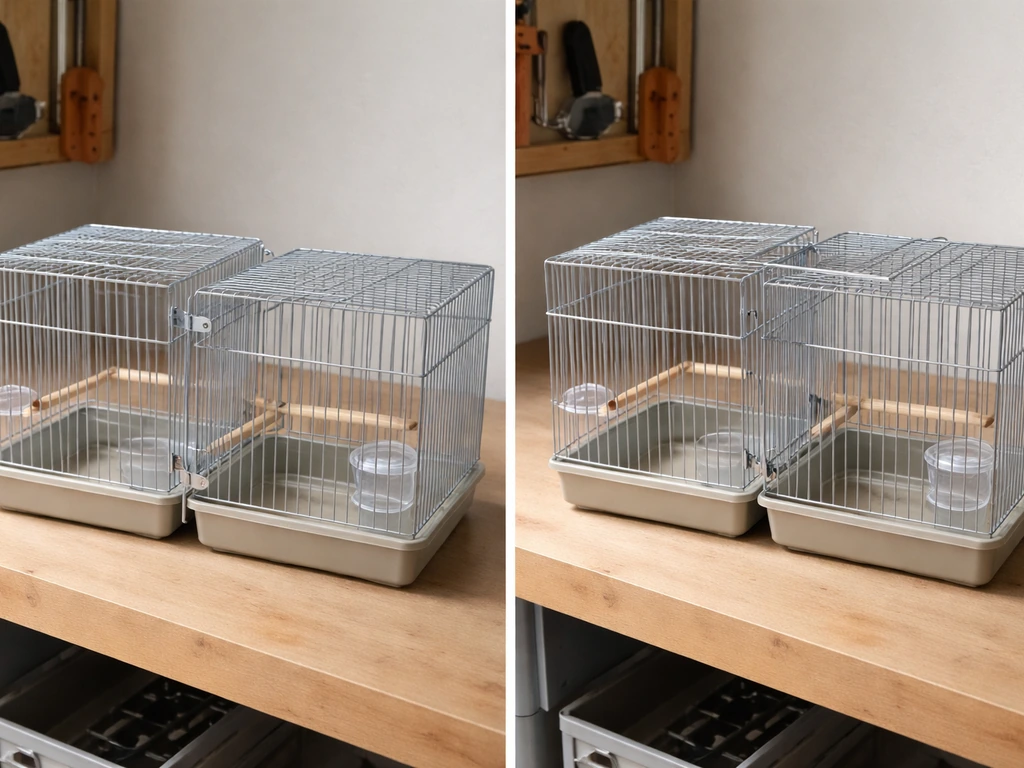
There are two fundamentally different ways to connect cages, and which one you choose changes everything about the project. The first is a side-by-side link, where the cages sit flush against each other and are fastened together so they behave as one stable unit, but the birds still live in their own separate spaces. The second is a passage link, where you remove or modify a section of bars on each cage to create an opening that lets birds move freely between both cages. Side-by-side linking is simpler, reversible, and safer for mixed-species or newly introduced pairs. Passage linking takes more work, requires more safety checks, and is really only worth it if you want both birds to share the full combined space.
Before you commit to a passage link, think about your birds. If they've already been co-housed successfully, a passage makes sense. If they're still getting used to each other, keep the cages joined but separate. You can always add a passage door later, and in fact, a removable divider door or panel (similar to the kind used when dividing a single cage) is the cleanest solution because it gives you full control over access. For most people reading this, a secure side-by-side link is the right starting point.
Tools and materials for a safe, sturdy cage link
The materials you use at the connection point matter just as much as the technique. Any connector that can rust, has sharp cut edges, or leaves a gap large enough for a bird's head is a hazard. For small birds like budgies or cockatiels, bar spacing must stay at or below half an inch, if your finger fits between bars at the connection point, it's too wide and needs to be addressed before the birds go in.
- Stainless steel or powder-coated quick links (also called carabiners or snap links) — these are the cleanest connector for most bar-to-bar joins
- Stainless steel zip ties or heavy-duty nylon zip ties rated for outdoor use — nylon is fine for most setups as long as you trim the tails flush so there's nothing to chew
- Flat stainless steel or powder-coated connector plates with pre-drilled holes, for a more permanent and rigid join
- Stainless steel nuts, bolts, and washers if you're drilling through a plate
- Needle-nose pliers and a wire cutter for positioning and trimming
- A level (even a phone app works) to check alignment
- Sandpaper or a metal file for smoothing any cut bar ends if you're creating a passage opening
- Work gloves — cage bars can have sharper edges than they look
Avoid galvanized hardware at the connection joint if your birds are likely to chew near it. Stainless steel is the gold standard for anything inside or adjacent to a bird's living space. Powder-coated finishes are acceptable for exterior connector plates as long as the coating is intact, chips or flakes are a chewing hazard. To make sure you buy the right size after measuring, focus on the cage’s usable width, height, and depth, plus the bar spacing at the connection area how to measure a bird cage. blank" rel="noopener noreferrer">Skip chromed wire and plain wrought iron connectors entirely; rust is a genuine threat to bird health and both of those materials are prone to it.
Step-by-step: aligning cages and securing the connection

Work on a flat floor or table so you're not fighting an uneven surface during alignment. If the cages are on stands, lock the casters before you start.
- Move both cages to their final position and push them flush against each other on the side you want to join. Don't leave any gap between the cage walls — even a small gap at the outer frame level can become a larger gap between bars further in.
- Check alignment from the top and front. The tops should be level with each other (use your level here) and the bar rows should line up horizontally as closely as possible. Mismatched bar heights aren't always fixable but they affect how securely you can attach connectors.
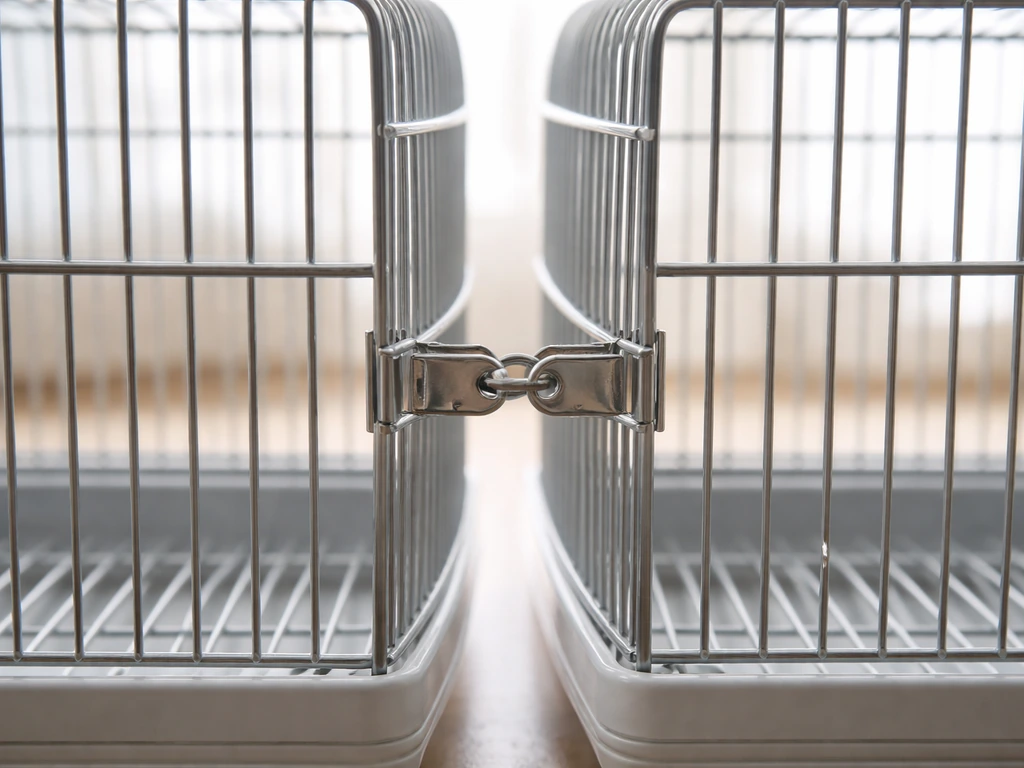
- Identify four to six attachment points along the joined wall — two near the top, two in the middle, two near the bottom. Spreading connections across the height of the cage prevents rocking and distributes the load.
- Thread a quick link or zip tie through a bar on cage one and a bar on cage two at each attachment point. Pull tight and close or cinch fully. For quick links, use pliers to tighten the gate so it can't work open.
- For a connector plate, position the plate so it bridges the outer frame of both cages, drill or align the plate holes with existing bar positions, and fasten with stainless bolts and washers. Tighten firmly but don't over-torque — you're attaching to cage wire, not structural steel.
- If you're creating a passage opening: measure the opening carefully based on your bird species (minimum 6 inches wide and tall for medium birds like cockatiels; larger for bigger birds), use wire cutters to remove the relevant bars, and file all cut bar ends smooth before finishing the connection. Fit a clip-on door or panel over the opening so you can close it when needed.
- Once all connectors are in place, grip each cage and push and pull to test for movement. There should be no rocking, shifting, or play at the joint. If anything moves, add another connector at the loosest point.
Feeder, water access, and airflow checks after linking
Linking cages changes the geometry of the setup and it's easy to accidentally block a feeder port, make a water bottle inaccessible, or push both cages against a wall in a way that kills airflow on one side. Walk through each of these checks before your birds go back in.
- Confirm you can still reach each bird's food and water containers from outside the cage without having to move the joined unit. If a feeder now sits against the joining wall and is blocked, relocate it to an outer wall.
- Check that water bottles or tubes mounted on the joining side aren't pinched or disconnected. Stainless steel bowls inside the cage are more flexible to reposition than external water bottles.
- Stand back and look at both cages from above. Neither cage should be flush against a wall on more than one side — at minimum, leave 2 to 3 inches of clearance on all exterior sides so air can circulate. Stacking two cages side by side against a corner wall kills ventilation on the interior cage faces.
- If you're using passage linking, check that the open connection doesn't create a draft corridor. A direct airflow path straight through both cages can cause chilling, especially in cooler months.
- Confirm that both birds can reach food and water without having to pass through the other bird's space to do it — this matters most in passage setups where one bird might guard resources.
Safety checks: gaps, rust, sharp edges, and stress points
This is the most important step and the one people rush. Do it slowly, ideally with good lighting and your reading glasses if you need them.
- Run your fingers along every part of the connection joint — the connector hardware itself, any cut bar ends, the bar surfaces around the connectors. If you feel anything sharp, file or sand it down now.
- Check every gap at the connection point. For small birds, no gap should be wide enough to fit your finger through. If it is, it's wide enough for the bird's head — and that's a potentially fatal entrapment risk.
- Look at the connector hardware up close. Stainless quick links and zip ties should show no surface rust. If you spot orange or brown discoloration on any hardware you've used, replace it before the birds go in.
- Test every door and latch on both cages to confirm the linking process didn't warp a frame or cause a door to sit unevenly. Doors that don't latch fully are an escape risk.
- Check the base of both cages. Linking sometimes lifts one cage slightly off its stand or causes one corner to rock. All four corners or caster feet should be in solid contact with the surface.
- If you have a passage opening, push a blunt object (like the handle of a spoon) through the opening from both sides to confirm there are no snagging points at the cut bar edges.
Cleaning, divider options, and troubleshooting
Linked cages produce more mess, not less, twice the droppings, seed scatter, dander, and feather debris. The good news is that if you've kept the cages separable (using quick links rather than permanent bolts), you can disconnect them for deep cleaning and reconnect them in under ten minutes. Build that into your routine.
For daily cleaning, the connection joint itself is a debris trap. Seed husks, droppings, and feather dander collect in the bar intersections where the connectors sit. A small brush (a toothbrush or grout brush works perfectly) keeps this area clear and lets you spot any connector movement or rust early. Keep the area around the joined cage base clean too, accumulated debris under linked cages is a pest attraction point.
If you want the option to separate your birds without fully disconnecting the cages, a divider panel is the right solution. A flat mesh or solid panel slid between the two cage walls at the connection point lets you control access without dismantling the whole setup. If you also plan to add a nesting box, follow a safe guide for how to attach a nesting box to a bird cage so it stays secure and accessible. This is especially useful for breeding pairs, birds that need to be separated during feeding, or if one bird gets sick and needs isolation. The technique for making or fitting a cage divider is closely related to how you'd divide a single cage, the same panel sizing and bar-attachment logic applies. If you need full separation, learn the basics of how to divide a single cage so the divider panel size and attachment stay safe.
Common issues and fixes
| Problem | Likely cause | Fix |
|---|---|---|
| Cages wobble or rock at the joint | Too few connectors or connectors not fully tightened | Add connectors at top and bottom of the join; retighten all existing ones with pliers |
| Visible gap between bar sections at the join | Cage frames are different heights or bar spacings don't match | Add a strip of small-gauge mesh over the gap, secured with zip ties, to eliminate the opening |
| Connector hardware shows rust spots | Non-stainless hardware used or finish was damaged | Replace with stainless steel quick links or zip ties immediately |
| Door or latch doesn't close properly after linking | Frame slightly warped by connection pressure | Loosen the nearest connector, realign, and retighten; adjust door hinge if needed |
| Bird escaping through connection area | Gap is too wide at the join, or a connector worked loose | Re-inspect all gaps with the finger test; add mesh or additional connectors over the problem area |
| Hard to clean connection zone | Connectors are too tightly packed or non-removable | Switch to quick links on the mid-section connectors so you can slide the cages apart for cleaning |
Placement and seasonal considerations for a linked setup
A linked cage is bigger, heavier, and harder to move than a single cage, so placement decisions matter more and are harder to reverse. Choose your spot with the full joined footprint in mind before you connect the cages, not after.
Keep the linked setup out of direct sun. The larger surface area of two joined cages can collect heat faster than a single cage, and the interior bird (if one cage faces a wall) may have worse airflow than the outer bird. Both factors raise the risk of overheating, especially when heat and humidity combine in summer. A spot with natural light but no direct sun exposure is ideal. If you're near a window, use a shade cloth, curtain, or blinds to block the harshest afternoon light.
In winter, the main concern is drafts. A joined setup that spans more wall space is more likely to catch cold air from a window gap, an exterior wall, or an air conditioning vent. Run your hand along the back and sides of the linked unit when the heating or cooling is on and feel for cold air movement. A cage cover on the non-access sides (the back and the outer side walls) at night helps retain warmth without blocking ventilation on the front.
Think about pest control too. Linked cages sitting on the floor or close to walls create more sheltered corners where mites, ants, and rodents can establish. Elevating the joined setup on stands with caster feet reduces this risk and makes floor cleaning easier. If you're in a humid environment, inspect the connection joint hardware monthly for early rust, especially in summer. Best Friends Animal Society’s “The Bird Owner’s Manual” warns that rust is a threat because “Water + metal + oxidation” can kill birds if they ingest rust inspect the connection joint hardware monthly for early rust, especially in summer.
Quick safety checklist before your birds go in
- All connectors are stainless steel or powder-coated and show no rust
- No gap at the connection point is wide enough to pass a finger through
- All cut bar ends (if you created a passage) are filed smooth with no snag points
- The joined unit does not rock or shift when pushed from any side
- Every door and latch on both cages closes and locks fully
- Food and water are accessible from outside the cage on both sides
- Airflow clearance of at least 2 to 3 inches on all exterior sides
- No direct sun exposure on the linked setup in its current position
- Cage floors and connection joint area are clean before birds are introduced
- If a passage opening was cut, a closeable door or panel is fitted and functional
FAQ
Can I connect two bird cages together using rope, wire, or non-cage hardware?
You generally should not. Natural fibers can fray and rope can loosen, wire can create sharp pinch edges, and random hardware may rust or leave metal burrs. Stick to cage-safe connectors, quick links, or stainless components meant for pet environments, and remove any burrs before the birds are exposed.
What gap is too big at the connection point, especially for smaller birds?
Treat anything that allows a bird’s head to pass as a red flag, even if it looks small. For very small birds, validate with a real-fit check by attempting to fit the bird’s head or a rigid sizing template between bars at the joint. If it fits, widen spacing is not corrected yet, add a guard plate or reposition connectors to eliminate the gap.
How do I prevent pinch points when the connector hardware sits between bars?
Position the connector so it lies flush and does not protrude into the bird-facing side of the bars. After assembly, run a gloved hand along every joint edge, then do a second check after 24 hours of normal use, since alignment can shift slightly when cages are moved or when casters roll.
Is a side-by-side link always safe for birds that are not fully compatible yet?
Side-by-side linking is safer than passage linking, but it still increases contact through adjacent bar space. If birds show aggression, add a temporary divider panel or keep the cages separated with quick links so you can disconnect fast. Also ensure each cage still has its own access to food, water, and a preferred resting spot.
Can I use connectors if my cages have different bar spacing or slightly different widths?
You can, but only if the connection does not force bars to misalign or create a widening gap at the joint. Measure usable dimensions and bar spacing at the exact connection area, then choose connector plates or hardware that match both cages without bending bars or leaving uneven openings.
Should I bolt the cages together permanently, or is a removable method better?
A removable method is usually better for safety and cleaning. Quick links let you disconnect for deep cleaning, inspect for rust, and verify that no debris is trapped along the joint. If you use permanent bolts, plan for how you will access the connection area without tools that leave sharp edges exposed.
How often should I inspect the joint after connecting cages?
Do a full safety sweep the first day, then at least weekly during the first month. After that, check monthly for rust or coating chips, and whenever you move the setup. In humid climates, inspect hardware more often, since corrosion can start faster than birds can detect.
What if the linked cages block airflow or a feeder or water port?
Re-align before adding birds back in. Confirm each cage’s feeder and water bottle remain reachable without stretching through the joint, and that there is clearance behind and around the cages for ventilation. A simple test is to check the airflow by placing a hand at the back and sides while air is moving in the room, then reposition until no area feels stagnant or draft-restricted.
How do I clean around the connection joint if it keeps collecting droppings and seed?
Use a narrow brush for intersections and bar ends at the joint, and clean the underside and base area where debris accumulates. If debris buildup is heavy, disconnect the cages for periodic deep cleaning, since brushing while cages are locked together can miss waste that settles into corners.
Is it safe to link cages if one is on wheels and the other is on a stand?
It can be, but you must eliminate unintended movement. Lock casters before assembly, ensure both cages are at the same height, and verify the joint stays tight when you gently press the cages from different directions. If the heights differ, the connector may flex and create gaps.
Can I create a passage link by removing bars, even if my birds chew metal?
If your birds chew, passage linking is higher risk because it increases access to the modified opening and any sharp edges. Use only cage materials designed for pet bird environments, ensure cut edges are smoothed and protected, and consider a removable divider option first so you can test comfort without permanently altering the cages.
What should I do if the cages are too heavy or bulky to move after linking?
Plan placement first, then connect once you have the final spot. If you must reposition later, recruit help and move slowly to avoid stressing the joint, keep the unit level to prevent misalignment, and re-check the joint gaps and sharp edges after moving.
Next Article
How to Make a Temporary Bird Cage Step by Step
Step-by-step DIY guide to build a safe temporary bird cage now, with sizing, bar spacing, materials, and safety checks.