For most conures, you need a cage that's at least 24 x 24 x 30 inches with bar spacing of 0.75 inches, placed away from kitchens and drafts, fitted with 2 to 3 varied-diameter perches, stainless steel food and water dishes, a paper liner you swap daily, a rotating toy setup, and a breathable cover for sleep. That's the core of it. Everything below is the how and why, laid out so you can get from zero to done today.
Conure Bird Cage Setup: Step by Step Guide for Beginners

Maya Bennett
4 May 2026
Choosing the right cage for your conure
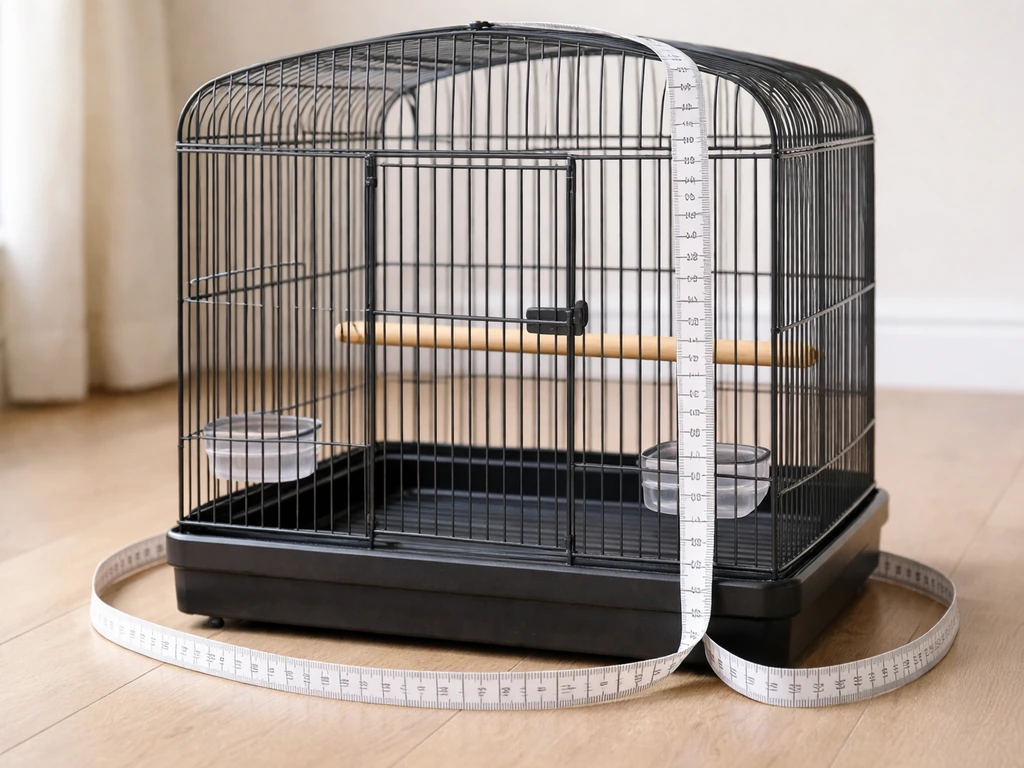
Cage size is the one decision that's genuinely hard to undo, so get it right from the start. LafeberVet recommends a minimum of 20 x 20 x 36 inches for conures, while Petco and That Pet Place land on 24 x 24 x 30 inches as a practical minimum for green-cheeks and sun conures. For larger species like a Patagonian or cherry-headed conure, push toward 36 x 24 x 48 inches as recommended by the Merck Veterinary Manual. My honest advice: buy bigger than the minimum if your budget allows. Conures are active, acrobatic birds. A cage that's technically "big enough" will feel cramped once you add perches, toys, and food stations.
Bar spacing matters as much as overall size because the wrong spacing is a genuine injury risk. For small conures (green-cheeks, maroons, dusky-headed), stay at 0.5 to 0.75 inches. For medium to larger conures (suns, jendays, nandays, Patagonians), 0.75 to 1.0 inches works, but don't go above 1 inch. Birds can get their heads, wings, or feet caught in bars that are spaced too wide, and they can squeeze through gaps that are too large.
Material is the other big factor. Powder-coated wrought iron or stainless steel are the two safe choices. Stainless steel costs more upfront but is easier to clean, won't chip, and lasts decades. Powder-coated cages are fine as long as the coating is intact and free of chips. If you buy a new galvanized cage (which I'd generally steer you away from), scrub the wires with a diluted white vinegar solution and rinse thoroughly before your bird ever touches it. This reduces surface zinc, which can cause heavy metal poisoning if ingested. Avoid any cage with flaking paint, sharp wire ends, or bars made from zinc-heavy galvanized wire.
| Conure Size | Min. Cage Dimensions | Bar Spacing | Best Cage Material |
|---|---|---|---|
| Small (green-cheek, maroon-bellied) | 24" W x 24" D x 30" H | 0.5–0.75 in | Powder-coat or stainless steel |
| Medium (sun, jenday, nanday) | 24" W x 24" D x 36" H or larger | 0.75–1.0 in | Powder-coat or stainless steel |
| Large (Patagonian, cherry-headed) | 36" W x 24" D x 48" H | 0.75–1.0 in | Stainless steel preferred |
Where to put the cage in your home
Placement affects your bird's health and behavior more than most people expect. The AVMA recommends placing the cage at eye level and away from drafts, which is a good starting rule. Eye level means your conure feels like a social participant in the room, not a prey animal scanning from the floor or an isolated fixture up near the ceiling. A corner position against a solid wall on at least one side gives the bird a sense of security without cutting it off from the room.
The kitchen is a hard no. Cooking fumes, aerosolized sprays, and especially nonstick cookware (PTFE/Teflon) heated to high temperatures can release gases that kill birds rapidly. VCA is unambiguous on this: keep birds out of any space where PTFE-coated products are used. Even a brief exposure can be fatal, and by the time you notice symptoms it's often too late. A living room or bedroom with good natural light and moderate, consistent foot traffic is ideal.
Aim for a room temperature between 65 and 85°F (18–29°C). Conures handle moderate temperature ranges fine, but sudden swings, cold drafts from AC vents or windows, and direct hot sun through glass are all stressors. A spot that gets a few hours of indirect natural light daily is great. If the cage is near a window, make sure there's a solid wall option nearby so the bird can retreat from glare. Keep the cage away from air conditioning vents, exterior doors, and bathroom exhaust fans.
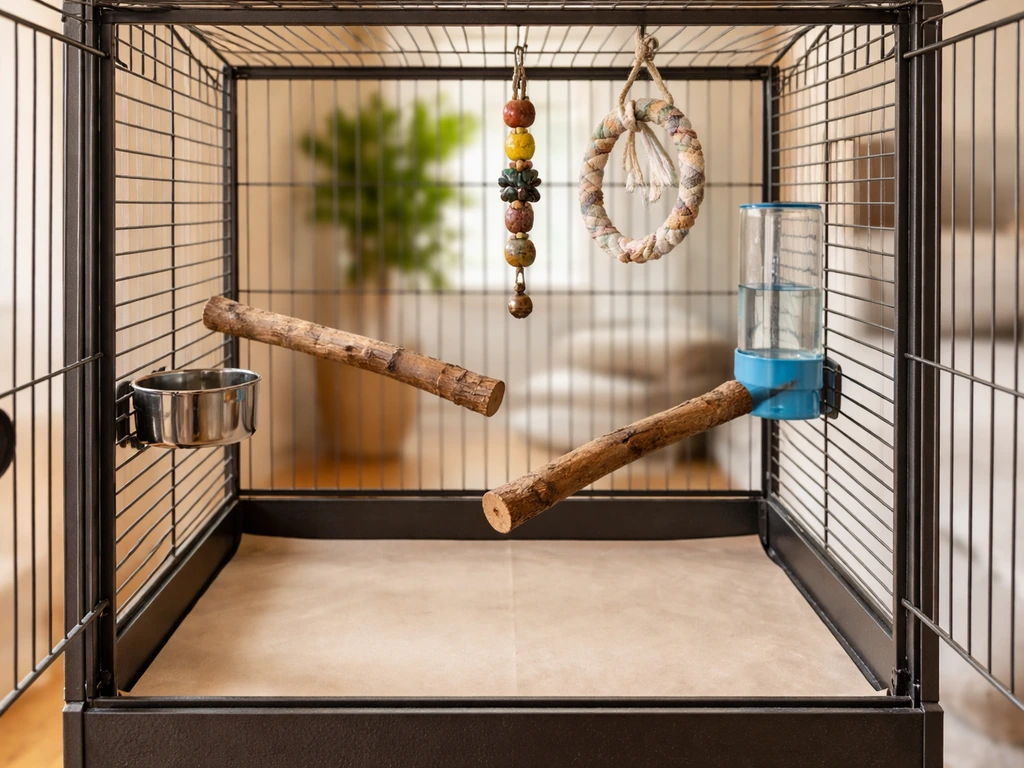
The core setup: perches, food, water, and liner
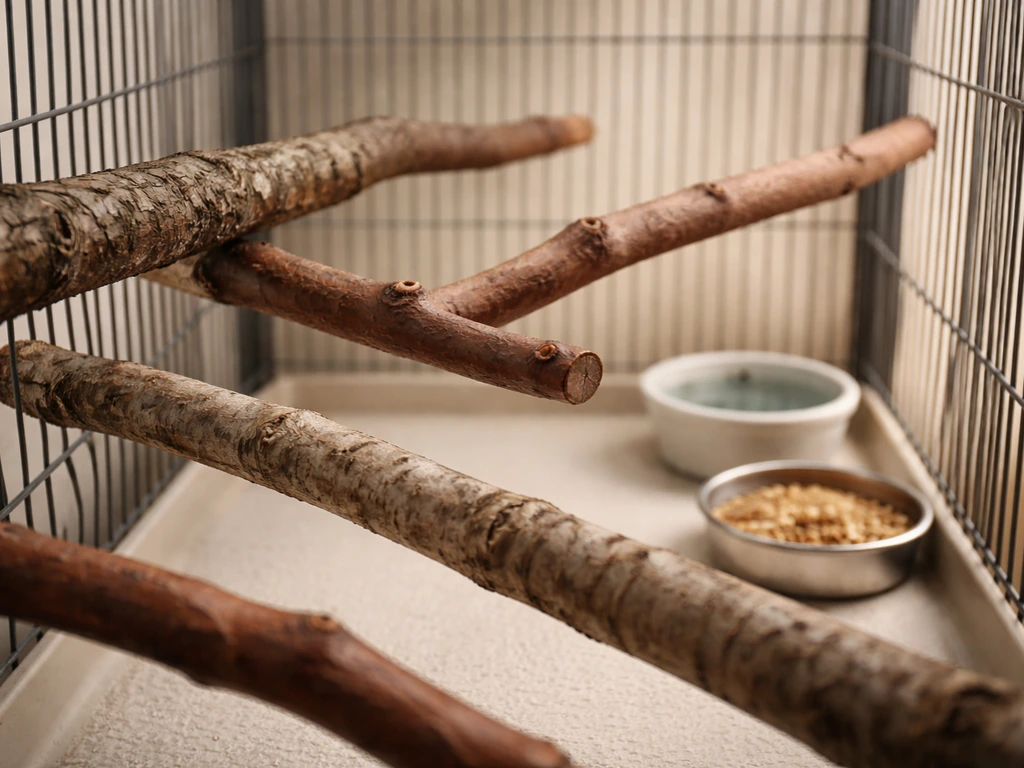
Perches
Perch variety is one of the most important welfare decisions you'll make. LafeberVet recommends a core perch diameter of 0.5 to 0.625 inches for conures, but the key is using multiple sizes so your bird's feet flex through different grip positions throughout the day. A foot gripping the same diameter all day is how bumblefoot (pododermatitis) starts. Install at least three perches at different heights: one near the top for roosting, one mid-cage for activity and feeding access, and one lower level. When you're ready to arrange them, follow a simple how to set up perches in bird cage checklist to place each type at the right height and distance.
Natural wood branches (apple, willow, manzanita) are the gold standard because their irregular diameters naturally vary grip across the perch. Petco recommends perches at least 9 inches long and 0.5 inches in diameter as a starting point, but go longer when you can. Rope perches and boings add a dynamic surface that shifts under the bird's weight, changing pressure points automatically. Avoid smooth wooden dowels as your only perch option; they're the main driver of foot sores. Sandpaper perch covers are also a no: they're abrasive, not beneficial.
Food and water stations
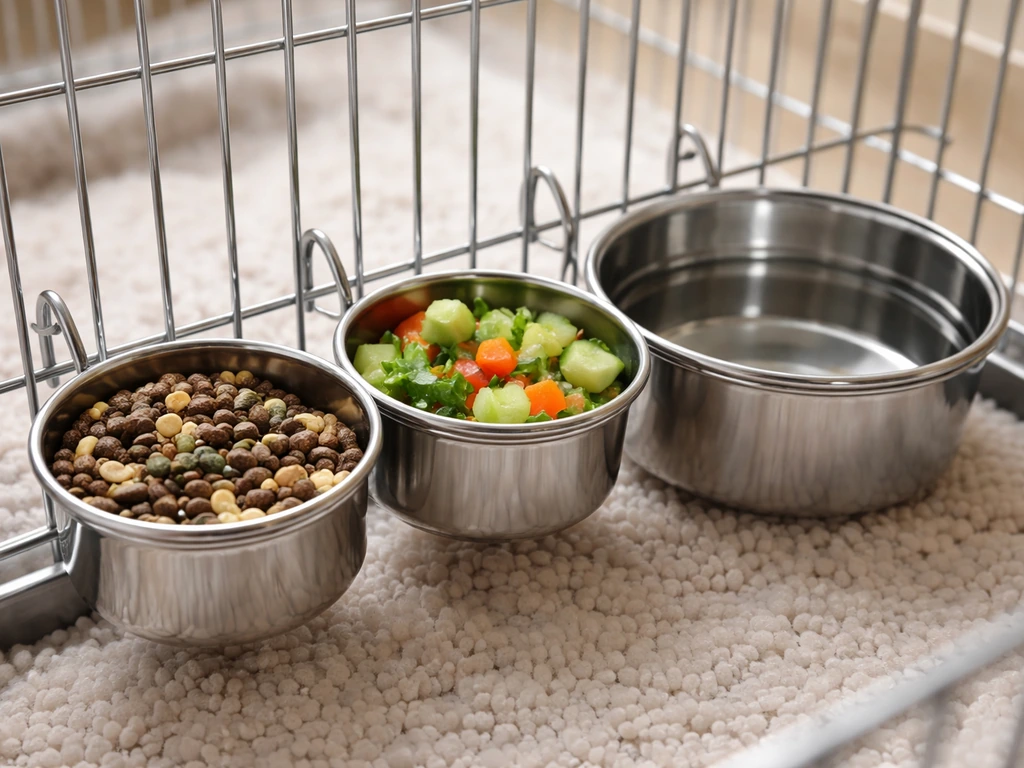
Use at least two food dishes: one for pellets or seed mix, one for fresh foods. Stainless steel cups that hook onto the cage bars are easy to remove, dishwasher-safe, and won't harbor bacteria the way plastic does over time. Position food dishes at a mid-cage height, never directly under a perch where droppings will contaminate them constantly.
For water, a stainless steel open bowl is the safest starting point because you can see immediately if it's clean. If you want to switch to a water bottle, LafeberVet advises keeping the bowl in the cage until you're absolutely certain your bird is drinking from the bottle, and checking the nozzle daily because they can clog without any visible sign. Whether you use a bowl or bottle, change and clean it every single day. Bacterial growth in standing water is fast, especially in a warm room.
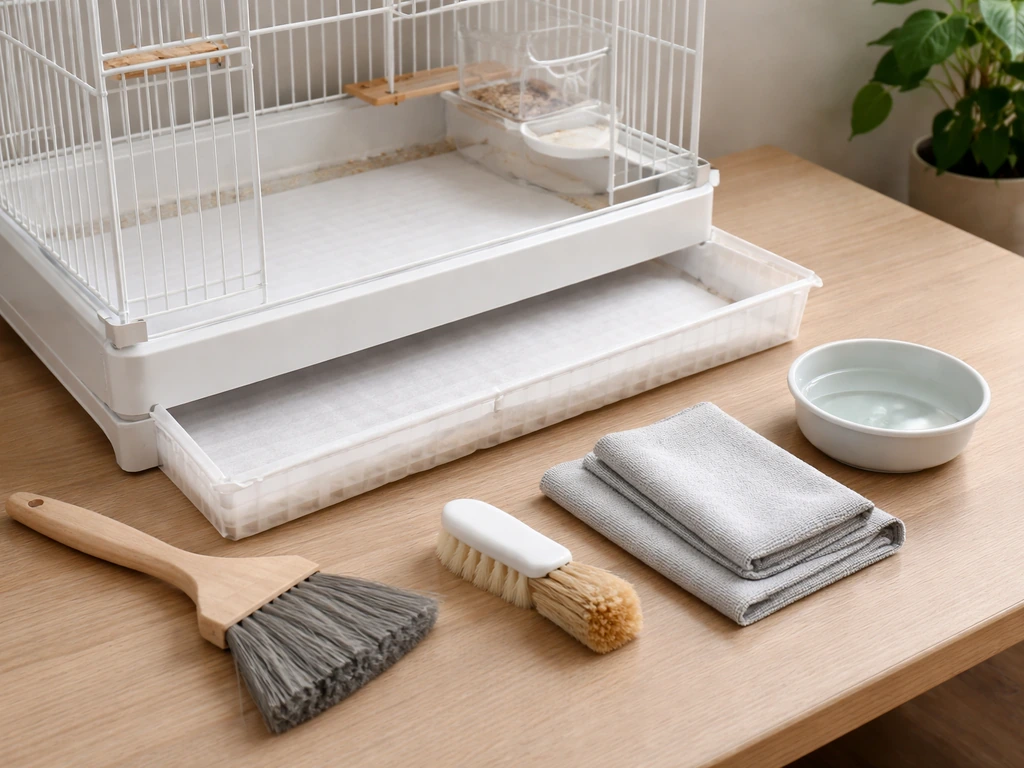
Cage liner and tray
Plain unprinted newspaper, paper bag paper, or paper towel laid flat in the tray is the best liner. It's cheap, easy to read for health monitoring (droppings color and consistency are visible), and you change it daily. Avoid walnut shell, corncob, or sand substrate on the cage floor; they can harbor bacteria and mold, and some materials are dangerous if ingested. The Purdue husbandry guidelines are clear: change cage-bottom coverings every day. Cut several sheets to the tray size in advance and stack them so daily changes take about 20 seconds.
Toys, enrichment, and foraging layout
Conures are intelligent, destructive, and easily bored. A cage with no enrichment will produce a stressed, screaming, feather-destructive bird faster than almost any other single factor. But an overcrowded cage is a different problem: birds need clear flight paths between perches, and cramming in a dozen toys leaves no room to move safely. A good rule of thumb is three to five toys at a time, with clear perch-to-perch movement space on at least one side of the cage.
Divide your toys into categories and rotate them every one to two weeks so the cage always feels new. Foot toys (small wood blocks, cork pieces, leather strips) can sit in a dish or on the cage floor. Hanging chew toys (palm fronds, soft wood slices, vine balls) attach near mid-cage. Foraging toys are the highest-value addition you can make: hide pellets, dried fruit, or nuts inside paper cups, foldable cardboard boxes, or commercial foraging wheels. Foraging engages the bird's problem-solving brain and dramatically reduces boredom behaviors.
Check every toy before it goes in the cage. Remove any toy with fraying rope loops large enough to catch a toe or neck (anything over about 0.5 inches in diameter loop size is a strangulation risk). Replace zinc or lead hardware (common on cheap imported toys) with stainless steel quick-links. Any toy with small plastic pieces that splinter off should go in the trash. When in doubt about a material, skip it.
Mess control and your cleaning routine
Conures are messy. They fling food, they bathe enthusiastically, and their droppings land everywhere. Building a realistic cleaning routine into your setup from day one keeps the cage hygienic and your sanity intact.
Daily tasks (5 minutes)
- Swap the tray liner for a fresh sheet
- Wash and refill food and water dishes
- Check water bottle nozzle if using one
- Spot-wipe any obvious droppings on perches or bars with a damp cloth
- Remove any uneaten fresh food before it spoils (within 2 to 4 hours)
Weekly tasks (20 to 30 minutes)
- Remove all perches, dishes, and toys and scrub them with hot water and mild dish soap
- Wipe down all cage bars and the tray with a bird-safe disinfectant (diluted white vinegar works, or an avian-safe cleaner like F10SC)
- Pay extra attention to corners of food bowls and tray edges where bacteria concentrate most
- Rinse everything thoroughly before returning items (residual disinfectant is toxic)
- Inspect perches and toys for damage and rotate enrichment
Monthly deep clean
Once a month, do a full teardown: remove your bird to a safe carrier, disassemble the cage as much as possible, and scrub every surface. Use a bottle brush on any sipper tube or water bottle. Inspect cage welds and bar connections for rust or damage. Let everything air dry completely before reassembling. The CDC specifically advises not cleaning cage equipment in the kitchen sink because of cross-contamination risk. Use a utility sink, bathtub, or do it outdoors.
For mess management around the cage, a seed catcher skirt that attaches to the outside of the lower cage perimeter catches a huge percentage of flung food. A mat under the cage catches what the skirt misses and is quicker to shake out than vacuuming bare floor constantly.
Sleep setup, cage covers, and seasonal protection
Night covering
Most conures do well with 10 to 12 hours of dark, quiet sleep. A cage cover helps block ambient light, muffle sounds, and signal "nighttime" consistently, which supports hormonal health and reduces night frights. Use a breathable fabric cover (cotton or linen) that fits loosely enough to allow airflow but blocks light effectively. Never use plastic sheeting or any cover that seals tightly around the cage. Conures need fresh air circulation at all times, and a sealed cover can cause dangerous CO2 buildup or overheating overnight. If your bird panics at night despite a cover, leave one small corner slightly open to admit a faint light source.
Seasonal temperature management
In winter, keep the cage away from exterior walls and cold window drafts. A fleece cover can add some insulation at night, but the room itself should stay above 65°F. In summer, make sure the bird isn't in direct sun streaming through glass (which can superheat a cage rapidly) and keep the room well-ventilated. If you use a fan for airflow, it should never blow directly on the cage, but rather circulate air in the room generally.
Pest prevention
Bird mites and rodents are the two main pest concerns around a conure cage. For mites, inspect your bird and the cage corners and perch ends regularly, especially if your bird came from a pet store or second-hand source. Red mites hide in crevices during the day and feed at night. If you see tiny reddish specks or your bird is restless at night, do a full cage clean with a bird-safe mite-control product and consult your vet. Never use pesticide sprays near the cage; birds are acutely sensitive to chemical fumes and even brief exposure can be fatal.
For rodents, keep seed and pellet storage in sealed hard-sided containers (not zip bags). Don't leave uneaten seed on the cage floor overnight. If you suspect a rodent problem in your home, address it with snap traps placed well away from the bird's space, never with poison bait blocks or chemical rodenticides near the cage area.
DIY upgrades vs. quick fixes
Not every improvement requires a project. Some of the most impactful upgrades are fast, cheap, and tool-free. Here's how to think about it:
| Upgrade | Quick Fix (No Tools) | DIY Build (Tools Needed) | Estimated Effort |
|---|---|---|---|
| Natural branch perches | Buy pre-cut manzanita perch from pet store | Cut, sand, and bake a hardwood branch from your yard | DIY: 30–60 min |
| Foraging enrichment | Buy commercial foraging wheel or stuff a paper cup | Build a multi-compartment foraging board from untreated pine | DIY: 1–2 hours |
| Seed catcher skirt | Buy fabric skirt that attaches with clips | Sew a custom skirt from canvas to fit your exact cage dimensions | DIY: 1–2 hours |
| Cage cover | Buy a commercial fitted cover | Sew a blackout-lined cotton cover sized to your cage | DIY: 2–3 hours |
| Play top/activity area | Attach a rope boing to cage top | Build a hardwood play gym that mounts to cage top | DIY: 2–4 hours |
If you're doing any DIY work on or near the cage, stick to untreated hardwoods (oak, maple, ash, manzanita), stainless steel hardware, and bird-safe finishes. Avoid MDF, plywood with formaldehyde glues, pressure-treated wood, galvanized hardware, and any paint or stain that isn't certified bird-safe. Sand all cut wood edges smooth before introducing them to the cage.
If perch setup is an area you want to go deeper on, a dedicated guide to how to set up perches in a bird cage covers placement angles, height staggering, and securing different perch types in detail. For smaller species comparisons, parakeet and budgie cage setups follow similar logic but with smaller scale dimensions and bar spacing, so the core workflow is transferable.
Your conure cage setup checklist
Run through this before you put your bird in the cage for the first time. For a budgie, you can use the same general ideas, but start with a budgie-appropriate cage, bar spacing, and placement before setting up perches, food, water, and liners how to set up a bird cage for a budgie. Every item here reflects a real welfare or safety consideration covered above. For a disabled bird, focus on safe access points, stable perches, and easy-to-reach food and water placement so your conure can eat and rest without straining disabled bird cage setup.
- Cage meets minimum size for your conure species (24 x 24 x 30 in minimum, larger is better)
- Bar spacing confirmed: 0.5–0.75 in for small conures, 0.75–1.0 in for medium/large
- All bars and welds checked for sharp edges, rust, or chipped coating
- New galvanized cage scrubbed with vinegar solution and rinsed if applicable
- Cage placed at eye level, away from kitchen, AC vents, exterior drafts, and direct glass-amplified sun
- At least 3 perches installed at varied heights with varied diameters (including at least one natural branch)
- No smooth wooden dowels as the only perch type
- Stainless steel food and water dishes positioned away from perch droppings lines
- Water source confirmed working and clean (bowl or tested bottle)
- Paper liner cut and stacked in tray, ready for daily swaps
- 3 to 5 toys installed with clear flight path between perches
- All toy hardware checked for zinc/lead (replace with stainless steel quick-links)
- Rope loops checked: no loop diameter larger than 0.5 inches
- At least one foraging toy included
- Breathable cage cover ready for sleep (not plastic, not sealed tight)
- Seed and food storage in sealed hard-sided containers
- Cleaning supplies staged and ready (vinegar or bird-safe disinfectant, bottle brush, paper towels)
- Daily, weekly, and monthly cleaning schedule written down and posted near the cage
FAQ
What should I do if I realize my conure cage bars are slightly too wide after setup?
If you buy a cage that meets the minimum bar spacing but the bird is getting into the corners and pressing its head between bars, treat that as a sizing warning. Add more perch options so it does not have to climb to the highest points to feel secure, and inspect for any loose or damaged bars where gaps can widen over time.
How high should toys and hanging items be, and what locations should I avoid?
Avoid hanging toys where a conure can get both feet hooked at once, especially near the cage floor and directly above a food dish. Keep the lowest toys high enough that droppings do not fall into them, and periodically tug-check ropes and quick links to confirm they are not stretching or loosening.
My conure panics when I put the cage cover on at night, what’s the safest way to adjust?
For the first week, use a gradual transition: keep your bird in the cage with the cover off for a few hours in the evening, then add the cover only during the true sleep window. If the bird panics, use a looser breathable cover or leave one small corner slightly open until your conure associates the cover with calm routines.
How can I tell if a used cage is safe, even if it looks mostly clean?
Don’t assume “rust-colored” is the only issue. Check welds, tray edges, and bar joints for flaking or pitting, because micro-rust can spread during cleaning. If you see corrosion on stainless or powder-coated surfaces, stop using the item until you can replace it, since scrubbing may not remove all damage.
Can I put perches right above or next to food and water?
Place perches so there is at least one easy path that does not require jumping over the food dishes. Also ensure the top roosting perch is not so close to the cage cover line that the bird bumps it during normal sleep movements.
My conure prefers seed, what’s a practical way to move toward a pellet and fresh-food routine?
If you use seed first as a training step, transition slowly by reducing portions rather than making sudden pellet-only changes. Keep fresh foods in a separate dish and remove uneaten items promptly, because wet produce can ferment fast even when other parts of the cage look clean.
How do I prevent water from getting dirty immediately?
For bowl water, switch positions if the bowl constantly gets contaminated, for example shift it slightly away from the foot traffic zone. If using a bottle, confirm drinking after at least one full day by observing an actual drinking pattern, and check the nozzle even if it looks clear.
How often should I change the liner and do deeper cleaning, beyond the daily tray swap?
Do daily spot checks, then decide what to change based on what you observe. If droppings are watery, clumped oddly, or food spoils faster than expected, clean more frequently that day. If droppings are consistent, you still keep the daily tray change, but you can avoid extra full teardowns.
What cleaning products are safest for the cage and accessories?
Do not sterilize with bleach, ammonia, or strong disinfectants unless the surface is fully compatible and rinsed thoroughly, because residues can irritate respiratory systems. Use hot water and bird-safe methods for routine cleaning, and reserve stronger cleaners for specific, product-labeled guidance with complete drying and ventilation.
How should I modify a conure bird cage setup for a bird that is older or less mobile?
Make the adjustment before problems start: provide at least three perch heights and ensure the lowest perch is stable and wide enough for comfortable grip. If mobility seems reduced, lower the “landing” height by adding an extra mid-level perch so jumps are shorter and the bird does not have to strain to reach food or water.
My conure seems stressed after I added toys, how do I tell if the cage is overcrowded?
If you have a multi-level cage, avoid stacking food and toys so the bird has to squeeze through clutter to reach water. Use fewer toys at once, keep the main flight path open, and check that the bird can move between perches without hopping over sharp hardware or tight rope loops.
What’s the first thing to change in the cage if I notice early bumblefoot signs?
If your bird develops bumblefoot, reduce risks immediately by swapping to more branch-like, varied-diameter natural perches and removing smooth dowels and abrasive covers. Then schedule a vet check, because foot pain and infection can progress even when you fix the cage.
If I suspect mites, what cage actions should I take without using risky sprays?
For bird-safe mite control, treat the environment and the bird only with a product your vet or an avian-safe guidance source approves, and follow label timing exactly. Increase corner and perch-end inspections after treatment, and repeat as directed because mites can persist through their life cycle.
What are the most common “hidden hazards” conures get into even with a good setup?
If you see any chewing on cables or a corroding toy component, remove it immediately and replace with stainless hardware and chew-safe materials. Also avoid storing string, twine, or small elastic items near the cage, since conures can grab them through openings and create entanglement risks.